Showing posts with label Garlic. Show all posts

Friday, December 14, 2012

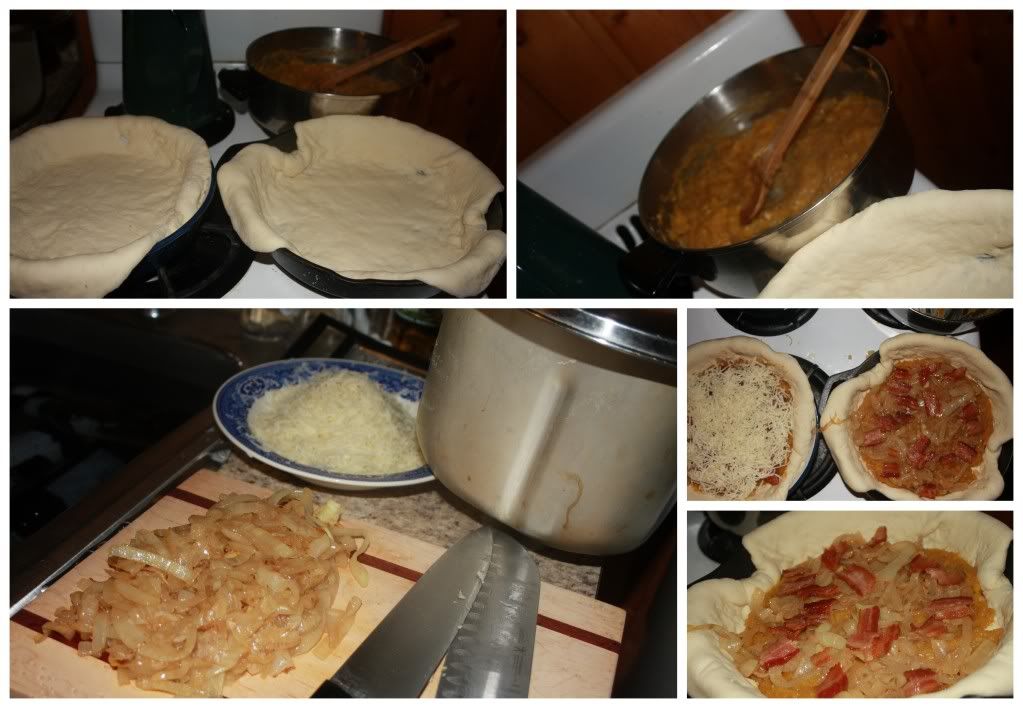
Pizza Experiment #1: Roasted Squash and Carmelized Onion Pizza

Extended Shelf Life for: Onions and Squash
Photobucket
In May of 2012, I decided to become a master of pie. I can do most anything in the kitchen, but I do have random fears of certain aspects, such as pastry. However, I conquered that fear and can turn out a pretty phenomenal pie (if I do say so myself).

Now, late in the year of 2012, I decided to become a master of pizza pie, but not for the purpose of fear, I don't fear pizza, nor pizza crust (although, I have had to re-learn the joys of baking and cooking at high altitude). No, the art of mastering pizza is more an exercise of discovering and developing some top notch pizza topping ideas and concepts for a very specific purpose, which, I currently do not have the privilege of sharing. Suffice it to say, someday, you might get to eat one of my delicious creations...

As for this pizza, I still love the concept, but I need to work on the roasted squash 'sauce' part of the recipe, because it wasn't tops.

Ingredients/Directions:

Prepare a pizza crust. We do ours in the bread machine. I'll post various recipes later, however, for now, this is just a break down of the topping.

Slice 1 onion and caramelize in a large skillet with 2 Tbsp. butter on medium high heat. Caramelizing takes about 15-20 minutes but is worth every second.

Roast a Squash of your choosing or take out a pack of pre-roasted, pureed squash from the freezer if you so happen to have one.

Prepare 6 strips of Bacon however you choose, I prefer the oven method.

In a sauce pan or deep skillet, heat a touch of butter, throw in some garlic and rosemary for about a minute (until fragrant) and then add squash, heat through.

When your pizza crust is ready to go as well as all the other ingredients, simply top the crust with squash sauce, followed by caramelized onions and bacon bites, top with mozzarella and bake at 450 for about 10-12 minutes until crust is golden brown and cheese is melted.

I would love to prepare this in a wood-fried oven, but am discovering that a pizza stone is just as good...for now ;)
Monday, November 12, 2012

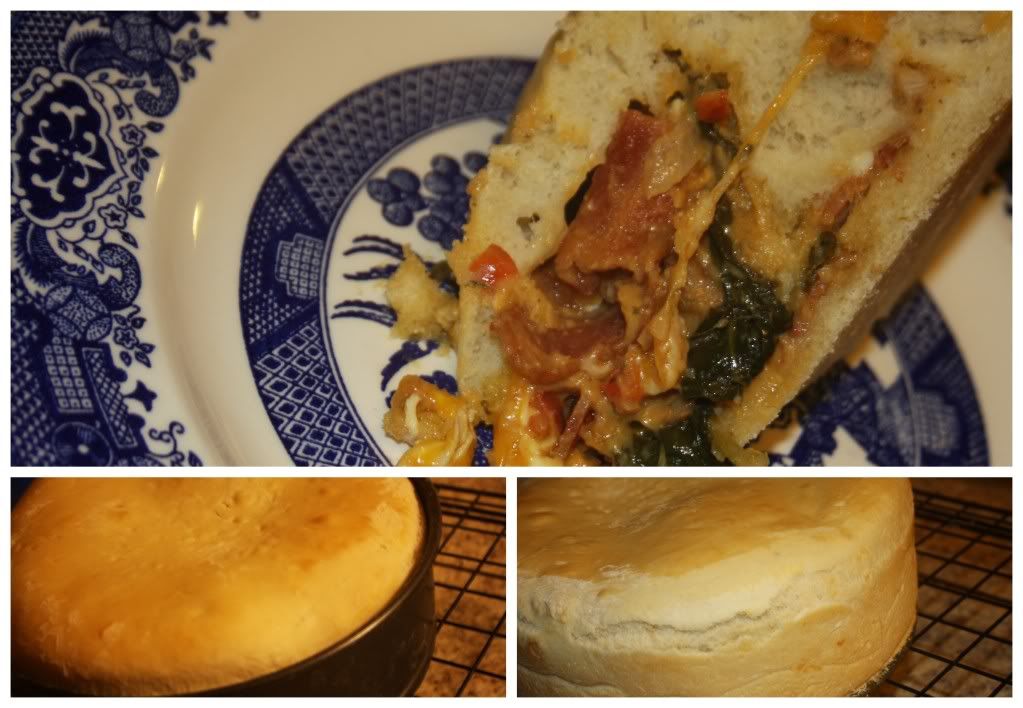
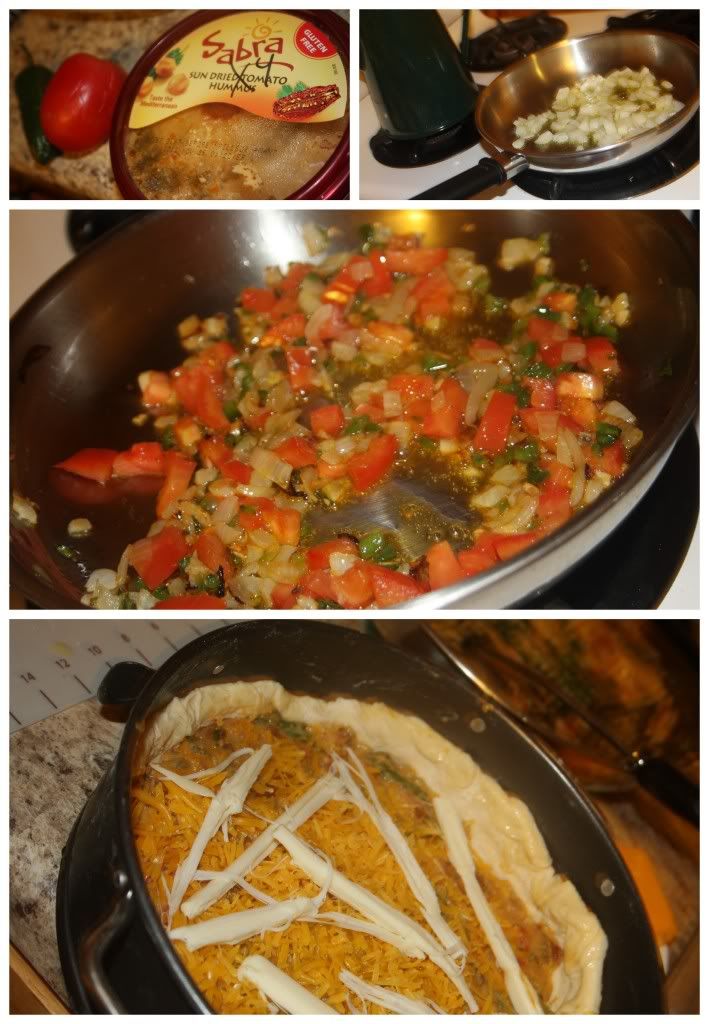
Hummus Pizza Torte

Extended Shelf Life for: Hummus, Tomato, Jalapeno, Onion

If you continue reading, you're going to discover, that this is one of my infamous posts where I give you nothing exact - just ideas and general guesstimates on how this can be created in your home. And, I'm okay with that. Because what I really want you to know is that Pizza Torte's are amazing! And you should, without a doubt, get a spring-form pan so you can make a pizza torte, because, like I said, they are amazing!

Photobucket
Ingredients/Directions (more of less):

Buy or prepare a batch of pizza dough. Personally, I love using my bread maker for this task because I know that it will have risen within a certain time, no matter what, since the bread machine can control temperature and humidity whereas my Laramie kitchen isn't always so predictable.

Split the dough ball into three equal parts.

Prepare your filling, you can do something traditional, or if you have some random bits and pieces of things to use up, like a tub of hummus, try out something like this:
  •  Saute 1 diced Onion, 2 minced Garlic Cloves and 1 diced Jalapeno in a bit of Olive Oil. When they are tender, throw in one diced Tomato for an additional one or two minutes. 
  • Add 1 tub of Hummus (that's about to expire or otherwise ~ we used a sun-dried tomato hummus, that honestly wasn't that delicious to my taste-buds, too strong, but still a good concept, trust me!)
  • Thin out with additional olive oil or water, use as your filling/sauce.
Place the first round  of pizza dough into your spring form pan, spread in half of the filling, top with cheese, repeat, finish the torte off with the final pizza dough round on top, seal up the edges, bake at 350 (probably- I'm currently in Sturgis, not with the cookbook where I got the recipe for this torte) and bake 15-20 minutes (or more) until crust is golden. Let torte sit for about 5 minutes before removing from the pan and cutting into appropriately sized serving pieces. Enjoy!
Photobucket

Sunday, November 11, 2012

Kimchi!

If you need to extend the life of cabbage, this is a great option. However, we simply needed to have some kimchi re-enter our life and this includes nothing salvaged, except perhaps an onion.

For me, it was relatively important to prepare some kimchi in November, as November/the fall is generally the time when all the old women come out from the woodwork gathered around piles and piles of cabbage and working together to make sure the Korean staple is ready for the long winter ahead.

A few other notable mentions about my kimchi making day: It was the Korean "holiday" of Peppero Day (11-11) AND I had the great joy of being assisted by a sweet Korean family that is here on behalf of the man of the household serving an exchange as a visiting professor, making my first kimchi experience feel that much more authentic and valuable.

Now, on to Kimchi making...

There are essentially three parts to preparing Kimchi: Soaking, Making the Red Pepper Paste and Assembly. I will give you a rough sketch of each one of these parts followed by a link to a very detailed explanation of each step just in case you are in need of more photos and great explanation. 

Part 1~SOAKING:

Photobucket
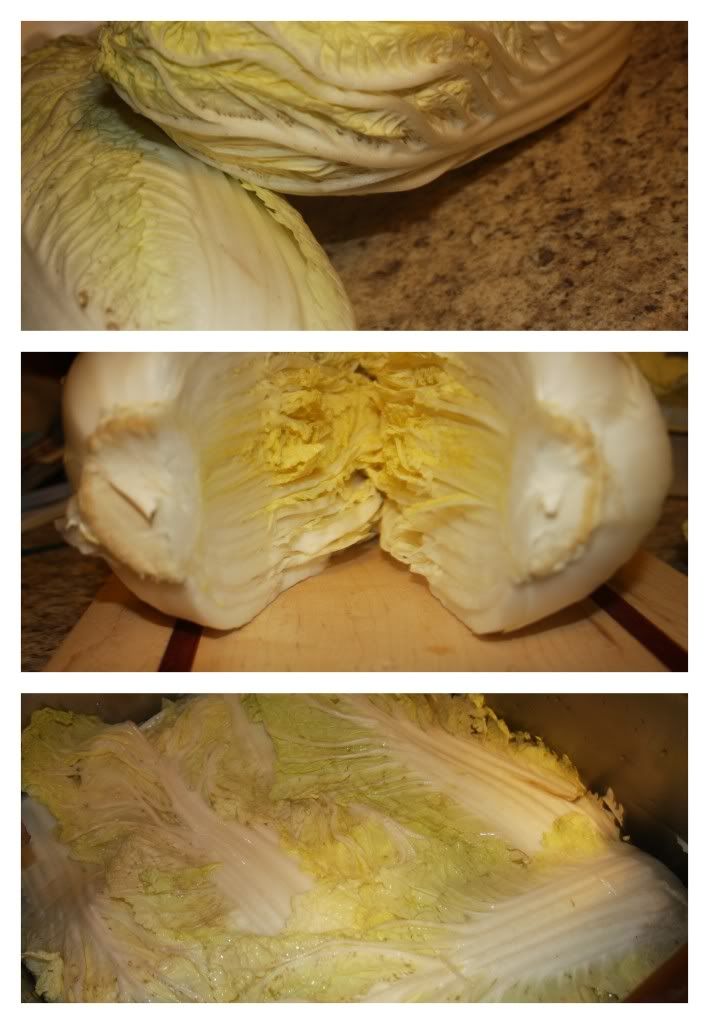
Kimchi making will undoubtedly be a two day process, starting with this first step which is, in essence, preparing the cabbage by soaking it in salt water.

You will need:
  • Two Heads of Napa/Chinese Cabbage
  • 3 cups Coarse Sea Salt, preferably from Korea -- no joke
  • 30 cups of Water
What you will do:
  • Remove the outer 2-3 leaves from each cabbage, but don't discard!
  • Cut a 2" slit in the stem of each cabbage, carefully split heads of cabbage in half (easier than it sounds, I promise)
  • Salt each leaf of the cabbage, making sure to get plenty of salt on the thick, white parts and extra careful not to tear the leaves or disassemble the cabbage half.
  • In a deep, large container (such as the kitchen sink), dissolve 3 cups of Salt in 30 cups of Water.
  • Place each cabbage half, face-up into the water and cover with the reserved cabbage leaves.
  • Cover with plastic and use rocks, tin cans or a heavy lid to press the cabbage halves down into the water.
  • Soak for 8 hours. Flip and soak another 4 hours.
  • Check for bend-ability in the cabbage stems, when they are supple it's time to rinse (3 times), halve again (so you end up with 8 quarters of a whole cabbage) and drain (at least two hours, during which you should prepare the next step).
For greater details on soaking, check out this thorough post at Beyond Kimchee (my favorite Korean food blog!)

Part 2~MAKING THE RED PEPPER PASTE:
Photobucket
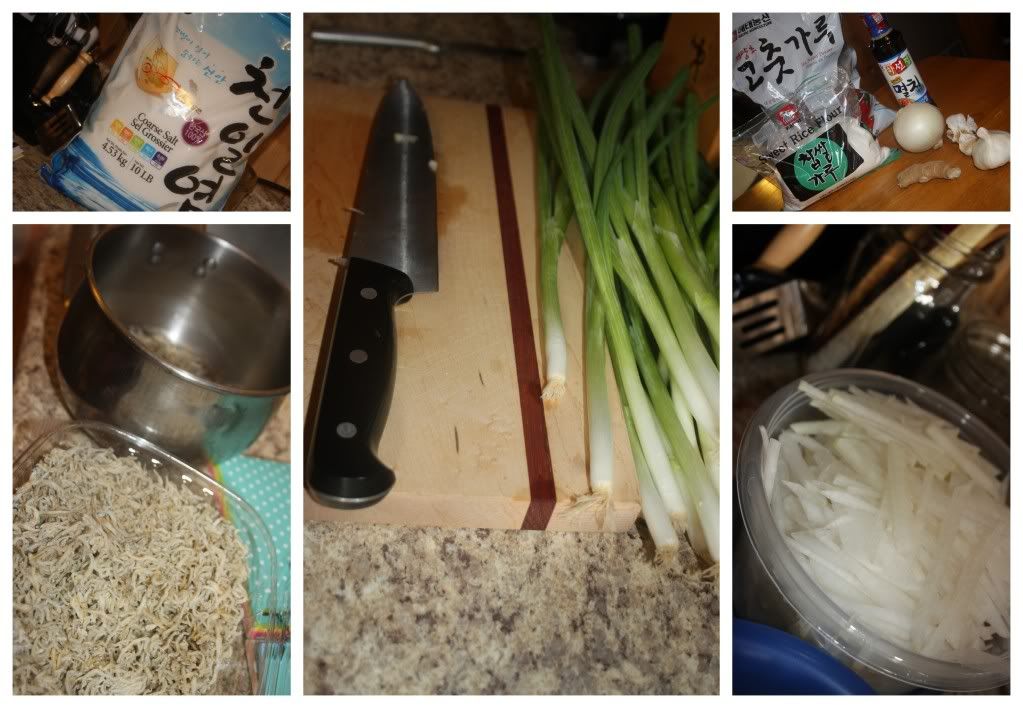
You will need:
  • A few handfuls of dried sea creatures (or one handful if you can't find multiple sea creatures or don't like sea creature flavored items - but one handful is a good idea)
  • 3 cups of Water
  • 2 Tbsp. Sweet, Glutenous Rice Flour
  • 1 Lg. Korean Radish, julienne into 1/8" matchsticks
  • 2 bunches of Green Onion
  • 4 cups of Korean Red Chili Flakes
  • 1/2 large Onion, roughly diced
  • 10 cloves Garlic
  • 2" piece of Ginger, roughly diced
  • 4 (or 2) Tbsp. Anchovy Sauce
  • 4 (or 2) Tbsp. Shrimp Sauce/Salted Shrimp
  • 1 1/2 Tbsp. Sugar
  • 2 Tbsp. toasted Sesame Seeds
What you will do:
  • Make a rice glue by boiling your handful of dried sea creatures in 3 cups of water, simmer for 10 minutes, remove from heat and let set, as is for 20 minutes. Strain off sea creatures and discard sea creatures, reserving 2 cups. Bring 1 1/2 cups of stock to boil while continuously whisking in the 2 Tbsp. of Glutenous Rice Flour until the mixture is bubbly and has thickened. Save the plain 1/2 cup stock for later.
  • In a blender or food processor, puree 1/2 large Onion, 10 cloves of Garlic, 2" piece of Ginger and reserved 1/2 cup Stock until smooth.
  • Pour 4 cups of Korean Red Chili Flakes into a large mixing bowl, add the onion mixture and cooled rice glue, anchovy sauce, salted shrimps, sugar and sesame seeds, mix.
  • Add the sliced Radish and diced Green Onions and let set for 30 minutes so the radish can extract some moisture and the mixture will be come more smooth and spreadable.
  • Taste test the sauce with a piece of cabbage to evaluate saltiness and flavor, adjust with additional fish sauce or stock for spread-ability as deemed necessary, then move on to assembly.
For greater details and more pictorial assistance, check out Cabbage Kimchee: Part Two from, yet again, Beyond Kimchee. 

Part 3~ASSEMBLY:
Photobucket
You will need:
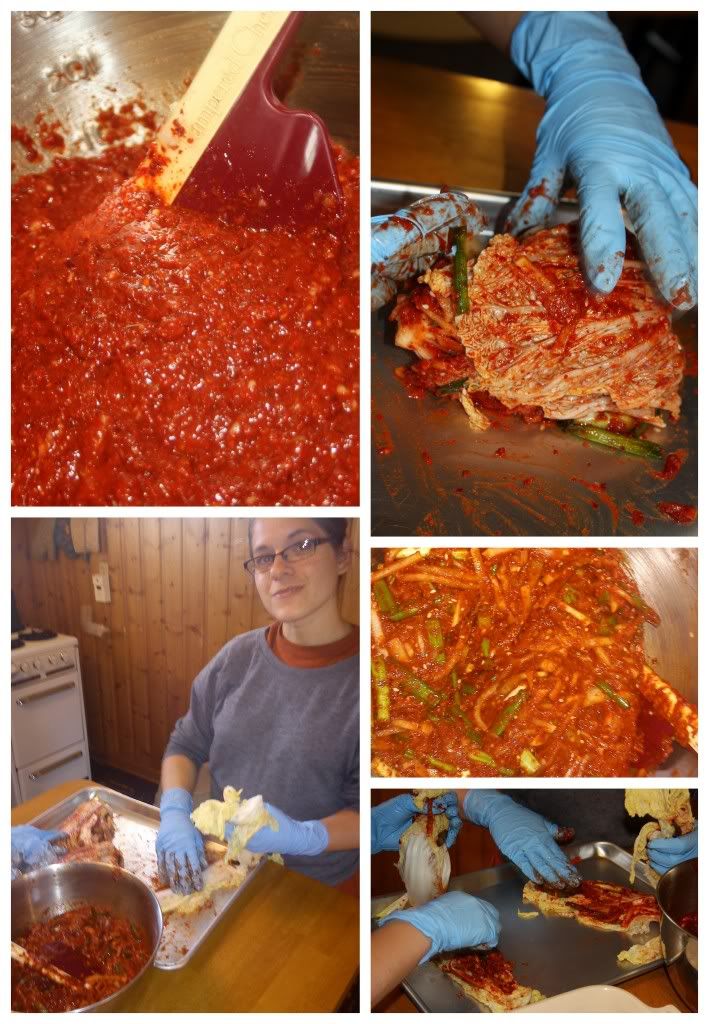
  • Rubber Gloves
  • A Cookie Tray or Large, shallow dish
  • Airtight containers for storage
 What you will do:
  • Gently handle each cabbage quarter and use your gloved hands to spread red chili paste between each and every leaf. Roll up the quarter, place in an airtight container. Let the kimchi sit out on the counter 2-3 days for fermentation and moisture extraction before relocating it to the refridgerator.
  • Our Korean assistants explained that the outer leaves can be used to cover a bit of the kimchi, but that it is also generally spread with red pepper paste and then cut up and eaten that day as fresh kimchi with rice, which, by the way, is delicious!
For more details on this final part of preparing your kimchi, head over to Beyond Kimchee one more time!

In our house, we really love this fermented vegetable and have been beyond satisfied with the results of this recipe and process, slightly time consuming, but if you love fermentation, spicy foods, or kimchi itself, it's well worth it!

Thursday, September 20, 2012

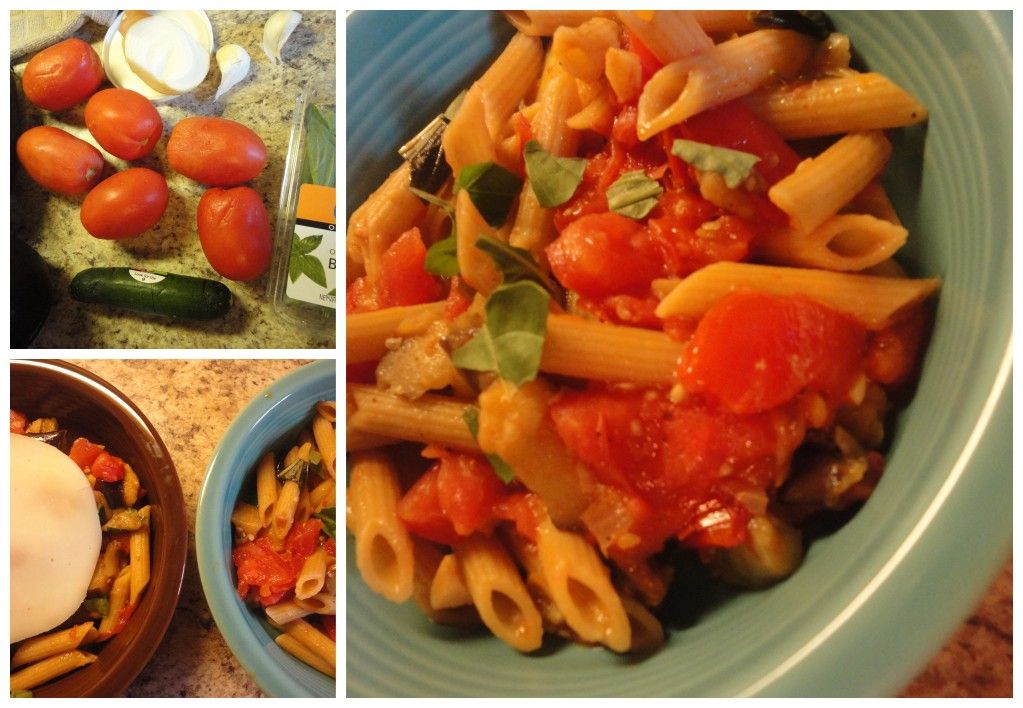
Eggplant Tomato Pasta

Extended Shelf Life for: Eggplant, Basil, Onion and Tomatoes
Photobucket
I absolutely LOVE salvaging eggplants, they have quickly become one of my favorite vegetables to experiment with and discover, this dish came together quickly and easily and left both Mike and I feeling quite content and satisfied!

Ingredients/Directions:
 
In a large skillet, heat about 2 Tbsp. Olive Oil over medium-high heat, add 2 Eggplants worth of cubes, saute about 10 minutes until tender. If needed, add additional olive oil. Saute 1/2 of a chopped Onion with eggplant for about 5 minutes, add 2-4 cloves, minced garlic, saute another 2-3 minutes. Add 6 diced Roma Tomatoes to the skillet, reduce heat and cook until tomatoes are tender and break down slightly. Mix the eggplant sauce with the pasta seasoning with salt and pepper and additional olive oil if needed. Tear fresh Basil and sprinkle over pasta mix, top with your choice of Italian cheese, enjoy!

For more on Eggplants and other recipe inspiration check out my more detailed and interactive Squidoo Lens: The Art of Salvaging {Eggplant}

Wednesday, September 19, 2012

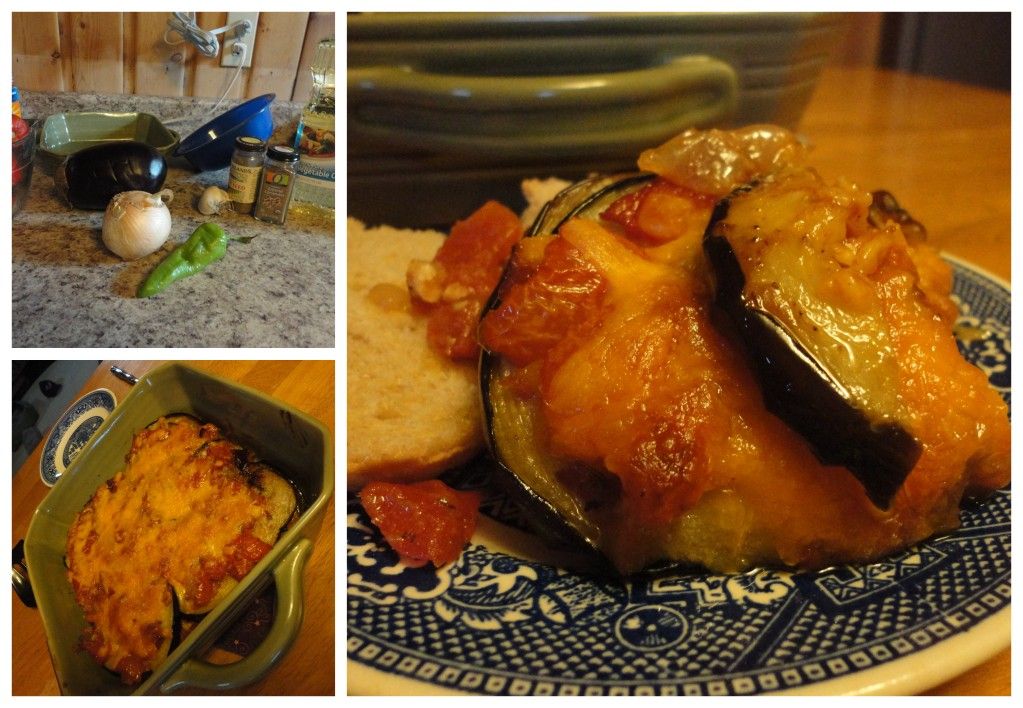
Egyptian M'saa'a

Extended Shelf Life: Eggplant, Pepper, Tomatoes

Photobucket
My first experiences with eggplants came by way of salvaged eggplants. Since those first moments with the spongy, purple veg I've come to love experimenting and playing with eggplant. Searching through my Kindle brought to the surface this delicious eggplant casserole, it is absolutely fantastic and highly recommended!

Ingreidents/Directions:
Inspired by: Nile Style: Egyptian Style Cuisine and Culture by Amy Riolo

Preheat oven to 350 degrees F.

 Heat 1 Tbsp. Vegetable Oil in a large saucepan over medium heat. Saute 1 small Onion until translucent, 3-5 minutes. Add 1 diced Anaheim Pepper and 6 cloves minced Garlic and cook until golden and aromatic. Add 3 cups Tomatoes, 1 tsp. ground Coriander, 1 tsp. ground Cumin and salt and pepper to taste. Bring tomato mixture to a boil, cover and reduce heat, simmer for 20 minutes or until thickened.

While the tomato sauce thickens, prepare the eggplant in a large wide skillet with one inch of vegetable oil over medium-high heat. When oil is hot (a drop of water sizzles when flicked into the oil is one way to test the readiness), add the eggplant slices and fry on both sides, about five minutes, until golden and soft. Drain cooked eggplants on a wire rack or plate covered with paper towels.

Once all pieces are ready, it's time to assemble the Ma'saa'a/Lasagna/Casserole. In a 9 inch cake pan, oval casserole dish or square casserole dish simply layer ingredients starting with eggplant, followed by sauce and cheese until all the ingredients are used and the dish is full. Bake uncovered for 20-30 minutes until cheese and sauce bubbles and a crust begins to form around the edges.

Enjoy with rice or crusty bread!

For more on Eggplants and other recipe inspiration check out my more detailed and interactive Squidoo Lens: The Art of Salvaging {Eggplant}

Tuesday, September 11, 2012

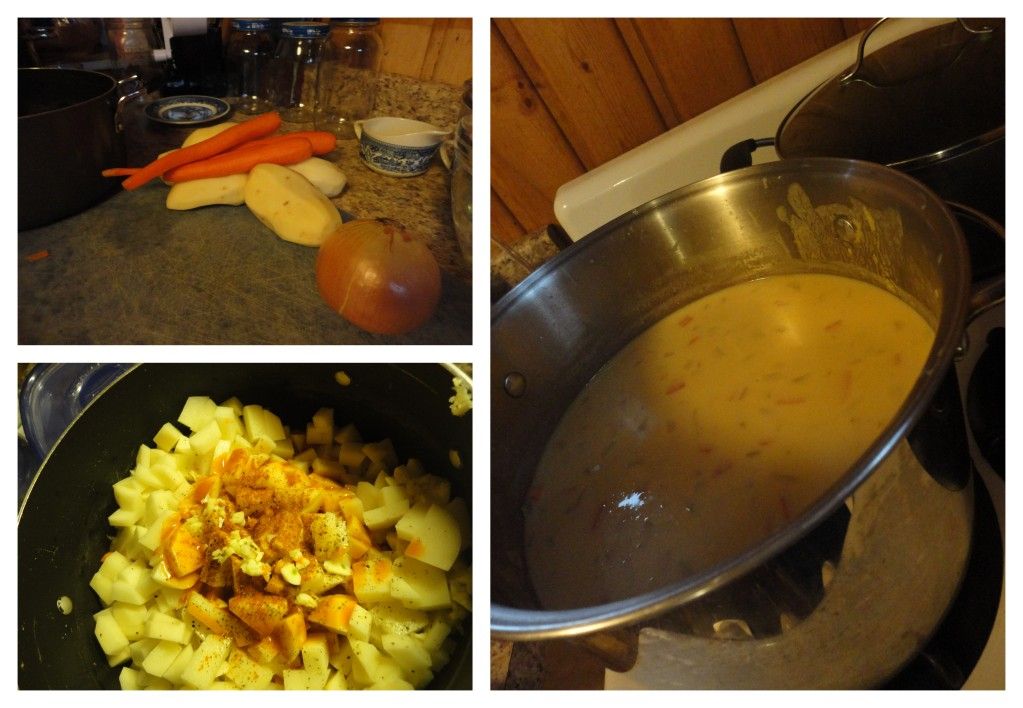
Beer Cheese Soup

Extended Shelf Life: Onions and Carrots
Photobucket
That's Right! Extended Shelf Life!

That can only mean one thing!?!?!

We're back in the land of abundance and waste and we're hitting up the grocers dumpsters and proving that expiration dates and scarred food don't make food inedible...just in need of some immediate tender loving care.

So when our good friend Harris, who heard about our dumpster diving ways while we all lived and taught in South Korea made his way out west, it seemed only fitting that he a) go for a dive and b) eat the fruits of his labor.

And since we were all so fresh to the homeland, it seemed most fitting that this inauguration meal incorporate a tasty micro brew and creamy delicious cheese.

Ingredients/Directions:

In a large saucepan over medium heat, stir together 1 1/2 cups chopped Carrots, 1 1/2 cups chopped Onions and 2 minced cloves of Garlic. Add 1 Tbsp. Hot Pepper sauce, 1/8 tsp. Cayenne Pepper and salt and pepper to taste.

Add 3 cups of Broth and 2 cups of flat Beer, simmer til veggies are tender. Remove from heat.

Meanwhile, heat 1/3 cup Butter in large soup pot over medium high heat. Stir in 1/3 cup flour with a whisk until flour is light brown. Gradually stir in 4 cups of Milk. Maintaining your whisking action, gradually add in 6 cups of shredded Cheddar Cheese, letting it melt and incorporate with each addition.

Stir the beer and veggie mixture into the cheese mixture. Season with 1 Tbsp. Dijon Mustard, 2 tsp. Worcestershire Sauce and 1 tsp. Dry Mustard. Add additional Hot Pepper Sauce if desired, simmer 10 minutes and serve up on a chilly fall night with a set of good friends and perhaps some football on the tele if you're so inclined.

Thursday, September 6, 2012

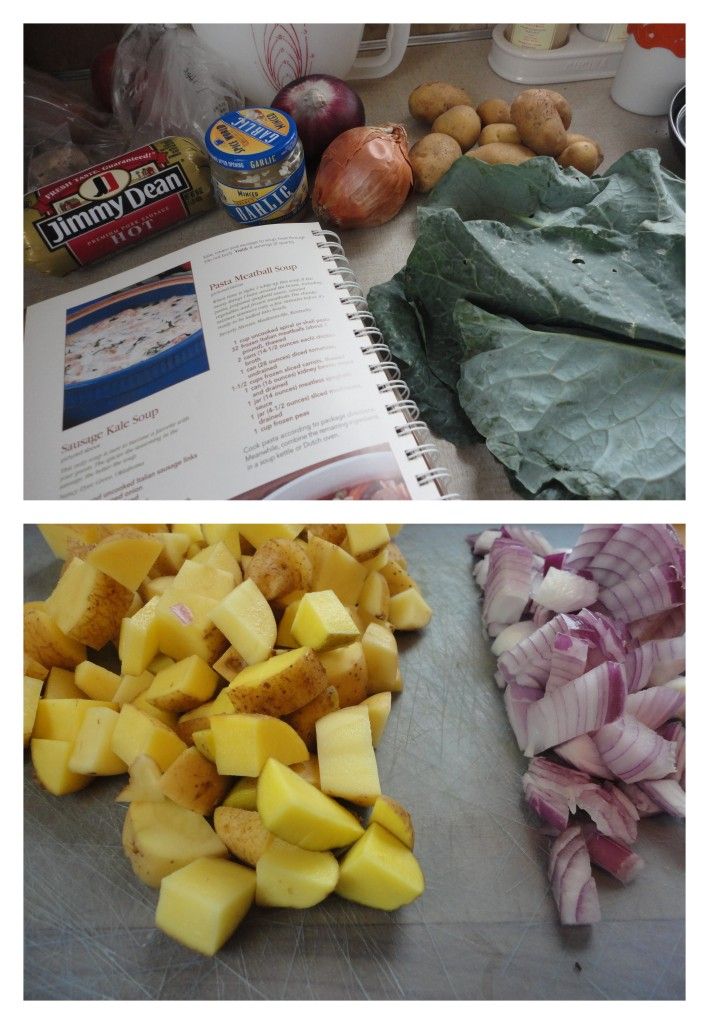
Sausage and Kale Soup


Upon returning to Laramie and even to our old abode, I was not disappointed when our good friends and upstairs neighbors/home-owners offered me the opportunity to do some food prep with their CSA veggies, so long as everyone in the house could have some food to chow-down on.

When I saw the fridge filled with Kale and realized that Italian Sausage was just a few blocks away at the local grocers, I remembered this Sausage and Kale soup from a couple years ago and knew exactly what to do!

 Ingredients:

4 cups Potatoes, peeled and diced
1 lb. Italian Sausage
1 lg. Onion, diced
3 cloves Garlic, minced
1 bunch Kale, green or purple, chopped
3 qts. Broth or Cold Chaser Tea
1 cup Heavy Cream (can also substitute yogurt, sour cream and/or milk)
Salt and Pepper, to taste
Frank's Red Hot Sauce, to taste

Directions:

Boil potatoes until tender. Meanwhile, in a seperate pot, cook Italian sausage. Remove sausage from pan, drain some drippings if there are a lot or just use them to saute onion and garlic. Stir in Kale, cook about 2 minutes, then add broth. Drain potatoes, add potatoes and sausage, salt and pepper, cook until heated through. Before serving, add Heavy Cream, heat through.

Monday, August 6, 2012

Crockpot Chicken Lentil Chili

When preparing to move to the other side of the world, there seems to be a steady realization that there are food items which have been begging to enter the home-dweller's bellies.

And so I found myself accessing my 99 or so Kindle cookbooks (all free downloads...don't worry) to find a way to use up some major lentils.

This Chicken and Lentil Chili was top notch!
Photobucket
Directions/Ingredients:
Original Recipe thanks to The Everything Healthy Cooking for Parties by Linda Larsen.

Combine 2 chopped Onions, 5 minced Cloves of Garlic and 2 chopped Carrots in the bottom of 4-5 qt. Slow Cooker. Sprinkle with a seasoning mix of 3 Tbsp. Chili Powder, 1/2 tsp. Cumin, 1 tsp. Basil, Salt and Pepper.

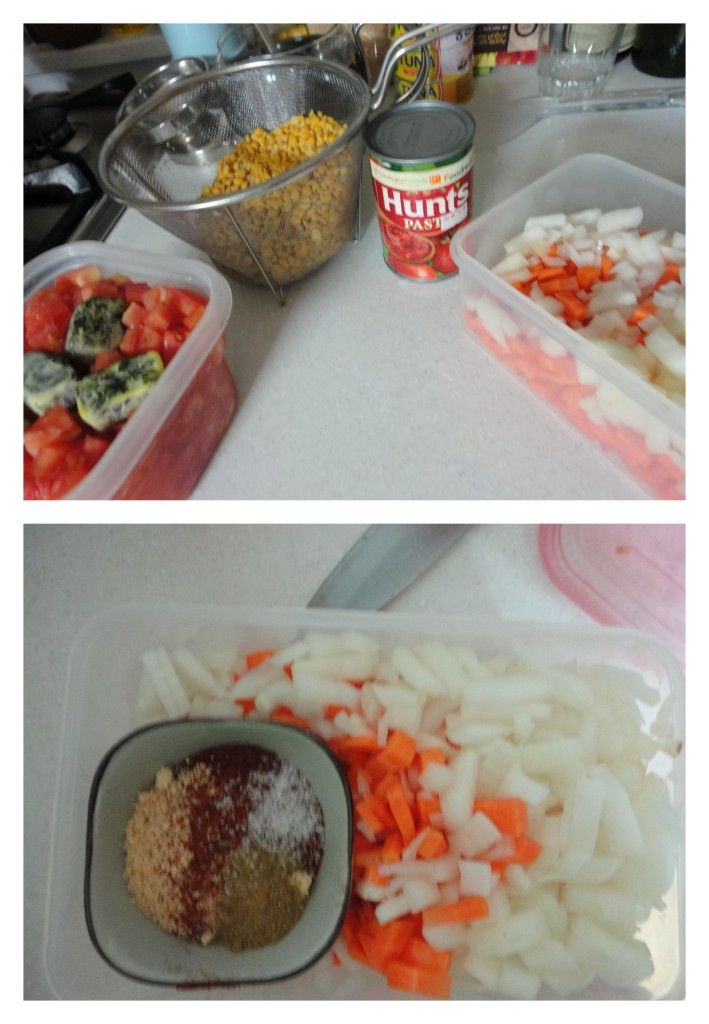
Top with 1 1/2 cups Dry Lentils, 1/2 cup Brown Rice and 1 lb. Chicken Breasts. Pour 3 cups Diced Tomatoes (fresh or canned) over all. In a small bowl, combine 1/2 cup Tomato Paste with 1 cup of the Chicken Stock; stir until tomato paste dissolves. Add to crockpot along with additional 3 cups Chicken Stock and 3 cups Water.

Cover and cook on low for 7-9 hours or until lentils and rice are tender and chicken is thoroughly cooked. Serve with sour cream (plain homemade yogurt) and salsa if desired.

Friday, August 3, 2012

Lasagna Soup

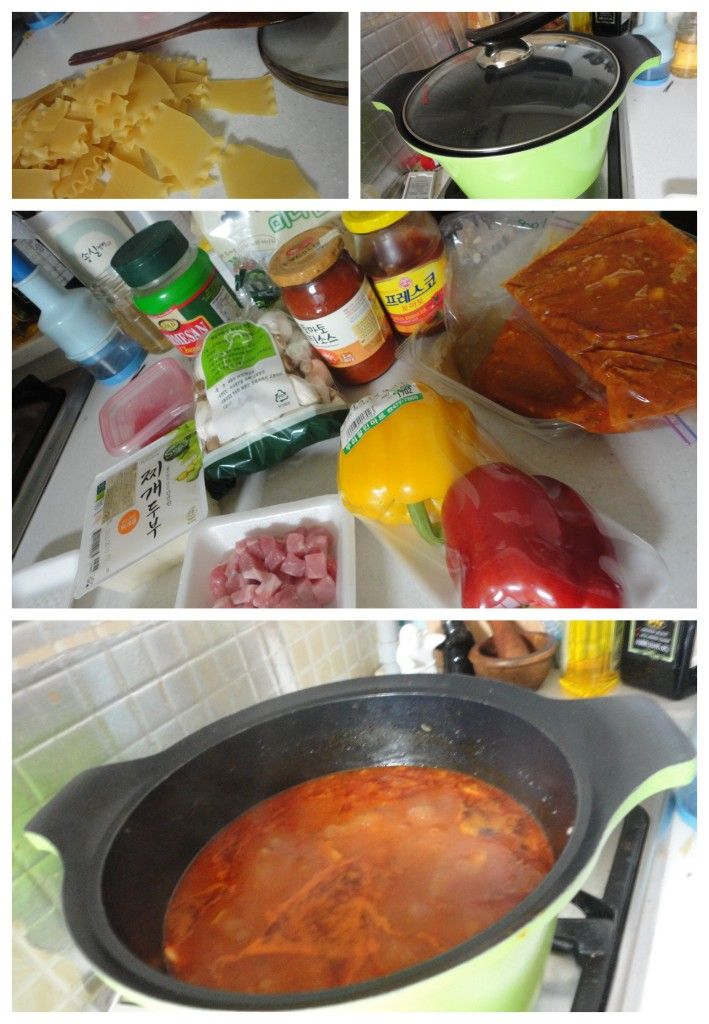
Inspired by the ease and success of a recent Tofu and Pork Skillet Lasagna, I opted to allow Pinterest to continue inspiring my kitchen creations and also to use up some lasagna noodles and complimentary ingredients I had at my finger tips.
Photobucket
As with the skillet lasagna, I opted to use tofu in this recipe simply because ricotta is difficult to track down in Korean markets and while I'm not opposed to either a) tracking it down nor b) making it from scratch, I'm equally satisfied with tofu as a substitute and since I was trying to put together a quick meal I figured the best bet was the ingredient which could be gathered from the small grocer at the bottom of the hill.

Directions/Ingredients:

Most of this is subject to change based on what's in the refrigerator and what your personal taste preferences are, that being said...

In a large pot, brown some ground or finely chopped pork (about 1 lb). Once browned, add a bit of olive oil if there is a lack of pork drippings and saute a chopped onion and bell pepper. As the onion and bell pepper begin to soften, add 2-3 minced garlic cloves shortly followed by about a cup of chopped mushrooms. Once this first set of ingredients is sufficiently sauteed and cooked add a jar and a half of pasta sauce and/or homemade tomato sauce (or tomatoes and tomato sauce would be a reasonable substitute about 4 cups total) and additional water or broth until ingredients are sufficiently covered and a bit of extra liquid remains. Bring to a boil.

Meanwhile, break apart 8 or so Lasagna noodles. Add noodles to boiling soup and let cook until al dente adding water or broth as necessary. While noodles are cooking, prepare one large package of tofu by draining off the water then crumbling as much or as little tofu as you like. Once noodles are cooked through add the tofu and cook for a couple of minutes until the entire dish is heated.

Serve with mozzarella cheese and crusty bread. Enjoy with the greatest of friends before enjoying some ruckus game-playing!

Monday, July 2, 2012

Black-Eyed Pea Hummus


Photobucket
Maybe readers are curious as to why the sudden increase in black-eye pea recipes...well, that's primarily because they're one of the dry bean varieties (along with chickpeas, red beans and black beans) that are available at the foreign food markets of Daejeon, South Korea AND there has been a tendency for folks leaving Daejeon to gift their leftover beans to Melissa. 

Not a problem really, considering the Harrington's eat like vegetarians in their homes and carnivores out in public. 

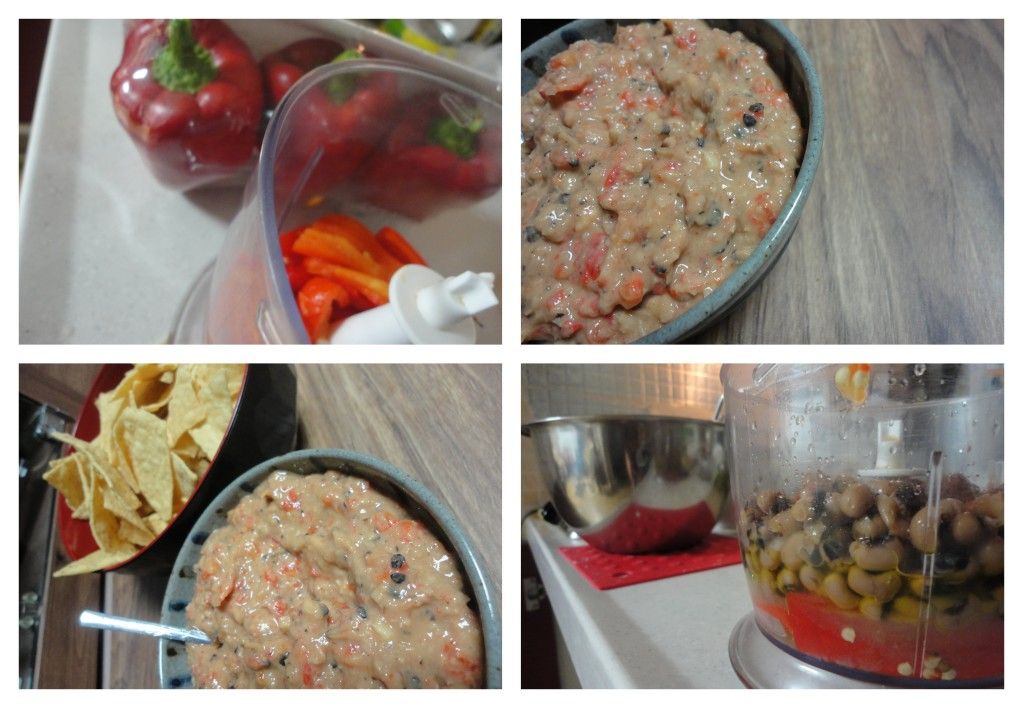
Anyway, this supply of beans and the impending departure of the Harrington's from South Korea has Melissa frequently searching out the next best way to incorporate black-eyed peas into a meal or snack, which in turn yields this Black-Eyed Pea Hummus, inspired by Foods for Long Life.

Ingredients/Directions:

In a food processor combine 8 oz of Roasted Red Bell Peppers (I roasted my own, but you could use store bought), 15 oz (about 2 cups) of Black Eyed Peas, 2 Tbsp. Tahini, 2 cloves of smashed Garlic, Sea Salt, 3 Tbsp. Lemon Juice, and a dash of Cayenne Pepper. May need to add olive oil or water to reach the desired consistency, process until smooth and dip-able!

Monday, April 30, 2012

Tomato Basil Noodle Bowl

Photobucket

We've had the great pleasure of being invited to various meals at the homes of our Korean friends lately and I'm continually finding myself being inspired to try out ingredients that are common in Korea and food preperation methods that also seem relatively specific to Korea.

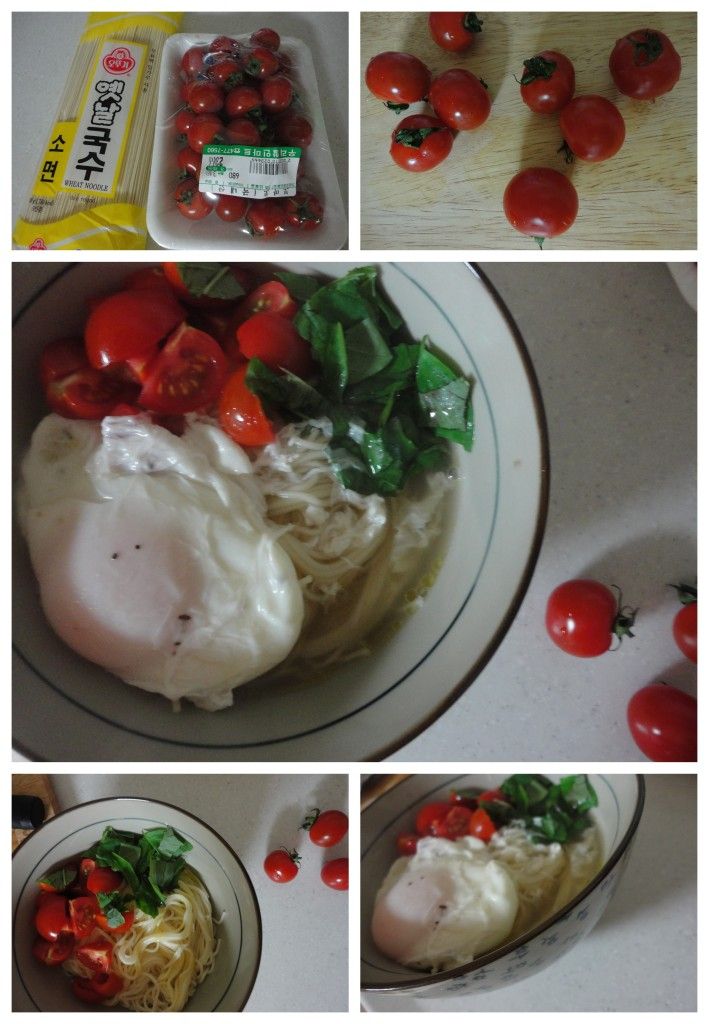
The other night, my friend served us a bowl of cold noodle soup with water kimchi. She explained it's kind of a common and quick dish in many Korean homes - simply boil noodles (I'm not sure about this specific kind of noodle...it's a common noodle in Korea, a little like spaghetti meets ramen). Anyway, once the noodles are drained, you place them in a bowl and then spoon over the top some broth or in the case of water kimchi, you spoon in some kimchi and the liquid portion of the kimchi.

I like noodle bowls. Spooning a broth of already prepared noodles, it's just nice.

Ingredients/Directions:

Prepare adequate amount of Korean noodles or ramen per individual being served. In seperate sauce pan, heat up chicken broth with any desired spices (salt, pepper, garlic, onion, etc.) Drain noodles and divide amongst the bowls. Tear a few fresh leaves of basil into each bowl, slice of chop tomatos and add to bowls, spoon broth into bowl, top with fried egg and grated parmesan if desired.

Tuesday, April 24, 2012

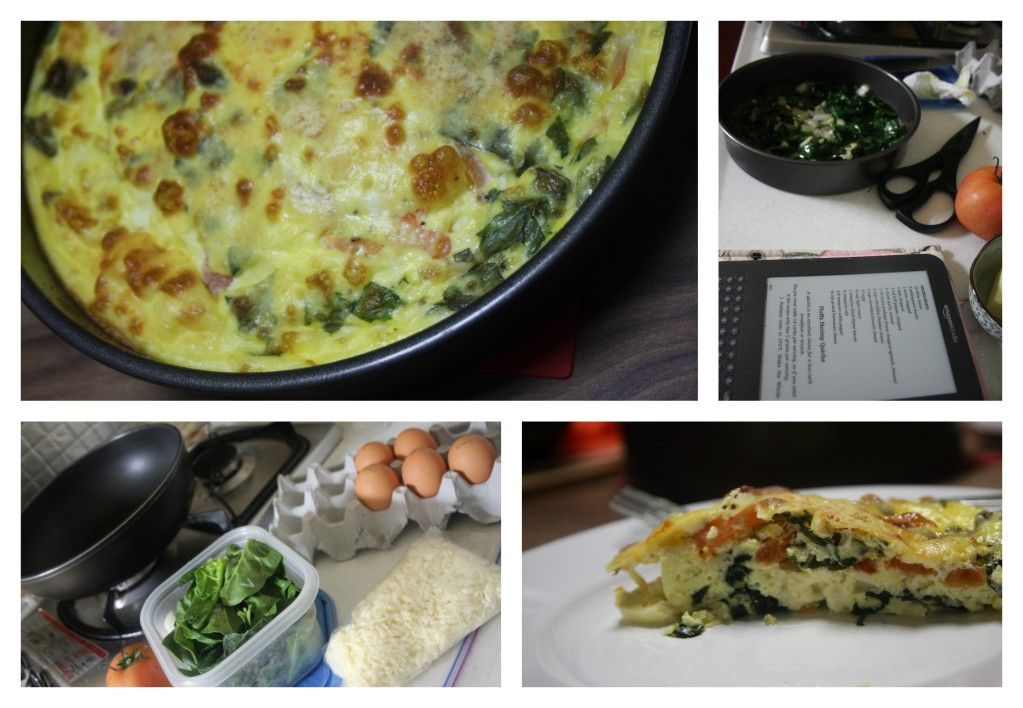
Crustless Spinach Tomato Quiche

I have currently set a goal to master pastry crusts, however, I had not set that goal, nor did I have sufficient time the night I opted to throw together this crust-less quiche. 

Served to new friends before splitting off into our respective genders for basketball and cafe chatting, this was a delightful light dinner on a school night.

Ingredients/Directions:

In a large skillet, saute half an Onion and a couple cloves of minced Garlic, add a couple of handfuls or roughly 2 cups of fresh, chopped Spinach. Once Spinach is wilted, throw into the bottom of a well greased round cake pan. Top with slices of tomato and a sprinkle on some mozzarella cheese. In a separate bowl, whisk together 6 eggs with 1/4 cup milk or yogurt, season with salt and pepper, pour over Spinach. Top with grated Parmesan and bake at 350F (177C) for 20-30 minutes or until egg mixture is set and top is beginning to brown.

Monday, April 23, 2012

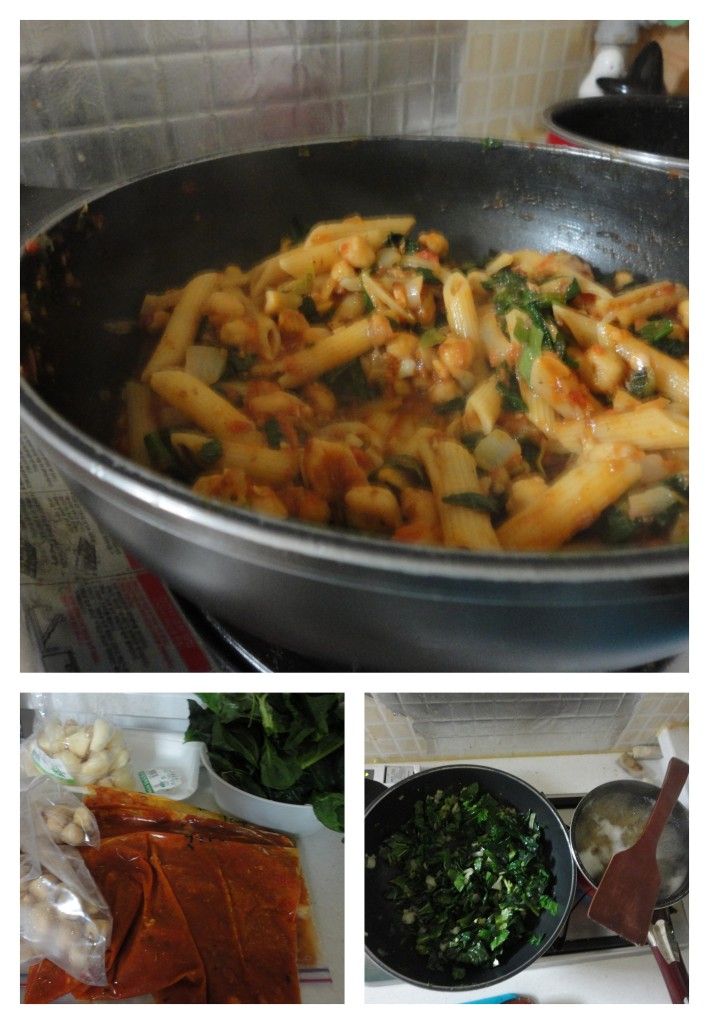
Chickpea Spinach Pasta

Photobucket

Over a month ago...many months ago in fact, I did a bit of 'once-a-month-cooking', knowing full well I wouldn't use it all up in a month because my life is busy, but not that busy and I just have too many ideas flooding my foodie brain to do all my cooking in one day. Regardless, having things like home-made tomato sauce just waiting for me in the freezer is quite awesome and I'm quite happy on the nights I don't feel like cooking nor walking to any food establishment, that there's something waiting to be prepared quickly and easily.

So, with a CouchSurfing Guest at home and a desire to feed him well while taking time to chat and enjoy his company I figured a quick boil of some pasta along with the defrost of some frozen chickpeas (since we can't get canned one here and it's easier to prepare many at once rather than a few at a time) and my home-made tomato sauce we'd soon have ourselves and enjoyable and hearty meal.

In a large skillet, saute an onion and garlic, add chickpeas, heat through. Next, add a few handfuls of washed and chopped spinach until wilted, dump in two cups of tomato sauce, heat through and mix in pasta , fresh basil and mozzerella cheese, enjoy!

Saturday, April 21, 2012

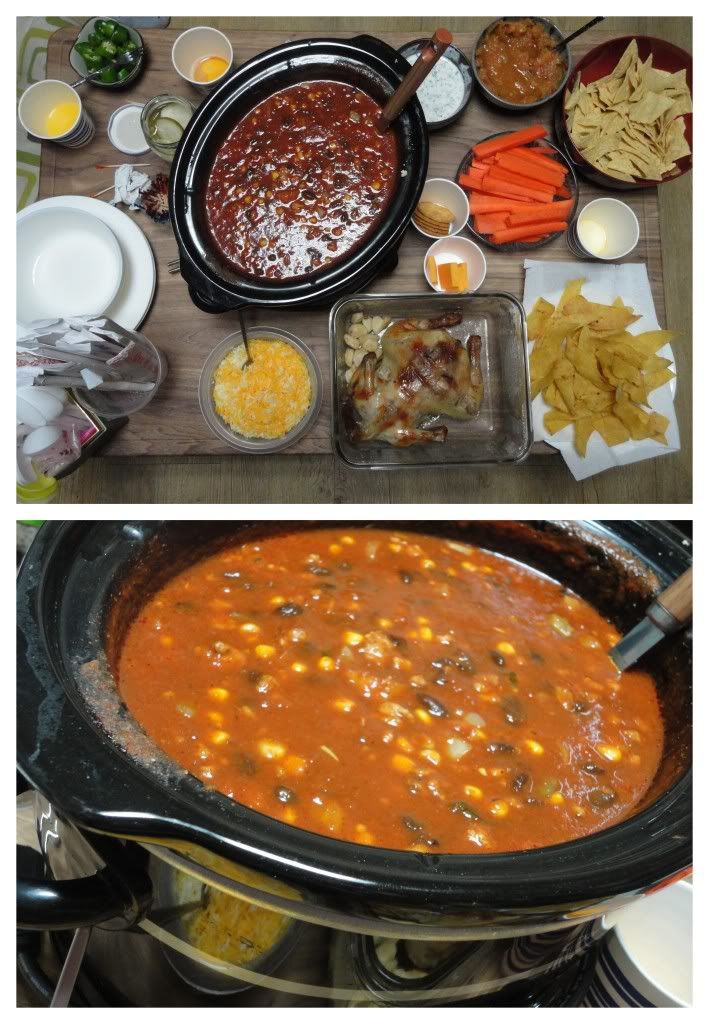
Taco Soup

Photobucket

This soup received rave reviews. Actually, I keep forgetting to post the recipe, but one friend has reminded me via Facebook that she would like to make this recipe, or rather she'd like her husband to make this recipe, so I suppose I should get to posting the recipe ^^

Unfortunately, for those living in South Korea, all of the ingredients aren't that easy to come by such as ranch dressing packets or Mexican chili powder. However, I think the ranch seasoning can be left out and perhaps you can replace the Mexican chili powder with Korean chili powder or take a look at some of Korea's online grocery stores.

Anyway, on to the recipe.
Photobucket

Ingredients/Directions:
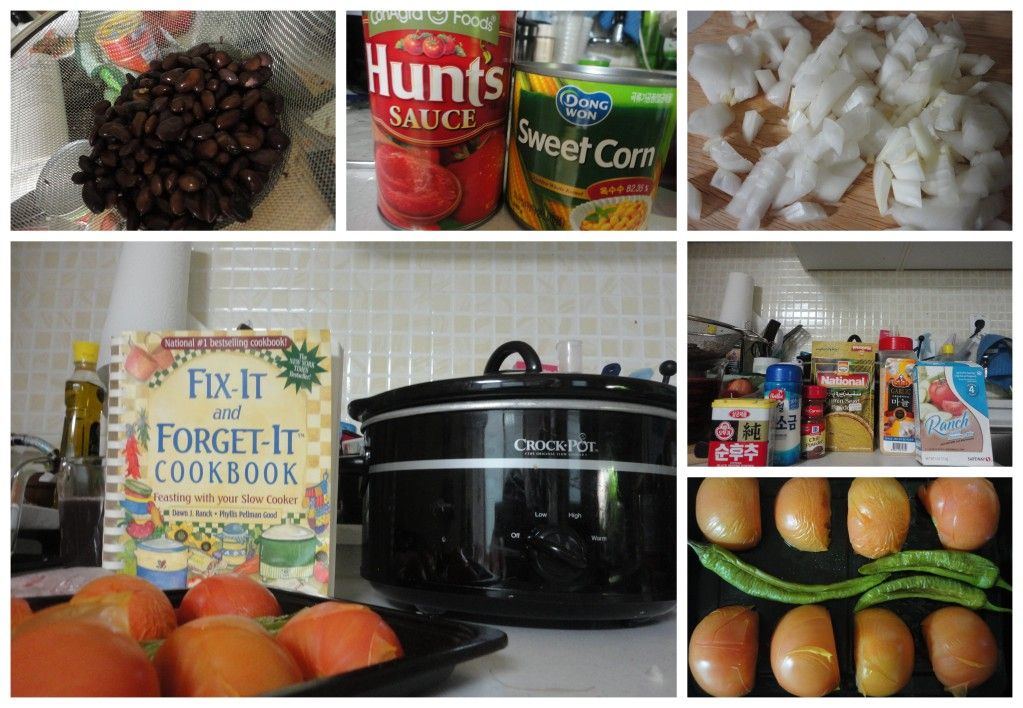
Adapted from the Fix-it and Forge-it-Cookbook

I use a slow-cooker otherwise called a crock-pot which we purchased at Costco to prepare this soup, however it can easily be made in a large pot on the stove and should take significantly less time. It is ready to eat when it's been thoroughly heated.

Into a large crockpot mix together 2 cups prepared Black Beans, 2 cups diced tomatoes (either canned or fresh - if you use fresh you may need to add water or chicken broth to the soup for the purpose of consistency), 1 diced Onion, 3-5 roasted and chopped Green Chilies, 1 can of Tomato Sauce, 1 can of Corn. Season the soup with 3-4 Tbsp. Mexican Chili Powder, 1/2 or whole package of dry Ranch Dressing seaoning (depending on what other uses you have for it/how difficult it is to get where you are currently located ^.~), a shake of Cumin, Cayenne Pepper (Tobasco Sauce would also work) Salt, Pepper, and 2-3 minced cloves of Garlic. Stir and add any liquid if necessary. Turn the slow-cooker to low and cook for 6-8 hours or heat on the stove-top for an hour or so. Serve with Cheese and Tortilla Chips!

Sunday, April 8, 2012

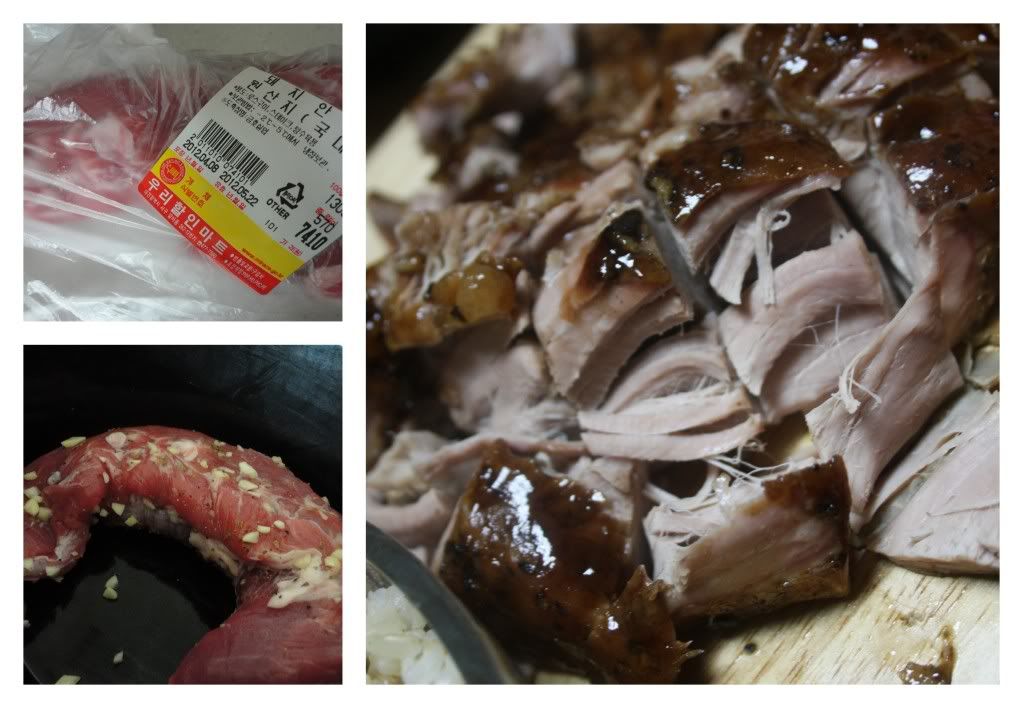
Brown Sugar Balsamic Glazed Pork Tenderloin


This is amongst one of the first recipes I ever pinned on Pinterest, unfortunately it took me entirely too long to get around to preparing this insanely easy and delicious pork tenderloin. Fortunately, it made for a perfect Easter-away-from-home dinner.
Photobucket
Ingredients/Directions:
Pinned from Let's Dish Recipes

Season a 2 lb. (~1Kg) Pork Tenderloin with Oregano, Salt, Pepper and minced Garlic to taste (just a few shakes of each) and place in the slow cooker with 1/2 cup of Water. Cook on low for 6-8 hours. In the last hour of cooking, combine on the stove-top 1/2 cup Brown Sugar, 1 Tbsp. Cornstarch, 1/4 cup Balsamic Vinegar, 1/2 cup Water and 2 Tbsp. Soy Sauce until thickened. Brush the pork loin with this mixture 2-3 times during the last hour of cooking and serve the loin with any left over sauce. Enjoy with rice and a fresh green salad and more importantly with good friends!

Thursday, March 15, 2012

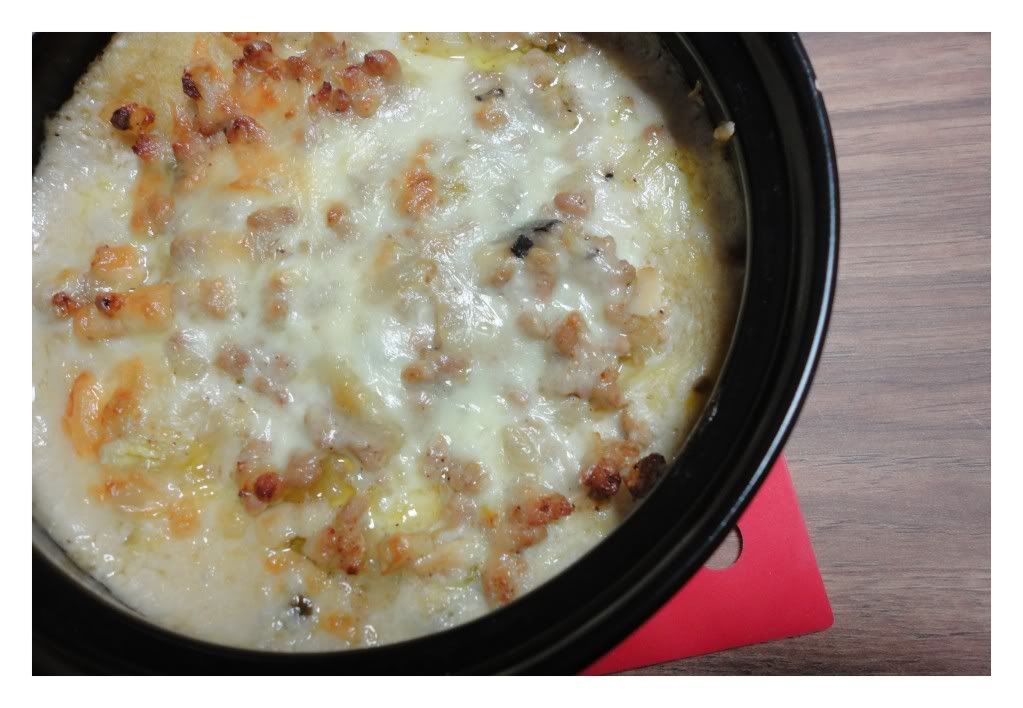
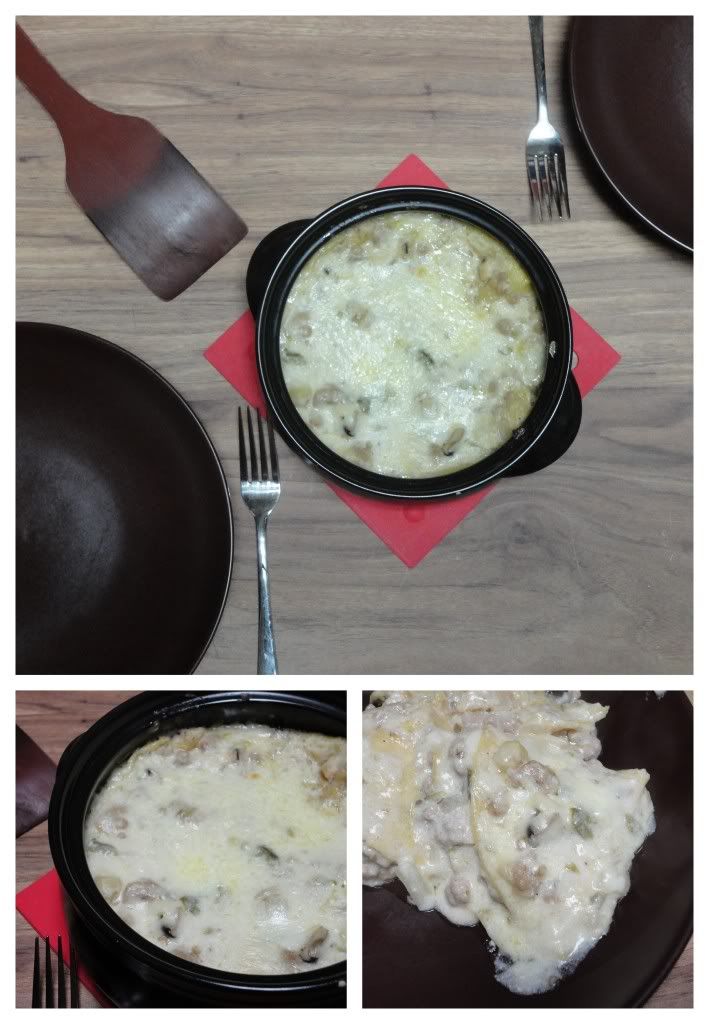
Chilie Sour Cream Pork Layer Enchiladas

Photobucket

This was delicious. So much so, we ate it two nights in a row. So much so, that the man and the Lady (annyeong) licked the plates clean.

I recently made yogurt. Two jars were exactly what I wanted my yogurt to be. Three jars were a little more sour and thick than I had intended, a little like sour cream, so I decided. Therefore, I searched for recipes that used sour cream and substituted my home-made sour-creamish yogurt.
Photobucket

There's a lot of parts to enchiladas. Don't fret. Just breath and take your time, the efforts quite worth it!

Ingredients/Directions:

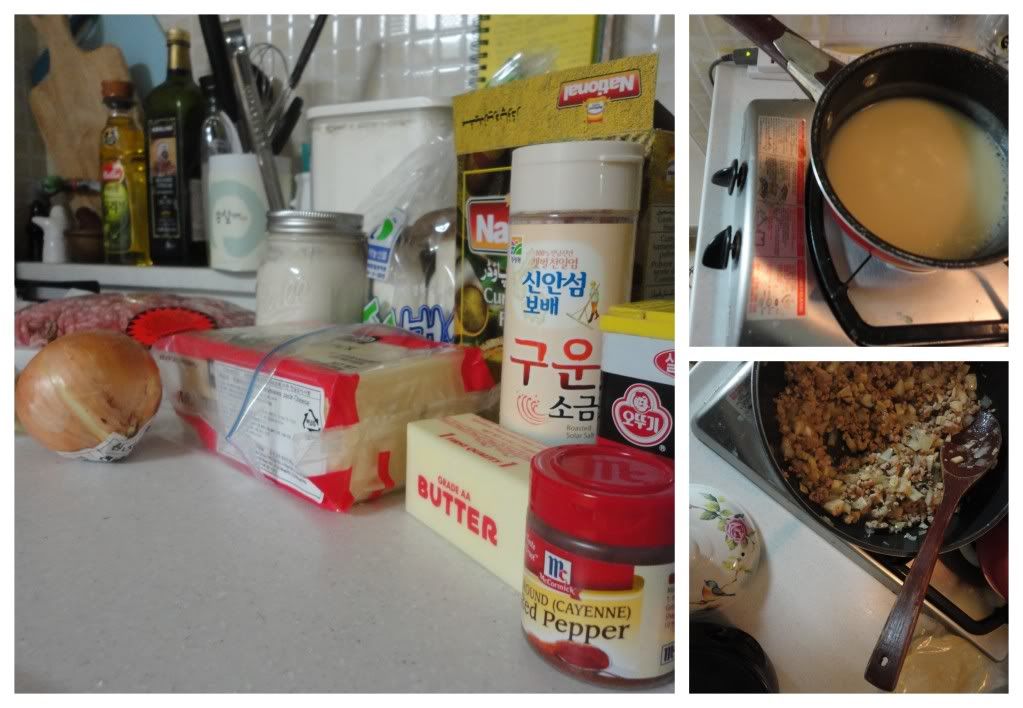
I began with the sauce which came together by melting 1/4 cup Butter in a small saucepan and then adding 1/4 cup Flour and stirring about 5 minutes to make a roux. (The author of my recipe inspiration states the key to roux is working the flour-butter mixture until  the flour smell resides). Slowly whisk in 1 1/2 cups Chicken Broth before reducing the heat and whisk in 1 1/2 cups Sour Cream. Once sauce is well mixed, add diced green chilies from a can or fresh diced green chilies, salt and pepper all to taste.

With the sauce complete, move on to the meat filling. For this, I simply diced up one Onion, minced 2-3 Garlic cloves and sauteed them before adding a small package of ground pork and cooking it through.

Photobucket
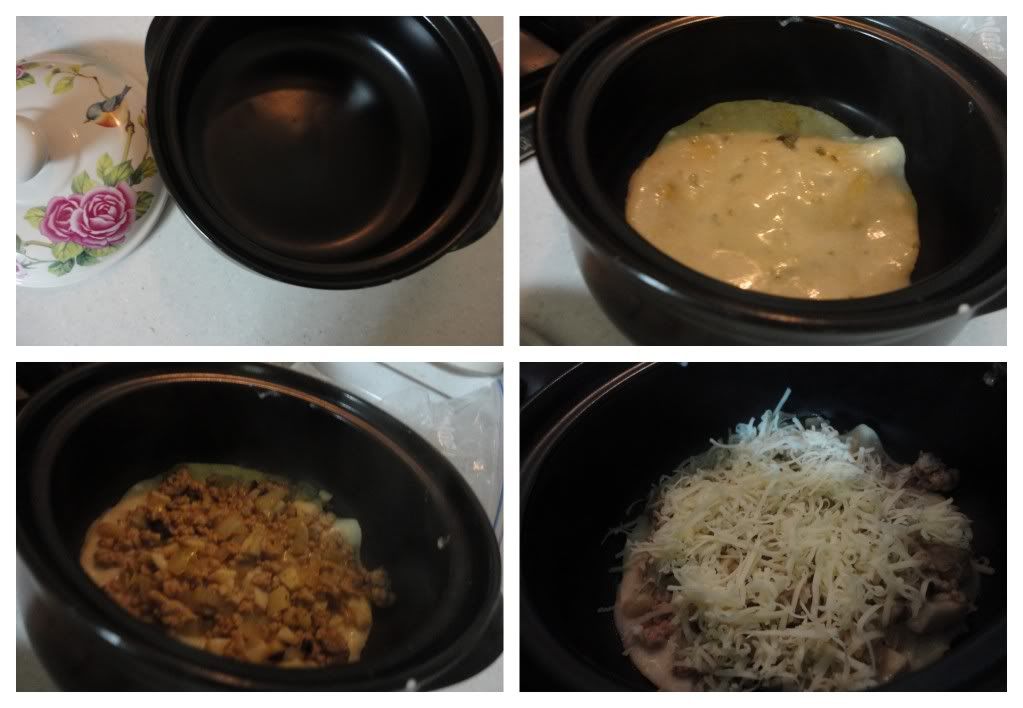
Now, it's time for assembly. You can do the whole wrapped enchilada concept which will likely look more lovely, however, in an itty-bitty oven I've found the layered, casserole style dish is a much better option. For this, I just dip a corn tortilla in the cream sauce, place in the bottom of a small round casserole dish, sprinkle with pork filling and shredded Monterrey jack cheese until the dish is filled. Pop the dish in the oven at 350*F (177*C) and bake for 15 minutes with a cover and 5 minutes uncovered until golden and bubbly. Enjoy!


Photobucket

Tuesday, March 6, 2012

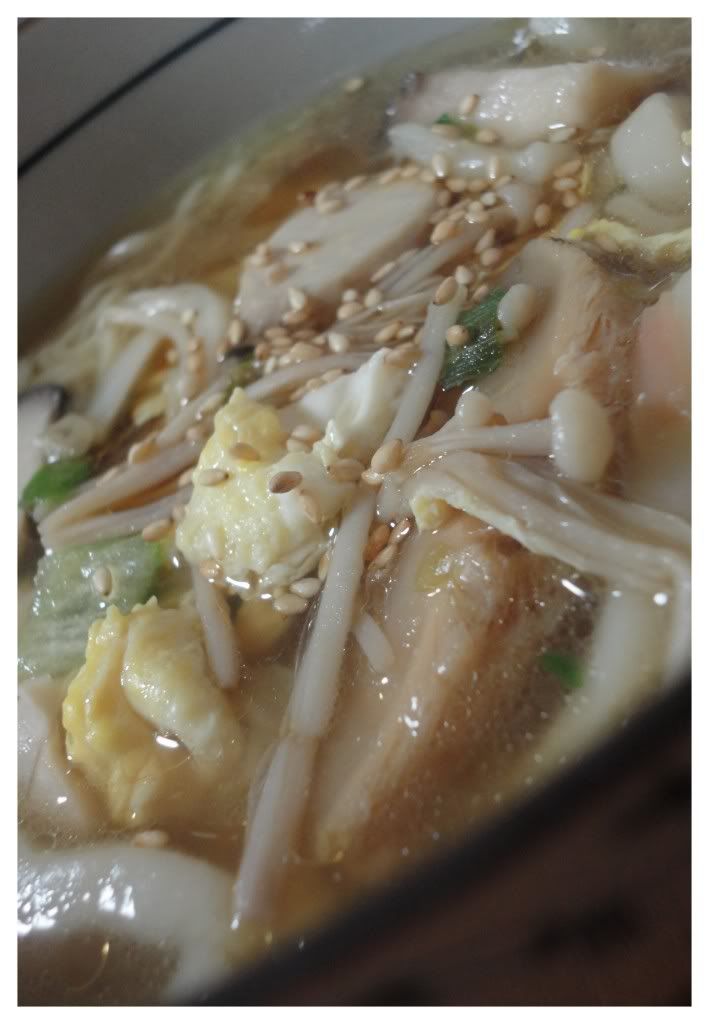
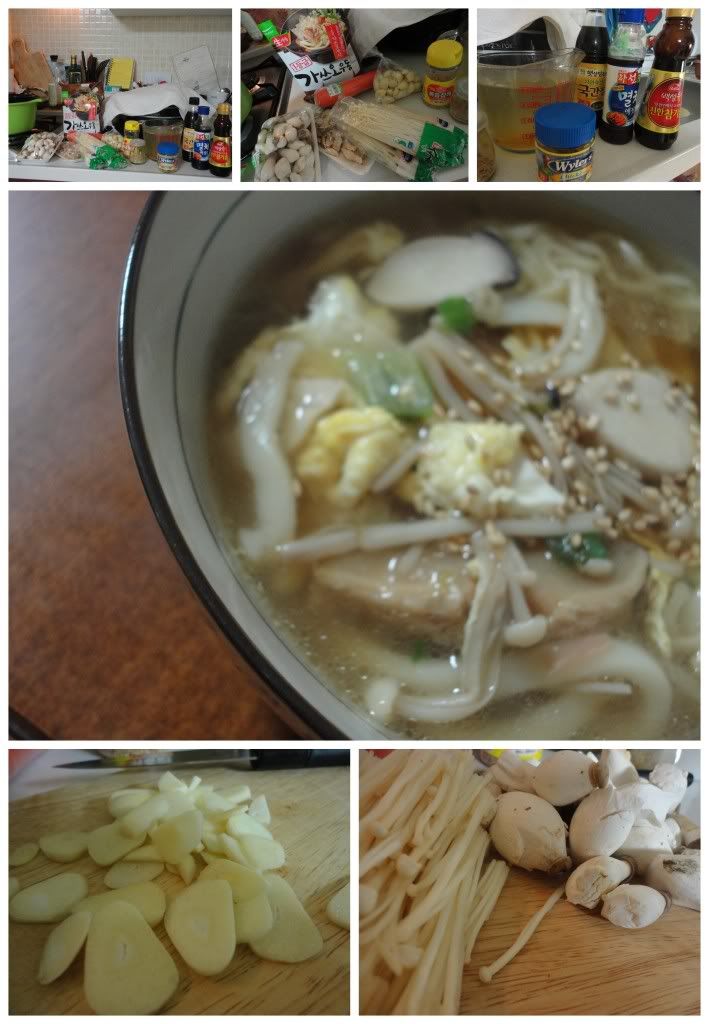
Asian Mushroom and Noodle Soup


Photobucket

Using this Food Network recipe as my starting point I threw together this Mushroom Noodle soup just a few nights ago. As is common in my personal cooking adventures, I made some adjustments based on what was available in my home and on what I was and wasn't willing to go to the store to purchase.

For example, I wanted to add Udon noodles. I had only a single person serving of said noodles. Regardless, I wanted noodles, but not a walk to the grocery store. So the resulting recipe featers a serving of udon noodles mixed with a serving of Ramen noodles, not necessarially 'ideal' or 'beautiful' but edible and fine and why not? Why not cook in such a way that allows us to be creative and lazy at the same time. The dish was nourishing and tasteful, all that matters after a long days work.
Photobucket
Ingredients/Directions:

In a large pot heat 2 Tbsp. Vegetable Oil and saute 3-4 sliced or minced Garlic Cloves and 1 tsp. ground Ginger until fragrant and lightly browned. Add 2 qts. Broth or Tea (I'd recommend black or green or a hearty herb tea if you happen to have one), 3 Tbsp. Soy Sauce and 2 Tbsp. Fish Sauce (the udon I purchase comes with it's own sauce packets, I throw that in the pot and add soy and fish sauce per taste). Bring the stock to boil while you prepare any combination of 3-5 cups of mushrooms you fancy (I can give details on my own because I frankly don't know, one is thin, white and squeaky on the teeth, one is quite plump and some were dried). Simmer for about 15 minutes before adding choice or combination of noodles (udon or ramen) and continue to simmer 2-3 minutes until noodles are soft. If you'd like to add a bit of protien, whisk 2-3 eggs and slowly drizzle mixture into the simmering pot, let simmer with out stirring for 1-2 minutes. Stir, ensure eggs and noodles are cooked properly. Serve hot with a drizzle of sesame oil and a sprinkle of sesame seeds!

Saturday, March 3, 2012

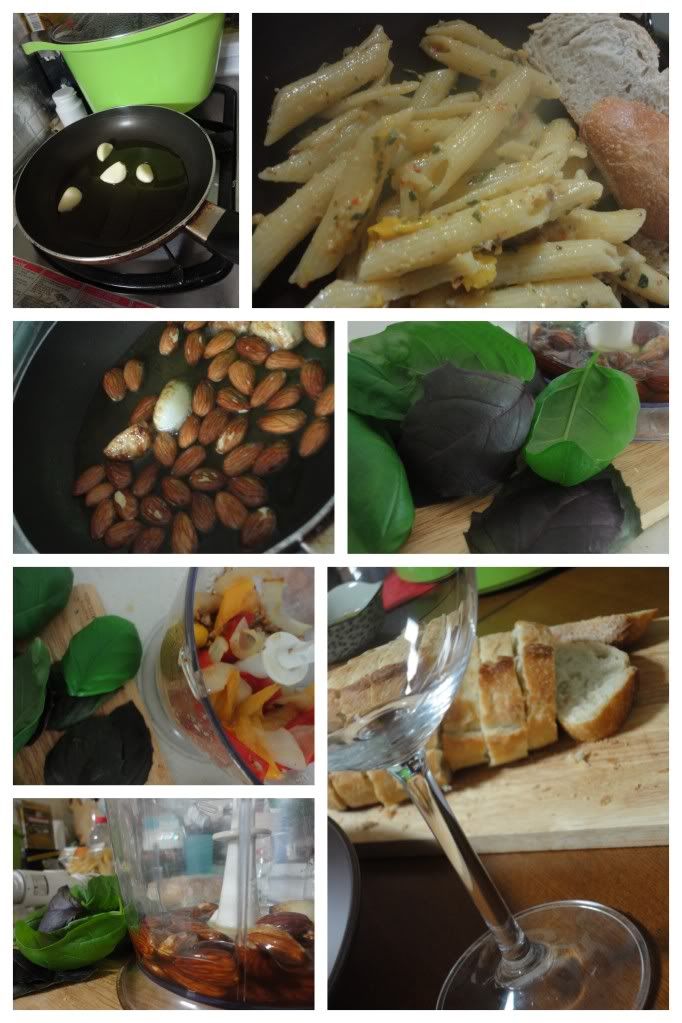
Roasted Pepper and Onion, Almond Pesto Pasta

This evening (that's right, this evening, as in, I'm posting a blog merely hours after having eaten the meal - I do believe that's a first) I went to work harvesting some fresh basil from my fabulous AeroGarden which was a Christmas gift from the man.

It's been a day of throwing fresh herbs into whatever I can, and I'm lovin' it! Hoping I can manage these greens well enough that they keep producing for me for a while at least.

Using this recipe from Menu Musings of a Modern American Mom, I created a dish that was truly satisfying and used up a number of ingredients I had on hand. I did, of course adjust the recipe to my availability of ingredients and personal tastes.

Here is what I came up with:Roasted Pepper and Onion, Almond Basil Pesto Pasta

Photobucket


Ingredients/Directions:

Bring a large pot of water to a boil. In a small skillet toast 4 whole cloves of Garlic in 1/3 cup room temperature extra virgin olive oil. As the garlic begin to toast, throw in 1/3 cup of Almonds and toast a couple minutes longer. Transfer ingredients from skillet into a food processor and pulse until a rough paste is formed (add additional EVOO throughout the process if necessary). Next, add 1/3 cup of cubed Parmesan to the food processor, pulse. Repeat that process with 1 cup of roasted peppers and onions then again with 1 cup of fresh basil. During this time, keep your eye on the water and add 1 lb. of Penne Pasta once the water begins to boil and cook until al dente. Reserve one cup of the pasta water (or you can have 1/2 cup heavy cream available) and drain the pasta. In the large pot, mix about 1/4 cup of the pasta water with 1/2 of the Pesto, continue adding pesto and a bit more water until you have the desired consistency in the sauce (not too runny, but not to stiff either), toss in the pasta, serve with additional Parmesan and basil with a fresh baguette and bottle of homemade wine, bon appetit!

Tuesday, January 31, 2012

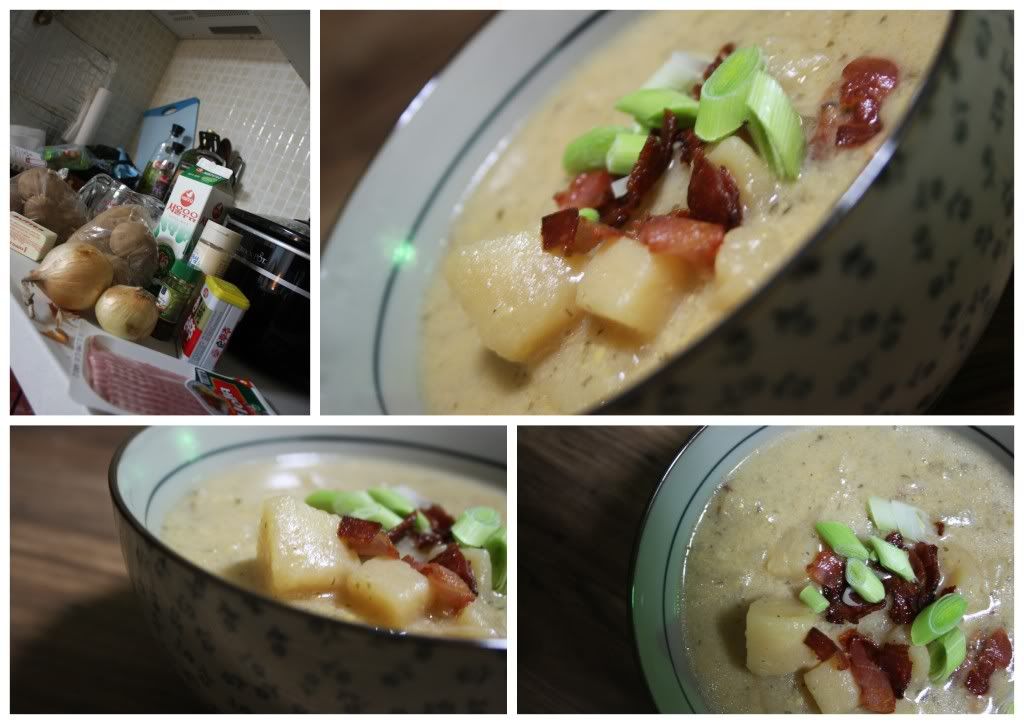
Cheesy Slow-Cooker Potato Soup

Photobucket

I love potato soup. I love comfort food. I love the slow-cooker.

Ingredients/Directions:

Into a slowcooker throw: 8 cups peeled and diced potatoes (between 6 and 10 potatoes depending on size, Korean potatoes are generally quite small), one Onion chopped, 3-4 minced garlic cloves, equal parts water/broth and milk (you want the potatoes and onions to be covered, so the exact amount can be tricky to calculate). Cook on high for 5-6 hours.  Add to broth your choice of thickening agent (flour + water or more effective, cornstarch + water) and cook on low 3 hours.  During the last hour of cooking add additional milk if necessary for consistency and 1-2 cups grated cheddar (or your choice) of cheese and 2 Tbsp. dried Parsley, season with Salt and Pepper. During the last hour, cook up some bacon until crispy and slice some green onions to use as garnish, serve and devour.

Sunday, January 15, 2012

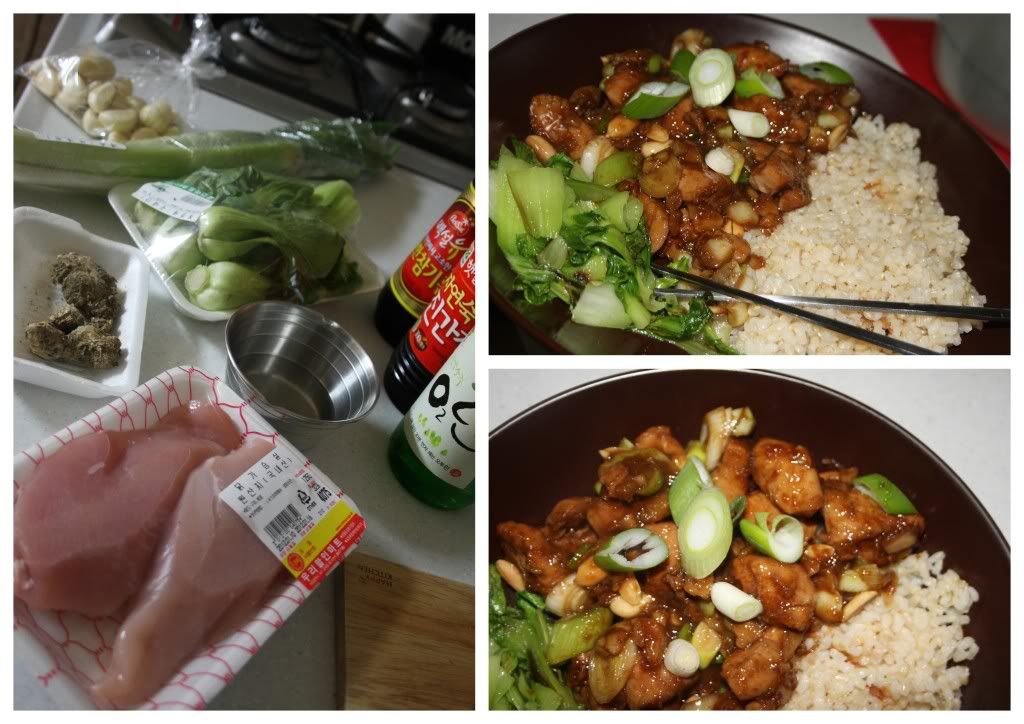
Taiwanese Three Cups Chicken

Photobucket

Perhaps it is in anticipation of soon setting down in Taiwan for a weeks worth of exploration that I suddenly craved a dish once prepared for us by an English expat of Taiwan who visited us via CouchSurfing.  Either way, the dish proved to be exactly what I was wanting for the evening meal and come together quicker than anticipated (minus the brown rice which is incredibly worth it, but incredibly slow in the rice cooker...and probably on the stovetop as well).

Ingredients/Directions:

Original Recipe and Inspiration come from this 'Not Eating Out in New York' post

In a wok/large skillet/whatever you have heat to boiling 1/3 cup Sesame Oil with 10-15 smashed Garlic cloves and 2 Tbsp minced Ginger. Add 2 chopped Chicken Breasts (more authentic recipes call for thighs and dark meat which would result in a more tender dish, my market only had breasts) and stir until all pieces are browned/seared.  Add 1/3 cup Soju (or any other kind of Rice Wine), 1/3 cup Soy Sauce and 3 Tbsp. Sugar, bring to a boil then cover.  Reduce to simmer until chicken is cooked through (roughly 5-10 minutes).  Stir in 1-2 chopped scallions and a handful of peanuts (personal choice, also highly recommended is Thai basil however I did not have that on hand...) and serve with your choice of rice.
Related Posts Plugin for WordPress, Blogger...