Showing posts with label Onion. Show all posts

Wednesday, January 23, 2013

Cheese and Onion Enchiladas

Extended Shelf Life for: Onions

Photobucket
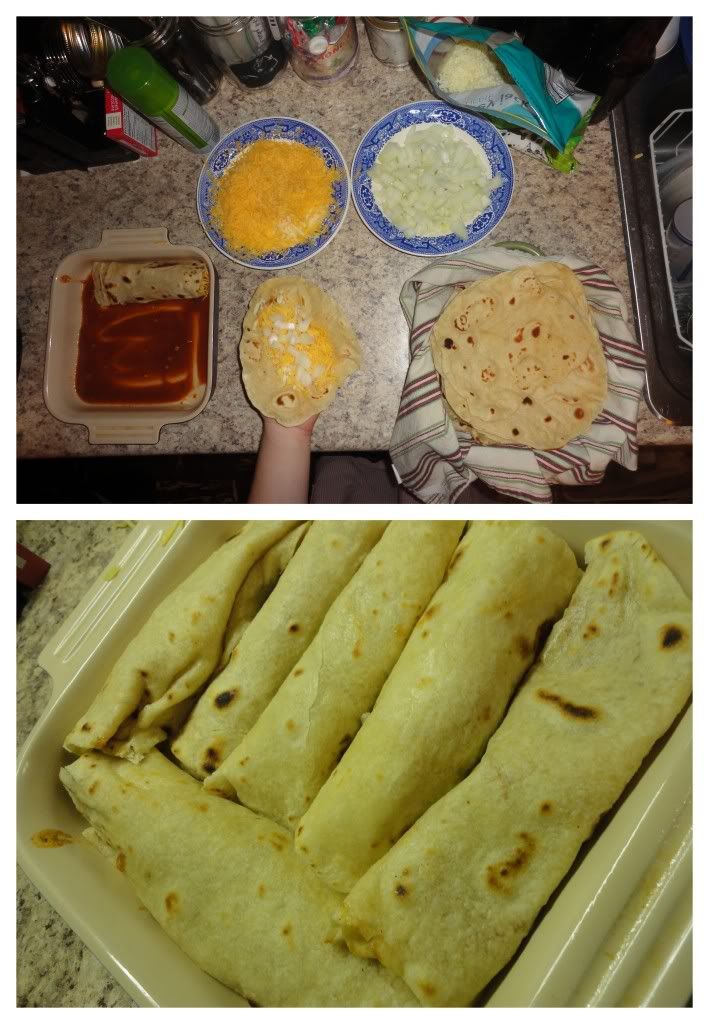
With fresh, Bacon Fat Tortillas, ready to go, it was time to kick a Mexican food craving in the rear and enjoy some home-made enchiladas. These guys were not even close to being a disappointment! Only bummer of the whole meal was not having enough Chile Powder to make this enchilada sauce correctly, regardless, a few extra shakes of Cayenne Pepper and a short prayer were all that was needed to thoroughly enjoy this weeknight meal.

Ingredients/Directions:

Spread a bit of Enchilada Sauce on the bottom of a 9x13 pan (or have two square pans ready to go) then begin filling each tortilla with a small handful of Onions (sauteed if that's your preference - we're not opposed to raw, so I left them that way), Cheese and a touch of Enchilada Sauce. Arrange tortillas in the pan, once it's full spread remaining Enchilada Sauce over the top, sprinkle with cheese and bake at 350 for 30 minutes or until cheese is melty and sauce is bubbly. Enjoy!

Wednesday, January 16, 2013

Pizza Experiment #4: French-Philly Pizza

Extended Shelf Life for: Onions

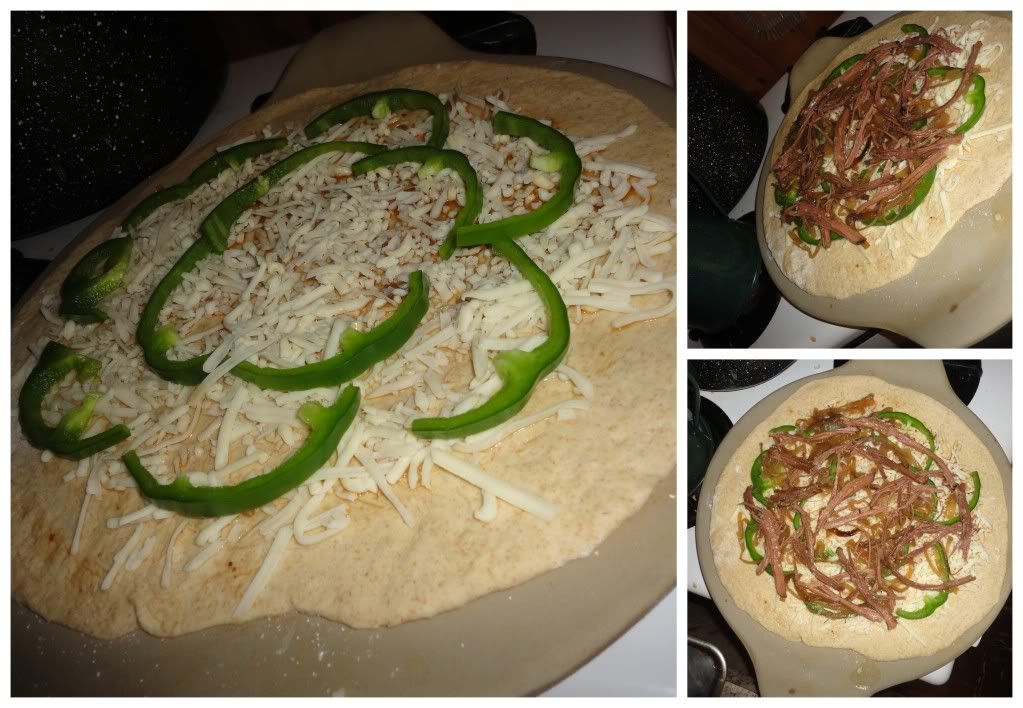
I realize we've only had a small handful of pizza experiments...but I think this one may be a favorite, a winner, winner - pizza dinner! With French Dips and Philly Cheesesteak Sandwiches serving as my inspiration, we enjoyed these pizzas which we're perfect in every way!

Photobucket


A few key points:

The recipe for the roast beef is known as the Best Beef Dips Ever, and they are, and they are easy. One roast, 1 cup of Soy Sauce, 6 cups of Water, Garlic, Rosemary, a Slow-Cooker and 8-10 hours on low. I recommend preparing the roast a day or two before preparing the pizza, just for the flavors to gain intensity.

Photobucket


The toppings:

Best Beef Dip Roast Beef, Green Pepper, Caramelized Onions, Mushrooms and Monteray Jack Cheese. When the pizza's finished, serve with a small bowl of Au Jus for dipping.


Sunday, January 13, 2013

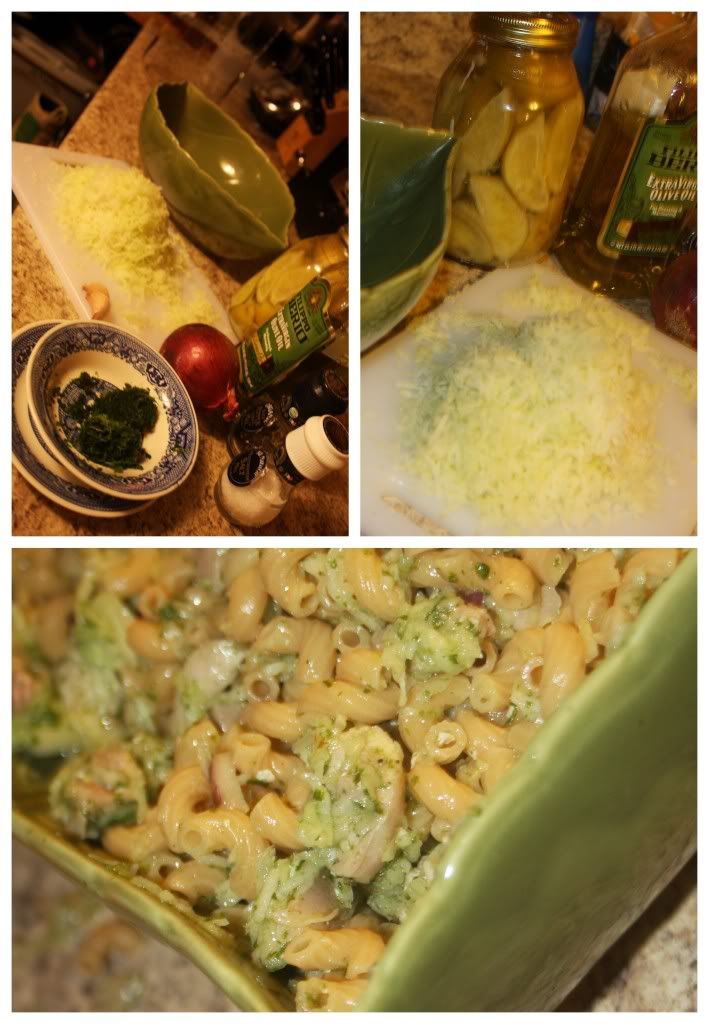
Orange-Avocado Pasta Salad

Extended Shelf Life for: Limes, Avocados, Tangerines, Onion
Photobucket
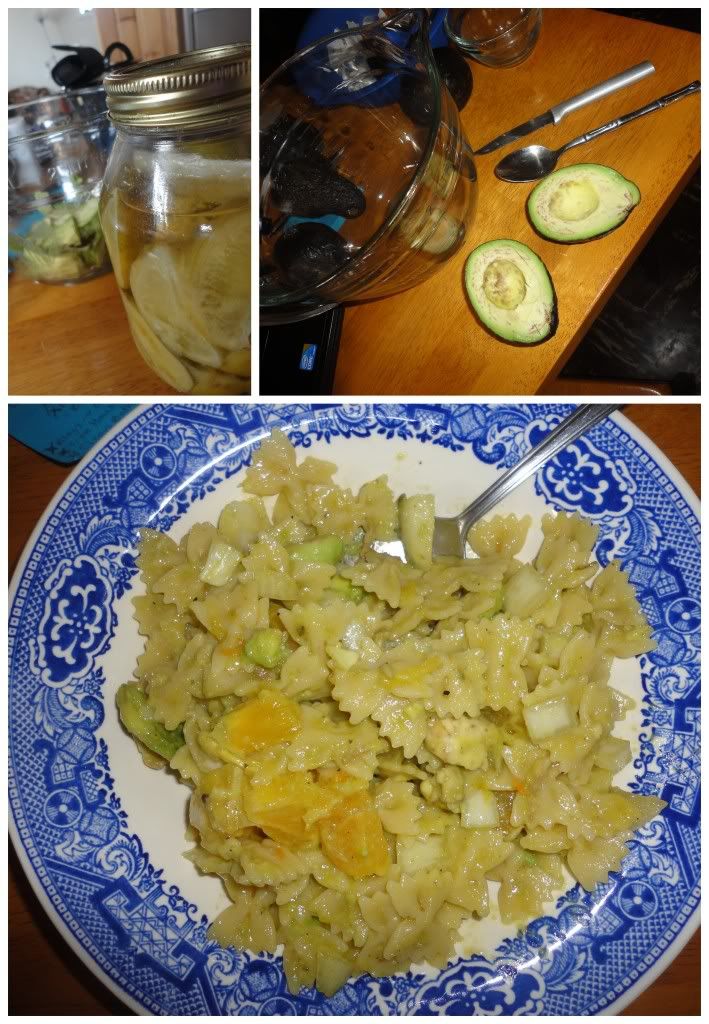
Sometimes you just throw something together quick and it works out in all the perfect ways.

Ingredients/Directions:

Prepare pasta of choice. Slice and dice an avocado, mix with juice of one lime, salt to taste, one minced onion and 2 chopped oranges which have been zested to add additional flavor to the dish. Add pasta to the avocado-orange mixture, mix - let set for a few moments before serving and devouring. Probably fits spring/summer better, but...when you dive...what can you do?

Thursday, January 10, 2013

Spanish Tortilla with Red Potatoes

Extended Shelf Life for: Potatoes and Onions
Photobucket
One of the greatest aspects of world travel (or even traveling domestically/regionally/locally) is the discovery of new foods. Even better is choosing to prepare these dishes, enjoy them post-travels and allow your taste-buds to trigger memories of those adventures you just recently enjoyed.

For me, Spain was the first time I left the comfort of the mother land, the first time I found myself surrounded by the unknown. And subsequently, the first time I had a Spanish style tortilla.

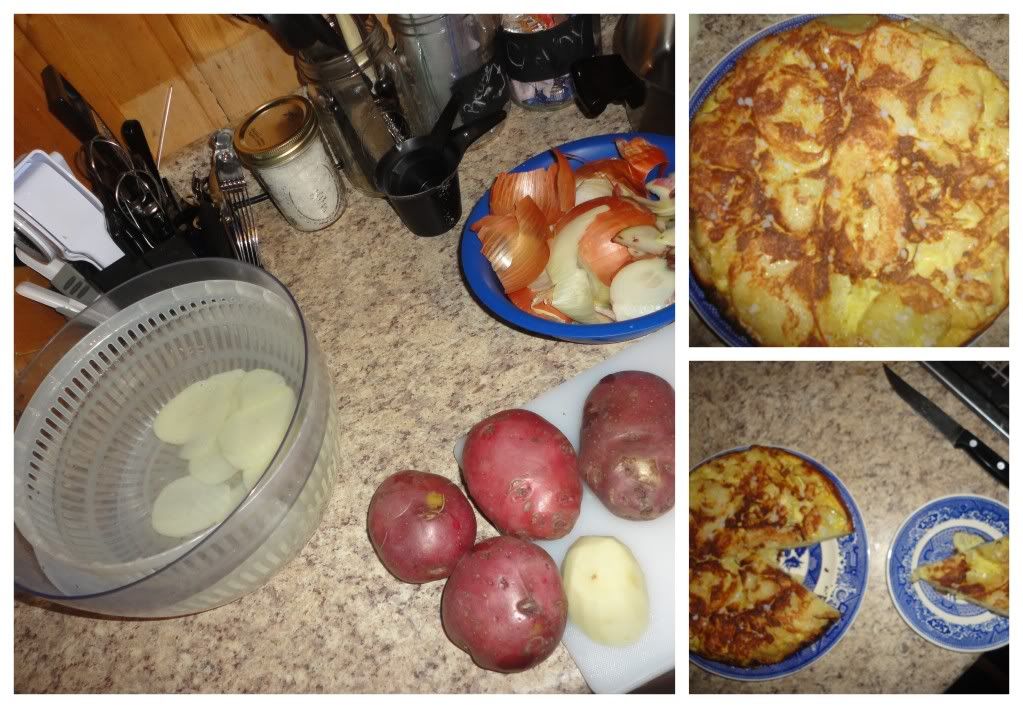
Considering the ridiculous amount of potatoes and onions we've had in our pantry, I figured a quick and easy meal that would also take me on a trip to one of my first country-lovers, would be a Spanish Tortilla.

I did some research and checked out the recipe from Smitten Kitchen and the Grumpiest Hippie, used what I had and came up with something along these lines ;)

Ingredients/Directions:

Peel and thinly slice 5-6 medium Red Potatoes, throw in a bowl of water with a dash of lemon juice to prevent browning.  Peel and thinly slice 1 Onion. In a large bowl, whisk together 6 Eggs, season with salt and pepper. Stir the potatoes and onions into the eggs, let set for 25-20 minutes. Heat 1/4-1/2 cup of Olive Oil in a cast iron (or specialized tortilla pan) and pour in the egg mixture...and now things get tricky and I am no expert (may you want to refer to the two referenced recipes at this time). Anyway, let it cook long enough to set throughout the bottom half but not so long as to burn it...I burned mine a little bit... Flip and cook the other side. Serve warm or at room temperature. May serve with hot sauce, chopped tomatoes, a drizzle of olive oil or sea salt (or any combination thereof). Enjoy!

From the Archives:

January 10th, 2012: No Bake Cookies
January 10th, 2012: Ddeok-guk

Saturday, January 5, 2013

Pizza Experiment #3: Tomato and Preserve Onions

Extended Shelf life for: Onions and Tomatoes
Photobucket
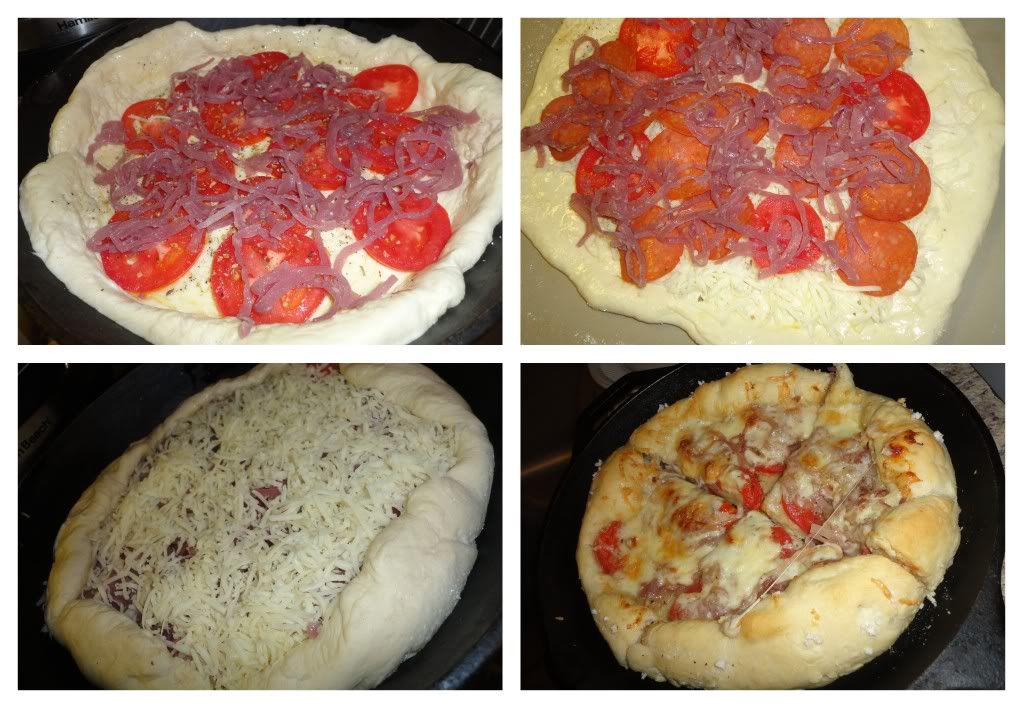
I recently revealed one pizza crust recipe, and have yet to post any others (although I'm working on it ;) ). A few weeks back, I also let you in on the secret of delicious preserved red onions. And now, here I am, ready to throw together a new pizza! Essentially, the toppings are the same for both pizzas:

Tomato, Preserved Red Onions and Cheese.

One also received a few pepperonis.

Rather than making a sauce I simply brushed the crusts with olive oil and sprinkled with oregano.

Other than the pepperonis, the primary difference was that for one of these pizzas I sprinkled cheese on first, followed by ingredients and then a touch more cheese, where as the other was done in the more tradition: ingredients then cheese style.

It didn't make a huge difference, but I kind of liked having my vegetables surrounded by cheese and how the bottom layer of cheese was extra gooey and the top layer of cheese was a bit more golden and allowed the vegetables and toppings to 'shine' through.

So there you have, Pizza Experiment #3!
Photobucket

Wednesday, January 2, 2013

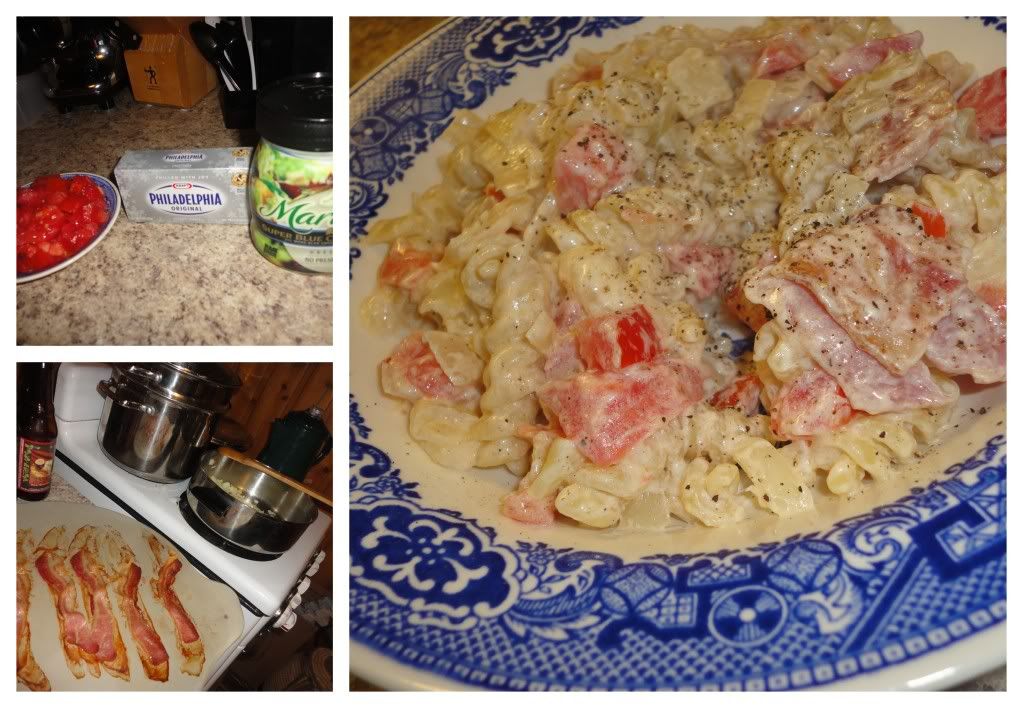
Bleu Cream Pasta with Bacon and Tomatos

Extended Shelf Life for: Tomatoes, Bacon, Onions, and Bleu Cheese Dressing

Photobucket

Ingredients/Directions:

Prepare bacon to your liking. (I like the oven method, as it's efficient and I don't get splattered by hot flying grease).

Meanwhile, bring a large pot of water to boil and prepare 1/2 pkg. of Pasta (about 4 oz.).

In a large-deep skillet, saute1 onion in about 2 Tbsp. of Olive Oil until translucent. Add to the pan, 4 Tbsp. of Cream Cheese and 2 Tbsp. of Butter, melt. Add 1/4 cup pasta water to the sauce followed by 3-4 Tbsp. Bleu Cheese Dressing. Heat through, add 6 Strips of Bacon, crumbled and the pasta. Finally add, 3 Roma Tomatoes, diced and heat through. Season with black pepper, serve with shredded Parmesan or Mozzarella.

Wednesday, December 26, 2012

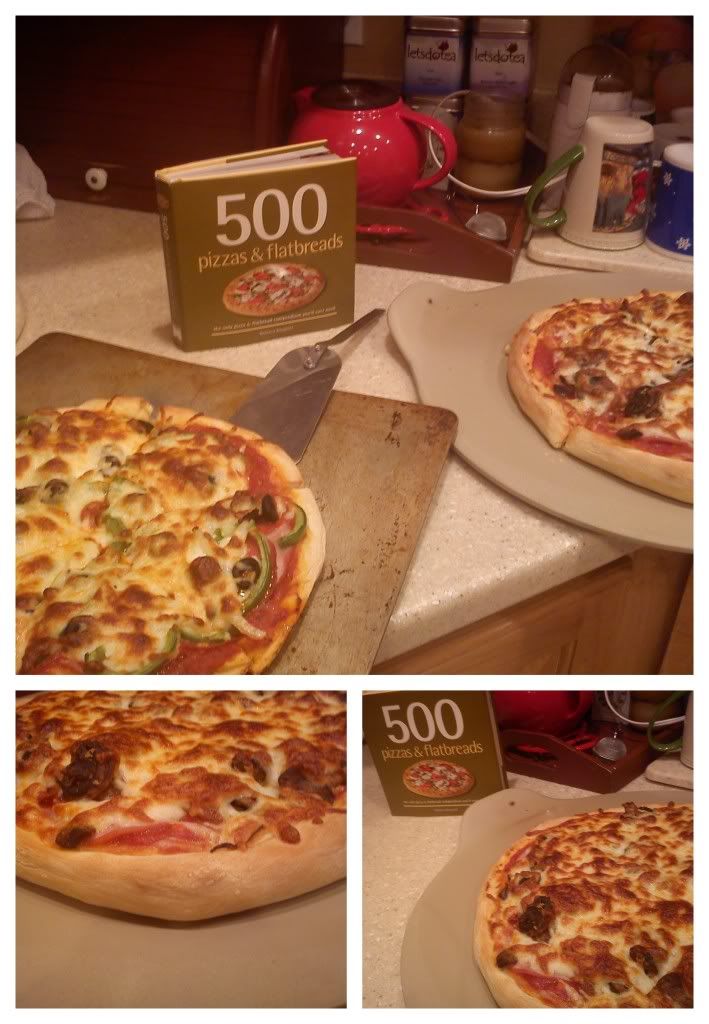
Pizza Experiment #2: Super Meat and Supreme

Not so much a recipe for extending any shelf life, this is a part of my master-mind plan to develop and master some pizza goodness....because, who doesn't love a good homemade pizza...and because, I just might need to know a solid thing or two about pizzas in the upcoming months ;)

So, after Christmas with family and gifts which would encourage this endeavor, such as a pizza stone and a new cookbook, I was ready to hit the ground running and kick pizza experimentation into full gear. With all the time and inspiration in the world, I prepared a couple of pizzas post-Christmas while the family played games and read new books, there couldn't have been a more peaceful home while dinner preparations were in the works and it's unlikely there could have been a more delighted group of folks once the pizza was prepared.

Photobucket

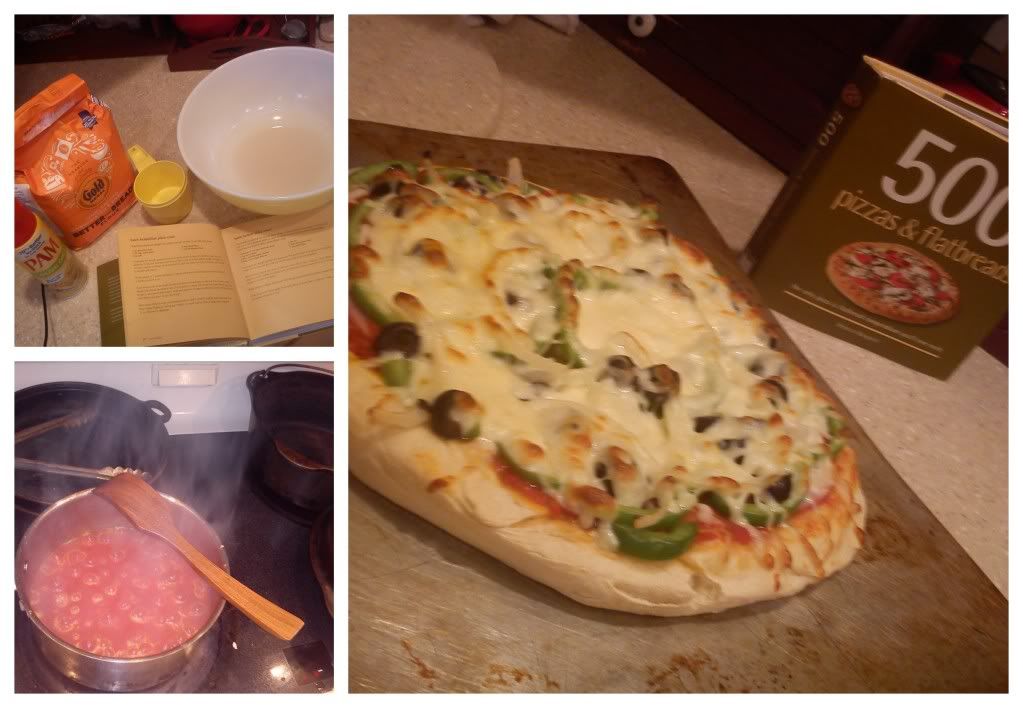
Pizza Crust
Ingredients/Directions:
From the Cookbook: 500 Pizzas & Flatbreads

Classified as 'basic neapolitan pizza crust', this recipe will give you enough for two 12-inch pizzas.

Begin by sprinkling 1 tsp. Active Yeast over 1 1/4 cup Warm Water. If you have a standing mixer, use the bowl for that otherwise you'll be doing it by hand in a large mixing bowl. Let water and yeast set for 5 minutes.

Add 1 tsp. Salt, then mix in a total of 3 cups of Flour, one cup at a time (it's recommended to use 2 cups bread flour and 1 cup all-purpose flour, I however, only used the latter). Kneed or mix with a dough hook once it begins to form, for about 5 minutes until the dough is smooth and elastic.

Divide dough in half and place in separate, lighly oiled bowls. Roll dough around so as to transfer a bit of oil onto the dough ball itself.

Cover bowls with flour cloth or paper towels and allow to rise for 2-3 hours until dough has doubled in size. 

When the rest of your pizza is ready to assemble, simply roll out dough, using additional flour as needed and prepare for your pizza-eating pleasure!
Photobucket

Pizza Sauce
Ingredients/Directions:
From the Cookbook: 500 Pizzas and Flatbreads

So simple, so delicious.

Heat 3 Tbsp. Olive Oil in a large, heavy frying pan, add 1 minced Garlic clove and cook 1-2 minutes. Add one 28-oz. can of Whole Tomatoes, breaking them down with a wooden spoon. Simmer for 15-20 minutes until sauce has thickened and liquid has evaporated. Season with salt, oregano, red pepper flakes and other seasonings of choice.
Photobucket

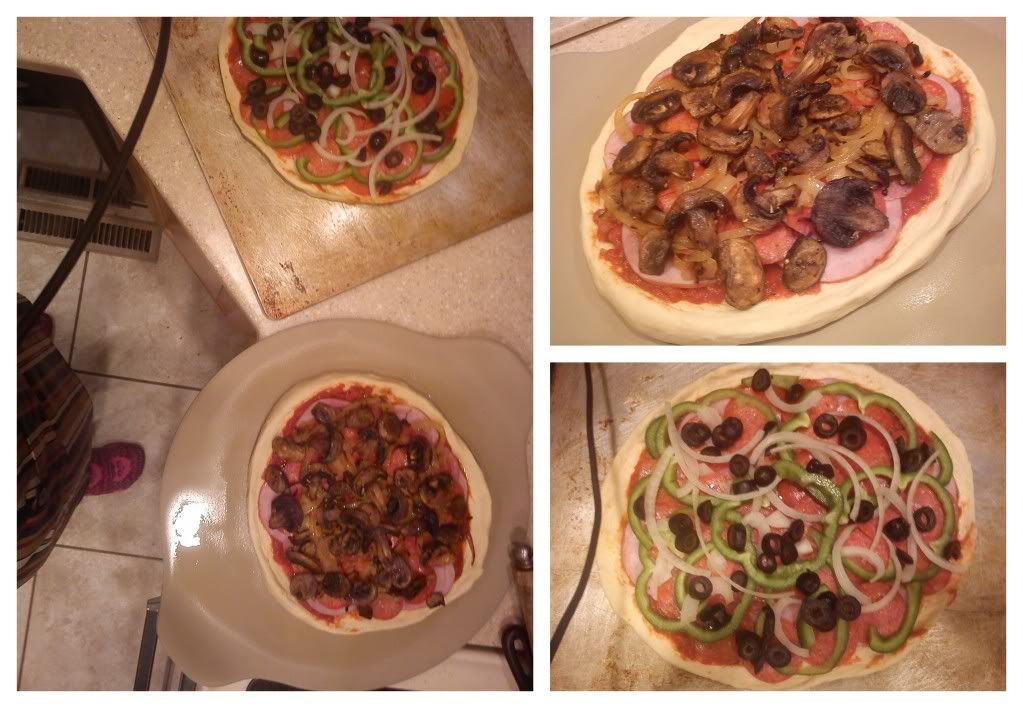
Pizza Toppings
Not rocket science...

For these experiments I prepared one pizza using the following ingredients after spooning on some sauce:

Pepperoni, Sliced Summer Sausage, Canadian Bacon, Sauteed Mushrooms and Caramelized Onions

The other pizza was similar yet different and was topped, after spooning on sauce, with:

Pepperoni, Canadian Bacon, Fresh Onions, Olives

Both were delicious and well received...what more could you ask for?

Sunday, December 16, 2012

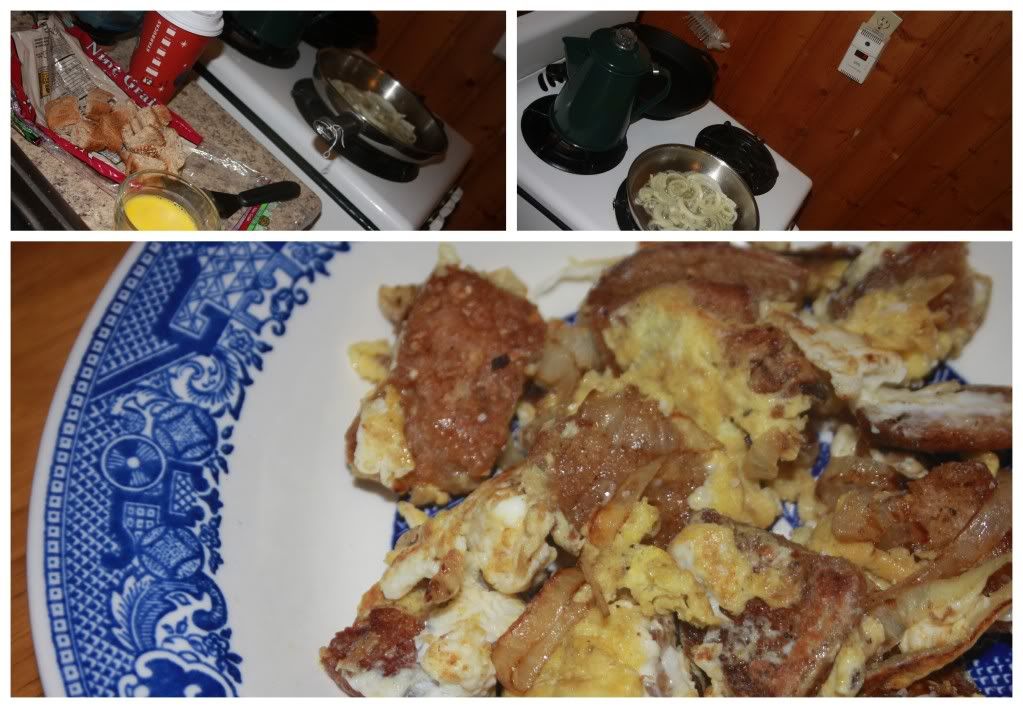
German Mish-mash Breakfast

Extended Shelf Life for: Bread Heels, Onions
Photobucket
I think bread heels are slightly obnoxious...until you learn to use them in delicious ways that is.

Since I purchased the Juicer that Can do Everything, I have made my own bread crumbs simply by saving the heels in the freezer until I have enough to fill up a cookie sheet to dry out, on low heat in the oven before running them through the juicer (mincing nozzle of course, not the juicing nozzle).

However, the other day, I had a few bread heels leftover and happened to read this page on Squidoo, which has a handful of great, frugal, use-up-things-in-the-kitchen-recipes, the first of which was this German Mish-mash which was incredibly easy and so, stinkin' delicious!

Ingredients/Directions:

In a heavy skillet, melt 3 Tbsp. Butter, when it's melted, add half of a sliced onion and stir for a couple of minutes until onions are tender and little brown. Add two slices of bread that have been cubed and stir until they absorb all the butter and become little bite sized toasts. Pour in two beaten eggs, coat bread and onions, cook until eggs are no longer runny. Season with salt and pepper, enjoy!

Friday, December 14, 2012

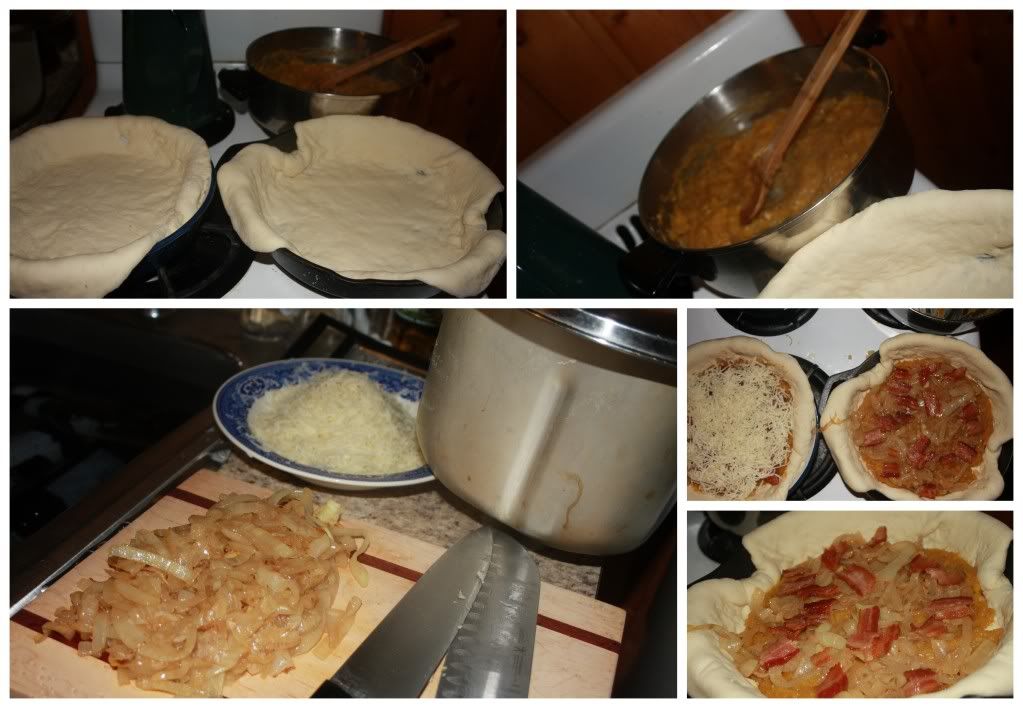
Pizza Experiment #1: Roasted Squash and Carmelized Onion Pizza

Extended Shelf Life for: Onions and Squash
Photobucket
In May of 2012, I decided to become a master of pie. I can do most anything in the kitchen, but I do have random fears of certain aspects, such as pastry. However, I conquered that fear and can turn out a pretty phenomenal pie (if I do say so myself).

Now, late in the year of 2012, I decided to become a master of pizza pie, but not for the purpose of fear, I don't fear pizza, nor pizza crust (although, I have had to re-learn the joys of baking and cooking at high altitude). No, the art of mastering pizza is more an exercise of discovering and developing some top notch pizza topping ideas and concepts for a very specific purpose, which, I currently do not have the privilege of sharing. Suffice it to say, someday, you might get to eat one of my delicious creations...

As for this pizza, I still love the concept, but I need to work on the roasted squash 'sauce' part of the recipe, because it wasn't tops.

Ingredients/Directions:

Prepare a pizza crust. We do ours in the bread machine. I'll post various recipes later, however, for now, this is just a break down of the topping.

Slice 1 onion and caramelize in a large skillet with 2 Tbsp. butter on medium high heat. Caramelizing takes about 15-20 minutes but is worth every second.

Roast a Squash of your choosing or take out a pack of pre-roasted, pureed squash from the freezer if you so happen to have one.

Prepare 6 strips of Bacon however you choose, I prefer the oven method.

In a sauce pan or deep skillet, heat a touch of butter, throw in some garlic and rosemary for about a minute (until fragrant) and then add squash, heat through.

When your pizza crust is ready to go as well as all the other ingredients, simply top the crust with squash sauce, followed by caramelized onions and bacon bites, top with mozzarella and bake at 450 for about 10-12 minutes until crust is golden brown and cheese is melted.

I would love to prepare this in a wood-fried oven, but am discovering that a pizza stone is just as good...for now ;)
Monday, December 3, 2012

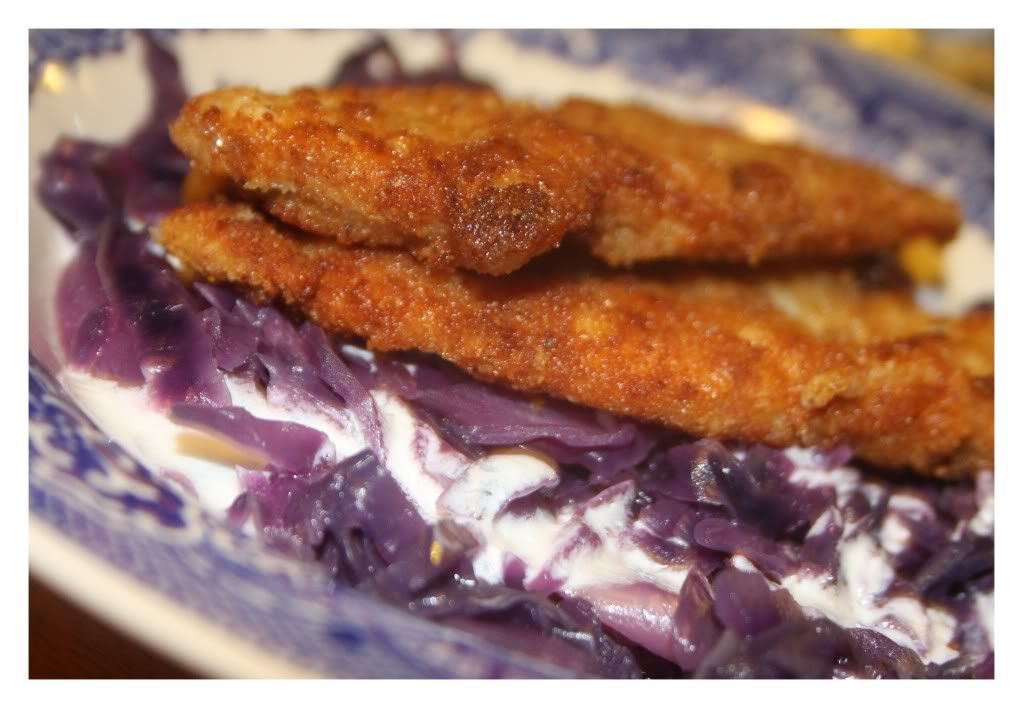
Pork Cutlets and Braised Purple Cabbage

Extended Shelf Life for: Red Cabbage, Onion, Bread

If you know the man at all, you are well aware that he is a good eater, bless his soul, because if he wasn't, I don't know what I would do. He eats a wide variety of vegetables and although he claims that the "Only thing better than meat and potatoes is meat and meat," the truth is, we eat a lot of veggie-heavy meals and even a lot of vegetarian meals, so really, his life doesn't center around meat.

This meal is not vegetarian, and it's actually kind of close to a meat and potatoes meal, but my man was so extremely satisfied by this meal that I am extremely confident that it would go over well in many homes...I think...it is still cabbage...which can be unappetizing to some.
Photobucket
Photobucket
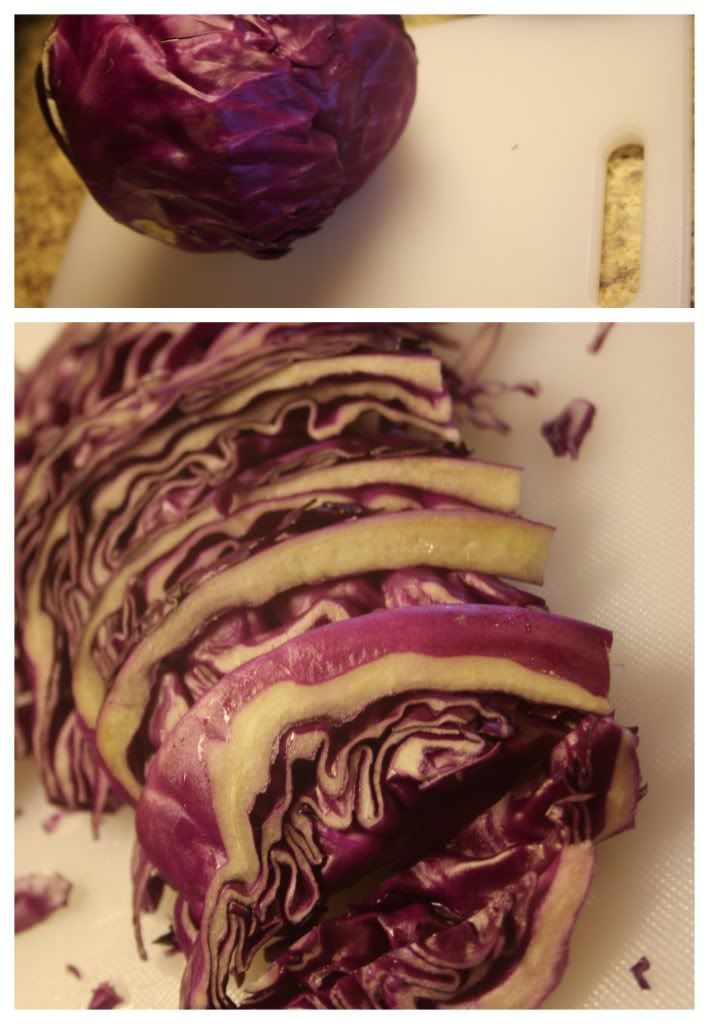
Braised Purple Cabbage ~ Ingredients/Directions:

Quarter, core and thinly shred 1 head of Purple Cabbage. Soak in a large bowl of water.

Meanwhile, heat 2 Tbsp. Butter in a heavy skillet or cast iron kettle (my personal choice). Once melted and fragrant, add and saute until golden 1/4 cup finely chopped Onion.

Remove cabbage from water and add to pan along with 1 thinly sliced Apple, 1/4 cup Apple Cider Vinegar, 2 Tbsp. Honey or Sugar, and a shake of Salt.

Cover and cook over low heat, stirring occasionally for 1 - 1 1/2 hours adding hot water as needed - at the end you want moist, but not soaked cabbage. It will be sweet and tangy and perfectly accompanied by a drizzle of yogurt and topped with pork cutlets as described below!

Photobucket
Pork Cutlets ~ Ingredients/Directions:

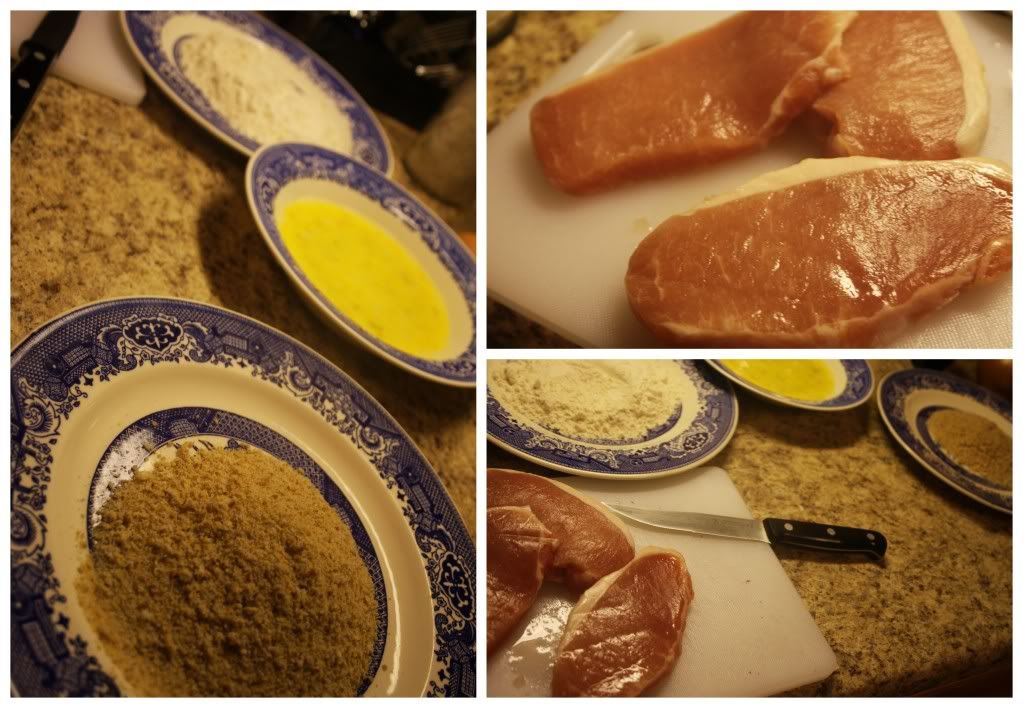
Thinly slice as many pork chops as you need to satisfy whoever will be at your table.

Heat 2-3 Tbsp. of Vegetable oil in a heavy skillet or cast iron skillet (again, my choice).

Dip each pork cutlet into a shallow bowl of flour, followed by a bowl of 2 beaten eggs and finally a bowl of bread crumbs (I made my own by saving the heels of bread, drying them in the oven and running them through our juicer on the mincing nozzle, a food processor would work as well).

Fry in the skillet for 2-3 minutes on each side, drain on a layer or two of paper towels, enjoy on a bed of braised cabbage!

Monday, November 26, 2012

Turkey Kimchi Chigae

Extended Shelf Life for: Mushrooms, Onions and a Turkey Carcass
Photobucket
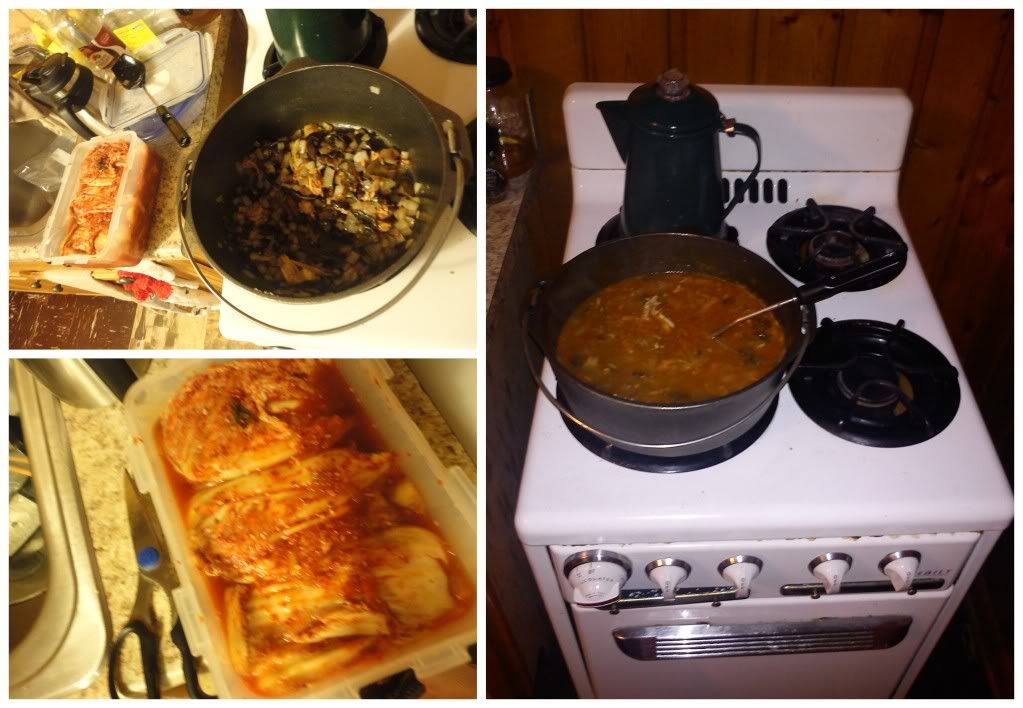
With my recently fermented kimchi and the end of the first round of Turkey eating for the Thanksgiving holiday and the winter chill setting in, I was craving some Kimchi Chigae.

However, unlike my go-to Kimchi Chigae recipe, I used my turkey carcass to make a large batch of turkey broth, much in the same way that I make chicken broth and therefore was able to use Turkey Broth and the turkey pieces to add some meat and flavor to this pot of stew.

But that's just the great thing about stews and soups in general, they're easy to substitute and recreate...

Wednesday, November 21, 2012

Cranberry Salsa

Extended Shelf Life for: Red Onion, Lime Juice, Jalapeno
Photobucket
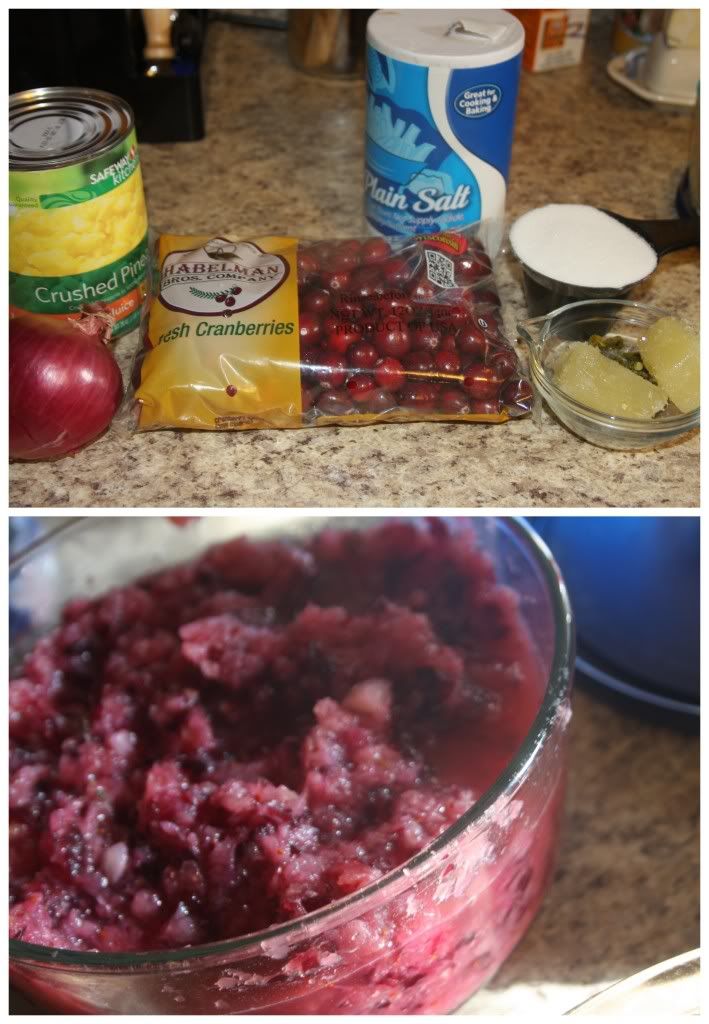
A teacher at the school I work at prepared this unique salsa just before the holiday's and I knew immediate that I needed to prepare a batch and take it to our family Thanksgiving celebration. It's sweet, it's spicy and it features cranberries, can a holiday dish get any better? Yes! Because you also get to have tortilla chips at your holiday table, and who doesn't love some tortilla chips and salsa?

Ingredients/Directions:

Run one package of fresh cranberries through a food processor or the mincing component of a high-quality juicer. In a medium bowl mix minced cranberries and 1/2 cup sugar. Mix in 1 drained can of Crushed Pineapple, 1 diced Jalapeno (or 1 thawed jalapeno cube if your a preserver/freezer), 2 Tbsp. Lime Juice (again, if you have frozen cubes, this is a great time to use them!), 1/2 cup chopped Red Onion and 1/2 tsp. Salt. Let set for two hours or overnight and enjoy with your favorite tortilla chips!

Tip: If you have leftovers (since it's a pretty big batch), AND you're in need of a quick lunch, make up a quick batch of brown rice (or quinoa, pasta, etc.) mix in a few large spoonfuls and you'll have a delicious and relatively nutritious lunch!

Monday, November 12, 2012

Hummus Pizza Torte

Extended Shelf Life for: Hummus, Tomato, Jalapeno, Onion

If you continue reading, you're going to discover, that this is one of my infamous posts where I give you nothing exact - just ideas and general guesstimates on how this can be created in your home. And, I'm okay with that. Because what I really want you to know is that Pizza Torte's are amazing! And you should, without a doubt, get a spring-form pan so you can make a pizza torte, because, like I said, they are amazing!

Photobucket
Ingredients/Directions (more of less):

Buy or prepare a batch of pizza dough. Personally, I love using my bread maker for this task because I know that it will have risen within a certain time, no matter what, since the bread machine can control temperature and humidity whereas my Laramie kitchen isn't always so predictable.

Split the dough ball into three equal parts.

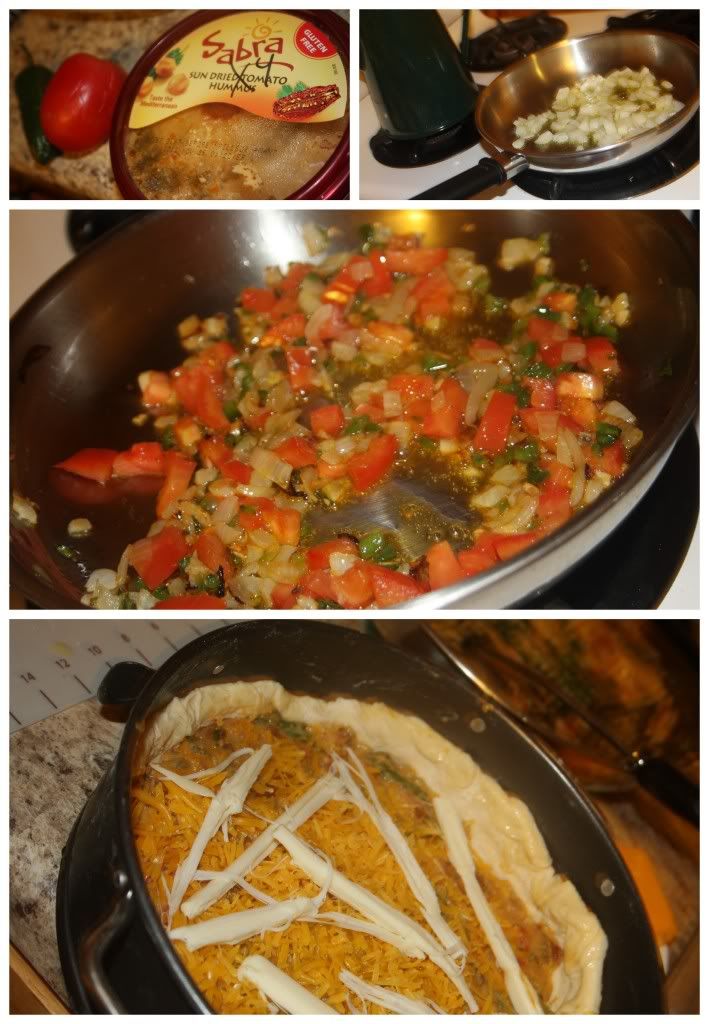
Prepare your filling, you can do something traditional, or if you have some random bits and pieces of things to use up, like a tub of hummus, try out something like this:
  •  Saute 1 diced Onion, 2 minced Garlic Cloves and 1 diced Jalapeno in a bit of Olive Oil. When they are tender, throw in one diced Tomato for an additional one or two minutes. 
  • Add 1 tub of Hummus (that's about to expire or otherwise ~ we used a sun-dried tomato hummus, that honestly wasn't that delicious to my taste-buds, too strong, but still a good concept, trust me!)
  • Thin out with additional olive oil or water, use as your filling/sauce.
Place the first round  of pizza dough into your spring form pan, spread in half of the filling, top with cheese, repeat, finish the torte off with the final pizza dough round on top, seal up the edges, bake at 350 (probably- I'm currently in Sturgis, not with the cookbook where I got the recipe for this torte) and bake 15-20 minutes (or more) until crust is golden. Let torte sit for about 5 minutes before removing from the pan and cutting into appropriately sized serving pieces. Enjoy!
Photobucket

Sunday, November 11, 2012

Kimchi!

If you need to extend the life of cabbage, this is a great option. However, we simply needed to have some kimchi re-enter our life and this includes nothing salvaged, except perhaps an onion.

For me, it was relatively important to prepare some kimchi in November, as November/the fall is generally the time when all the old women come out from the woodwork gathered around piles and piles of cabbage and working together to make sure the Korean staple is ready for the long winter ahead.

A few other notable mentions about my kimchi making day: It was the Korean "holiday" of Peppero Day (11-11) AND I had the great joy of being assisted by a sweet Korean family that is here on behalf of the man of the household serving an exchange as a visiting professor, making my first kimchi experience feel that much more authentic and valuable.

Now, on to Kimchi making...

There are essentially three parts to preparing Kimchi: Soaking, Making the Red Pepper Paste and Assembly. I will give you a rough sketch of each one of these parts followed by a link to a very detailed explanation of each step just in case you are in need of more photos and great explanation. 

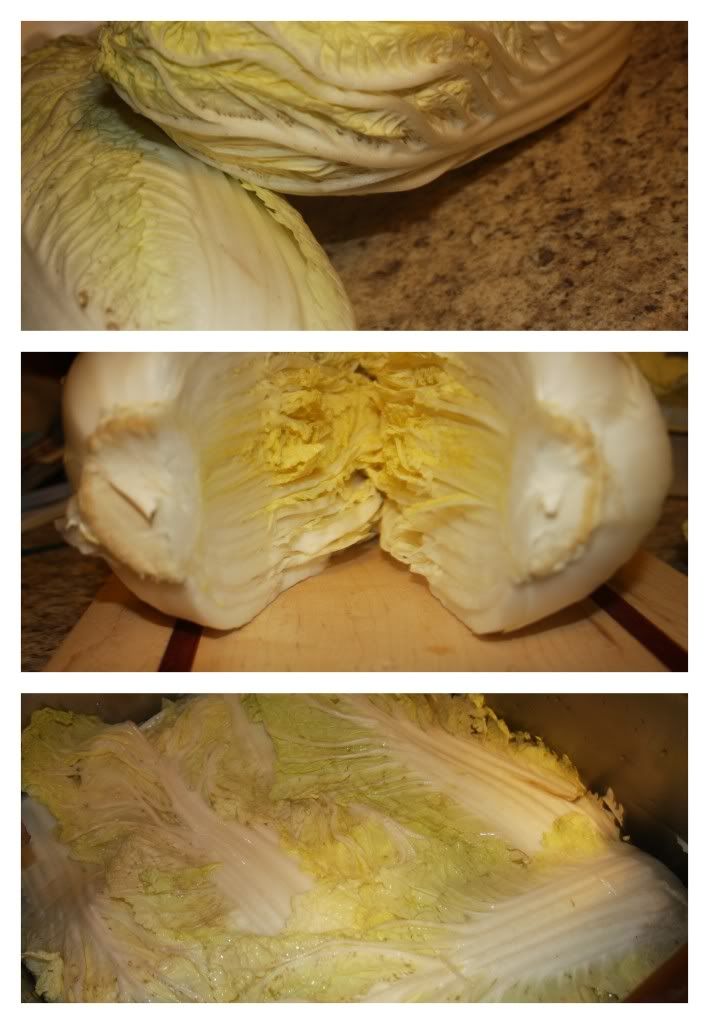
Part 1~SOAKING:

Photobucket
Kimchi making will undoubtedly be a two day process, starting with this first step which is, in essence, preparing the cabbage by soaking it in salt water.

You will need:
  • Two Heads of Napa/Chinese Cabbage
  • 3 cups Coarse Sea Salt, preferably from Korea -- no joke
  • 30 cups of Water
What you will do:
  • Remove the outer 2-3 leaves from each cabbage, but don't discard!
  • Cut a 2" slit in the stem of each cabbage, carefully split heads of cabbage in half (easier than it sounds, I promise)
  • Salt each leaf of the cabbage, making sure to get plenty of salt on the thick, white parts and extra careful not to tear the leaves or disassemble the cabbage half.
  • In a deep, large container (such as the kitchen sink), dissolve 3 cups of Salt in 30 cups of Water.
  • Place each cabbage half, face-up into the water and cover with the reserved cabbage leaves.
  • Cover with plastic and use rocks, tin cans or a heavy lid to press the cabbage halves down into the water.
  • Soak for 8 hours. Flip and soak another 4 hours.
  • Check for bend-ability in the cabbage stems, when they are supple it's time to rinse (3 times), halve again (so you end up with 8 quarters of a whole cabbage) and drain (at least two hours, during which you should prepare the next step).
For greater details on soaking, check out this thorough post at Beyond Kimchee (my favorite Korean food blog!)

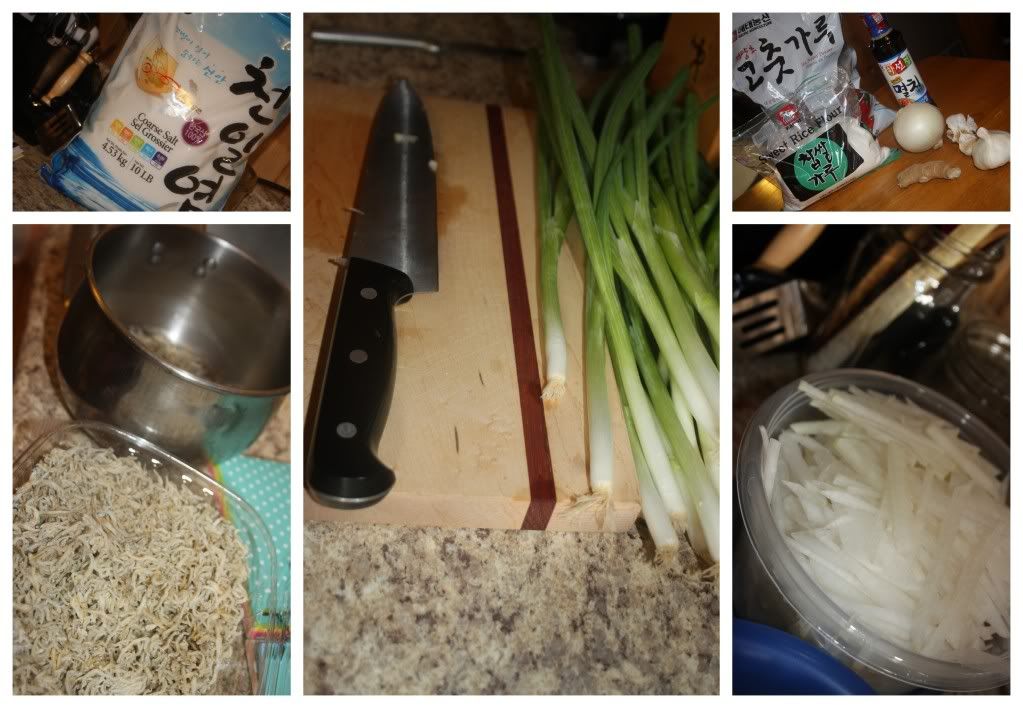
Part 2~MAKING THE RED PEPPER PASTE:
Photobucket
You will need:
  • A few handfuls of dried sea creatures (or one handful if you can't find multiple sea creatures or don't like sea creature flavored items - but one handful is a good idea)
  • 3 cups of Water
  • 2 Tbsp. Sweet, Glutenous Rice Flour
  • 1 Lg. Korean Radish, julienne into 1/8" matchsticks
  • 2 bunches of Green Onion
  • 4 cups of Korean Red Chili Flakes
  • 1/2 large Onion, roughly diced
  • 10 cloves Garlic
  • 2" piece of Ginger, roughly diced
  • 4 (or 2) Tbsp. Anchovy Sauce
  • 4 (or 2) Tbsp. Shrimp Sauce/Salted Shrimp
  • 1 1/2 Tbsp. Sugar
  • 2 Tbsp. toasted Sesame Seeds
What you will do:
  • Make a rice glue by boiling your handful of dried sea creatures in 3 cups of water, simmer for 10 minutes, remove from heat and let set, as is for 20 minutes. Strain off sea creatures and discard sea creatures, reserving 2 cups. Bring 1 1/2 cups of stock to boil while continuously whisking in the 2 Tbsp. of Glutenous Rice Flour until the mixture is bubbly and has thickened. Save the plain 1/2 cup stock for later.
  • In a blender or food processor, puree 1/2 large Onion, 10 cloves of Garlic, 2" piece of Ginger and reserved 1/2 cup Stock until smooth.
  • Pour 4 cups of Korean Red Chili Flakes into a large mixing bowl, add the onion mixture and cooled rice glue, anchovy sauce, salted shrimps, sugar and sesame seeds, mix.
  • Add the sliced Radish and diced Green Onions and let set for 30 minutes so the radish can extract some moisture and the mixture will be come more smooth and spreadable.
  • Taste test the sauce with a piece of cabbage to evaluate saltiness and flavor, adjust with additional fish sauce or stock for spread-ability as deemed necessary, then move on to assembly.
For greater details and more pictorial assistance, check out Cabbage Kimchee: Part Two from, yet again, Beyond Kimchee. 

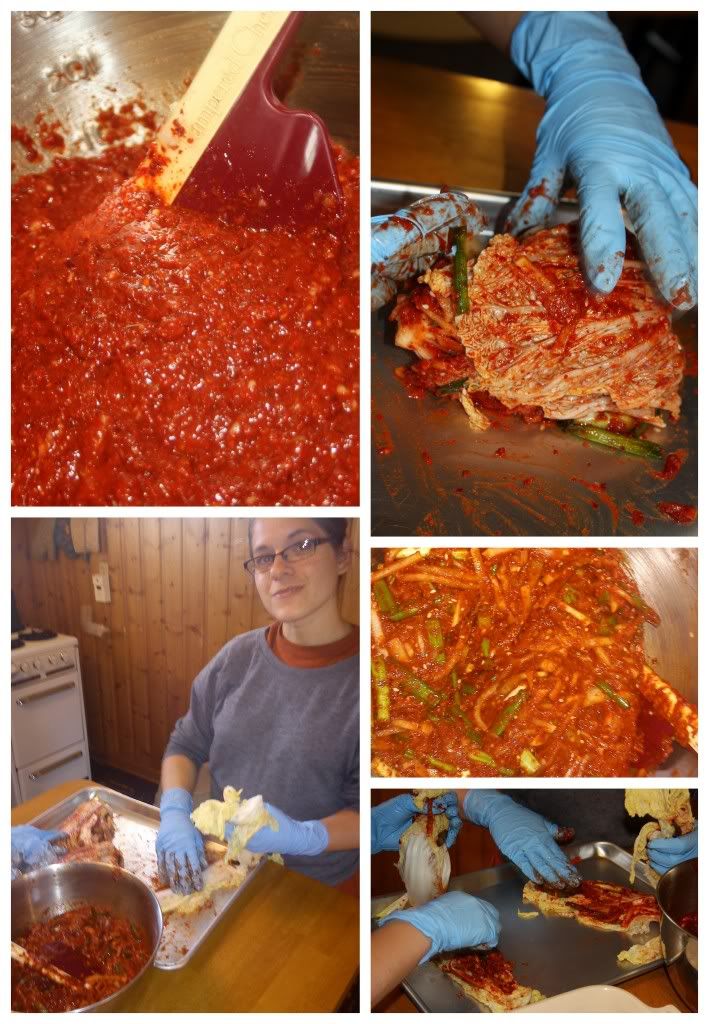
Part 3~ASSEMBLY:
Photobucket
You will need:
  • Rubber Gloves
  • A Cookie Tray or Large, shallow dish
  • Airtight containers for storage
 What you will do:
  • Gently handle each cabbage quarter and use your gloved hands to spread red chili paste between each and every leaf. Roll up the quarter, place in an airtight container. Let the kimchi sit out on the counter 2-3 days for fermentation and moisture extraction before relocating it to the refridgerator.
  • Our Korean assistants explained that the outer leaves can be used to cover a bit of the kimchi, but that it is also generally spread with red pepper paste and then cut up and eaten that day as fresh kimchi with rice, which, by the way, is delicious!
For more details on this final part of preparing your kimchi, head over to Beyond Kimchee one more time!

In our house, we really love this fermented vegetable and have been beyond satisfied with the results of this recipe and process, slightly time consuming, but if you love fermentation, spicy foods, or kimchi itself, it's well worth it!

Wednesday, November 7, 2012

Kohlrabi Pasta

Extended Shelf Life for: Kohlrabi, onion, limes and cilantro
Photobucket
Sometimes you just need to make a bulk amount of something so you can eat the rest of the week. Ultimately, the week of this dish I was craving a deliciously warm and thick soup, but that was not an option with the ingredients on hand. So, we ended up with this pasta dish which was delicious but made me wish warm weather were around the corner.

Ingredients/Directions:

Prepare one package of Noodles such as macaroni. Shred one large Kohlrabi, season with Salt and the juice of 1 Lime. Toss in one chopped red Onion and 1 Tbsp. of packed chopped Cilantro. Mix in cooked Pasta, add salt, lime juice and black pepper to taste. Enjoy at room temperature or chilled.

Thursday, October 4, 2012

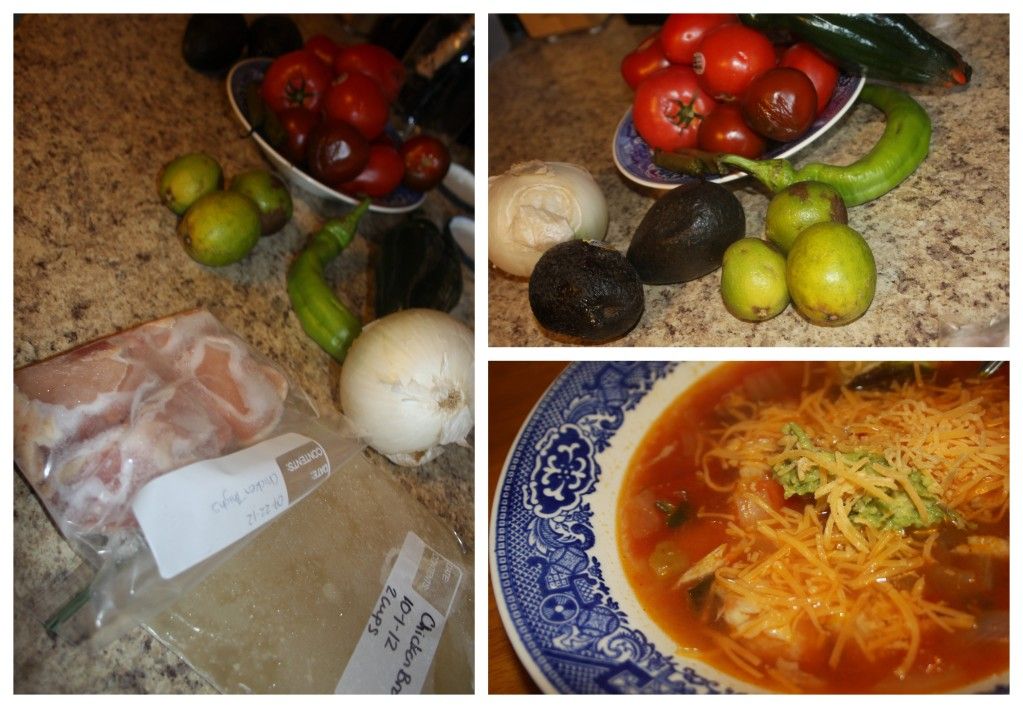
Chicken Taco Soup

Extended Shelf Life for: Tomatoes, Peppers, Onions, Avocados, Limes
Photobucket
If I am truthful, I will let you know that I remember very little about the true way in which this soup came together and as is incredibly common in this kitchen, I have no idea what amount of what went in or stayed out, etc. And I realize that makes me a poor food blogger. But here's the thing, I believe, that sometimes in the kitchen, the most important thing is knowing what goes together, to know your personal preference for how much broth to have compared to the density of other ingredients and above all else, I think what is important is to use what you have, to use it well and enjoy the results as they are...this was a delicious soup and I'm going to tell you what goes into, but as for how much and exact measurements, let go of that and just let it come together, it's a soup for goodness sake!

Ingredients/Directions:
Inspired by Rachel Ray's recipe Mexican Chicken Lime Soup

 In a stock pot or dutch oven saute 1 chopped onion in a drizzle of olive oil until tender and translucent. Add 2-3 (or more) minced Garlic Cloves and 1 minced pepper of choice (or a couple and a variety if you like spice - we have handy-dandy roasted jalapeno ice cubes which I added at the end), saute for a couple of minutes, then push to the side. Add additional olive oil if needed and begin cooking 4-6 Chicken Breasts until juices run clear. At this point, I like to take a pair of kitchen sheers and a fork and cut the breasts into bite size pieces. Add 2-cups Home Made (or store bought) Chicken Broth to the pot and bring to a boil. Run about 10 tomatoes through a juicer (but not on the juicer mode...more like mincing/blending mode) or blender and add to boiling broth. Adjust liquid according to personal preference by adding water or broth. Season with, lime juice, salt, pepper, cayenne, chili powder and cumin. Scoop into bowls top with Shredded Cheddar Cheese and slices of Avocado (or mashed avocado if they're a little ripe ;)).

Tuesday, October 2, 2012

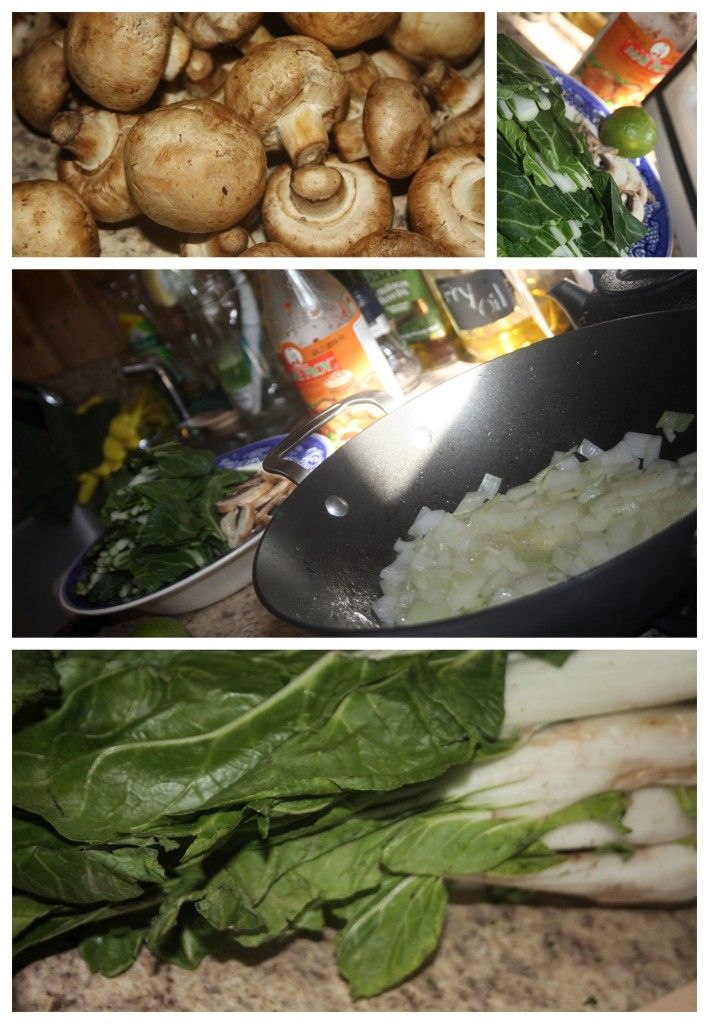
Stir-Fry for the Man

Extended Shelf Life for: Mushrooms, Lime, Onion, Bok Choy

Photobucket
Sometimes, I go out to dinner with friends but still manage to throw something together for my man.

Unfortunately, I don't know how delicious this dish was or wasn't, but I can give you a quick run down in case you're in need of some stir-fry action.

This particular stir-fry began with sauteed onions, followed by mushrooms (add a touch of butter at this point because mushrooms are always better with butter), garlic and finally bok choy. We had some sweet and spicy Thai sauce leftover in the refrigerator which I used to add some kick and flavor, serve over rice and cross-your-fingers that it will be enjoyed while you head out to enjoy dinner with friends!

Wednesday, September 26, 2012

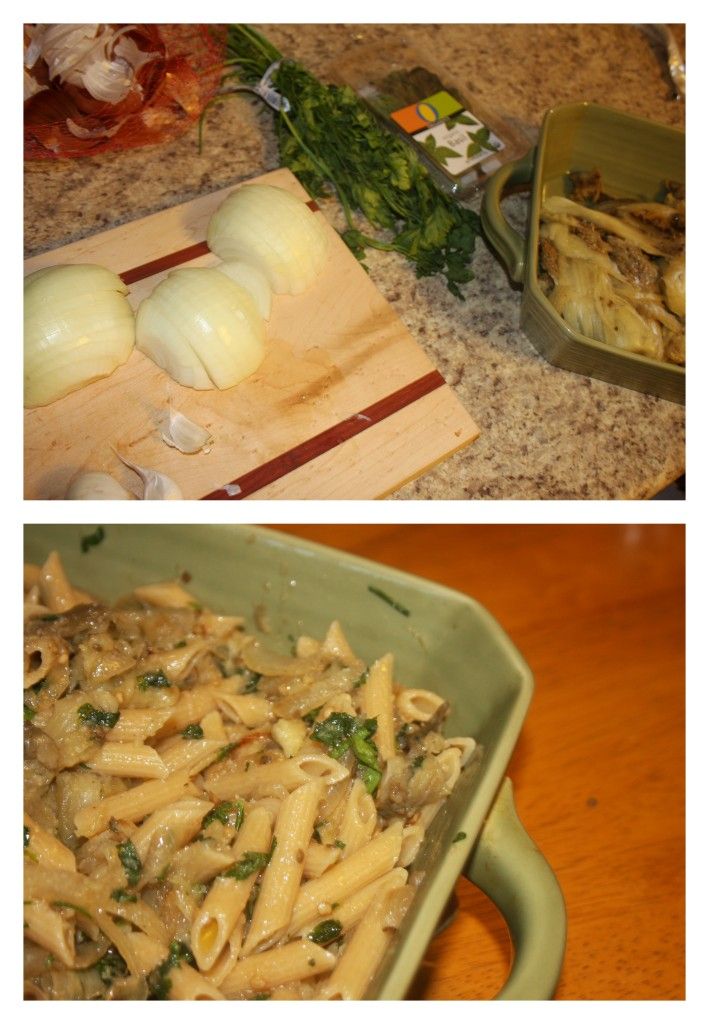
Roasted Eggplant and Carmelized Onion Pasta

Extended Shelf Life for: Eggplant, Onions, Parsley and Basil
Photobucket
Living this semi-freegan/living-in-a-foreign-land-with-random-ingredient has taught me a few tricks, such as nearly anything can be made into a pasta dish ^^

When we ended up with a large supply of eggplants I worked some magic and made a variety of Eggplant dishes such as Eggplant M'saa'a, Chinese Style Eggplant and Potatoes, and a simple Eggplant Tomato Pasta dish. Being completely honest, out of the two pasta dishes (the one I'm about to share and that Eggplant Tomato dish you have a link to), the latter was my preference. Regardless, knowing how to make any random set of ingredients into dinner is a skill that cannot be replaced, so if you happen to have surplus onions and an eggplant lying around, this just might work for you!

Ingredients/Directions:

Preheat the oven to 450 degrees F. Prick your eggplant with a fork (to prevent explosions) and place on the oven rack for about 30 minutes until it's tender. Scoop out eggplant pulp and mash with a work, season with olive oil, salt and pepper. While eggplant is roasting, slice one large onion and saute in 2-3 Tbsp. of melted butter. Stir frequently for 15-20 minutes until onions are golden and delicious. Meanwhile, bring water to boil for choice of pasta, I used penne pasta for my dish. Mix onions and eggplant together season with fresh parsley and basil, mix in pasta, serve as is or top with shredded Italian cheeses and bake for 15-20 minutes at 350 until cheese is melty and browned.

Sunday, September 23, 2012

Potato Chicken and Chard Soup

Extended Shelf Life for: Swiss Chard, Potatoes
Photobucket
When winter rolls around my heart skips a beat and my taste buds beg for soups, stews and chili. I realize not everyone enjoys the biting cold of winter, especially a Laramie/Wyoming winter, but I absolutely love it! I love being in flannel pjs and slippers with a large mug of hot tea, a book and a blanket curled up on the sofa - of course that moment follows making a hearty, delicious soup.

 I love soup.

Can't get enough! And in my adult years/dumpster diving years, I've discovered that hearty greens in a soup are an absolute win! Sasuage, Kale and Potato soup is one of my favorites and a frequent 'go-to' recipe during the late fall and long winter months.

This is essentially a variation of Sausage, Kale and Potato Soup and equally delicious and hearty and for those who might care: a bit more healthy.

Ingredients/Directions:

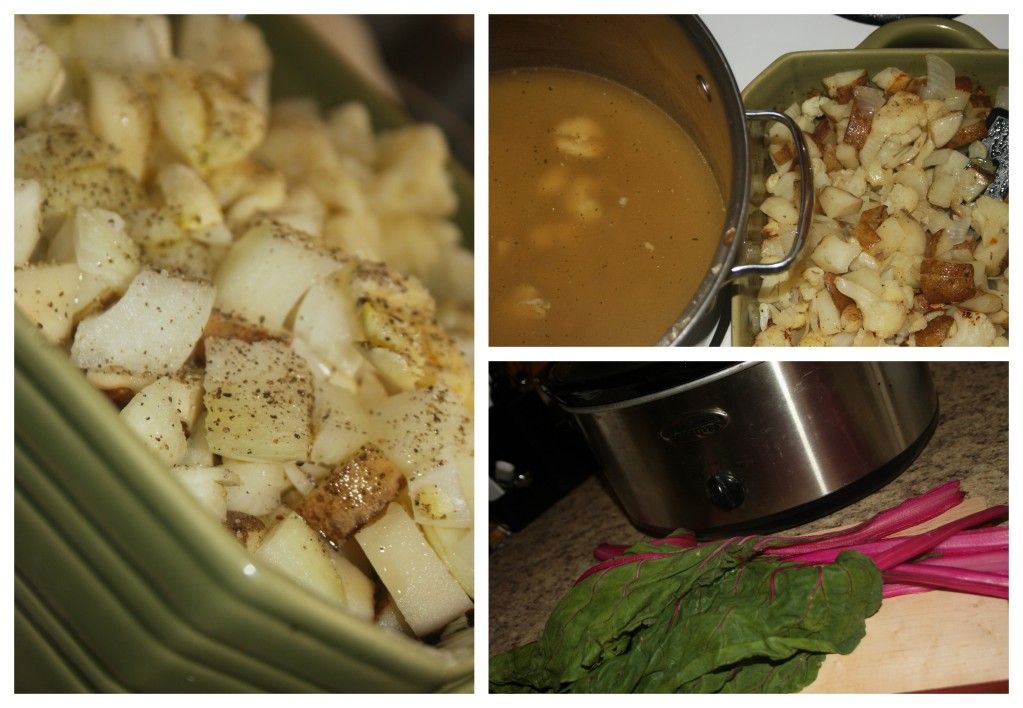
Toss 2-3 diced Medium Potatoes and 1 diced Onion in a touch of Olive Oil. Season as desired (salt, pepper, rosemary, etc.) Roast at 375 for 45 minutes. In a large stock pot heat a touch of Olive Oil and fry up 2-3 Chicken Breasts or Chicken Thighs (thighs are dark meat, so not as lean, but possibly cheaper and still delicious, so go for it!). Remove and cut or dice cooked chicken into bite size pieces. Pour in 4-6 cups Chicken Broth/Water into stock pot and incorporate chicken bits into the broth for added flavor. When potatoes are nearly done or completely finished, throw into the broth and bring to a boil. Using an immersion blender, blend a bit of the soup to create a semi-creamy texture. Add chicken pieces. Wash and tear into bite size pieces 1 bunch of Swiss Chard, throw into soup, let wilt. Season with sour cream, milk, half-and-half or plain yogurt. Serve with crusty bread and a nice brew, enjoy!

Things you DON'T have to do:
  • Roast the Potatoes: I simply did this for added flavor, but it's definitely not necessary.
  • Blend the Soup: This was more a texture and appearance adjustment, but isn't necessary by any means.
  • Use Chicken: Sausage or Bacon would be nice as well.
  • Use Swiss Chard: Kale or another hearty green, perhaps even spinach at the very last minute, would work out just as well.

Saturday, September 22, 2012

Chinese Style Eggplant and Potatoes

Extended Shelf Life: Eggplant, Potato, Bell Pepper, Onion, Jalapeno
Photobucket
While living in South Korea we discovered two things: a) Every nation has a different take on Chinese food and b) Authentic Chinese food, when discovered, is absolutely, friggin' fantastic! While living in Daejeon, we discovered a fantastic little Chinese restaurant which our British friend described as being 'Proper". Within minutes of having our plates set before us we realized that 'Proper Chinese' was the best Chinese. 

So, when a wealth of eggplants landed in my sink, I was quick to remember a tasty eggplant and potato dish and went to searching for a recipe which would bless our taste buds and remind us of a meal, and people, we dearly loved.

Ingredients/Directions:
Original Recipe and inspiration from MiJoRecipes

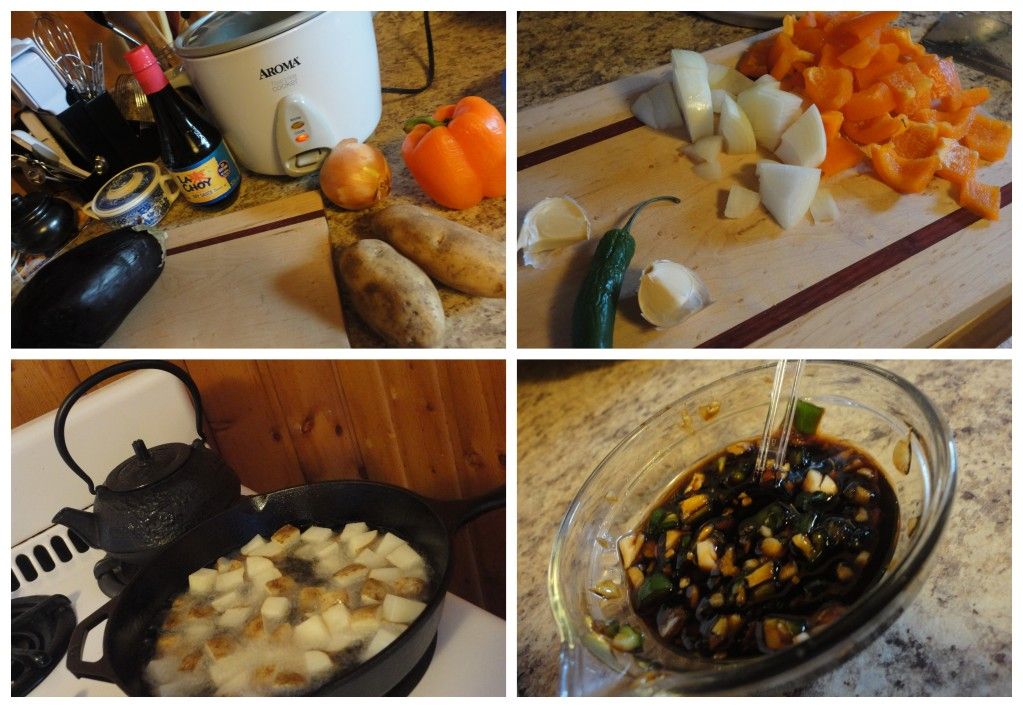
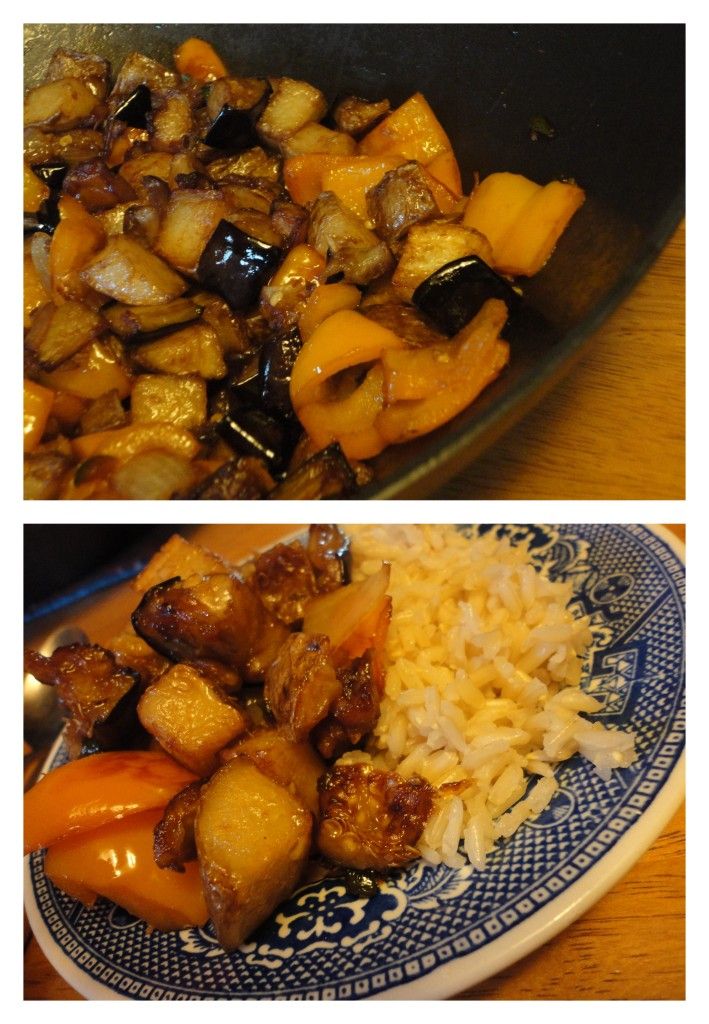
Heat oil (enough to nearly cover potatoes and eggplants when being fried, you'll definitely need to be adding more throughout the process) over medium heat. When oil is ready (sizzles when sprinkled with water) deep fry the potato until golden and crispy. Next, fry the eggplant until beautifully browned. In a wok, heat 1 Tbsp. Oil, saute the bell pepper and 1 diced Jalapeno until tender. Add the previously fried potatoes and eggplant. In a small dish, mix together 1 1/2 Tbsp. Soy Sauce, 1/2 Tbsp. Sugar, and 2 cloves minced Garlic. Pour over vegetables and heat through until aromatic. Serve over rice and bust out the chopsticks!
Photobucket
For more on Eggplants and other recipe inspiration check out my more detailed and interactive Squidoo Lens: The Art of Salvaging {Eggplant}
Related Posts Plugin for WordPress, Blogger...