Showing posts with label fermentation. Show all posts

Thursday, January 10, 2013

Blueberry Vinegar

Extended Shelf Life for: Blueberries
Photobucket
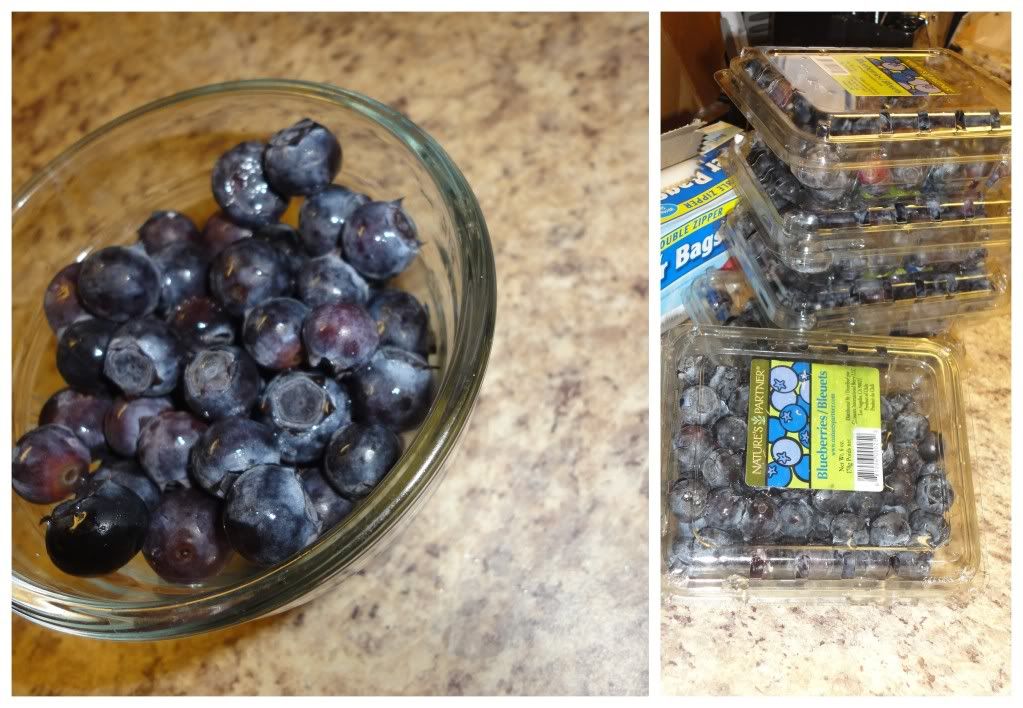
I did this the same as all the other vinegars. Although I used the whole berry rather than just the skins. Some were also moldy, so I'm not sure how it'll turn out, but if it's good - it's going to be a friggin-fantastic dressing addition, right?

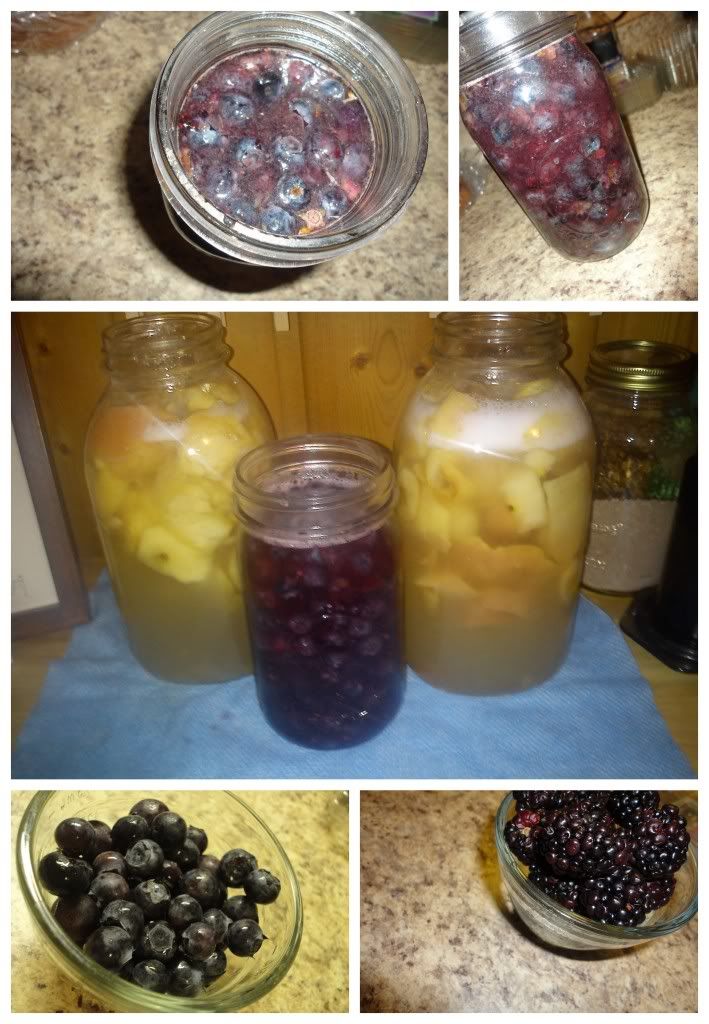
Peels/Fruit + 1 quart of water to 1/4 cup of dissolved Sugar until fruit is covered + Cheesecloth and room-temperature for a week = Step one Vinegar Making

Strain Fruit + Cover with Cheesecloth for 2-3 weeks until it's obviously vinegar = VINEGAR!!!

I'll be sure to update on the results once it's finished.

Photobucket


From the Archives:

January 10th, 2012: No Bake Cookies
January 10th, 2012: Ddeok-guk

Sunday, January 6, 2013

Banana Vinegar

Extended Shelf life for: Bananas (peels specifically)

Much like apple cider vinegar and fruit cocktail vinegar, Banana Vinegar is simply the mixing of banana peels with a 1 quart to 1/4 cup sugar water mix until full. One week of fermenting as is followed by straining and a few more weeks of fermentation and you should wind up with a nice vinegar.

Photobucket

However, at this point, I'm not too confident that this vinegar is going to turn out well. It smells stranger than previous vinegars and has had a really eerie white gunk floating on the top...so, I'll keep you posted!

Friday, November 30, 2012

Fruit Cocktail Vinegar

Extended Shelf Life for: Pear Skins, Apple Skins and Lemon Peel
Photobucket
Recently, I made Apple Cider Vinegar, it was easy and turned out a DELICIOUS pot of vinegar of which the man and I have enjoyed a daily shot (which is beneficial in terms of boosting our immune system AND regulating our blood sugar, meaning we aren't starving 2 hours after breakfast - awweeesome!)

Anyway, in learning to make Apple Cider Vinegar, I discovered that basically the scraps of any fruit or veggie can easily and quickly be turned into a health-packed (and surprisingly delicious) vinegar product.

So, with some aging apples, pears and another few lemons I set to work with another batch of vinegar with was the cores and skins of a few pears, a few more apples and the peel of a single lemon. I put these scraps into our large crock and covered with water and sugar (one quart of water + 1/4 cup of sugar) until the peels were completely covered. Cover the crock with cheesecloth, let set in room temperature (60-70 Fahrenheit) for about a week before straining out the peels, transferring the liquid to another crock (or glass jars) and covering with cheese cloth for another 2-3 weeks until you have the degree of fermentation and vinegary taste that you love and desire. The lemon peel here makes the vinegar quite tart and sour, but completely enjoyable!

Sunday, November 11, 2012

Kimchi!

If you need to extend the life of cabbage, this is a great option. However, we simply needed to have some kimchi re-enter our life and this includes nothing salvaged, except perhaps an onion.

For me, it was relatively important to prepare some kimchi in November, as November/the fall is generally the time when all the old women come out from the woodwork gathered around piles and piles of cabbage and working together to make sure the Korean staple is ready for the long winter ahead.

A few other notable mentions about my kimchi making day: It was the Korean "holiday" of Peppero Day (11-11) AND I had the great joy of being assisted by a sweet Korean family that is here on behalf of the man of the household serving an exchange as a visiting professor, making my first kimchi experience feel that much more authentic and valuable.

Now, on to Kimchi making...

There are essentially three parts to preparing Kimchi: Soaking, Making the Red Pepper Paste and Assembly. I will give you a rough sketch of each one of these parts followed by a link to a very detailed explanation of each step just in case you are in need of more photos and great explanation. 

Part 1~SOAKING:

Photobucket
Kimchi making will undoubtedly be a two day process, starting with this first step which is, in essence, preparing the cabbage by soaking it in salt water.

You will need:
  • Two Heads of Napa/Chinese Cabbage
  • 3 cups Coarse Sea Salt, preferably from Korea -- no joke
  • 30 cups of Water
What you will do:
  • Remove the outer 2-3 leaves from each cabbage, but don't discard!
  • Cut a 2" slit in the stem of each cabbage, carefully split heads of cabbage in half (easier than it sounds, I promise)
  • Salt each leaf of the cabbage, making sure to get plenty of salt on the thick, white parts and extra careful not to tear the leaves or disassemble the cabbage half.
  • In a deep, large container (such as the kitchen sink), dissolve 3 cups of Salt in 30 cups of Water.
  • Place each cabbage half, face-up into the water and cover with the reserved cabbage leaves.
  • Cover with plastic and use rocks, tin cans or a heavy lid to press the cabbage halves down into the water.
  • Soak for 8 hours. Flip and soak another 4 hours.
  • Check for bend-ability in the cabbage stems, when they are supple it's time to rinse (3 times), halve again (so you end up with 8 quarters of a whole cabbage) and drain (at least two hours, during which you should prepare the next step).
For greater details on soaking, check out this thorough post at Beyond Kimchee (my favorite Korean food blog!)

Part 2~MAKING THE RED PEPPER PASTE:
Photobucket
You will need:
  • A few handfuls of dried sea creatures (or one handful if you can't find multiple sea creatures or don't like sea creature flavored items - but one handful is a good idea)
  • 3 cups of Water
  • 2 Tbsp. Sweet, Glutenous Rice Flour
  • 1 Lg. Korean Radish, julienne into 1/8" matchsticks
  • 2 bunches of Green Onion
  • 4 cups of Korean Red Chili Flakes
  • 1/2 large Onion, roughly diced
  • 10 cloves Garlic
  • 2" piece of Ginger, roughly diced
  • 4 (or 2) Tbsp. Anchovy Sauce
  • 4 (or 2) Tbsp. Shrimp Sauce/Salted Shrimp
  • 1 1/2 Tbsp. Sugar
  • 2 Tbsp. toasted Sesame Seeds
What you will do:
  • Make a rice glue by boiling your handful of dried sea creatures in 3 cups of water, simmer for 10 minutes, remove from heat and let set, as is for 20 minutes. Strain off sea creatures and discard sea creatures, reserving 2 cups. Bring 1 1/2 cups of stock to boil while continuously whisking in the 2 Tbsp. of Glutenous Rice Flour until the mixture is bubbly and has thickened. Save the plain 1/2 cup stock for later.
  • In a blender or food processor, puree 1/2 large Onion, 10 cloves of Garlic, 2" piece of Ginger and reserved 1/2 cup Stock until smooth.
  • Pour 4 cups of Korean Red Chili Flakes into a large mixing bowl, add the onion mixture and cooled rice glue, anchovy sauce, salted shrimps, sugar and sesame seeds, mix.
  • Add the sliced Radish and diced Green Onions and let set for 30 minutes so the radish can extract some moisture and the mixture will be come more smooth and spreadable.
  • Taste test the sauce with a piece of cabbage to evaluate saltiness and flavor, adjust with additional fish sauce or stock for spread-ability as deemed necessary, then move on to assembly.
For greater details and more pictorial assistance, check out Cabbage Kimchee: Part Two from, yet again, Beyond Kimchee. 

Part 3~ASSEMBLY:
Photobucket
You will need:
  • Rubber Gloves
  • A Cookie Tray or Large, shallow dish
  • Airtight containers for storage
 What you will do:
  • Gently handle each cabbage quarter and use your gloved hands to spread red chili paste between each and every leaf. Roll up the quarter, place in an airtight container. Let the kimchi sit out on the counter 2-3 days for fermentation and moisture extraction before relocating it to the refridgerator.
  • Our Korean assistants explained that the outer leaves can be used to cover a bit of the kimchi, but that it is also generally spread with red pepper paste and then cut up and eaten that day as fresh kimchi with rice, which, by the way, is delicious!
For more details on this final part of preparing your kimchi, head over to Beyond Kimchee one more time!

In our house, we really love this fermented vegetable and have been beyond satisfied with the results of this recipe and process, slightly time consuming, but if you love fermentation, spicy foods, or kimchi itself, it's well worth it!
Related Posts Plugin for WordPress, Blogger...