Showing posts with label Cheese. Show all posts

Thursday, February 14, 2013

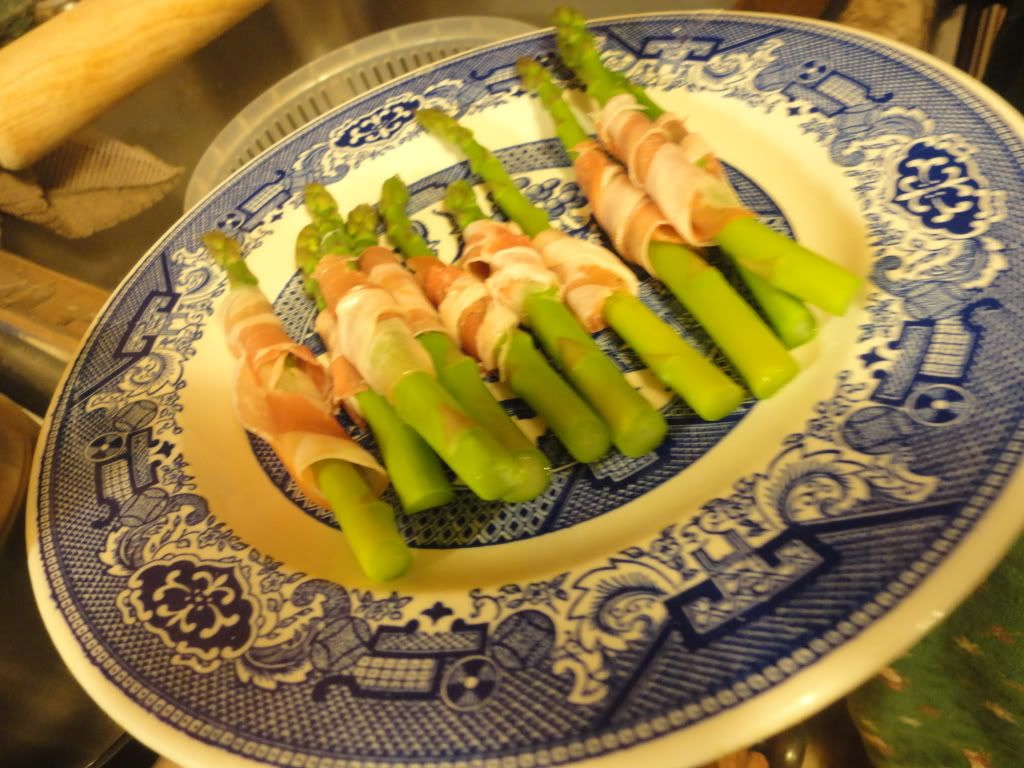
Pancetta and Puff Pastry Wrapped Asparagus

Photobucket

And then we made these.

And they were DELICIOUS.

Step 1: Steam the Asparagus
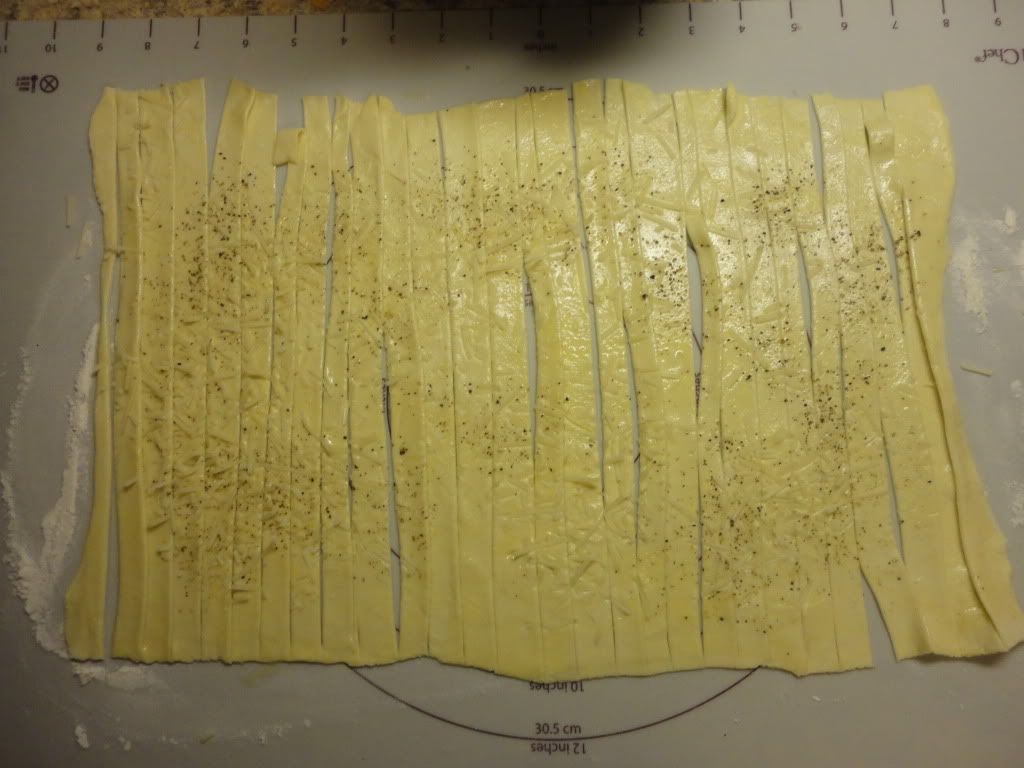
Step 2: Roll our Puff Pastry, sprinkle with salt, pepper and Parmesan. Slice. (enough strips per stalk of Asparagus.

Photobucket

Step 3: Wrap Asparagus in Pancetta.
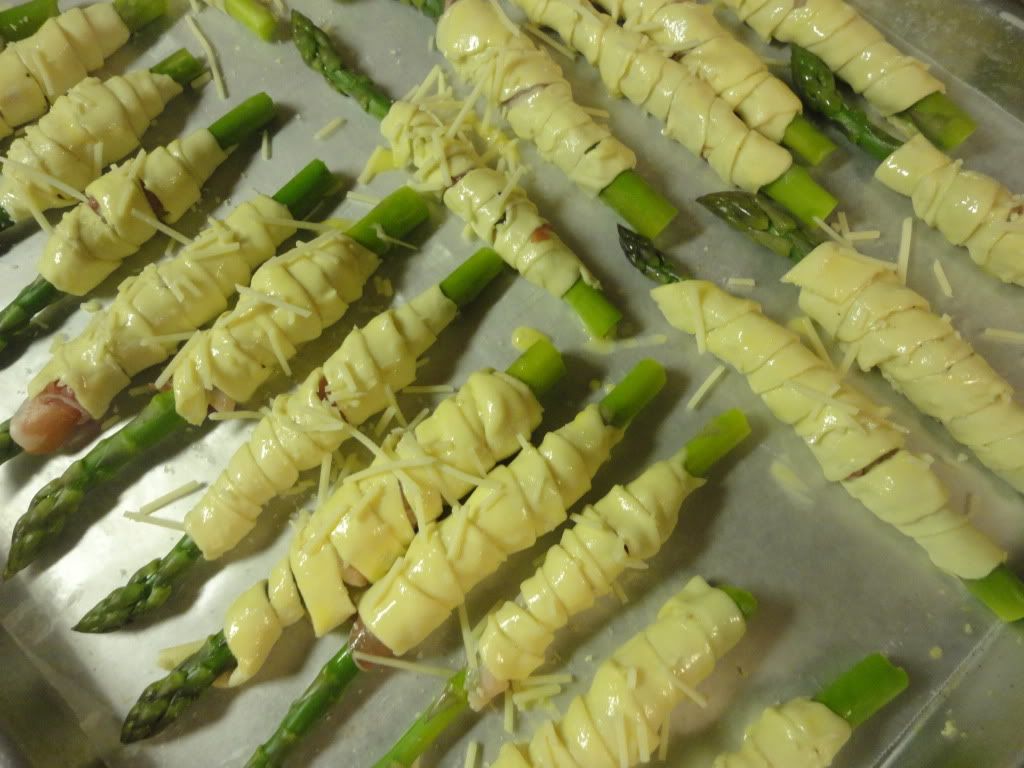
Step 4: Wrap Pancetta wrapped Asparagus in Puff Pastry.
Step 5: Brush with Egg Wash and sprinkle with Parmesan.

Photobucket

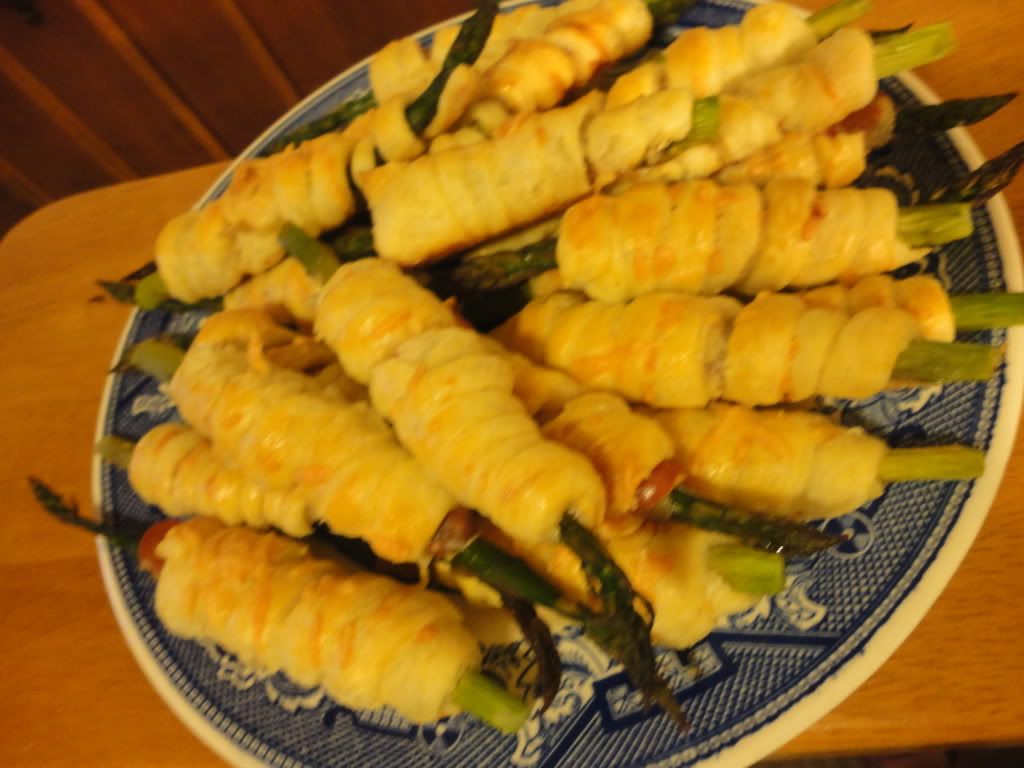
Step 6: Bake at 325 (or whatever is recommended by the puff pastry package) until golden.
Step 7: Enjoy...there's no other choice.

Photobucket

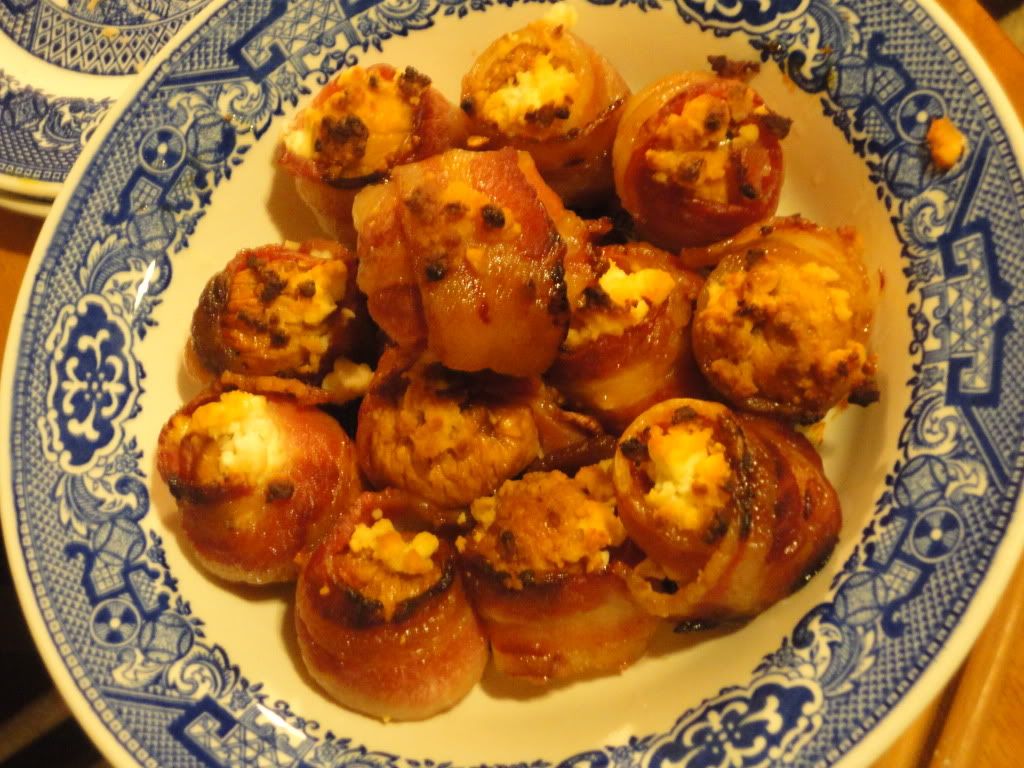
Feta Stuffed Figs Wrapped in Bacon

Photobucket
So...if you haven't caught on yet, out annual Valentine's Meal was a showcase of appetizers which we ate in various courses starting with the Apple Brie Bread and Feta Stuffed Peppers.

Next, we started on some meaty, bacon-wrapped dishes such as these delicious morsels.

Figs, stuffed with Feta, wrapped in Bacon - easy as it sounds.

Bake at 425 until the bacon is fully cooked.

Photobucket

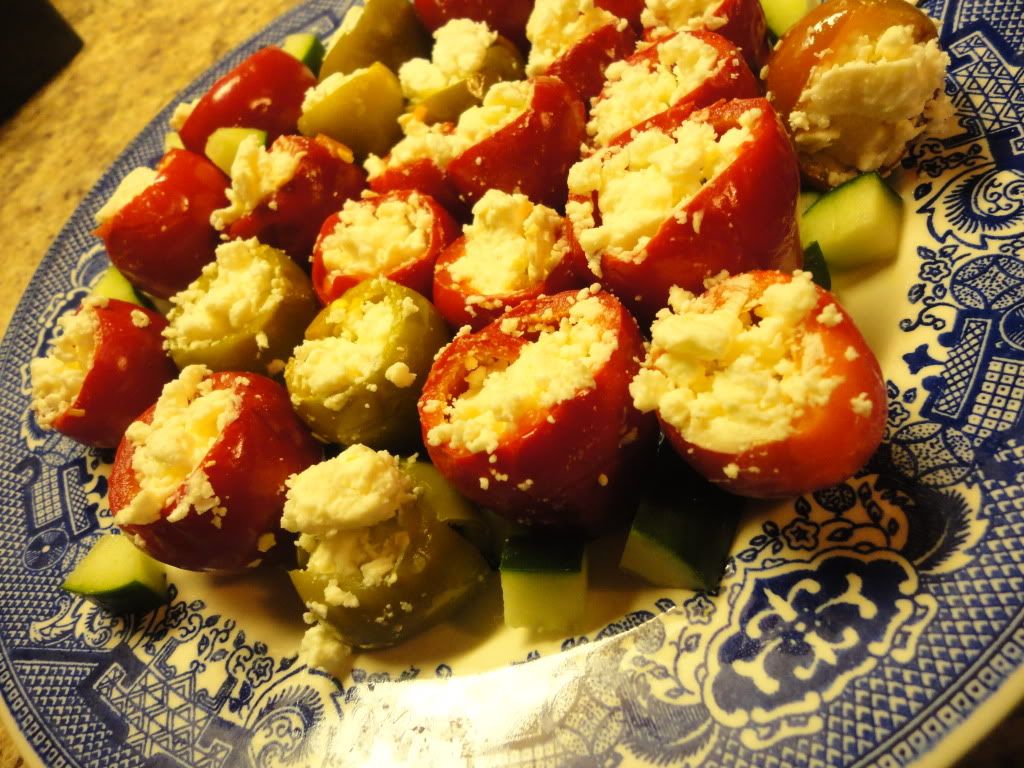
Feta Stuffed Cherry Peppers

For one of our first "Valentine Dinner Extravaganza's" we made these spicy, flavorful little morsels and were not, at all, bummed to make them a second time.

They're vinegary, pickly, not-to-spicy, refreshing and creamy.

They are easy.

Photobucket

The original recipe suggests Peppadews, but our lack of grocer options have lead to our using Cherry Peppers.

Once you have your pickled peppers there are just a few steps:

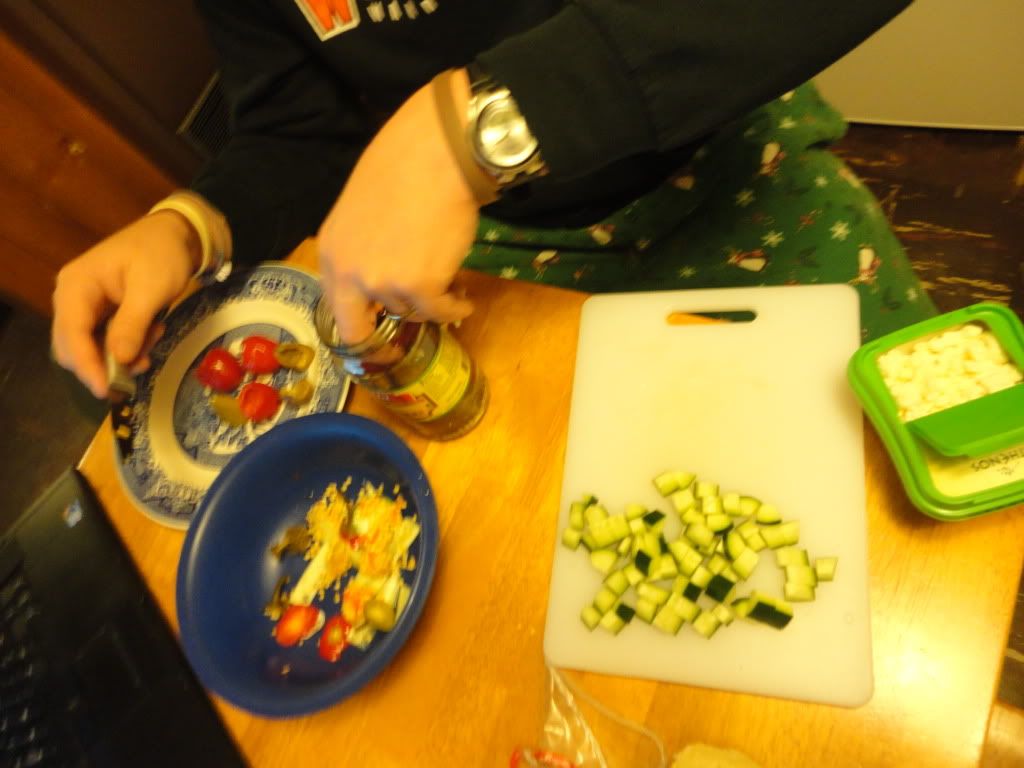
Step 1: Remove seeds from peppers.
Step 2: Remove seeds from one cucumber and dice.
Step 3: Place 2-3 cucumber cubes in the shell of each pepper.
Step 4: Stuff remaining space of the pepper with Feta cheese.
Step 5: Place in mouth, bite down and enjoy!

Photobucket

Apple and Brie Toasts

Photobucket

One of our all time favorite food combinations is Apples + Brie.

Occassionally, we'll buy a round of brie, dice up some apples, sprinkle the apples with cinnamon and nutmeg, surround the brie by the seasoned apples - bake and dig in with a baguette.

Want something that required an ounce less chopping but held the same flavors - we put this together for annual "Valentine's Dinner Cooking Extravaganza".

Photobucket

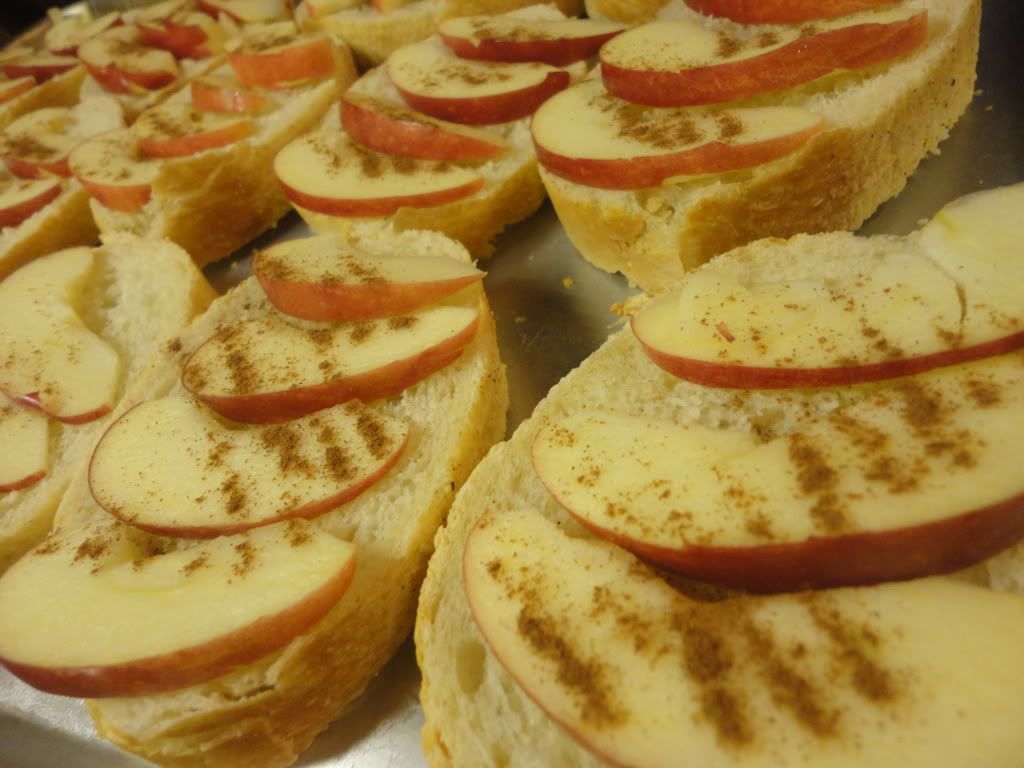
Sliced bread.
Topped with sliced apples.
Sprinkled with Cinnamon.
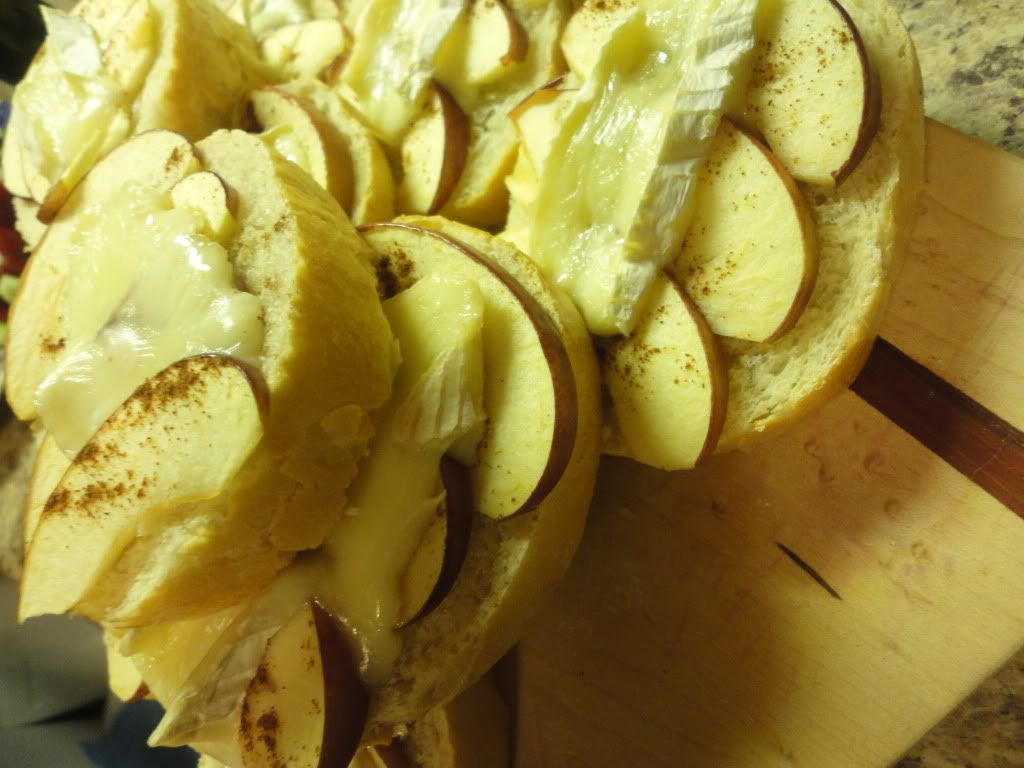
Topped with sliced brie.
Baked for 10-ish minutes until cheese is melty.

Easy Peasy and Absolutely delicious!

Thursday, February 7, 2013

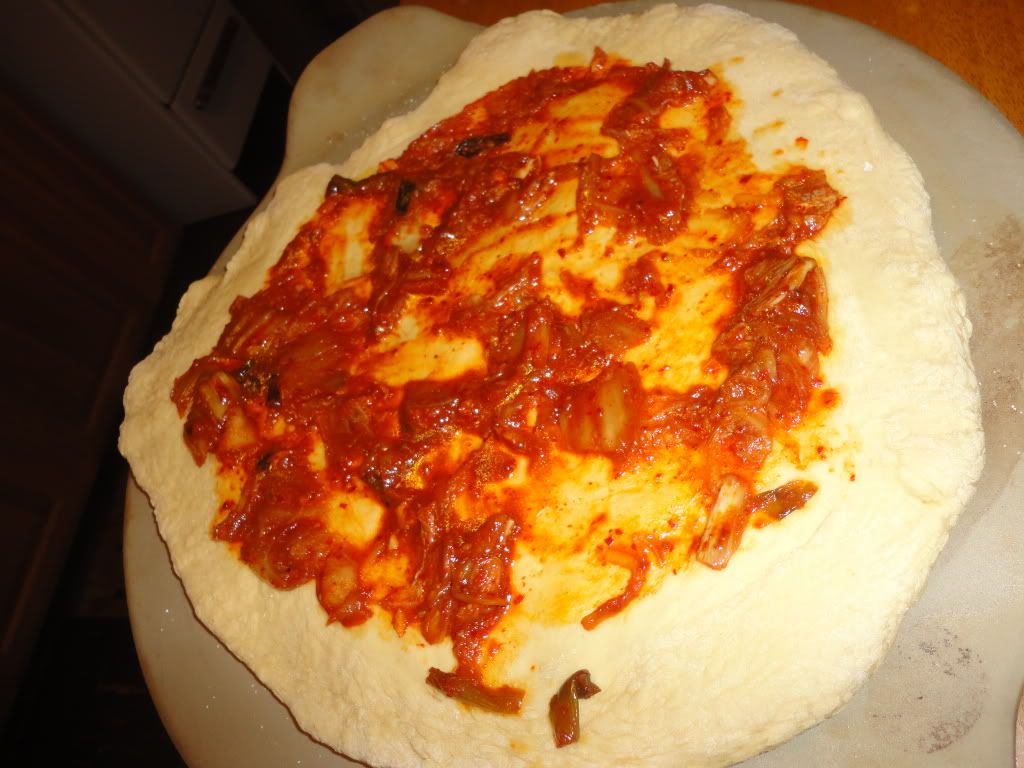
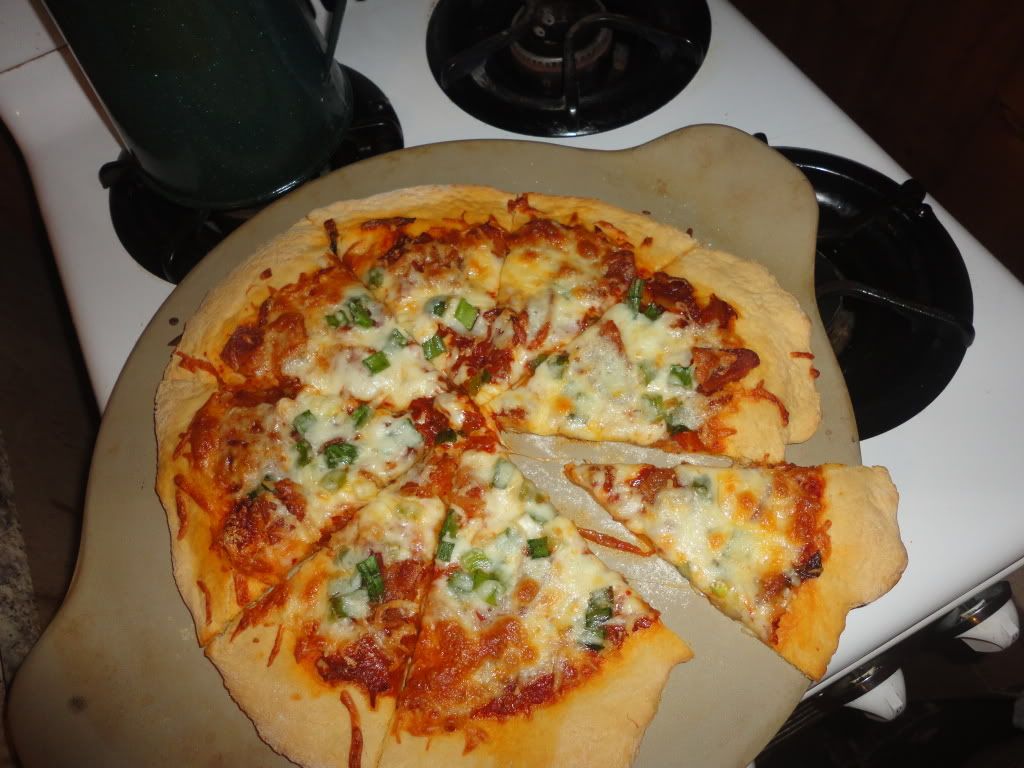
Pizza Experiment #6: Kimchi Pizza with Bacon on a Beer Bread Crust

This is a dearly beloved brain-child of mine which I believe will have only a handful of lovers, yet for me, it is worth it!

I've lived in South Korea. I've mastered the art of making and fermenting Kimchi. And now I'm bringing the two worlds - East and West - together in a truly delectable fashion.

I was pleased with this pizza experiment. And truth be told, so were our guests (all family...who did visit us in South Korea). Definitely something that has potential to be a 'signature' dish.

And, I tried out another Beer Crust, with much success!

Photobucket


Raised Beer Bread Pizza Crust:

You can either throw these ingredients into your bread machine per bread machine directions (our machine requires wet ingredients on bottom). Or you can follow these simple directions:

Mix together 4 cups Flour, 2 1/2 tsp. Active Yeast, 1 tsp. Baking Powder, and 1 1/2 tsp. Salt. Add to these dry ingredients 2 Tbsp. Olive Oil and 1 1/2 cups Beer, mix together.

Turn out onto a floured surface and knead about 10-15 minutes.

Place in lightly greased bowl, cover and let rise until about doubled 2-3 hours. Proceed as with other crusts.

For the 'sauce', I heated up a bit of Sesame Oil before tossing in some fermented Kimchi, Soy Sauce and Go-ju-chang (Korean red pepper paste). This was then spread on the crust, topped with Mozzarella Cheese and Green Onions.

Photobucket


Definitely unique and ultimately, delicious!

Thursday, January 24, 2013

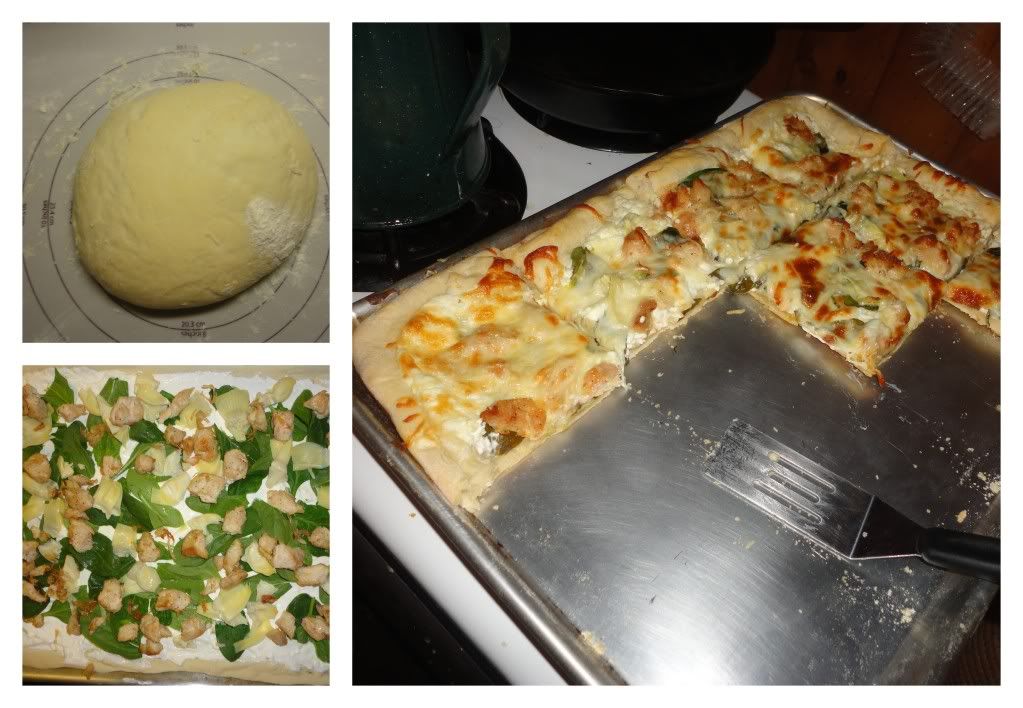
Pizza Experiment #5: Spinach Artichoke Dip Inspired

If you're going to choose to experimenting with one thing or another, you really can't go wrong with Pizza! We've enjoyed loads of pizza experiments and I think I'm getting better and coming up with ideas as well as critiquing each pizza.

I didn't love this sauce, but also knew from the beginning that I wouldn't recreate in the exact same way, ever again. I would have liked to use only Cream Cheese for the 'sauce', but I had some plain yogurt that need to be moved out of the refrigerator, therefore, it went into the mix...and then I had to pile it on, not entirely ideal. Regardless of all the small things I would change given the opportunity, I truly enjoyed this pizza pie and will continue to work with this concept.
Photobucket
Pizza Crust: Bread Machine

Using the bread machine to prepare the dough for pizza crust is an easy way to ensure proper rising, etc.

According to manufacturer recommendation place the following items into your bread machine:

1 1/2 cups Water, 1/4 cup Olive Oil, 3 1/2 cups Flour, 1 Tbsp. Sugar, 1 1/2 tsp. Salt and 2 tsp. Yeast.

Set to dough cycle. Upon cycle completion divide dough based on number of desired pizzas. Flatten each ball and knead a few times, cover with a damp towel for 30 minutes until dough has increased by 20 percent. Roll out and prepare as desire

Toppings: Spinach Artichoke Inspired

Spread crust with a whipped, softened Cream Cheese. Top with Pan Cooked Chicken, Artichoke Hearts, Spinach, Mozzarella and Parmesan. Bake at 450 for 10-15 minutes until cheese is golden and bubbly. Enjoy as part of a budding Family Pizza Night tradition.

Wednesday, January 23, 2013

Cheese and Onion Enchiladas

Extended Shelf Life for: Onions

Photobucket
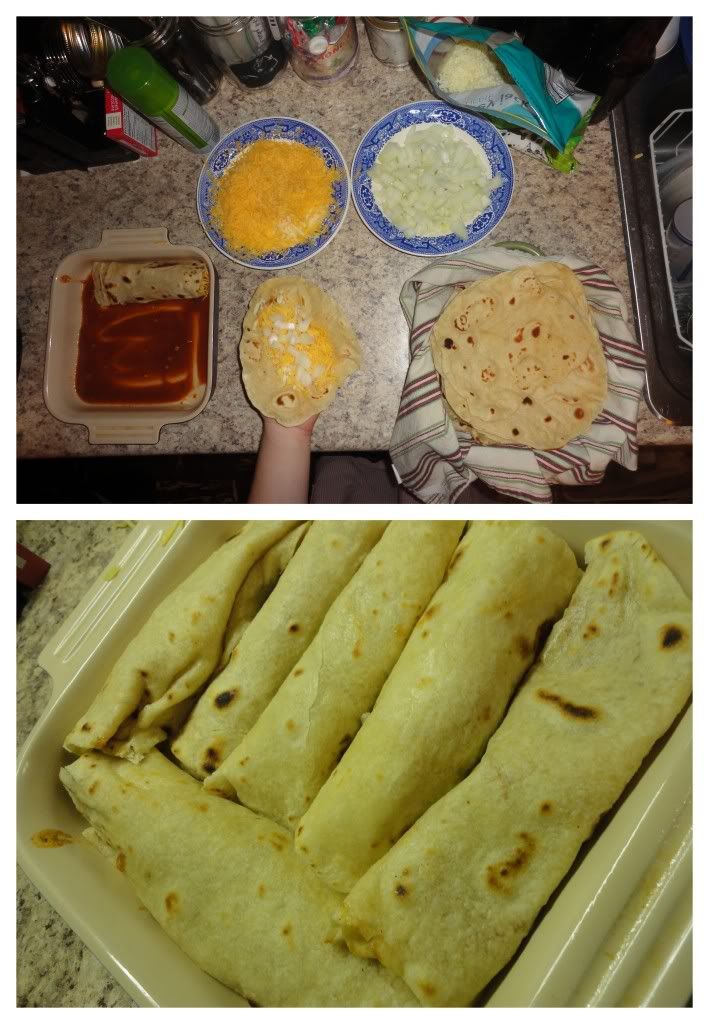
With fresh, Bacon Fat Tortillas, ready to go, it was time to kick a Mexican food craving in the rear and enjoy some home-made enchiladas. These guys were not even close to being a disappointment! Only bummer of the whole meal was not having enough Chile Powder to make this enchilada sauce correctly, regardless, a few extra shakes of Cayenne Pepper and a short prayer were all that was needed to thoroughly enjoy this weeknight meal.

Ingredients/Directions:

Spread a bit of Enchilada Sauce on the bottom of a 9x13 pan (or have two square pans ready to go) then begin filling each tortilla with a small handful of Onions (sauteed if that's your preference - we're not opposed to raw, so I left them that way), Cheese and a touch of Enchilada Sauce. Arrange tortillas in the pan, once it's full spread remaining Enchilada Sauce over the top, sprinkle with cheese and bake at 350 for 30 minutes or until cheese is melty and sauce is bubbly. Enjoy!

Wednesday, January 16, 2013

Pizza Experiment #4: French-Philly Pizza

Extended Shelf Life for: Onions

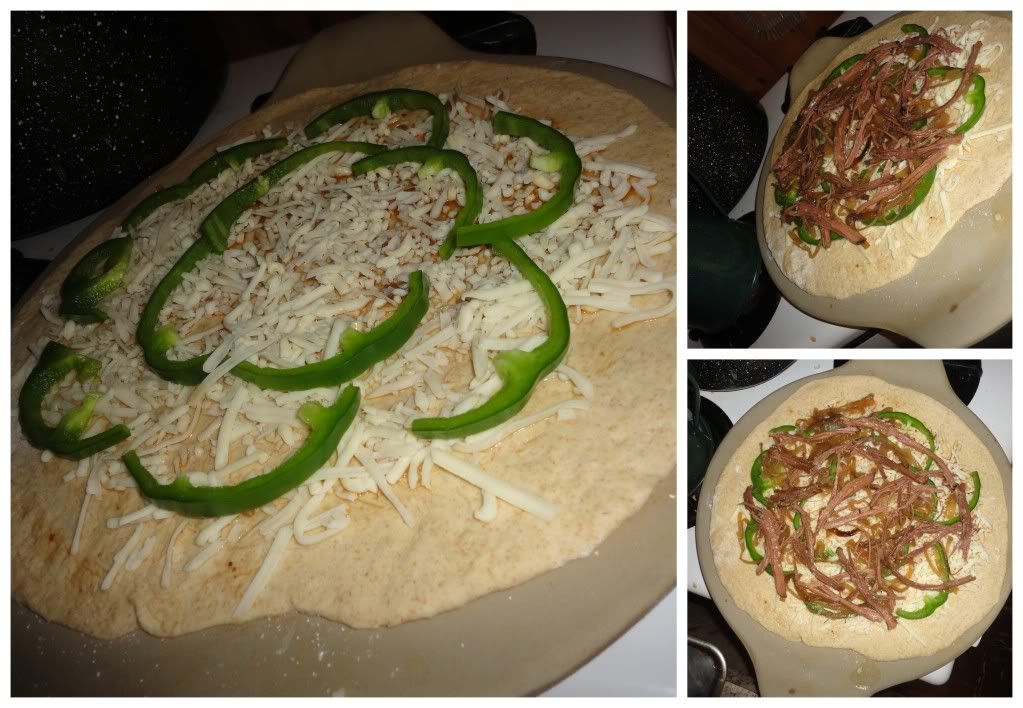
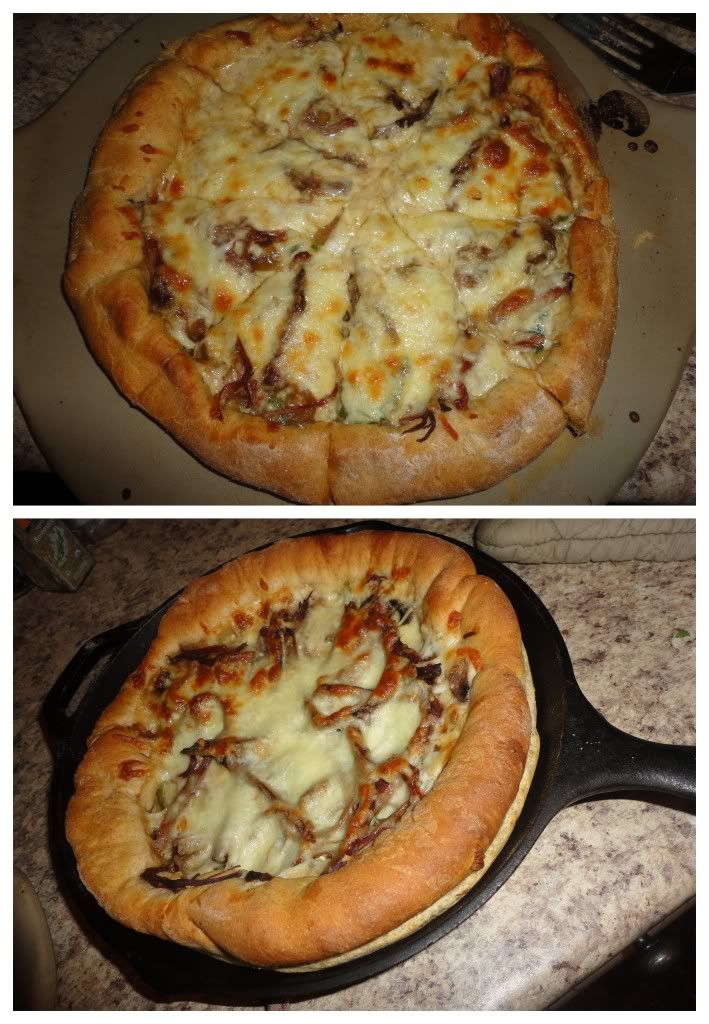
I realize we've only had a small handful of pizza experiments...but I think this one may be a favorite, a winner, winner - pizza dinner! With French Dips and Philly Cheesesteak Sandwiches serving as my inspiration, we enjoyed these pizzas which we're perfect in every way!

Photobucket


A few key points:

The recipe for the roast beef is known as the Best Beef Dips Ever, and they are, and they are easy. One roast, 1 cup of Soy Sauce, 6 cups of Water, Garlic, Rosemary, a Slow-Cooker and 8-10 hours on low. I recommend preparing the roast a day or two before preparing the pizza, just for the flavors to gain intensity.

Photobucket


The toppings:

Best Beef Dip Roast Beef, Green Pepper, Caramelized Onions, Mushrooms and Monteray Jack Cheese. When the pizza's finished, serve with a small bowl of Au Jus for dipping.


Saturday, January 5, 2013

Pizza Experiment #3: Tomato and Preserve Onions

Extended Shelf life for: Onions and Tomatoes
Photobucket
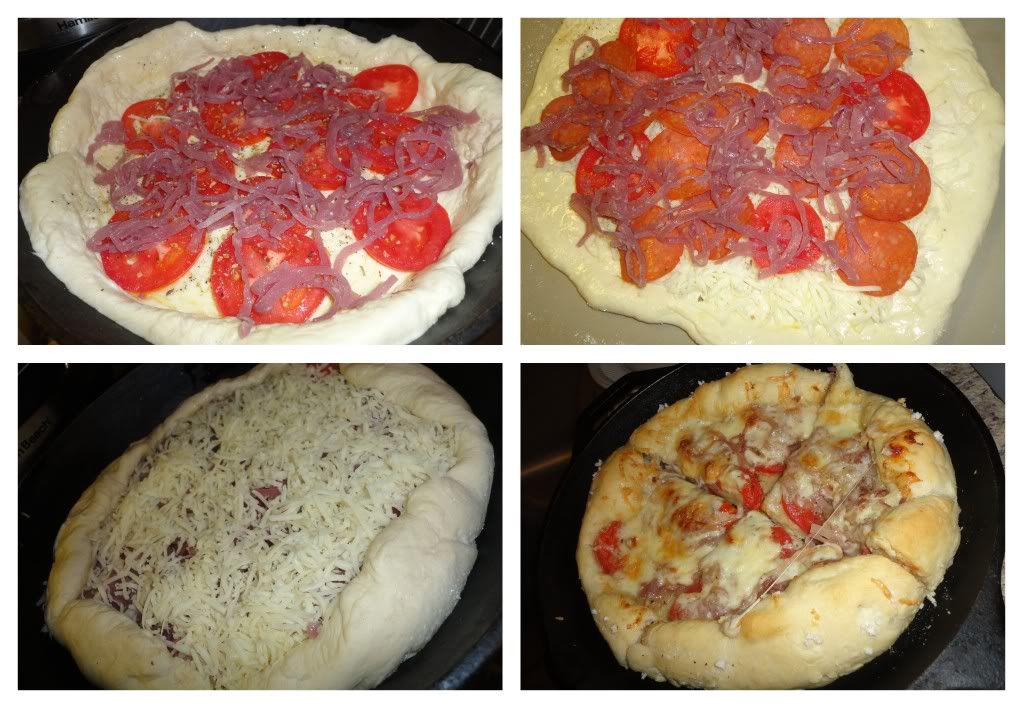
I recently revealed one pizza crust recipe, and have yet to post any others (although I'm working on it ;) ). A few weeks back, I also let you in on the secret of delicious preserved red onions. And now, here I am, ready to throw together a new pizza! Essentially, the toppings are the same for both pizzas:

Tomato, Preserved Red Onions and Cheese.

One also received a few pepperonis.

Rather than making a sauce I simply brushed the crusts with olive oil and sprinkled with oregano.

Other than the pepperonis, the primary difference was that for one of these pizzas I sprinkled cheese on first, followed by ingredients and then a touch more cheese, where as the other was done in the more tradition: ingredients then cheese style.

It didn't make a huge difference, but I kind of liked having my vegetables surrounded by cheese and how the bottom layer of cheese was extra gooey and the top layer of cheese was a bit more golden and allowed the vegetables and toppings to 'shine' through.

So there you have, Pizza Experiment #3!
Photobucket

Wednesday, January 2, 2013

Bleu Cream Pasta with Bacon and Tomatos

Extended Shelf Life for: Tomatoes, Bacon, Onions, and Bleu Cheese Dressing

Photobucket

Ingredients/Directions:

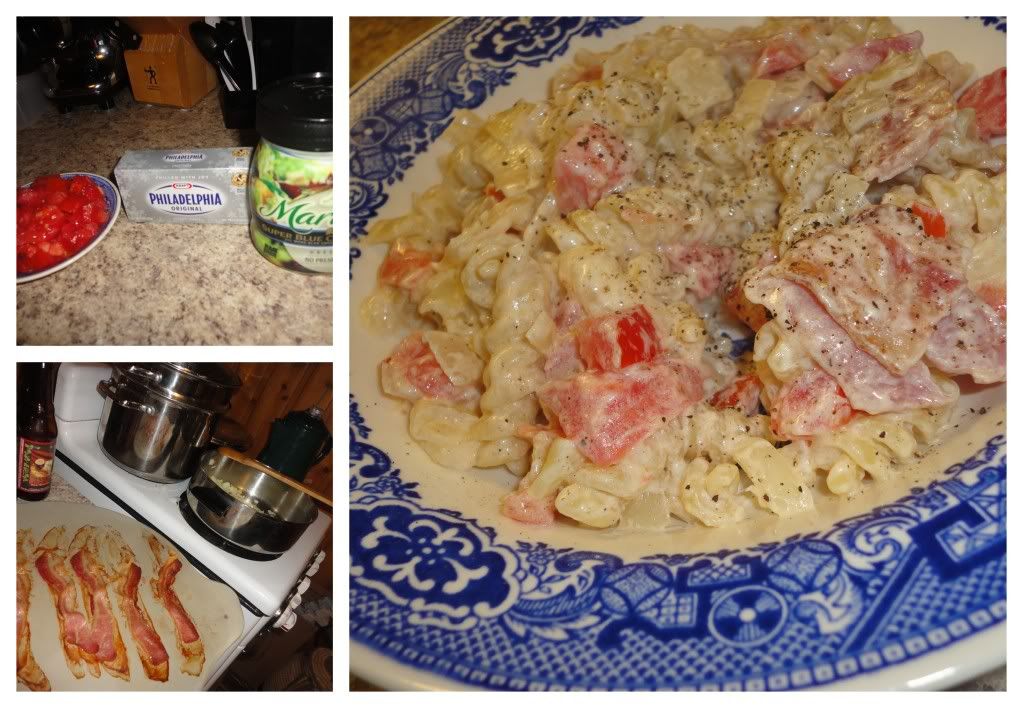
Prepare bacon to your liking. (I like the oven method, as it's efficient and I don't get splattered by hot flying grease).

Meanwhile, bring a large pot of water to boil and prepare 1/2 pkg. of Pasta (about 4 oz.).

In a large-deep skillet, saute1 onion in about 2 Tbsp. of Olive Oil until translucent. Add to the pan, 4 Tbsp. of Cream Cheese and 2 Tbsp. of Butter, melt. Add 1/4 cup pasta water to the sauce followed by 3-4 Tbsp. Bleu Cheese Dressing. Heat through, add 6 Strips of Bacon, crumbled and the pasta. Finally add, 3 Roma Tomatoes, diced and heat through. Season with black pepper, serve with shredded Parmesan or Mozzarella.

Tuesday, October 30, 2012

Quick and Easy: Beans and Rice

Extended Shelf Life for: Leftover Pico de Gallo
Photobucket
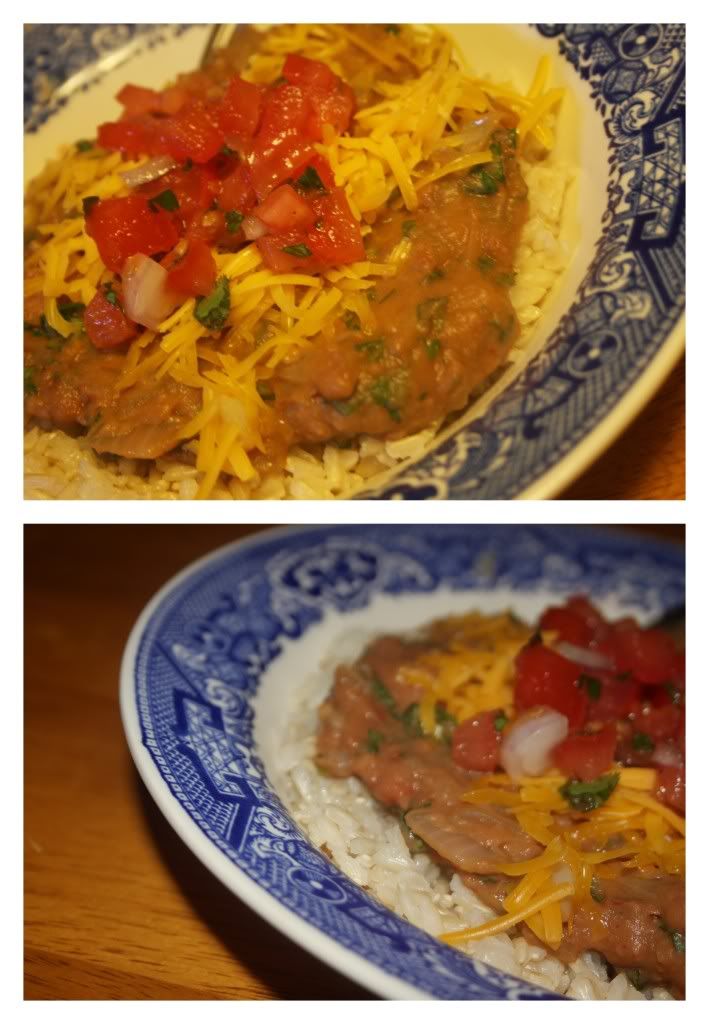
Sometimes, I just need to use up random leftovers, for example some leftover pico de gallo from a night with our friends and a meal of fish tacos. Since we were lacking dinner options and tortilla chips I did some quick thinking and came up with this dish.

Rice from a rice cooker.

Canned refried beans heated in a skillet with pico de gallo juice and a cilantro "ice" cube.

Rice topped with beans, cheese and pico de gallo.

There you go! Enjoy!

Thursday, October 4, 2012

Chicken Taco Soup

Extended Shelf Life for: Tomatoes, Peppers, Onions, Avocados, Limes
Photobucket
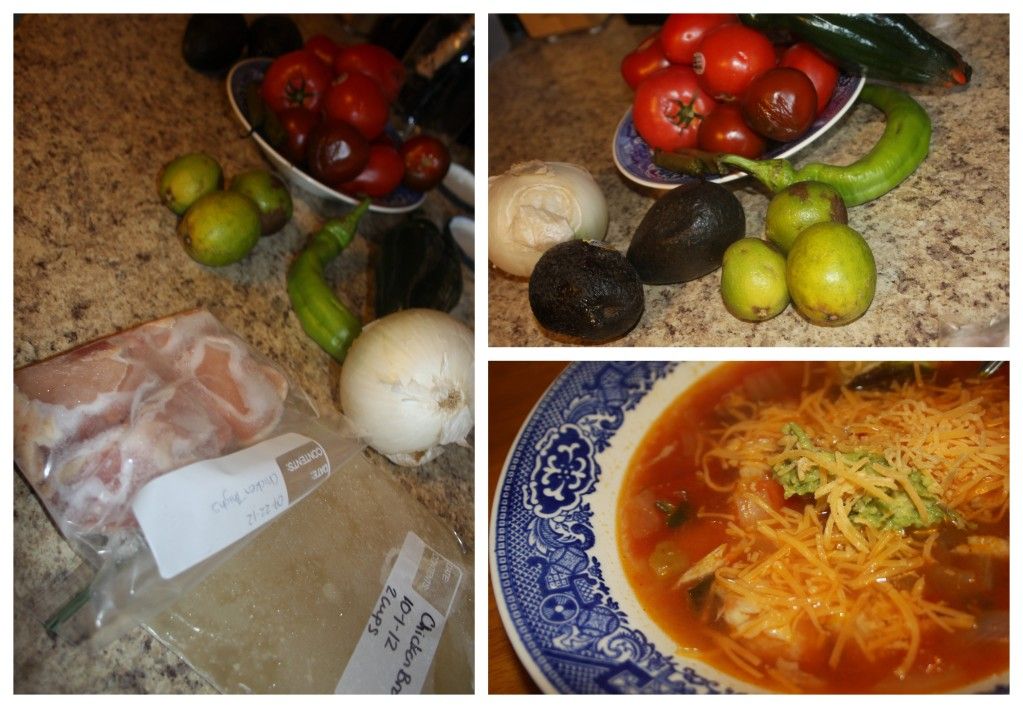
If I am truthful, I will let you know that I remember very little about the true way in which this soup came together and as is incredibly common in this kitchen, I have no idea what amount of what went in or stayed out, etc. And I realize that makes me a poor food blogger. But here's the thing, I believe, that sometimes in the kitchen, the most important thing is knowing what goes together, to know your personal preference for how much broth to have compared to the density of other ingredients and above all else, I think what is important is to use what you have, to use it well and enjoy the results as they are...this was a delicious soup and I'm going to tell you what goes into, but as for how much and exact measurements, let go of that and just let it come together, it's a soup for goodness sake!

Ingredients/Directions:
Inspired by Rachel Ray's recipe Mexican Chicken Lime Soup

 In a stock pot or dutch oven saute 1 chopped onion in a drizzle of olive oil until tender and translucent. Add 2-3 (or more) minced Garlic Cloves and 1 minced pepper of choice (or a couple and a variety if you like spice - we have handy-dandy roasted jalapeno ice cubes which I added at the end), saute for a couple of minutes, then push to the side. Add additional olive oil if needed and begin cooking 4-6 Chicken Breasts until juices run clear. At this point, I like to take a pair of kitchen sheers and a fork and cut the breasts into bite size pieces. Add 2-cups Home Made (or store bought) Chicken Broth to the pot and bring to a boil. Run about 10 tomatoes through a juicer (but not on the juicer mode...more like mincing/blending mode) or blender and add to boiling broth. Adjust liquid according to personal preference by adding water or broth. Season with, lime juice, salt, pepper, cayenne, chili powder and cumin. Scoop into bowls top with Shredded Cheddar Cheese and slices of Avocado (or mashed avocado if they're a little ripe ;)).
Wednesday, September 19, 2012

Egyptian M'saa'a

Extended Shelf Life: Eggplant, Pepper, Tomatoes

Photobucket
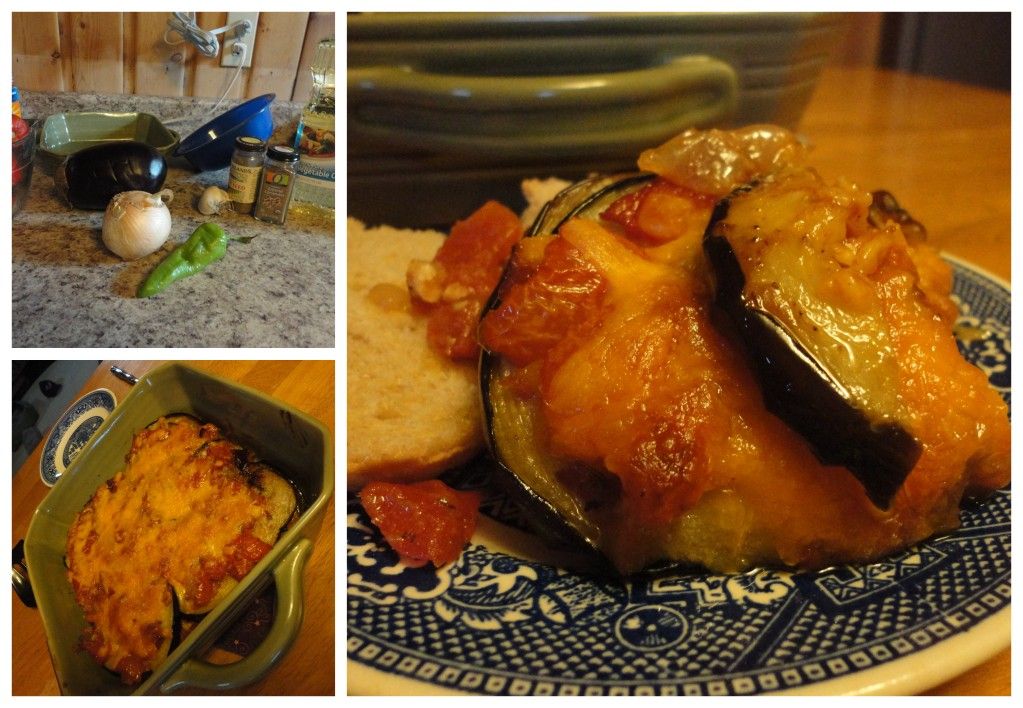
My first experiences with eggplants came by way of salvaged eggplants. Since those first moments with the spongy, purple veg I've come to love experimenting and playing with eggplant. Searching through my Kindle brought to the surface this delicious eggplant casserole, it is absolutely fantastic and highly recommended!

Ingreidents/Directions:
Inspired by: Nile Style: Egyptian Style Cuisine and Culture by Amy Riolo

Preheat oven to 350 degrees F.

 Heat 1 Tbsp. Vegetable Oil in a large saucepan over medium heat. Saute 1 small Onion until translucent, 3-5 minutes. Add 1 diced Anaheim Pepper and 6 cloves minced Garlic and cook until golden and aromatic. Add 3 cups Tomatoes, 1 tsp. ground Coriander, 1 tsp. ground Cumin and salt and pepper to taste. Bring tomato mixture to a boil, cover and reduce heat, simmer for 20 minutes or until thickened.

While the tomato sauce thickens, prepare the eggplant in a large wide skillet with one inch of vegetable oil over medium-high heat. When oil is hot (a drop of water sizzles when flicked into the oil is one way to test the readiness), add the eggplant slices and fry on both sides, about five minutes, until golden and soft. Drain cooked eggplants on a wire rack or plate covered with paper towels.

Once all pieces are ready, it's time to assemble the Ma'saa'a/Lasagna/Casserole. In a 9 inch cake pan, oval casserole dish or square casserole dish simply layer ingredients starting with eggplant, followed by sauce and cheese until all the ingredients are used and the dish is full. Bake uncovered for 20-30 minutes until cheese and sauce bubbles and a crust begins to form around the edges.

Enjoy with rice or crusty bread!

For more on Eggplants and other recipe inspiration check out my more detailed and interactive Squidoo Lens: The Art of Salvaging {Eggplant}

Tuesday, September 11, 2012

Beer Cheese Soup

Extended Shelf Life: Onions and Carrots
Photobucket
That's Right! Extended Shelf Life!

That can only mean one thing!?!?!

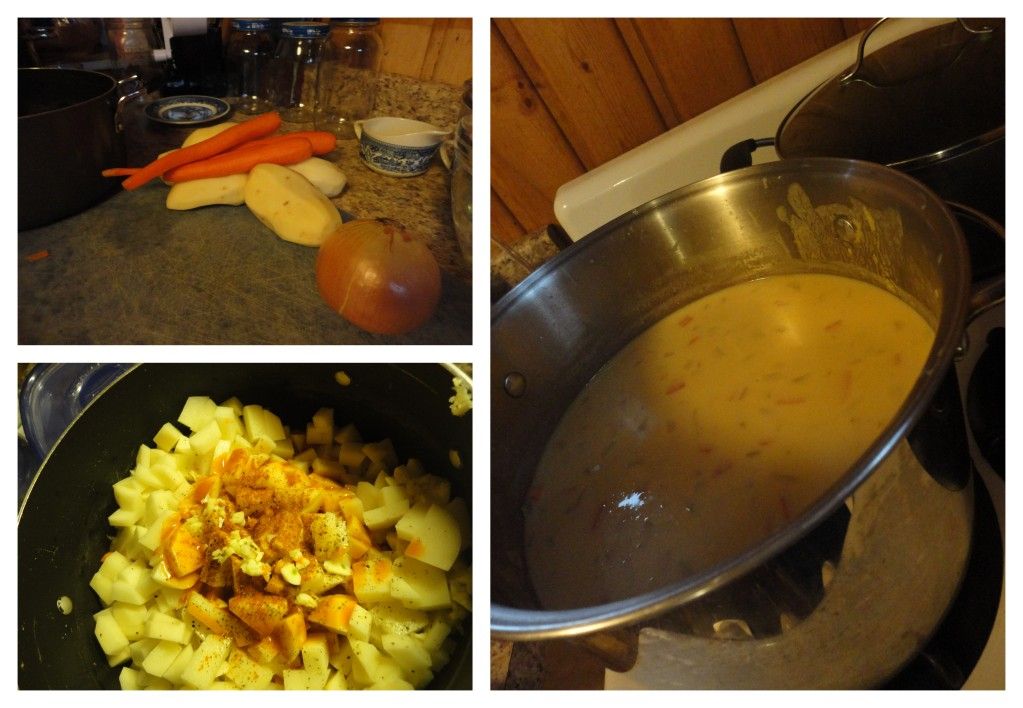
We're back in the land of abundance and waste and we're hitting up the grocers dumpsters and proving that expiration dates and scarred food don't make food inedible...just in need of some immediate tender loving care.

So when our good friend Harris, who heard about our dumpster diving ways while we all lived and taught in South Korea made his way out west, it seemed only fitting that he a) go for a dive and b) eat the fruits of his labor.

And since we were all so fresh to the homeland, it seemed most fitting that this inauguration meal incorporate a tasty micro brew and creamy delicious cheese.

Ingredients/Directions:

In a large saucepan over medium heat, stir together 1 1/2 cups chopped Carrots, 1 1/2 cups chopped Onions and 2 minced cloves of Garlic. Add 1 Tbsp. Hot Pepper sauce, 1/8 tsp. Cayenne Pepper and salt and pepper to taste.

Add 3 cups of Broth and 2 cups of flat Beer, simmer til veggies are tender. Remove from heat.

Meanwhile, heat 1/3 cup Butter in large soup pot over medium high heat. Stir in 1/3 cup flour with a whisk until flour is light brown. Gradually stir in 4 cups of Milk. Maintaining your whisking action, gradually add in 6 cups of shredded Cheddar Cheese, letting it melt and incorporate with each addition.

Stir the beer and veggie mixture into the cheese mixture. Season with 1 Tbsp. Dijon Mustard, 2 tsp. Worcestershire Sauce and 1 tsp. Dry Mustard. Add additional Hot Pepper Sauce if desired, simmer 10 minutes and serve up on a chilly fall night with a set of good friends and perhaps some football on the tele if you're so inclined.

Monday, July 9, 2012

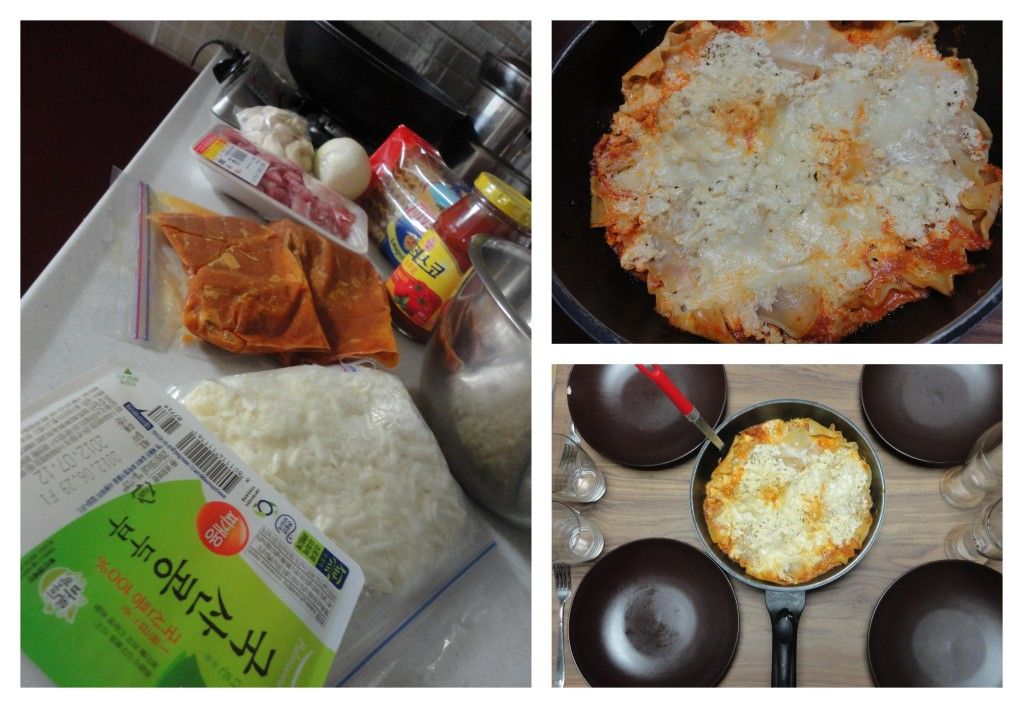
Easy Tofu and Pork Skillet Lasagna


Photobucket
A while back I inherited some lasagna noodles when saying farewell to more than a couple of friends who were departing the land of kimchi. However, lasagna and Korean toaster ovens aren't necessarily the best match-up. Nor is it possible to find ricotta or cottage cheese and while it's possible to make either of those without too much effort, it still requires effort and planning ahead...

Fast forward more than a couple of months to a dinner date with some Korean friends, one of whom enjoys cooking and baking and even knows a deal more than the typical Korean regarding western foods. During conversations of food I learned that her and her husband have come to enjoy lasagna on a relatively regular basis and have happily discovered that the ever ready and available tofu is a perfect substitute for ricotta!

With renewed inspiration and motivation I again pursued the making of a lasagna, sure that while it may fit in the oven, I didn't have an ideal pan, I dug from my memory brain box a post on Pinterest for a Skillet Lasagna and set forth on lasagna making adventures.

Ingredients/Directions:

Squeeze the excess moisture out of 1 pkg of Firm Tofu and season with Salt, Basil, Oregano, Black Pepper, and 1/4 cup Grated Parmesan Cheese. Set aside.

In a large skillet brown 1 lb. Ground Beef or Pork and choice of veggies (onion, zucchini, etc) and 2 cups of Pasta Sauce (I used a couple baggies of home-made sauce from my once-a-month-adventures). Remove about half of the sauce from the skillet and set aside.

If you have no-boil Lasagna, use those, otherwise boil water and semi-prepare non-boil lasagna noodles while making the tofu/cheese mixture and sauce. 

Over the top of the sauce that remains in the skillet place 2-4 lasagna noodles, covering the sauce as completely as possible. Layer about 1/2 or 1/3 of the Tofu Cheese Mixture followed by sauce, noodles, etc. until the pan is filled. Top it off with shredded mozzarella cheese, cover the skillet, reduce to medium-low heat and cook for about 20 minutes, let set for 5 before serving.

Enjoy with a nice baguette.

Wednesday, June 27, 2012

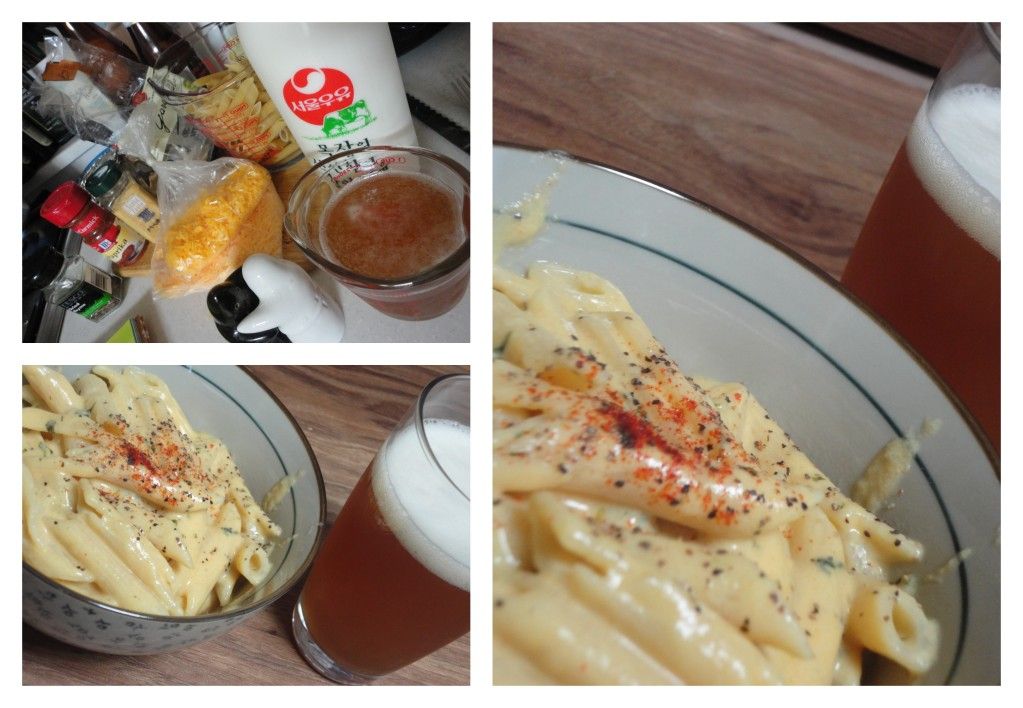
Beer Cheese Macaroni


Photobucket
Inspired by non-other than Pinterest.

Ingredients/Directions:
Adapted from Homemade by Holman.

Prepare 12 oz. of Macaroni or other short noodle. In a sauce pan or deep skillet melt 2 Tbsp. Butter over medium heat. Add 2 Tbsp. flour and mix constantly for about 2 minutes until mixture is golden and bubbly (this should be a roux for those who are well versed in the kitchen). Next, add 1 cup of Milk and 1 cup of Flat Beer (flat's just preferable, and easier to manage), stir constantly. Cook for 5 minutes before reducing heat. Add a total of 12 oz. Shredded Cheese and 6 slices of American Cheese. Season with Paprika, Mustard, Salt, Pepper, Thyme and Fresh Basil.

Thursday, June 14, 2012

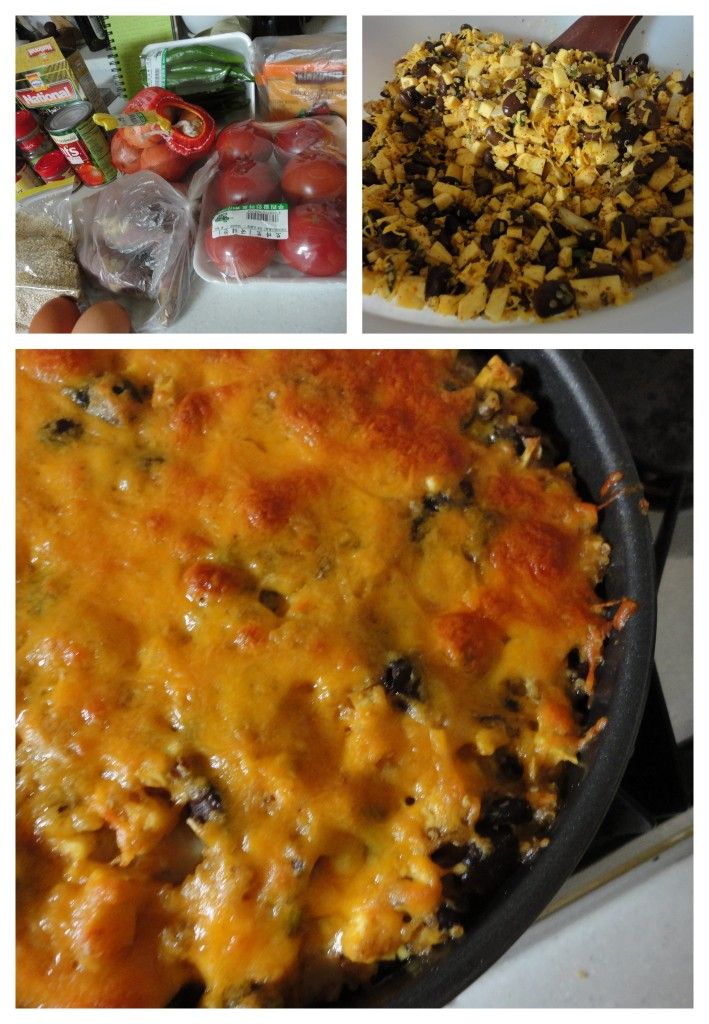
Quinoa with Black Bean and Sweet Potato Casserole


Photobucket

I pinned this recipe a while back, back when I didn't actually have Quinoa and wasn't sure how I was going to get my hands on the intriguing little grain taking my Pinterest wall by storm.  Soon enough, however, another English teacher left the land of Korea and in turn passed on some Quinoa to the Harrington household. Recognizing that I now had the opportunity to be preparing the handful of Quinoa recipes I'd pinned, I got excited and began the preparations for this Casserole which features not only Quinoa, but also black beans and sweet potatoes - one of my favorite combinations.

Ingredients/Directions:
Adapted from SparkPeople

Prepare a square baking dish or round cake pan/casserole dish with oil and preheat the oven to 350 F (177 C). In a large bowl mix together 1 cup of prepared Quinoa, 3 cups Black Beans, 2 lg. Sweet Potatoes finely diced or shredded, 1/2 cup Cheddar, 1 Tbsp. Cumin, Salt and Pepper. In a smaller bowl, mix together 2 eggs and 1 cup Salsa. Mix the veggies and quinoa with the salsa and egg mixture before sprinkling with additional cheese and baking for 30 minutes.

Saturday, June 9, 2012

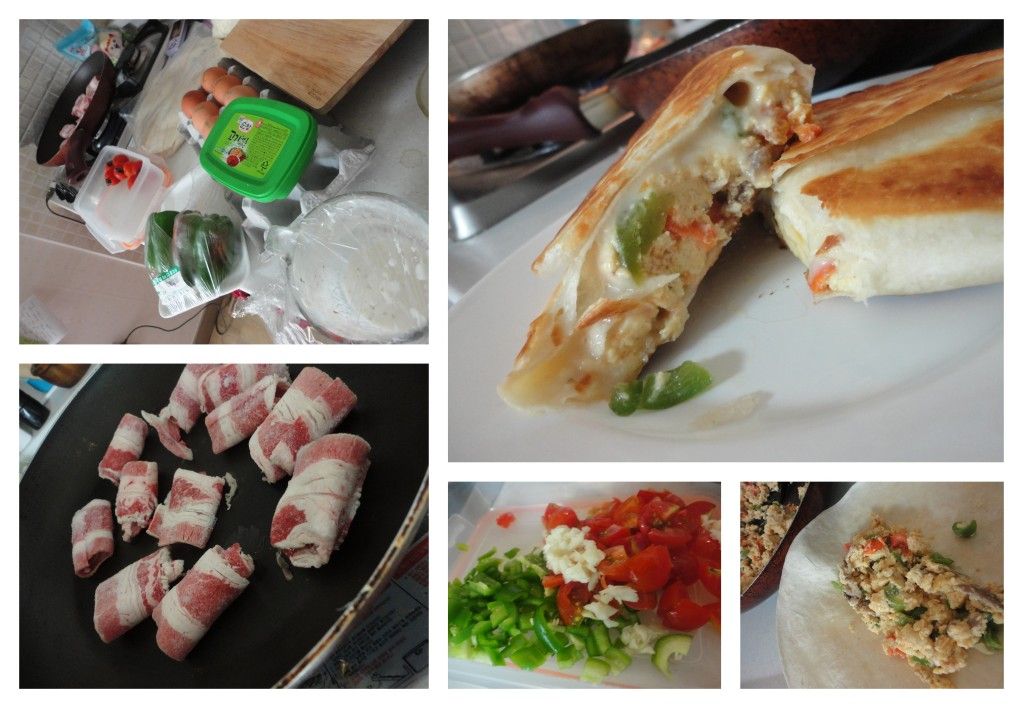
Samgyupsal Breakfast Burritos

Photobucket

Samgyupsal is Korean three-layered pork which resembles bacon but doesn't have that cured and salty factor the American bacon possesses. Regardless of your opinion on how bacon/pork should taste, Samgyupsal is delicious as a grilled/BBQ'd meat which is the typical serving style here in South Korea - but it also makes for a nice addition to various dishes including good ole Saturday Morning Breakfast Burritos.

Also, i did these burritos up with some additional flare because it just so happened to be a day when I need to clear a few things out of the refridgerator - so while I add a common Korean meat dipping paste and a few tablespoons of ranch to my eggs, it's not really necessary, but helpful if you find yourself in need of clearing out some room in the fridge.

Ingredients/Directions:

In a large skillet, fry up some thinly sliced samgyusal until cooked through, use scissors to cut the pork into bite size pieces. If loads of fat have been rendered, drain some off, however about a Tbsp. or so will be a nice way to add flavor and non-sticking power to 1 chopped Green Pepper a handful of diced Cherry Tomatoes and 2 cloves of minced Garlic. While sauteing the pork and the veggies, beat in a seperate bowl 6-8 eggs with no more than a 1/4 cup of ranch and a Tbsp. or 2 of Korean bean paste for dipping meat. Make sure sufficient oil/fat remains in the skillet to keep the eggs from sticking before pouring it over the meat and veggies. Let egg set slightly before using a spatula to break up the egg and continue cooking. Throw the mix in a flour tortilla, top with cheese, fold it up and throw on to a hot, dry skillet to  melt the cheese and make the outside crispy. Enjoy!

Tuesday, June 5, 2012

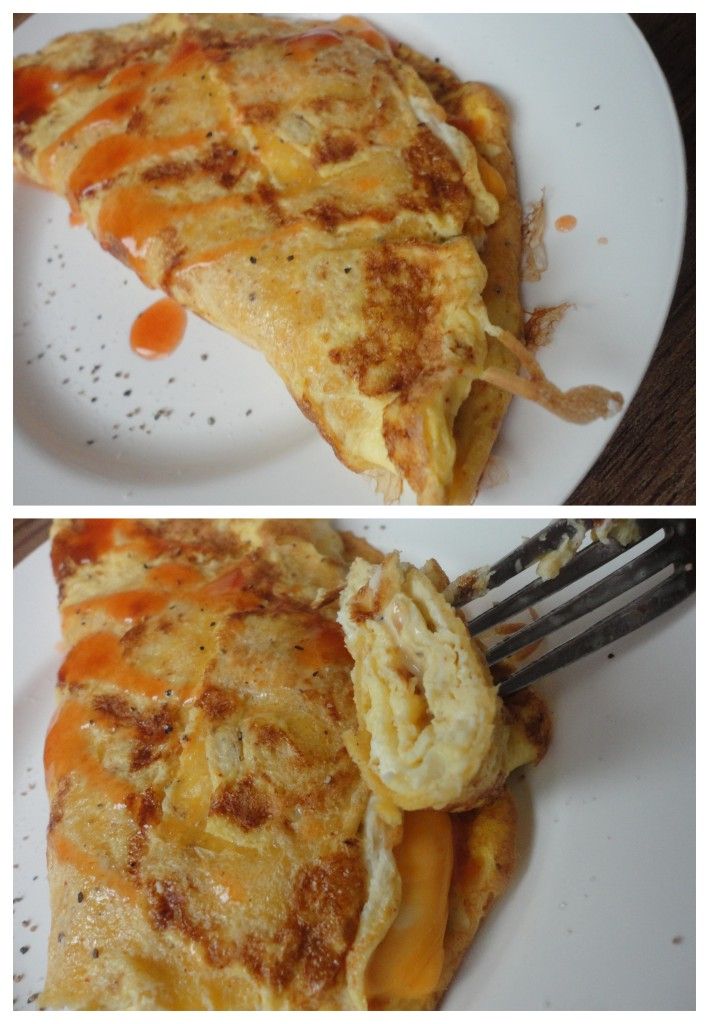
Corn Tortilla Omelet


Photobucket

Sometimes, I want to post a recipe or a recipe idea just because it worked surprisingly well and I want to remember it for future reference not because it's something extraordinary or necessarily special. This is one such 'recipe'. 

Because it's really just an omelet.

Surrounding a corn tortilla and stuffed with cheese.

I whisked my eggs as per usual, poured into a  hot skillet, let it set for a minute or so before setting a corn tortilla on top and working the uncooked egg over the top of the tortilla. Let it set a bit longer, flipped the whole thing over, sprinkled on some cheese, folded it over and let it finish doing it's business.

An incredibly quick and easy weekend brunch for one.

Thursday, May 24, 2012

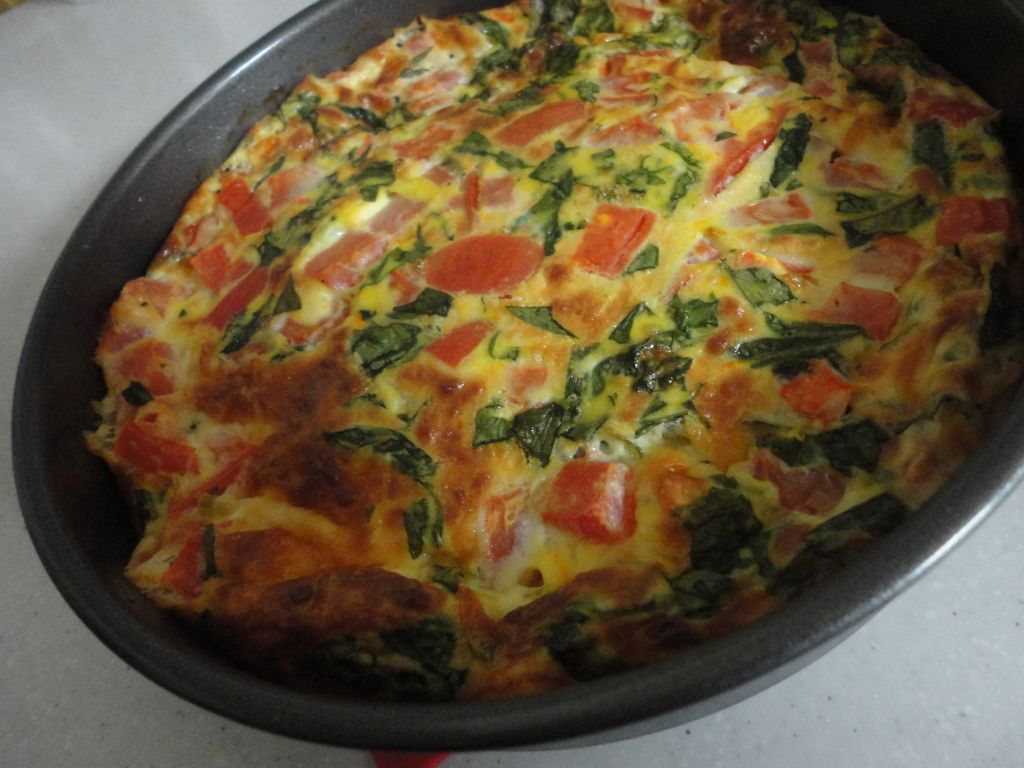
Tomato Basil Crust-less Quiche


Photobucket

We eat a lot of eggs. My recent Spinach and Tomato Crustless Quiche was impressively easy so I decided with a recent gift of fresh basil from a friend whose basil is still in production, I'd be quite happy to make the same dish substituting basil for the spinach. Easy, delicious and easy to re-heat in the morning for a satisfying breakfast!

Ingredients/Direactions

In a large skillet, saute half an Onion and a couple cloves of minced Garlic, add a couple of handfuls or roughly 1 cup of fresh, chopped Basil. Once Spinach is wilted, throw into the bottom of a well greased round cake pan. Top with slices of tomato and a sprinkle on some mozzarella cheese. In a separate bowl, whisk together 6 eggs with 1/4 cup milk or yogurt, season with salt and pepper, pour over Spinach. Top with grated Parmesan and bake at 350F (177C) for 20-30 minutes or until egg mixture is set and top is beginning to brown.


Related Posts Plugin for WordPress, Blogger...