Showing posts with label Yogurt. Show all posts

Wednesday, December 5, 2012

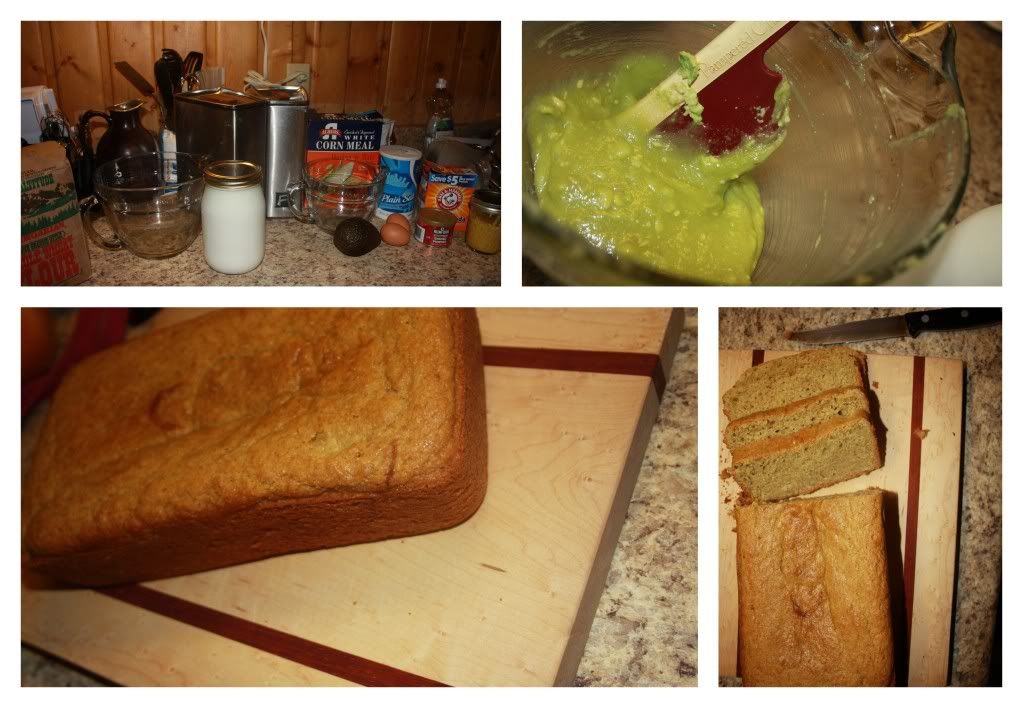
Avocado Bread

Extended Shelf Life: Avocados
Photobucket
The problem, so to speak, with dumpster diving is that you never know what you're going to get, which I've come to love. However, you also never know that you just might end up with a few more avocados even though you just froze a couple dozen.

The not so problematic part of this problem is, since you've done some research on how to use avocados you'll actually be quite happy to discover that the new handful of avocados isn't in quite as bad as shape as the others and doesn't require you to add chocolate to account for color issues.

So now, you get to try a non-chocolate avocado bread, although you never really complained about having Chocolate Avocado Bread in the first place.

Ingredients/Directions:
From Fleur De-Licious

I was so intrigued by the original recipe that I didn't stray from the recipe, and I'm glad I didn't, the combination of white flour, wheat flour and corn meal was really quite amazing!

Preheat oven to 350 Fahrenheit, butter and flour a loaf pan.

In a medium bowl, whisk together 1/4 cup Corn Meal, 1 cup All Purpose Flour, 3/4 cups Wheat Flour, 1 1/2 tsp. Baking Powder, 1/4 tsp. Baking Soda and 1/4 tsp. Salt, set aside.

In a large bowl, "cream" together 2 Ripe Avocados and 1 cup Sugar with a rubber spatula. Add 2/3 cups Vegetable Oil and 2 Eggs and whisk until well combined. Whisk in 1/2 cup Buttermilk of Plain Yogurt as well as 1 tsp. Orange (or Lemon) Zest.

Add dry ingredients to Avocado Mixture until just incorporated. Pour batter into pan and bake for 40-45 minutes until golden brown and a toothpick inserted in the middle comes out clean.

Enjoy for breakfast, snack or dessert!
Monday, December 3, 2012

Blackberry-Orange Biscuit Rolls

Extended Shelf Life for: Blackberries, Orange
Photobucket
Sometimes, brilliant ideas are spawned from a dumpster arrival of blackberries and an orange already on the shelf, waiting to be used. And sometimes, those brilliant ideas are compounded by the fact that one of your favorite, most spectacular friends has a birthday the next day.

So you dream and ponder and before you know it your pulling Blackberry-Orange Biscuits Rolls out of the oven, drizzling them with a fine orange glaze and praising the Lord for creativity, dumpster abundance and birthdays!

Ingredients/Directions:

Preheat oven to 450 Fahrenheit.

In a bowl stir together 2 cups All Purpose Flour, 1 Tbsp. Sugar, 2 tsp. Baking Powder, 1 tsp. Orange Zest, 1/4 tsp. Salt and 1/4 tsp. Baking Soda. Cut in 1/2 cup Butter with a pastry blender until mixture is coarse and crumbly.

Make a well in center dry mix and add 6 oz. of Yogurt and 1 Tbsp. Milk, mix with a fork until just moistened.

Turn dough out onto a lightly floured surface and kneed 10-12 strokes until dough is smooth. Pat or roll dough out to 1/4 - 1/2 inch thick.

In a small bowl, sprinkle a handful or 1/2 cup of Blackberries with Sugar and mash with a fork. Sprinkle with 1-2 tsp. of Cornstarch and mix again.

Spread Blackberry mixture onto biscuit dough. Carefully roll dough as you would for cinnamon rolls.

Carefully slice the biscuit log and create biscuits that about 1/2 inch thick. Place on a lightly greased baking sheet and bake for 10-15 minutes until dough is golden brown.

For the Glaze:

In a small bowl, combine 3/4 cups Powdered Sugar with 1 tsp. Orange Zest and 3-4 tsp. of Orange Juice until you reach glazing consistency.


Sunday, July 22, 2012

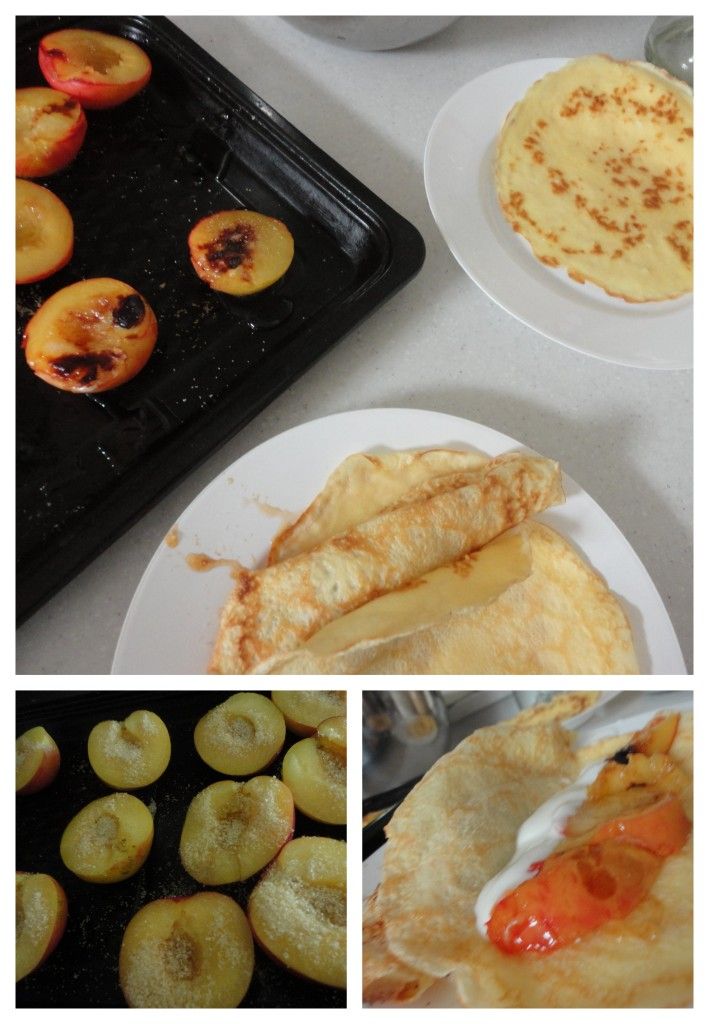
Crepes with Broiled Plums and Home-made Yogurt


Photobucket

I've read through breakfast cookbooks and browsed recipes online and chatted-it-up with friends enough to discover that a grapefruit, topped with a bit of sugar and broiled is something heavenly, delicious and easy. I have yet to have the opportunity to try such a technique with a grapefruit, but having recently been gifted a bag of tart, happy little plums, I figured it was worth a go substituting plums for grapefruits and without fail, they were delectable!

Simply halve your plums, remove the seeds, sprinkle with some brown sugar and place under the broiler for about 10 minutes (I'm not sure my oven's broiler is a legit broiler, so the time may be a bit off) let them cool slightly and enjoy!

I sliced ours up and placed them in crepes with a bit of homemade yogurt, sprinkled some powdered sugar on top and enjoyed a lovely Saturday morning.

Saturday, June 16, 2012

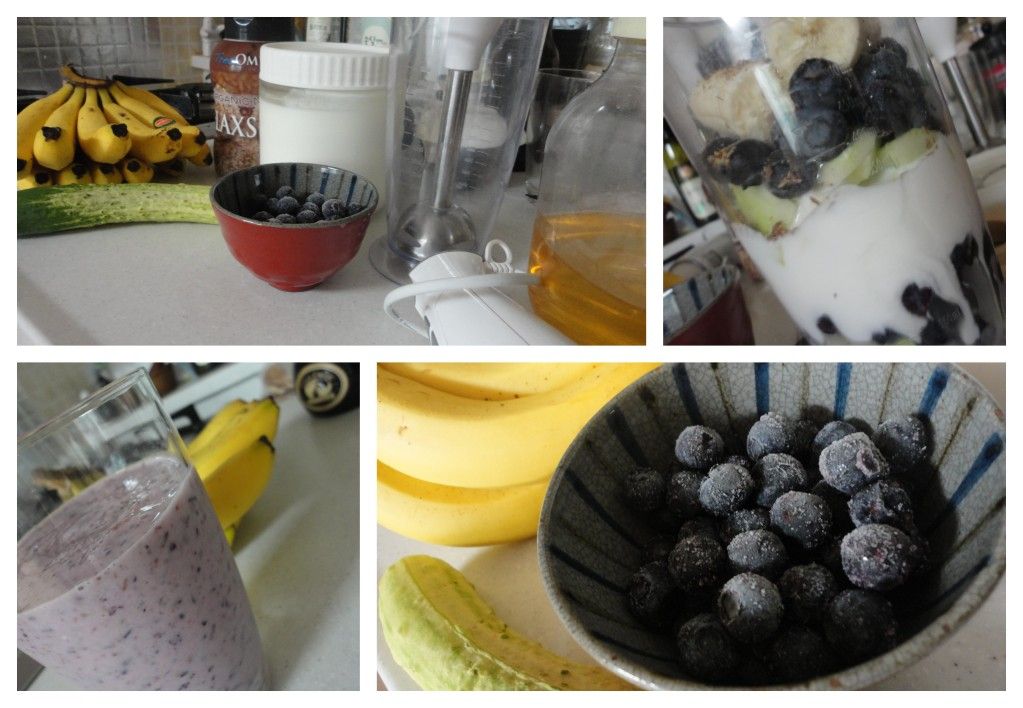
Cucumber-Blueberry Smoothie


Photobucket
This recipe showed up in my email from Vegetarian Times and lead to immediate smoothie creation.

I kept the main theme of Blueberry meets Cucumber but added a couple of bananas, some flax seed and used honey rather than agave nectar. 

Absolutely refreshing and highly, highly recommended!

Sunday, June 10, 2012

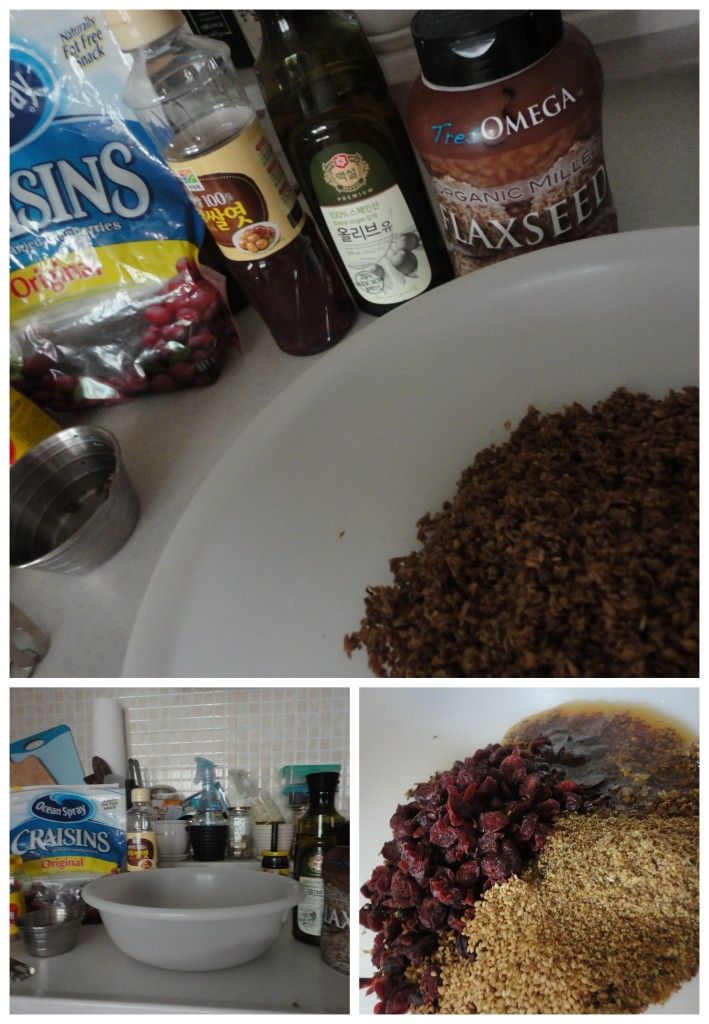
Successful Spent Grain Granola

Months ago, I attempted to make Spent Grain Granola and basically failed. And maybe, just maybe gave up a little.

But a few months later, with entirely too many bags of spent grains taking up my freezer space, it became clear that I was going to have to give it a go.

And, while I still have a lot to learn to make perfect Spent Grain Granola, this batch far exceeded the first!
Photobucket

Ingredients/Directions:
Adapted from Healthy with Heather

Squeeze out excess moisture from 4 cups of Spent Grains. Preheat oven to 350 F (177 C) and line a baking sheet with parchment paper or tin foil. In a large bowl, mix together the grains, 2 Tbsp. Sesame Seeds, 2 Tbsp. Flax-seeds, 1/2 cup Brown Rice Syrup (or honey, or maple syrup) and 1/4 cup Vegetable Oil (or 2 Tbsp. Coconut Oil). Separately, mix together 1/3 cup Wheat Flour, 1/4 tsp. Salt and any seasonings you may like such as cinnamon etc. (not too much, the recipe I referenced originally, called for 3 Tbsp of Cinnamon which I'm finding to be overwhelming). Mix the dry ingredients with the wet and spread out onto a baking sheet. Bake 40-60 minutes stirring every 20 minutes, you want it to stay golden and beautiful, so if it looks like it's getting to dark, stop at the 40 minute mark otherwise keep going! Reduce heat to 275 F (135 C) and bake an additional 20-30 minutes, this is when you want it to dry out, but not really cook any more, stir every 20 minutes. Remove from oven and cool completely before storing in an airtight container in the refrigerator. At the reduced temperature time or after completely baking the granola you can add some craisins or other dried fruit and some nuts if it suits your fancy. However, I added craisins at the beginning of this recipe and ended up with crispy, dark dried cranberries, better to wait it out!

Anyway, that's the most basic spent grain granola and it pairs quite nicely with home-made yogurt if I do say so myself ^^

Thursday, June 7, 2012

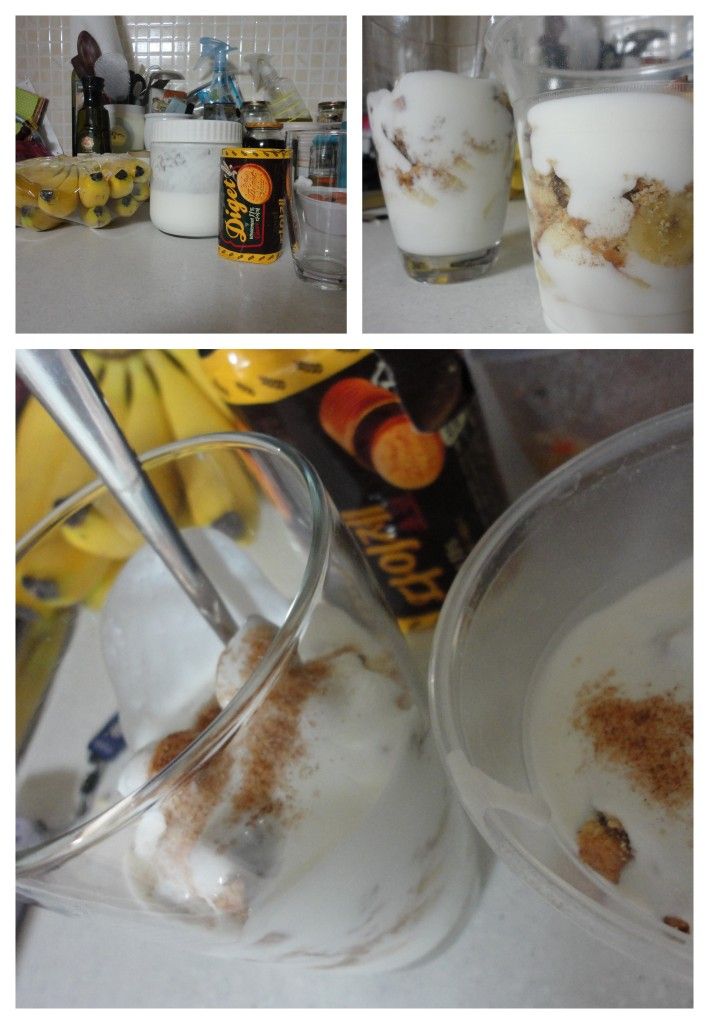
Diget Parfait


Photobucket

Diget's are basically the Korean version of Graham Crackers.

Layered between yogurt and bananas with a sprinkle of cinnamon and sugar, they make for a quick, easy and delicious start to the morning.

Friday, May 11, 2012

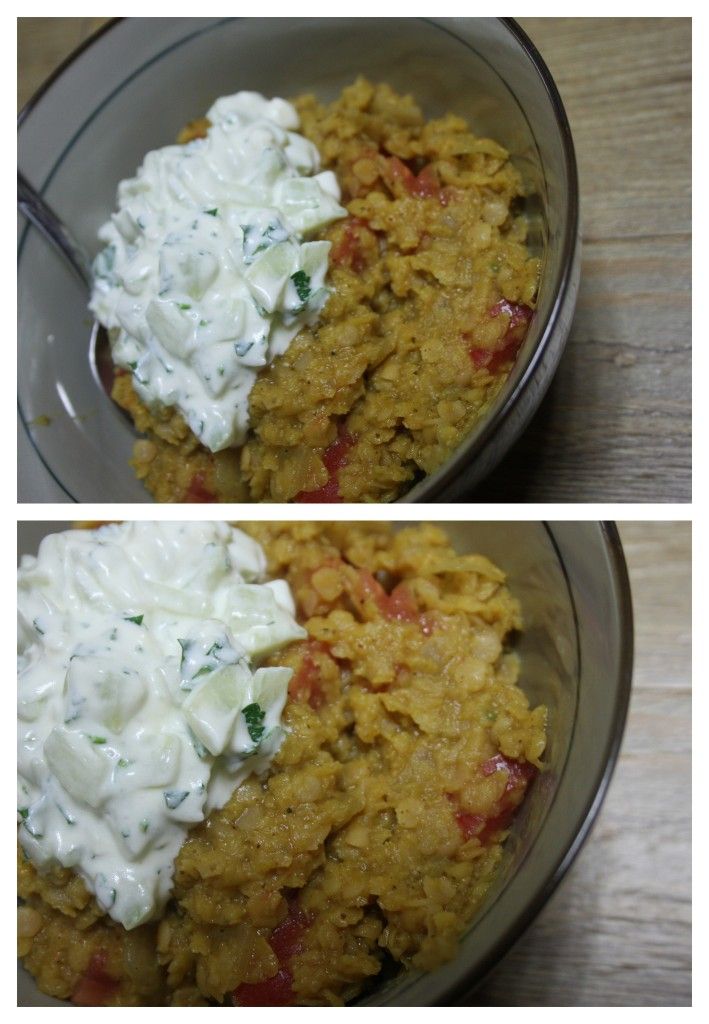
Lentils and Yogurt Sauce


Photobucket
Unfortunately, I wasn't all to impressed with my lentils from this meal, so I'll just say, find yourself a decent lentil or dall recipe and then get to work on this Yogurt Sauce - serve them up together and enjoy! The yogurt sauce (Tzatziki/Tsatsiki) is quite divine!

Ingredients/Directions:

Peel, seed and chop one large cucumber (preferably English), sprinkle with salt and let drain in a large colander for about an hour. Using 1 1/4 cups of Greek or Strained yogurt add 2 Tbsp. Olive Oil, 1 Tbsp. fresh Lemon Juice, black pepper and 2-4 cloves of minced Garlic. Mix well, cover and refrigerate until serving. Before serving, squeeze remaining moisture from cucumbers, add to the yogurt along with freshly torn mint and parsley, mix well to combine. Enjoy on lentils, crackers, pitas, etc.

Sunday, May 6, 2012

Crepe Variations

Photobucket

Having made a batch of crepes (actually a double batch so we could enjoy some crepes throughout the week), it was time to fill them with a variety of delicious things.

We had the standard Nutella with Banana, followed by Peanut Butter, Yogurt and Banana and finally Orange Curd and Banana. I threw some powdered sugar into an empty and thorougly cleaned out spice canister and went to town sprinkling the warm little crepes with sugary good-ness.

What's you favorite way to eat crepes?

Saturday, May 5, 2012

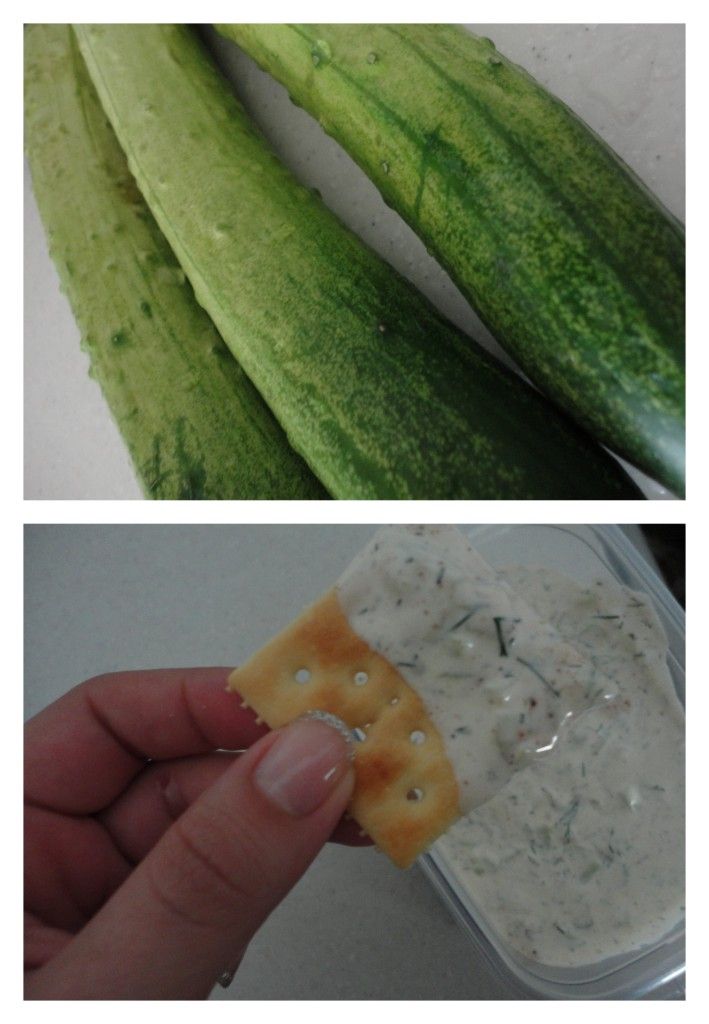
Creamy Dill Cucumber Dip

Photobucket
Derby Days. Cinco de Mayo. Children's Day.

May 5th.

A day for celebration and gathering together under the bridge alongside the river.

I took this dish...not to brag, but it was a favorite among the picnic-ers.

Ingredients/Directions:

Mix together one container softened cream cheese with 3/4 of the same container plain yogurt and 1/4 of the same container mayonaise (you can also do this as a cup, 3/4 cups and 1/4 cup - but I didn't want to creat extra dishes, therefore just used the cream cheese container to 'measure'). Add to this mixture two peeled, seeded and diced cucumbers, 2 Tbsp. chopped Fresh Dill and Salt and Pepper to taste. Enjoy with crackers, chips or vegetables and a good group of friends.

Tuesday, May 1, 2012

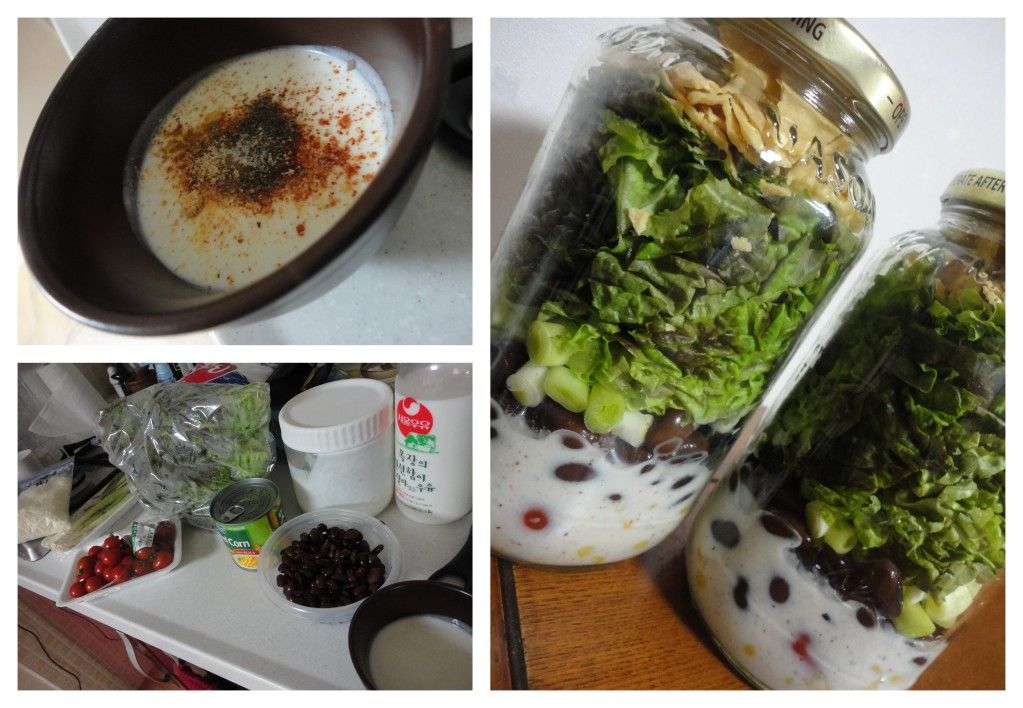
Mason Jar Taco Salad

Photobucket
Mason Jar salads are apparently all the rage on the blogging world...or in the Pinterest world...they are not all the rage in South Korea - but that doesn't mean we haven't heard about them nor that we can't bust out a few ourselves ^^

I try to think ahead. We had some obligations coming up, so I opted to throw together some Mason Jar Salads and see how they worked out. They were quite delicious. I may have needed a bit more dressing, and a bit more space at the top for easier shaking, otherwise - it was a nice dinner and seems like a promising picnic option...time to get into our car and enjoy some road trips!

Ingredients/Directions:

The basics of Mason Jar Salads are to layer up starting with dressing, a hearty set of veggies, cheese and finally lettuce.

For this Taco Salad, I started with a yogurt dressing which I threw together - essentially plain, home-made yogurt with chili powder, cayenne powder, salt, pepper and cumin. (Sour Cream and Salsa would work equally well, if not better for a taco salad). Next, I threw in some corn, followed by tomatoes and black beans. Once those items were layered in, I tore some lettuce into the jar and finally placed some tortilla chip crumbs on the very top. When the dinner hour rolled around, the hubs and I got some exercise shaking our jars and enjoyed some salad (except Mike doesn't really like corn, so he didn't enjoy his as much).

Friday, April 27, 2012

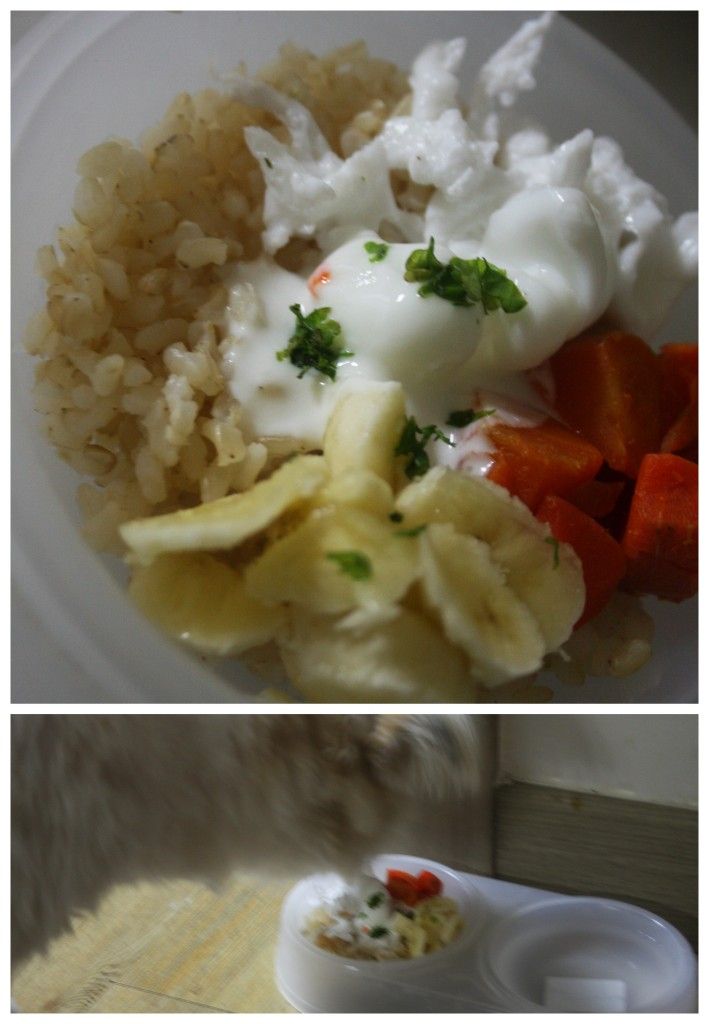
Puppy Rice Bowls

Photobucket
For awhile now, I've been wanting to feed our sweet pup nutritious, real food. She's never been that pumped about her kibble and I can't say I blame her. I'm quite confident one can feed their animals with relative ease and great affordability while all the while making for a much happier and grateful pet-friend.

 You'll find the internet littered with various recipes and ideas, advice for and against feeding your pets 'real' food. As well, everyone suggests that you chat with your veterinarian to make sure your planned feeding schedule meets your pets individual needs.

I started with a number of dog-friendly recipes and ideas and continue to post them on my Pinterest Pinboard For the Lady (because our pup's name is Lady Annyeong). I also made sure to search foods that are safe for dogs and unsafe for dogs before starting on this feeding adventure.

For the past couple of weeks then, I have been serving Lady up a morning and evening bowl of brown rice mixed with boiled carrots, squash and/or pumpkin. I pre-cook these ingredients to last one-to-two weeks. Then, I've been adding a few slices of hard-boiled eggs in the morning, banana on occasion, a bit of yogurt, fresh parsley, flax seed and even blueberries and strawberries on occasion. She's much more eager to eat these days, although she's getting a bit picky about carrots...

Tuesday, April 24, 2012

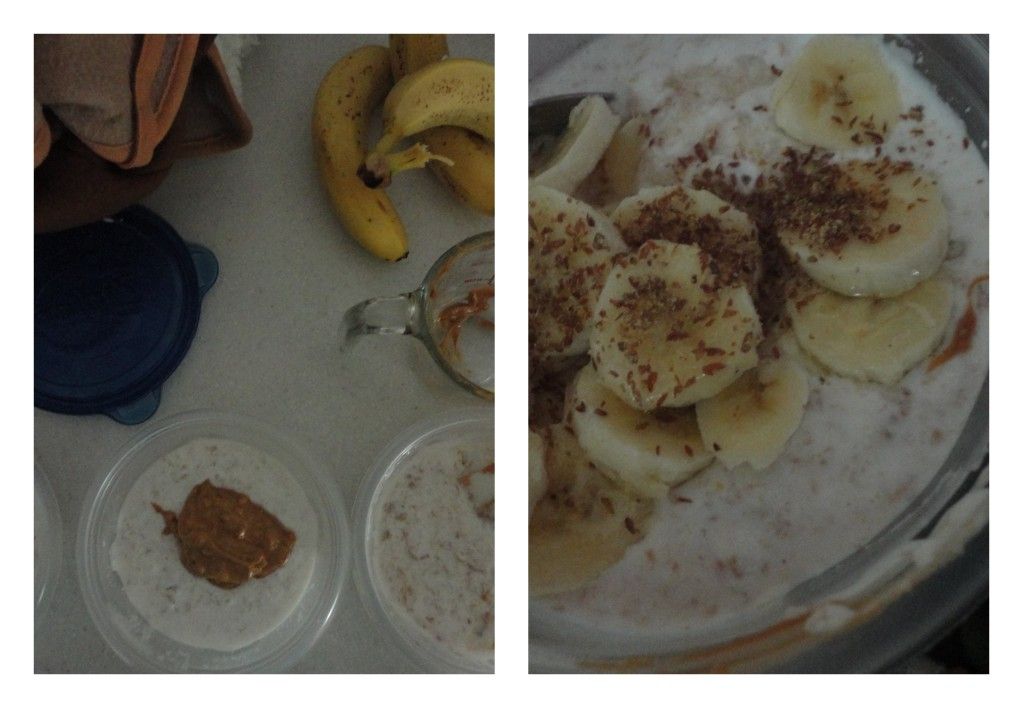
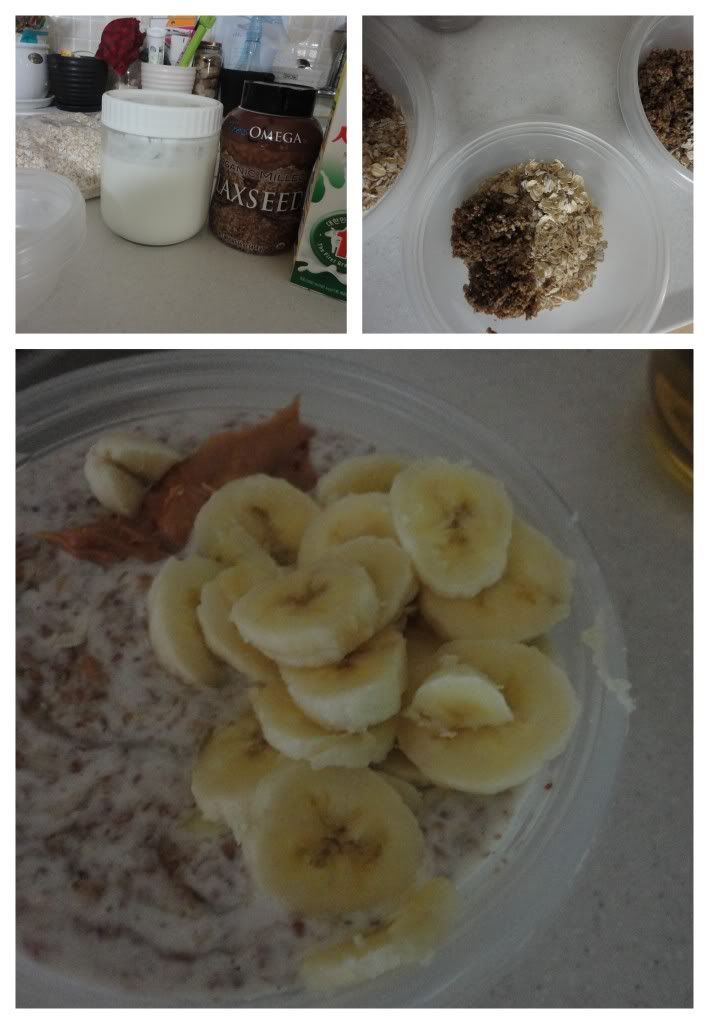
Overnight Oats Variation: Banana, Peanut Butter and Honey

I bet you're thinking of a sandwich right now.

A peanut-buttery, sweet, sticky, honey and banana sandwich.

It'd be delicious. And so would this variation on Overnight Oats.
Photobucket
Overnight Oats + Fresh Bananas + Honey + Slightly melted Peanut Butter.
Sprinkle a little flaxseed on top.

Breakfast perfection.

Monday, April 23, 2012

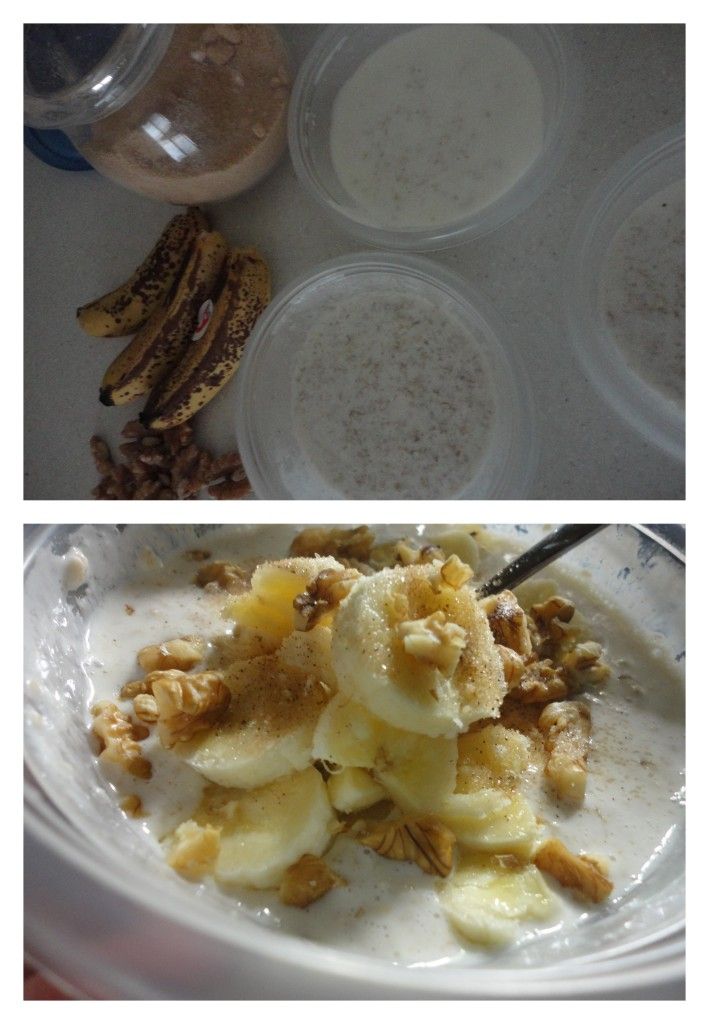
Overnight Oats Variation: Banana Bread Inspired

Photobucket
One of the latest Overnight Oats variations that was hit at the Harrington's breakfast table was a Banana Bread Inspired mix of fresh bananas, walnuts, a shake of brown sugar and shake of cinnamon!

Overnight Oats will never disappoint.

Sunday, April 15, 2012

Tuna and Dill Kimbap

Photobucket
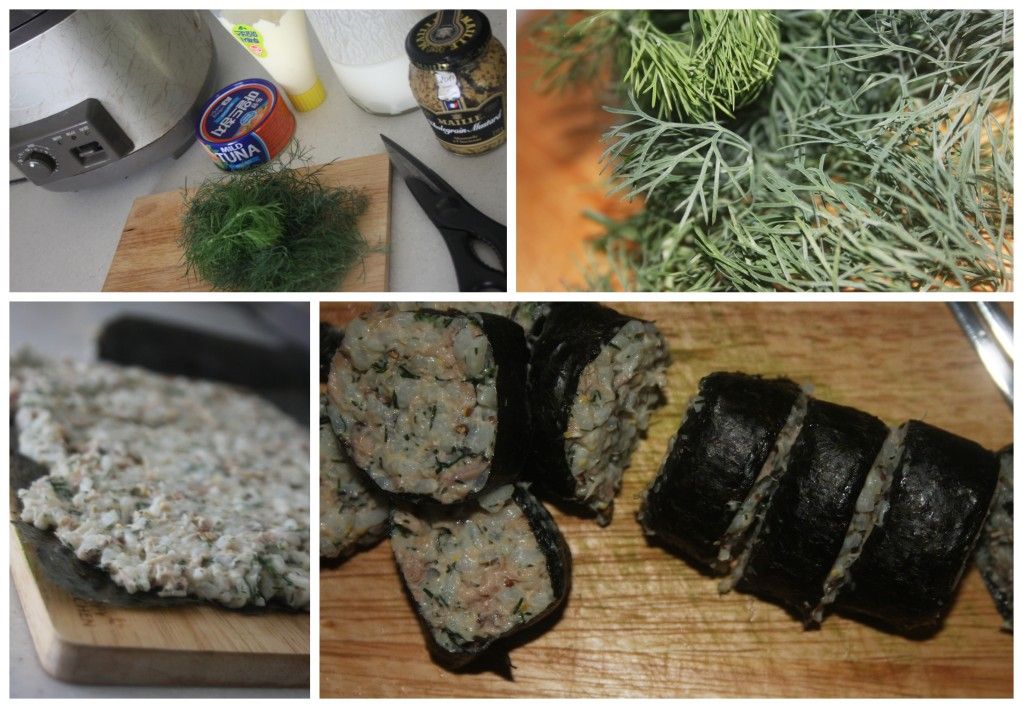
Sometimes, nothing comes together more quickly and easily in my Korean kitchen than a few rolls of Kimbap. This new Kimbap in a Pinch variation is one of my new favorites.

Ingredients/Directions:

Into about a cup of cooked rice mix a large handful of chopped dill, a tablespoon or two of Mustard, 1/4-1/3 cup Plain Yogurt, a couple squirts of Mayonnaise and a tin of Tuna. Split this mixture evenly on 2-4 sheets of seaweed, roll, slice, enjoy!

(All measurements are approximations as I generally just eyeball this type of recipe, if you decide to measure it out exactly, please leave a comment with either your post of the recipe or your measurements!)

Photobucket

Wednesday, April 4, 2012

Home-made Yogurt Tips: South Korea

Photobucket

I've already explained a few things about making your own yogurt and I hope more and more people will attempt it because it incredibly easy and worth the small effort and hours of waiting, because waiting is not that painful. However, I wanted to take a moment to offer a few things I've learned about yogurt making, specific to South Korea.

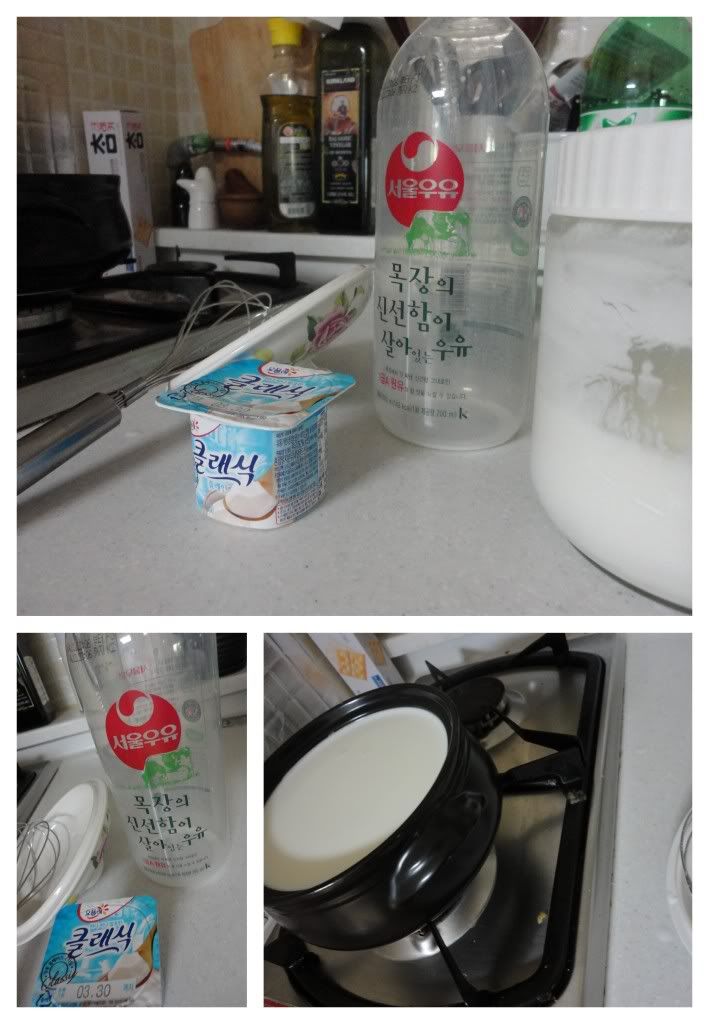
First of all, my favorite way to prepare yogurt now is to use a stone pot (often used for dol-sot bibimbap, kimchi-chigae, etc.) I find these everywhere including the little markets near our home, I'm fairly certain I paid about 12,000 won for mine, so it's worth the investment and can safely be used on the stovetop. From there I just heat a full pot of milk to 110*F (43*C), you can get thermometers here from BakingSchool.co.kr or here from BeerSchool.co.kr

As for milk, I've had the best luck with Seoul Milk in the plastic container - I prefer higher fat content, but that's just preference. And, as for yogurt, I try to choose one that seems to be fresh and plain and have had decent luck, I recently used Yoplait and now just use my own yogurt to start the next batch, but Denmark Yogurt would also work out well.

Once you've heated the milk and added the yogurt to the stonept, simply remove the pot from the stovetop and wrap in a blanket (no need for heating pads or crockpots) and let it set 5-8 hours until it's set and the consistency you desire. No hassle, really. I bought a large glass jar from a Daiso for about 2,000 Won and happily fill it every week or so with fresh, plain, home-made yogurt!

Tuesday, March 27, 2012

Overnight Oats with Spent Grains

Photobucket
If you spend any time at all on Pinterest, sure as anything, you have seen Overnight Oats in adorable Mason Jars being posted all-over the place, and for good reason!

In an attempt to keep up with eating hearty, healthy, filling breakfasts, I decided to jump on the train and am incredibly thankful I did because this is quite possibly one of the easiest breakfasts I've made yet.

Ingredients/Directions:

In a jar or small tuperware bowl, mix together 1/2 cup Rolled Oats, 2 Tbsp. Spent Grains, Sprinkle of Flaxseed, 1/2 cup Plain Yogurt and 2/3 cups milk. Let set overnight (or I've read a minimum of 30 minutes). In the morning serve with your choice of fruits, jams, spices, honey, peanut butter, etc. Make additional jars/bowls per mouth to feed. (Spent grains and flaxseed not required, most basic oats can be made with jut oats, yogurt and milk!)

Saturday, March 17, 2012

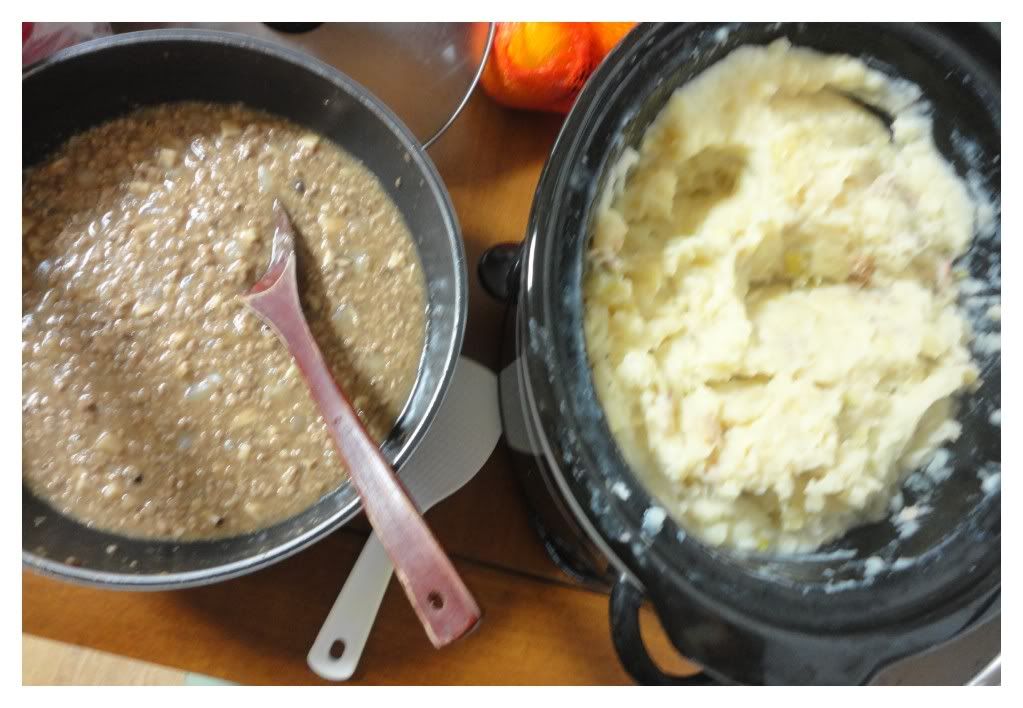
Colcannon and Guinness Sausage Gravy

Photobucket
Closet Cooking lead to the majority of my St. Patrick's day cooking inspiration. Following Sour Cream Banana Bread (which was intended to hold me over while preparing this Colcannon and Gravy before our Iron Chef: Guinness St. Pat's Party) I took a look at his recipe for Bangers and Colcannon with Guinness Onion Gravy before making some adjustments and creating a pork gravy to accompany the colcannon since Bangers are not readily or affordably available in South Korea.

Photobucket
Colcannon - Ingredients/Directions:
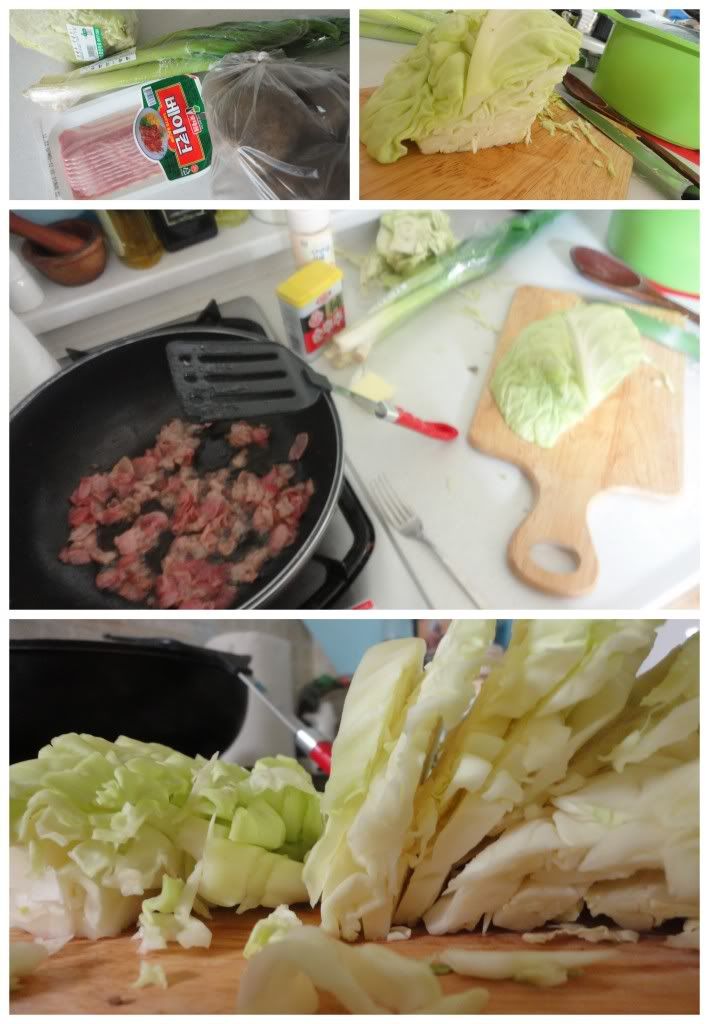
Boil a large pot of peeled and cubed Potatoes (I used 8-10 small-medium potatoes) until fork tender. Meanwhile, in a skillet cook 1 small package of Bacon or 4-5 slices until the fat is rendered. Season the bacon with salt and pepper and add 1 Tbsp. of Butter until the butter and bacon fat is foamy. Add 1/4 of head of cabbage that has been thinly sliced and coat in the greasy goodness. Cook until cabbage is tender, about 10 minutes. Add 4 sliced Green Onions and cook about 3 minutes before setting aside until potatoes have finished cooking and you have added sour cream, milk and butter to taste. Then mix the cabbage and the potatoes together, serve with gravy. (If you're waiting for guests, it's possible to keep this mixture warm in a slow-cooker.)

Photobucket
Pork Guinness Gravy - Ingredients/Directions:

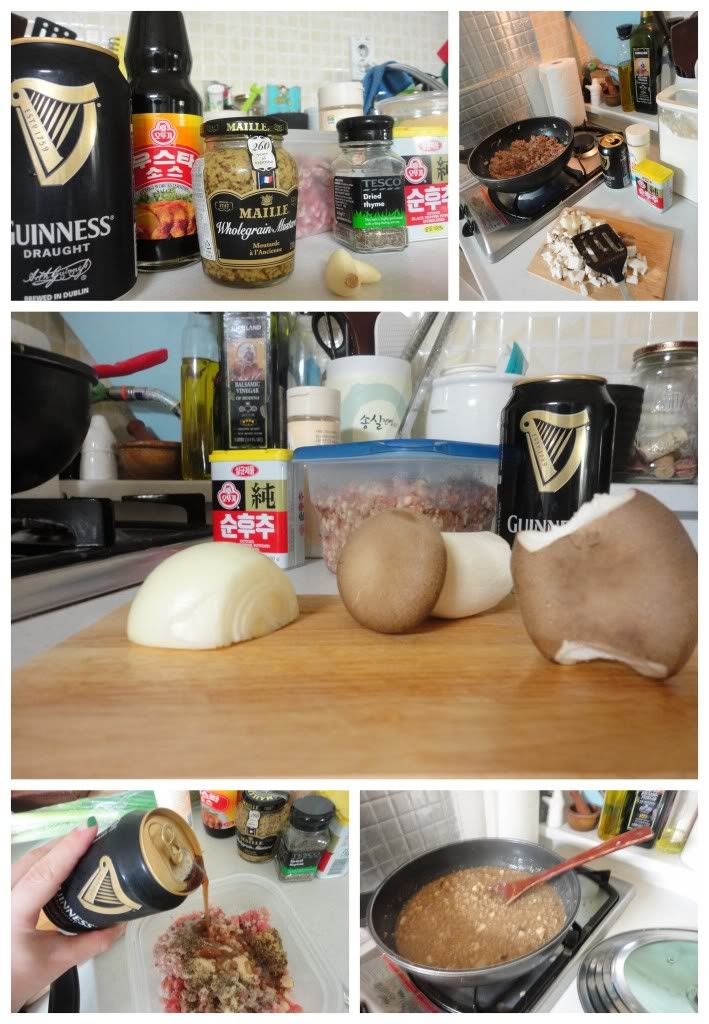
Begin by marinating ground pork in 1/2 can of Guinness, 3 minced cloves of Garlic, 1 tsp. Thyme, 2 Tbsp. grainy brown mustard, 1 Tbsp. Worcestershire sauce, salt and pepper. I let it marinate for one or two hours before browning in a skillet. Once the ground pork has cooked thoroughly add 1 chopped Onion and 1 cup chopped Mushroom, saute.  Now remove the meat and veggies from the pan, leaving the drippings in order to create a savory gravy. To pan drippings, add the remainder of the can of Guinness and sprinkle in two Tbsp. Flour. Quickly whisk together the beer and flour while on medium-low heat. Depending on the amount of gravy you desire, continue to add Guinness (or water) and flour until you have the perfect consistency, reintroduce the meat and veggie mix stirring together and ensuring the gravy consistency is as you would desire.

Thursday, March 15, 2012

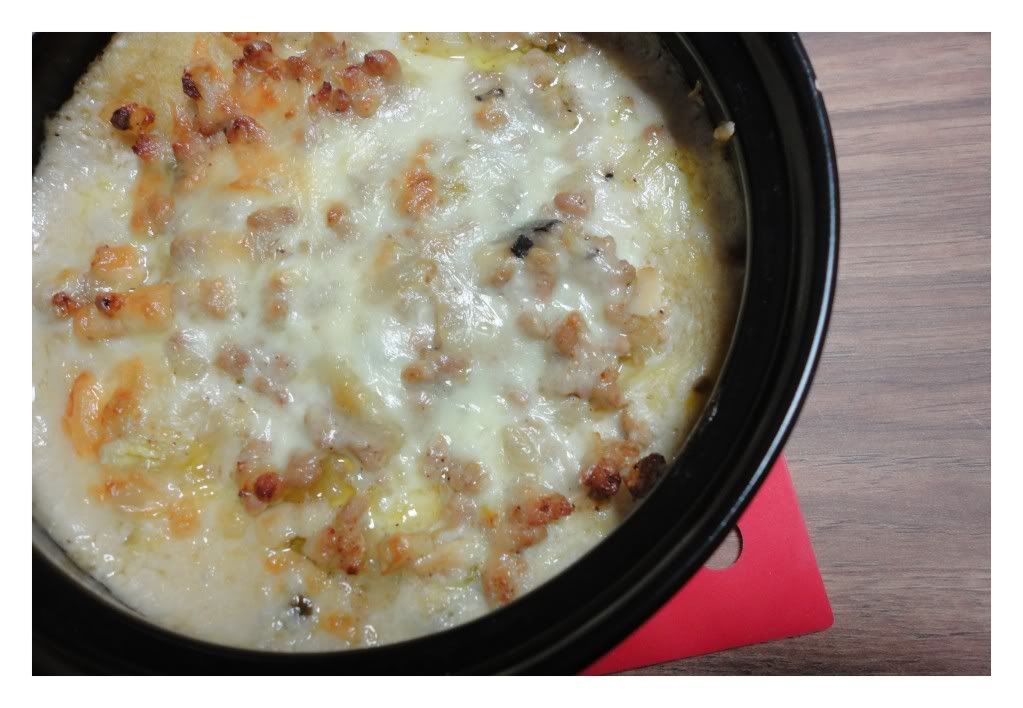
Chilie Sour Cream Pork Layer Enchiladas

Photobucket

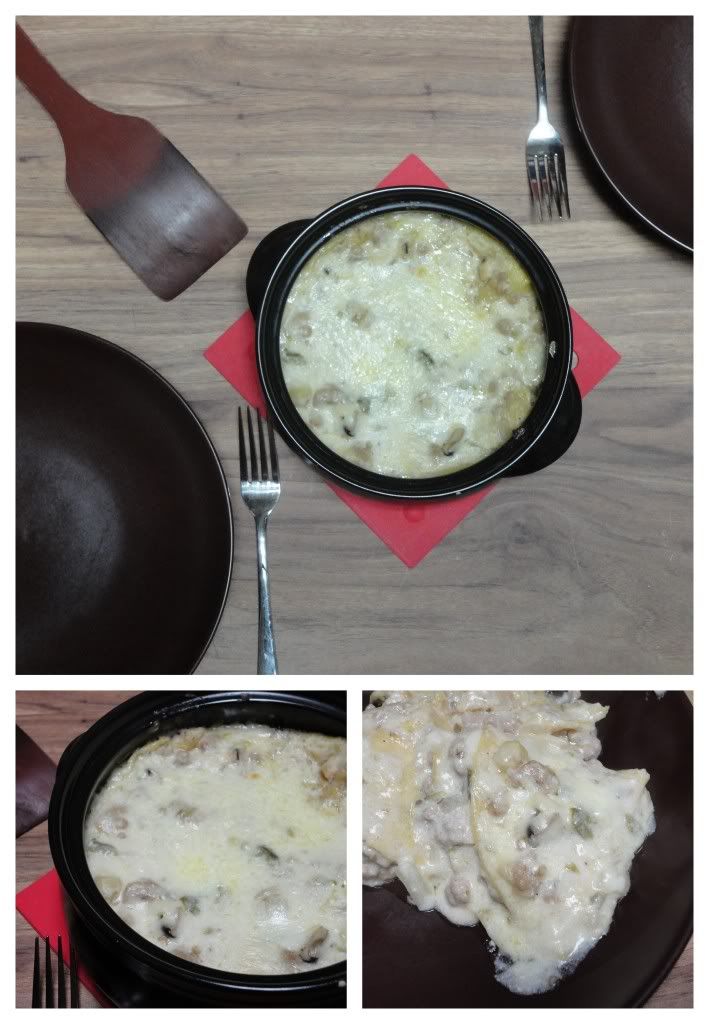
This was delicious. So much so, we ate it two nights in a row. So much so, that the man and the Lady (annyeong) licked the plates clean.

I recently made yogurt. Two jars were exactly what I wanted my yogurt to be. Three jars were a little more sour and thick than I had intended, a little like sour cream, so I decided. Therefore, I searched for recipes that used sour cream and substituted my home-made sour-creamish yogurt.
Photobucket

There's a lot of parts to enchiladas. Don't fret. Just breath and take your time, the efforts quite worth it!

Ingredients/Directions:

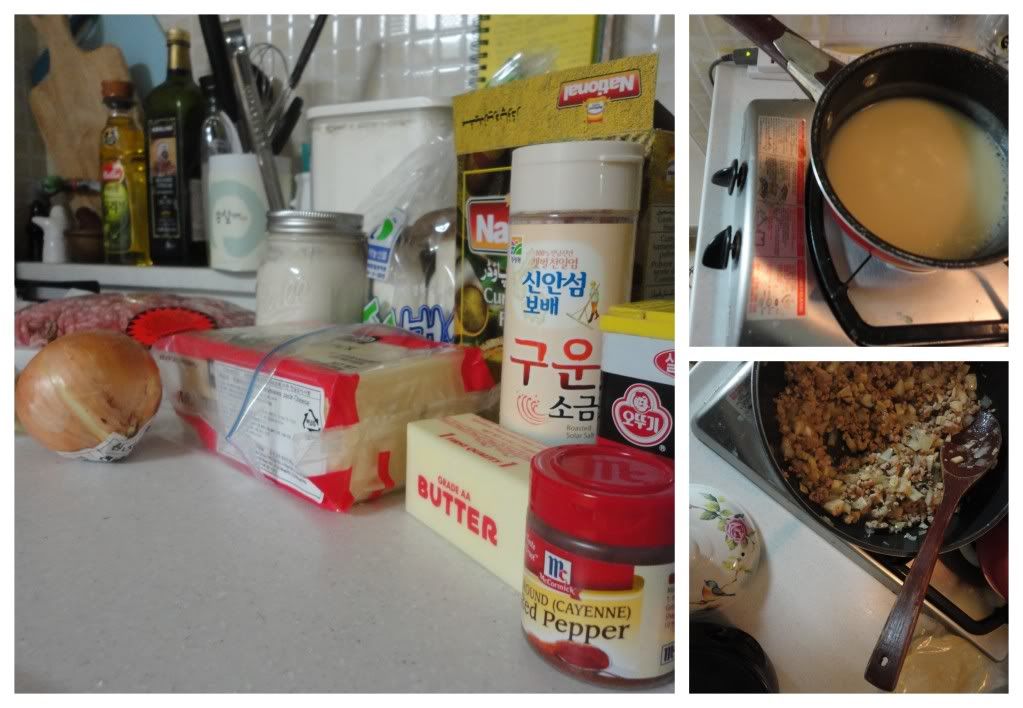
I began with the sauce which came together by melting 1/4 cup Butter in a small saucepan and then adding 1/4 cup Flour and stirring about 5 minutes to make a roux. (The author of my recipe inspiration states the key to roux is working the flour-butter mixture until  the flour smell resides). Slowly whisk in 1 1/2 cups Chicken Broth before reducing the heat and whisk in 1 1/2 cups Sour Cream. Once sauce is well mixed, add diced green chilies from a can or fresh diced green chilies, salt and pepper all to taste.

With the sauce complete, move on to the meat filling. For this, I simply diced up one Onion, minced 2-3 Garlic cloves and sauteed them before adding a small package of ground pork and cooking it through.

Photobucket
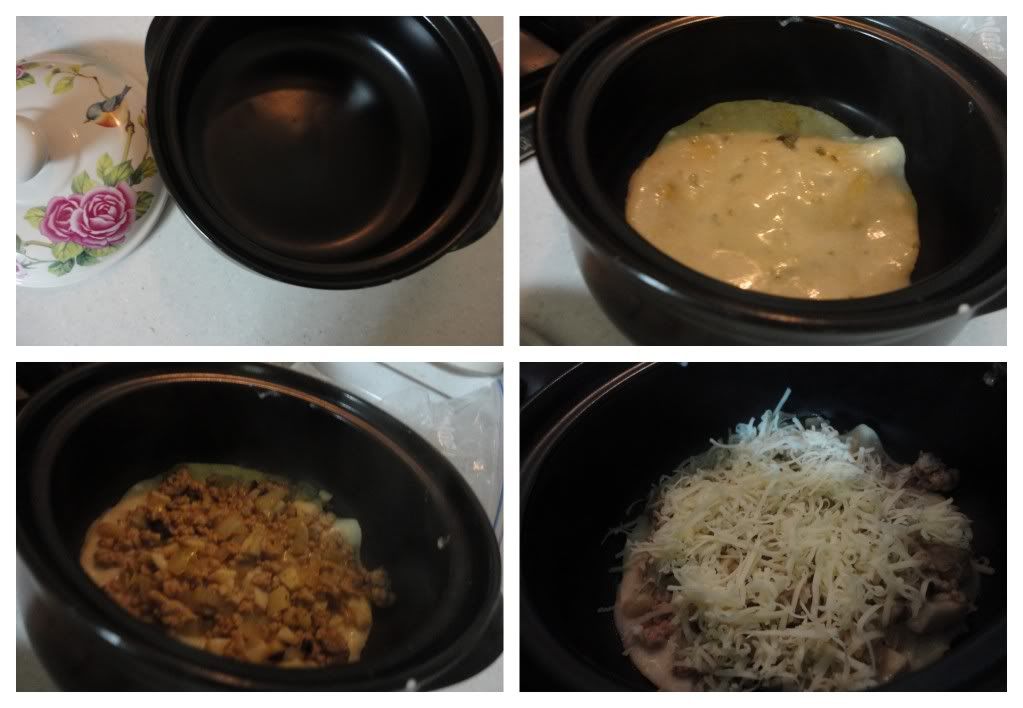
Now, it's time for assembly. You can do the whole wrapped enchilada concept which will likely look more lovely, however, in an itty-bitty oven I've found the layered, casserole style dish is a much better option. For this, I just dip a corn tortilla in the cream sauce, place in the bottom of a small round casserole dish, sprinkle with pork filling and shredded Monterrey jack cheese until the dish is filled. Pop the dish in the oven at 350*F (177*C) and bake for 15 minutes with a cover and 5 minutes uncovered until golden and bubbly. Enjoy!


Photobucket

Monday, March 12, 2012

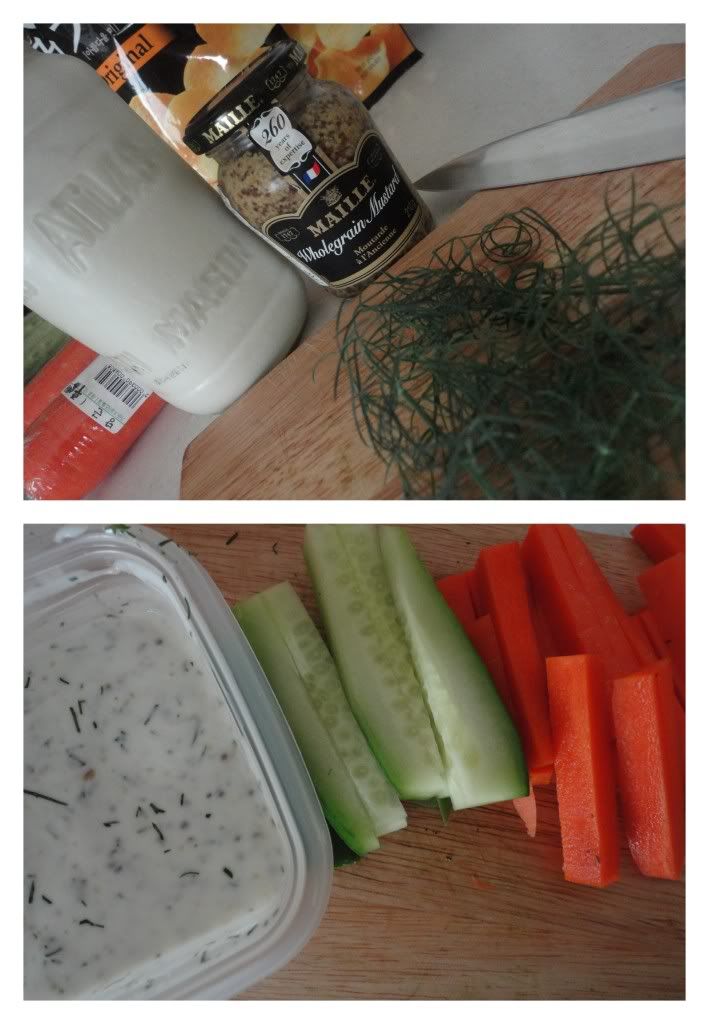
Mustard and Fresh Dill Dip

Photobucket
I love, LOVE having fresh herbs. I think my life will never be the same. They are a) delicious and b) inspiring. As in, to make the most of them I need to constantly be thinking or searching for something new and delicious to make.

Working from this post by My Man's Belly I quickly had a delightful afternoon snack.

Ingredients/Directions:

Mix 1 cup yogurt with 1-2 Tbsp. whole grain (or high quality) mustard and 2 Tbsp. fresh chopped dill, season with salt and pepper. Enjoy with chips, carrots, cucumbers or other veggies of your choice.

Sunday, March 11, 2012

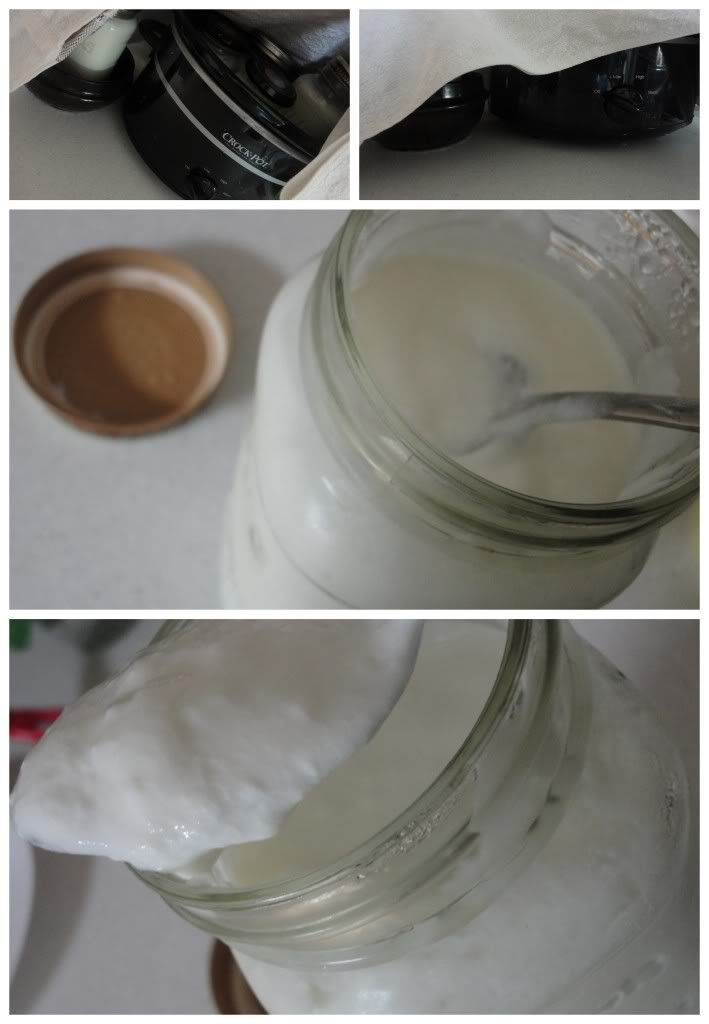
Home-made Yogurt

Photobucket
Home-made yogurt is...easy. and delicious.

But, don't let easy convince you it doesn't take a lot of time. Because, in fact, it's a lengthy process of waiting. But it's easy. You can do laundry, walk your dog, read a book, clean the bathroom, visit with neighbors, drink coffee and even take a nap or go to bed during the process. So it's easy. But lengthy.

I started with this recipe pinned by a friend of mine from Neo-Homesteading

This involves 3 steps...

First, heat 8 cups (1/2 gallon) of milk on the stove-top until the temperature reads 110*F (~43*C). When the milk reaches the required temperature add 2 Tbsp. - 1/2 cup of live, culture yogurt. Living in South Korea, I can't read the labels well enough to know if there is life in my yogurt, so I grabbed one that said Natural and translated as 'Fresh Cream Plain' flavor - it was sweeter than I anticipated, but worked perfectly and didn't cause my own yogurt to be sweet.

Second, transfer hot milk and yogurt mixture into sterilized glass jars. I don't think I really sterilized my jars, just boiled some water in the electric kettle, swished it a round and then dumped it out before adding the milk/yogurt mixture.

Third, incubate. Now is the lengthy part where you manuever a way to maintain the temperature of 110* for the next 8-24 hours. I used the crock-pot which involved me turning it on to low to preheat and then turning it on again for 5 minutes every hour to maintain the temperature and keeping it covered with a towel. Here is an extensive and complete post about other incubating methods.

Once it solidifies, you can let it cool a bit before placing in the fridge and get stoked to enjoy it for breakfasts and snacks.

Now, a few notes:

  • I found a blogger who did the whole process in her crock-pot, check it out, I might try it, but I'm not sure.
  • A lot of posts I've seen mentioned the yogurt didn't seem to set quite right or thicken up nicely. There's all kinds of suggestions, add more yogurt in the beginning, add gelatin, etc. I don't know why mine was as thick as it was...but it was.
  • Another blogger (crock-pot master from above) strained her yogurt to have a thick yogurt and the byproduct of whey. I've used whey in the past from Mike's cheese making - it's GREAT for animals and a great substitute in any bread recipe which calls for milk. I've also read of people freezing it as ice cubes and using it in smoothies to boost the nutrition level.
  • Two of my jars took less than 24 hours to thicken (I went to sleep thinking I had failed at yogurt making to wake up to 2 beautiful jars of perfect yogurt!) The other three took longer...not sure why and are a bit more like sour cream than yogurt, which is fine for me now...I think, but I'm a bit nervous that I just made extremely rotten milk @_@

Either way, rotten milk or not, home-made yogurt was far easier than I imagined it to be and I'm really looking forward to keeping it on hand!

For tips on making yogurt in South Korea and for some general lessons I've since learned, check out this update!
Related Posts Plugin for WordPress, Blogger...