Showing posts with label Bread. Show all posts

Thursday, February 11, 2016

Popovers: from the Kitchen of Patty

I’ve had a popover pan for years. Literally years.


I received the pan as a gift from one of our favorite people after he’d spent a summer “nannying” his niece and nephew on the East Coast. They’d made a trip to Acadia National Park where they supposedly serve world-famous popovers - or at least make some extra cash selling popover pans as the perfect souvenir. Of course, I LOVED the gift (if I recall, this particular friend also brought some high-quality, uber crafty beer, a gift we were pleased to receive, yet an area of indulgence we’d yet to foster - a foreshadow of beer love to come I suppose). I was certain I’d be busting out the best popovers in a matter of weeks.


However, as time often does, time for my goals/plans/desires eluded me. I found a home for the pan, read over the attached recipe and then forgot all about them or relegated them to the “some-day” pile.


Before “some-day” arrived, life was calling us overseas, implying that many of our beloved belongings were to be boxed up, stored and saved for another, yet undetermined life. Fast forward through the Korea years and the settling into business owning life as a Burlington-ites, where this ever-present popover pan sits in my awkward pantry, reminding me of the things I once planned to conquer in the culinary world.


A little pantry re-organizing brought the Popover pan back to the forefront of my mind and soon the Popover pan weaseled it’s way into the Culinary Goals of year 2016.


I did a bit of Pinterest searching and read up on Popovers. But THEN, I was on the hunt for a recipe box recipe to prepare in January and came across of recipe for Popovers from the kitchen of my dear mother-in-law. I eventually learned that Mike would frequently request Popovers as a reward for good grades, important moments, etc. Thus, with great anticipation I set about preparing the Popovers of Mike’s youth.


Fortunately, I’d read up on enough recipes to realize that the recipe, as recorded on the recipe card I had on hand, was short on ingredients and could surely not produce the fluffy, airy, custard-y cup I desired. I compared the recipe card to the recipe from Better Homes and Gardens and quickly realized the missing ingredient was milk, an easy add-in and an easy enough ingredient to add to the recipe card. With ingredients and motivation confirmed, I set about making popovers for the first time.


The results were simply perfect. Served hot with melty butter, boysenberry jam and hard chai lattes I understood completely the perks and allure of this simple breakfast item and will not hesitate to throw a batch of these together on future brunch occasions.


Ingredients:


2 Eggs

1 C. Flour

1 C. Milk

½ tsp. Salt

1 Tbsp. Oil


Directions:


Preheat oven to 450* F. Generally grease a popover pan or 8-tins of a muffin pan. Beat eggs slightly - add in flour, milk, salt and oil. Fill cups ¾ full and bake for 20 minutes, decrease the oven temperature to 350* F and bake an additional 20 minutes until the custard pops over the tin. Serve warm with butter, jam and/or honey (or plain, because they are simply delicious no matter what!)


Wednesday, February 10, 2016

White Chocolate Lemon Scones

I always schedule doctor appointments on Tuesdays. Even if I could work half a day, I enjoy the opportunity of lounging around my house and pretending it’s a weekend. So, when I had a late, Tuesday afternoon eye appointment, I figured it was the perfect opportunity to pretend like it was a Saturday. I woke up early enough to indulge in coffee and the joy of baking with fresh lemon juice and zest.

Side note: since living in Laramie and attending the Farmer’s Market there every late spring and summer, I grew a strong affinity for the combination of Lemon and White Chocolate, particularly in bread (if I can throw in a bit of mint, all the better!). One of my favorite indulgences of the Farmer's Market and an eating experience that made my heart do a double heel click was an Artisan Loaf of bread studded with white chocolate chunks, lemon zest and fresh mint. Bread, to me, is the body of Jesus, and White Chocolate Mint bread is nothing short of heavenly.

Thus, when the opportunity to combine these flavors presents itself, I answer with enthusiasm and anticipate the joy that will soon be mine and that of my tastebuds.

My only regret in putting these scones together was the lack of fresh mint I had on hand (I’d recently trimmed off some dead leaves and was awaiting regrowth from my window sill “garden”) Thus, I shall have to schedule yet another doctor's appointment so that I can pack these already delicious morsels with even more delicious goodness.

Recipe adapted from: Ashlee Marie

Ingredients:

4 ½ C. Flour

⅔ C. Sugar

2 Tbsp. Baking Powder

1 tsp. Salt

Finely grated zest of 2 Lemons (I LOVE using my Pampered Chef Microplane for this!)

6 Tbsp cold Butter, cut into ¼ inch pieces

1 ½ C. Heavy Cream

1 Egg Yolk, beaten slightly

10 Tbsp freshly squeezed Lemon Juice

Directions:

Preheat oven to 400* F. Sift/Mix together Flour, Sugar, Baking Powder and Salt in a large mixing bowl. Add the Lemon Zest and mix again. Cut in the Butter until mix resembles fine crumbs. Pour in cream, yolk and lemon juice; blend together until the dough holds together. Place the dough on a lightly floured surface, knead gently three-to-four times. Create four equal sized balls. Flatten each ball into a disk about ¾ inches thick, then cut into 6 wedges (24 scones in total). Bake in the center of the oven until golden brown, fluffy and delicious, about 16-18 minutes. Enjoy!


Thursday, February 14, 2013

Apple and Brie Toasts

Photobucket

One of our all time favorite food combinations is Apples + Brie.

Occassionally, we'll buy a round of brie, dice up some apples, sprinkle the apples with cinnamon and nutmeg, surround the brie by the seasoned apples - bake and dig in with a baguette.

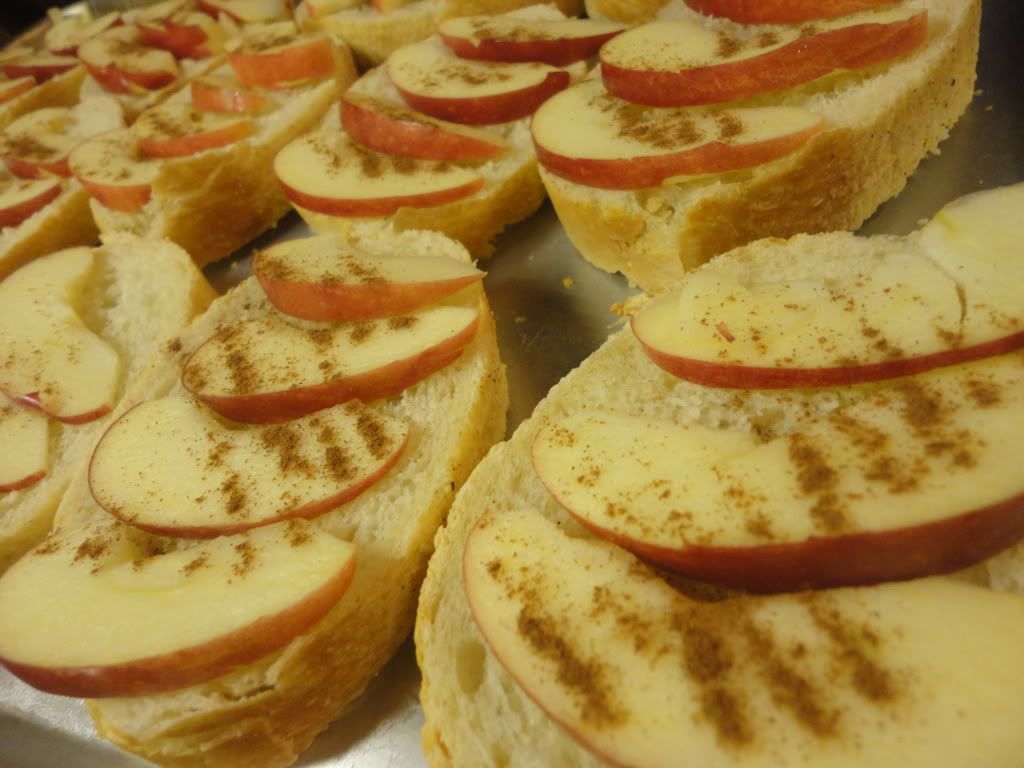
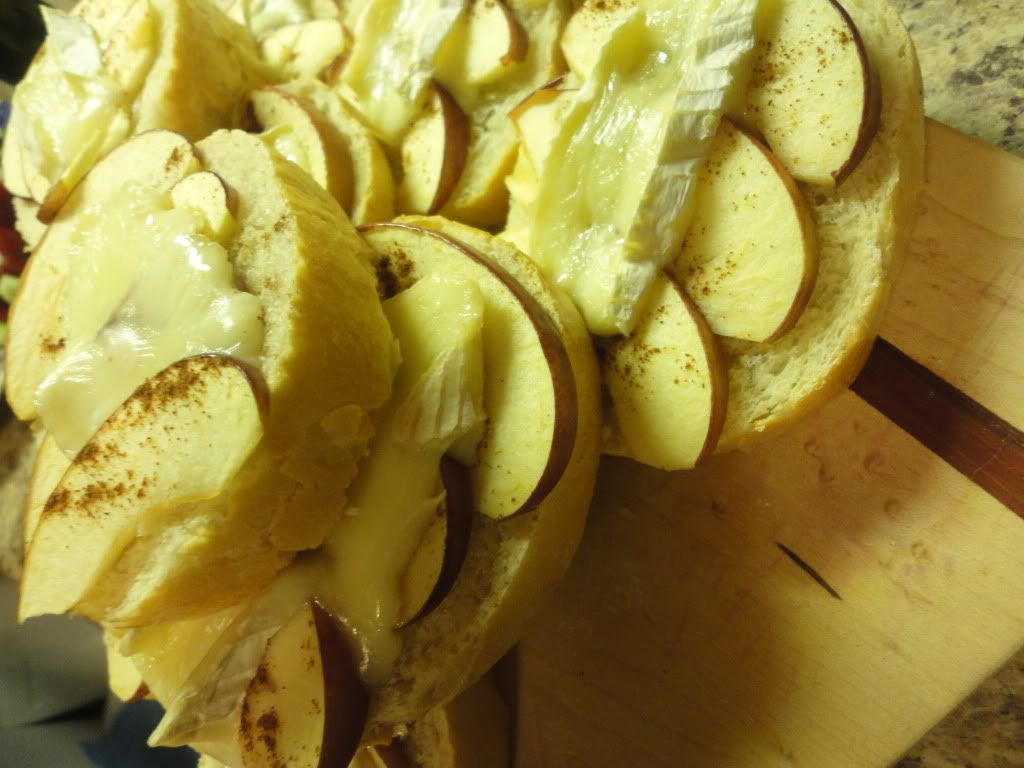
Want something that required an ounce less chopping but held the same flavors - we put this together for annual "Valentine's Dinner Cooking Extravaganza".

Photobucket

Sliced bread.
Topped with sliced apples.
Sprinkled with Cinnamon.
Topped with sliced brie.
Baked for 10-ish minutes until cheese is melty.

Easy Peasy and Absolutely delicious!

Wednesday, January 23, 2013

Bacon Fat Tortillas

Extended Shelf Life for: Bacon Fat
Photobucket
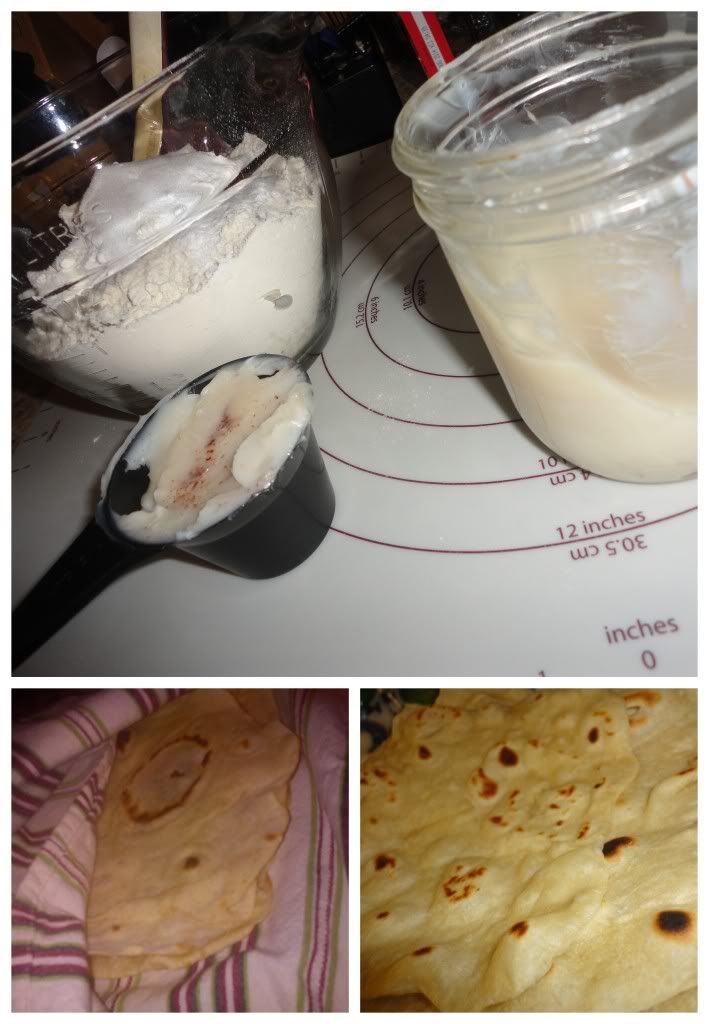
When the Bacon Delivery-Man had the misfortune of dumping his good near Laramie and the towns people enjoyed the gift of free bacon, I decided it was 100% necessary to look into saving bacon fat and what possibilities may be had.

There were many recommendations to use the delicious fat to fry up eggs, add flavor to beans and grease various pans depending on the dish.

Knowing that the best tortillas are in fact made with lard, I opted to throw some of my refrigerated bacon grease into a double batch of tortillas and quite satisfied with the results!

Ingredients/Directions:
From The Joy of Cooking

This recipe is for a single batch, although I doubled my batch with no problems.

Mix together 2 cups Flour, 1 tsp. Baking Powder, 1 tsp. Salt, 1/4 cup Bacon Fat and 3/4 cups Hot Water. Knead (or mix with dough hook) until  dough is smooth. Divide dough into 8 equal parts, let set for 20 minutes, covered.

Roll out each dough ball into a 6-8 inch tortilla.

Heat a large non-stick or cast-iron skillet over medium heat. Cook about 30 seconds on the first side, 15 seconds on second side until bubbly, browned and delicious looking! Enjoy as is or with your favorite filling.

Sunday, January 20, 2013

Blackberry Coffee Cake

Extended Shelf Life for: Blackberries
Photobucket
 We're still flying high on the recent salvaging of blackberries and every time I pull out a bag from the freezer, my heart rejoices and my taste buds wait in anticipation.

While I love berry dishes and cooking berry filled pies, cobblers or smoothies, we don't often spend money on fresh berries...because, well, we don't often spend money on any fresh produce :)

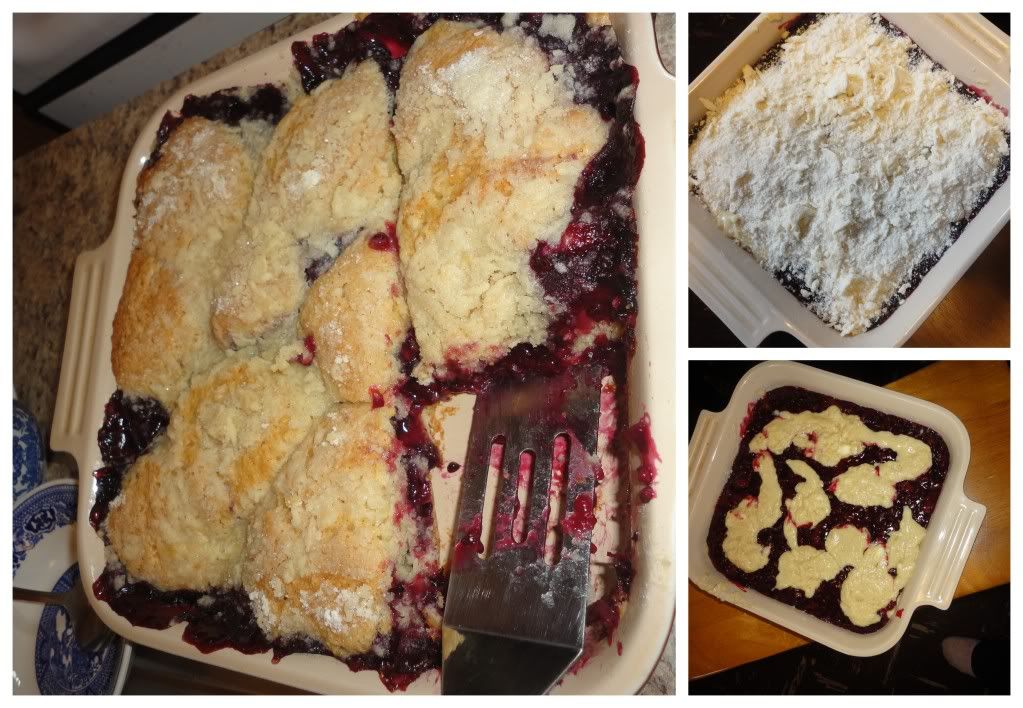
But berries only come around so often and when they do, it truly is a treat, so waking up a few mornings to enjoy this Blackberry Coffee Cake has definitely put me on cloud nine!

Ingredients/Directions:
From Better Homes and Gardens Cookbook

In a medium saucepan combine 1 1/2-2 cups fresh or frozen Blackberries and 1/4 cup Water. Bring to a boil, reduce heat and simmer about 5 minutes until fruit is tender. Combine 1/4 cup Sugar and 2 Tbsp. Cornstarch and stir into fruit. Cook and stir over medium heat until mixture is thickened and bubbly. Cook and stir an additional 2 minutes, then set aside.

Preheat oven to 350 F. In a medium bowl combine 1 1/2 cups flour, 3/4 cups Sugar, 1/2 tsp. Baking Powder and 1/4 tsp. Baking Soda. Cut in 1/4 cup Butter until mixture is coarse. Make a well in the center, set aside.

In a small bowl combine 1 beaten Egg, 1/2 cup Buttermilk and 1/2 tsp. Vanilla. Add this mixture, all at once, to the flour mixture. Stir until just moistened, batter should be lumpy.

Spread half of the batter in an un-greased square baking pan. Spread fruit filling on top and drop remaining batter in small mounds on top of fruit filling.

In another small bowl, stir together 1/4 cup Flour and 1/4 Cup Sugar. Cut in 2 Tbsp. Butter until misture is coarse, sprinkle over coffee cake.

Bake for 40-45 minutes until golden. Cool slightly, serve warm.

Wednesday, January 9, 2013

Banana Sandwich Loaf: for the Bread Machine

Extended Shelf Life for: Bananas

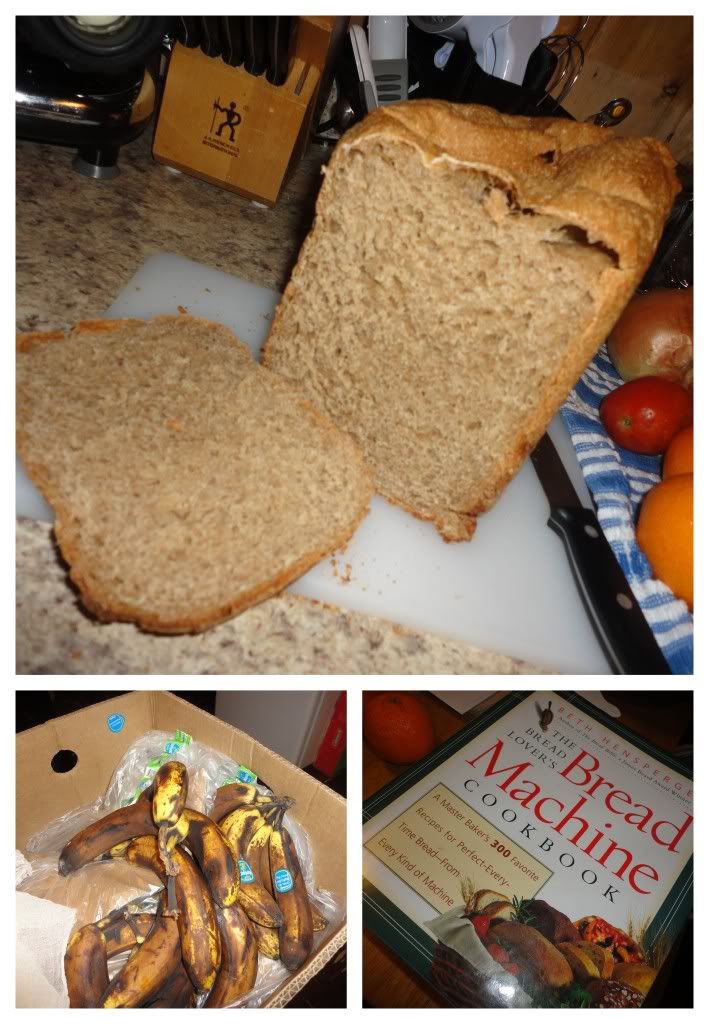
I don't know if you were able to make necessary assumptions, however we had a recent influx of bananas and after I preserved them every way I know how and took a chance on Banana Vinegar, I still had a few 'fresh' ones to use and opted to break out the ole bread maker and do a fine yeast bread.

Before I dish out the recipe, let me tell you that if you own and use a bread machine, you should get your hands on the cookbook: The Bread Lover's Bread Machine Cookbook. Seriously, if you've struggled with baking bread in a bread machine (especially at high altitude) this book will revolutionize your world and make bread machine baking a breeze! It's probably fantastic even if you're not at high altitude...yep, I'm sure it is actually.

Anyway, here is a recipe I made recently from this book (without any high altitude adjustments, however, if you go here, you'll find some helpful tips for high altitude), and it was a winner, especially with my recent Crockpot Apple Butter -- oh the joys of home-made things!
Photobucket
Ingredients/Directions:

Place the following ingredients into  the bread pan according to manufacturer's directions (mine requires all the wet ingredients to go in first, followed by dry).

1 cup water, 1 Tbsp. Vegetable Oil, 1 ripe Banana (cut into chunks), 3 cups Bread Flour (or all-purpose flour), 1/4 cup dry Buttermilk Powder (or plain milk powder), 1 Tbsp. Vital Wheat Gluten, 1 1/2 tsp. Salt, 2 tsp. Yeast. Set crust to medium and begin Basic Cycle. When cycle is finished, remove from pan, cool and slice! (This is for the 1 1/2-lb. Loaf).

Sunday, December 16, 2012

German Mish-mash Breakfast

Extended Shelf Life for: Bread Heels, Onions
Photobucket
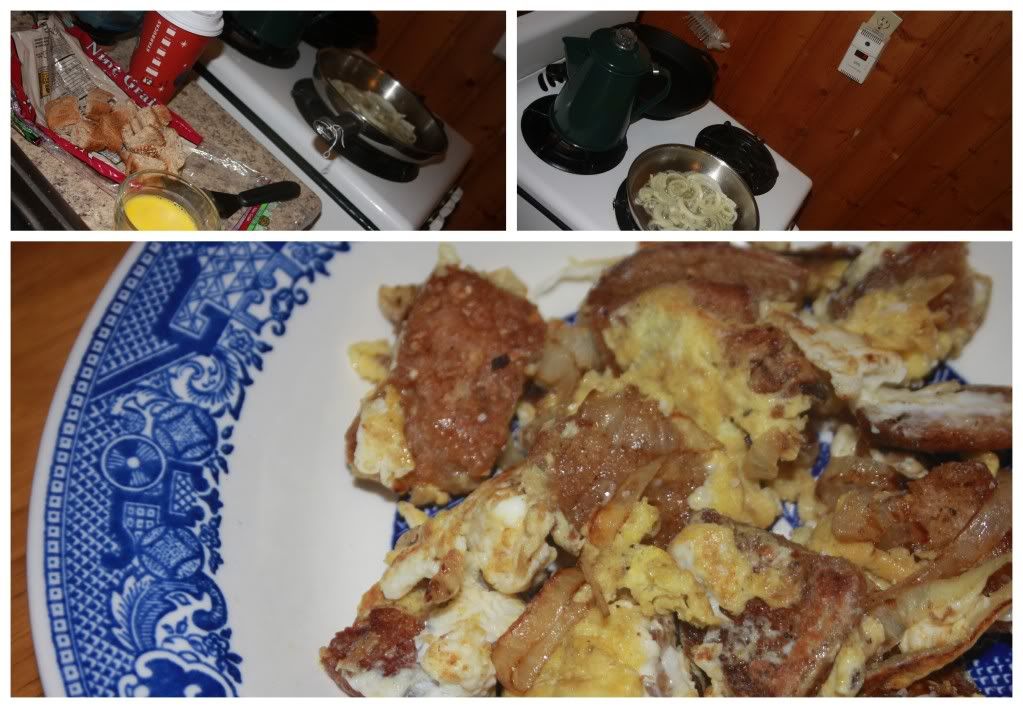
I think bread heels are slightly obnoxious...until you learn to use them in delicious ways that is.

Since I purchased the Juicer that Can do Everything, I have made my own bread crumbs simply by saving the heels in the freezer until I have enough to fill up a cookie sheet to dry out, on low heat in the oven before running them through the juicer (mincing nozzle of course, not the juicing nozzle).

However, the other day, I had a few bread heels leftover and happened to read this page on Squidoo, which has a handful of great, frugal, use-up-things-in-the-kitchen-recipes, the first of which was this German Mish-mash which was incredibly easy and so, stinkin' delicious!

Ingredients/Directions:

In a heavy skillet, melt 3 Tbsp. Butter, when it's melted, add half of a sliced onion and stir for a couple of minutes until onions are tender and little brown. Add two slices of bread that have been cubed and stir until they absorb all the butter and become little bite sized toasts. Pour in two beaten eggs, coat bread and onions, cook until eggs are no longer runny. Season with salt and pepper, enjoy!

Wednesday, December 5, 2012

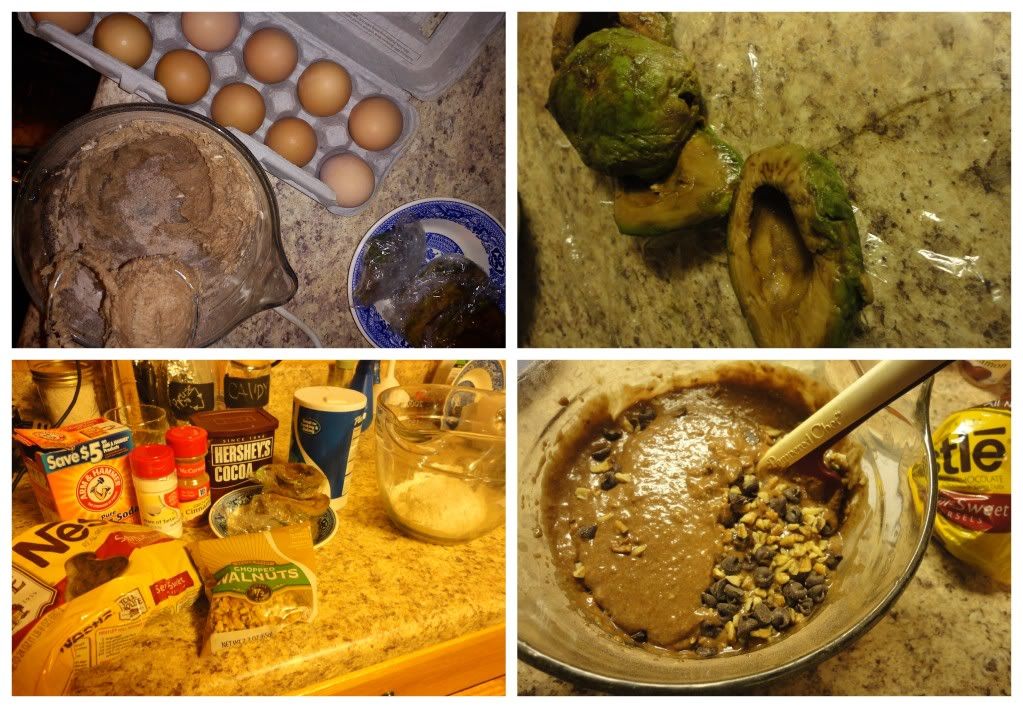
Avocado Bread

Extended Shelf Life: Avocados
Photobucket
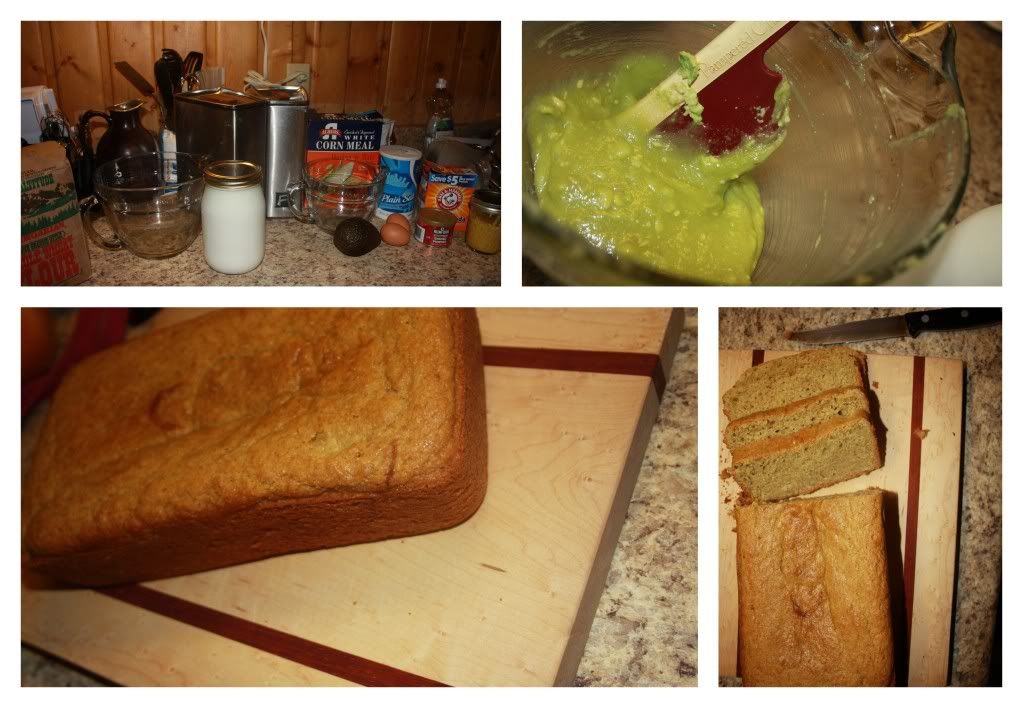
The problem, so to speak, with dumpster diving is that you never know what you're going to get, which I've come to love. However, you also never know that you just might end up with a few more avocados even though you just froze a couple dozen.

The not so problematic part of this problem is, since you've done some research on how to use avocados you'll actually be quite happy to discover that the new handful of avocados isn't in quite as bad as shape as the others and doesn't require you to add chocolate to account for color issues.

So now, you get to try a non-chocolate avocado bread, although you never really complained about having Chocolate Avocado Bread in the first place.

Ingredients/Directions:
From Fleur De-Licious

I was so intrigued by the original recipe that I didn't stray from the recipe, and I'm glad I didn't, the combination of white flour, wheat flour and corn meal was really quite amazing!

Preheat oven to 350 Fahrenheit, butter and flour a loaf pan.

In a medium bowl, whisk together 1/4 cup Corn Meal, 1 cup All Purpose Flour, 3/4 cups Wheat Flour, 1 1/2 tsp. Baking Powder, 1/4 tsp. Baking Soda and 1/4 tsp. Salt, set aside.

In a large bowl, "cream" together 2 Ripe Avocados and 1 cup Sugar with a rubber spatula. Add 2/3 cups Vegetable Oil and 2 Eggs and whisk until well combined. Whisk in 1/2 cup Buttermilk of Plain Yogurt as well as 1 tsp. Orange (or Lemon) Zest.

Add dry ingredients to Avocado Mixture until just incorporated. Pour batter into pan and bake for 40-45 minutes until golden brown and a toothpick inserted in the middle comes out clean.

Enjoy for breakfast, snack or dessert!

Monday, December 3, 2012

Blackberry-Orange Biscuit Rolls

Extended Shelf Life for: Blackberries, Orange
Photobucket
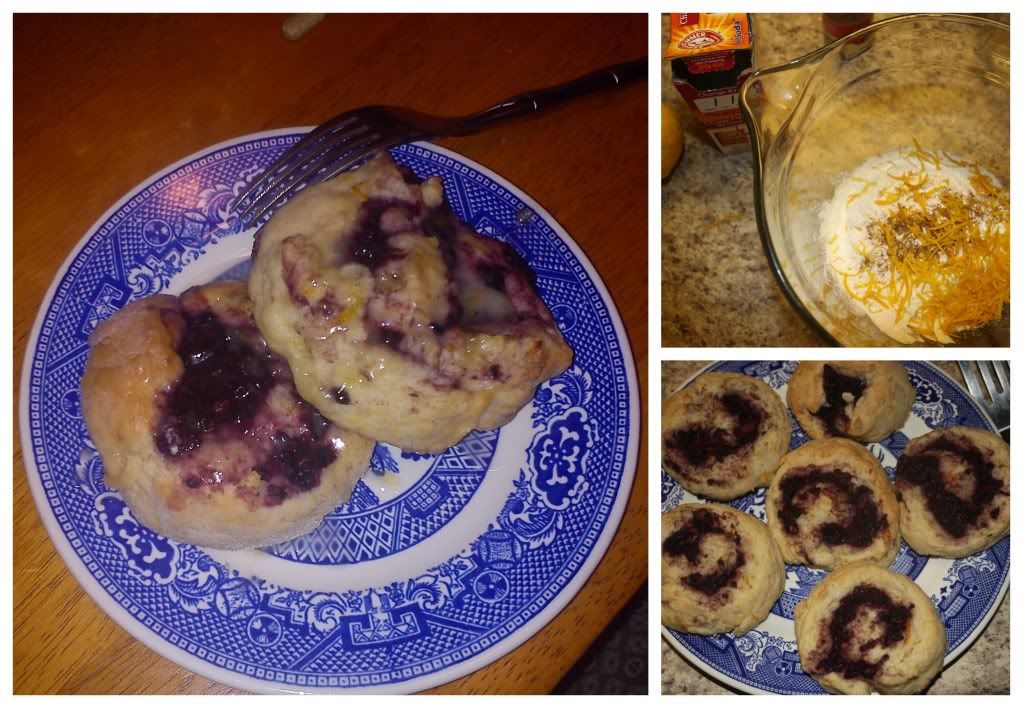
Sometimes, brilliant ideas are spawned from a dumpster arrival of blackberries and an orange already on the shelf, waiting to be used. And sometimes, those brilliant ideas are compounded by the fact that one of your favorite, most spectacular friends has a birthday the next day.

So you dream and ponder and before you know it your pulling Blackberry-Orange Biscuits Rolls out of the oven, drizzling them with a fine orange glaze and praising the Lord for creativity, dumpster abundance and birthdays!

Ingredients/Directions:

Preheat oven to 450 Fahrenheit.

In a bowl stir together 2 cups All Purpose Flour, 1 Tbsp. Sugar, 2 tsp. Baking Powder, 1 tsp. Orange Zest, 1/4 tsp. Salt and 1/4 tsp. Baking Soda. Cut in 1/2 cup Butter with a pastry blender until mixture is coarse and crumbly.

Make a well in center dry mix and add 6 oz. of Yogurt and 1 Tbsp. Milk, mix with a fork until just moistened.

Turn dough out onto a lightly floured surface and kneed 10-12 strokes until dough is smooth. Pat or roll dough out to 1/4 - 1/2 inch thick.

In a small bowl, sprinkle a handful or 1/2 cup of Blackberries with Sugar and mash with a fork. Sprinkle with 1-2 tsp. of Cornstarch and mix again.

Spread Blackberry mixture onto biscuit dough. Carefully roll dough as you would for cinnamon rolls.

Carefully slice the biscuit log and create biscuits that about 1/2 inch thick. Place on a lightly greased baking sheet and bake for 10-15 minutes until dough is golden brown.

For the Glaze:

In a small bowl, combine 3/4 cups Powdered Sugar with 1 tsp. Orange Zest and 3-4 tsp. of Orange Juice until you reach glazing consistency.


Thursday, November 29, 2012

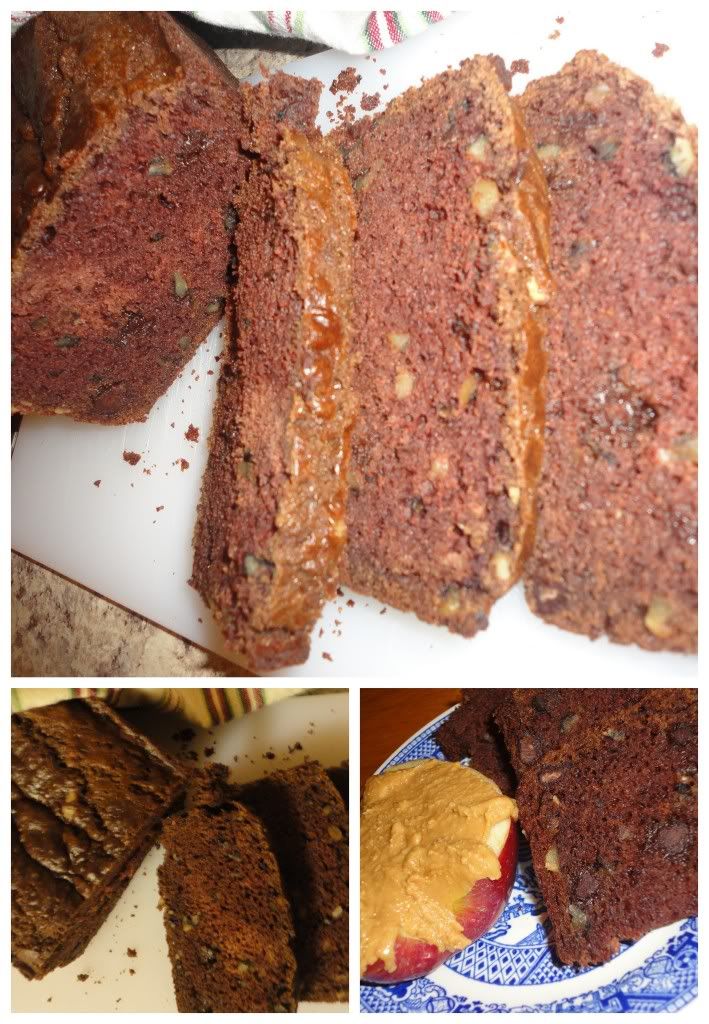
Chocolate Avocado Bread

Extended Shelf Life for: Avocados
Photobucket
Ugh... 
The problem with huge life transitions and letting your blog back up for months on end means you simply can't remember every recipe. This is one of those recipes. I have no idea where I received my inspiration or anything about anything. 
 What is important to note however is: 
a) Frozen, dumpster avocados, can in fact be turned into a delicious quick bread 
b) Frozen, dumpster avocados, can be pretty brown, which means adding chocolate is a very good idea.
c) You could probably essentially follow a recipe, such as this, and have this bread. One thing I do know, is that I didn't use banana, I just increased the avocado...so there you go.
d) I got to use farm fresh eggs from my sister's chickens, how awesome is that?!?!?
Photobucket

So, there you have it, a non-existent recipe for Chocolate Avocado Bread! But hey, at least now we all know I made it, and it can be made, right? RIGHT?!? Jeesh, I really am trying hard to be a more consistent food blogger, but I'm not sure how that's going to go...2013, I have a lot of hopes for you!

Friday, November 16, 2012

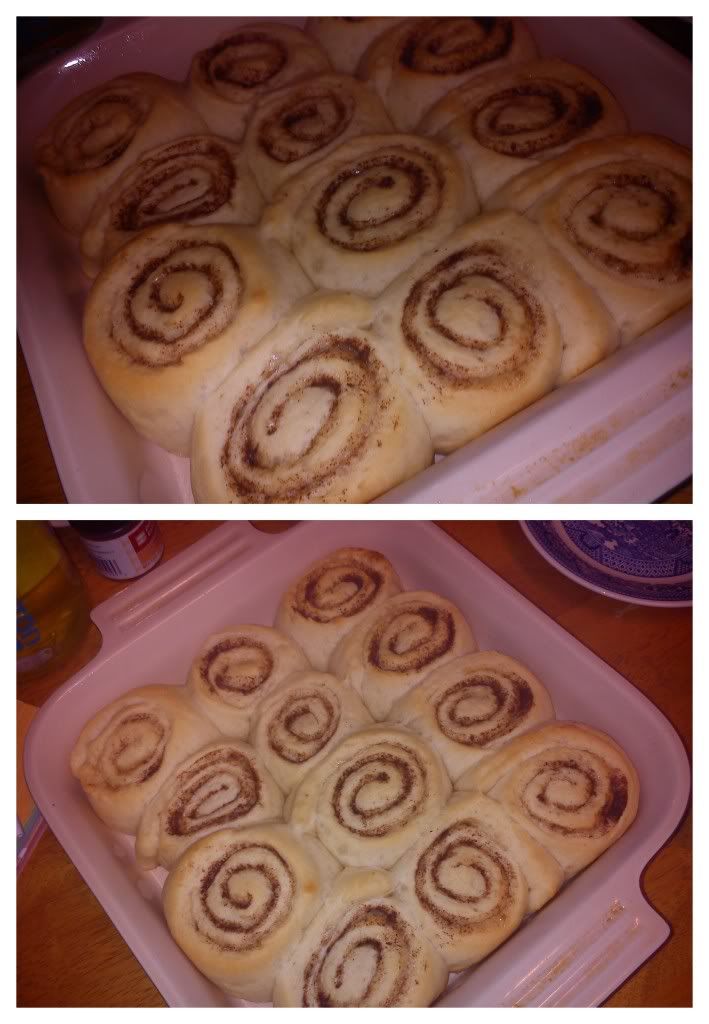
Cinnamon Rolls

Nothing here needed an extended shelf life...and honestly the recipe isn't anything special or different, but sometimes, I just like to remember when I bake delicious things - this is one of those times: My first cinnamon rolls since returning to Laramie.

Grateful to have a bread machine to do the dough.
Grateful to have an oven big enough to manage a tray of these.
Grateful for Cream Cheese Frosting.
Grateful to have neighbors and friends to share them with.
Photobucket
If I just got your hopes up and you were looking for a cinnamon roll recipe, have no fear, I do have a couple posted here at 519 Kitchen:

Two recipes, one post: Overnight Cinnamon Rolls + Big Batch Cinnamon Rolls 

A Favorite and one that's easily adjusted to your personal preferences: Choco-P.B. Rolls

Sunday, September 30, 2012

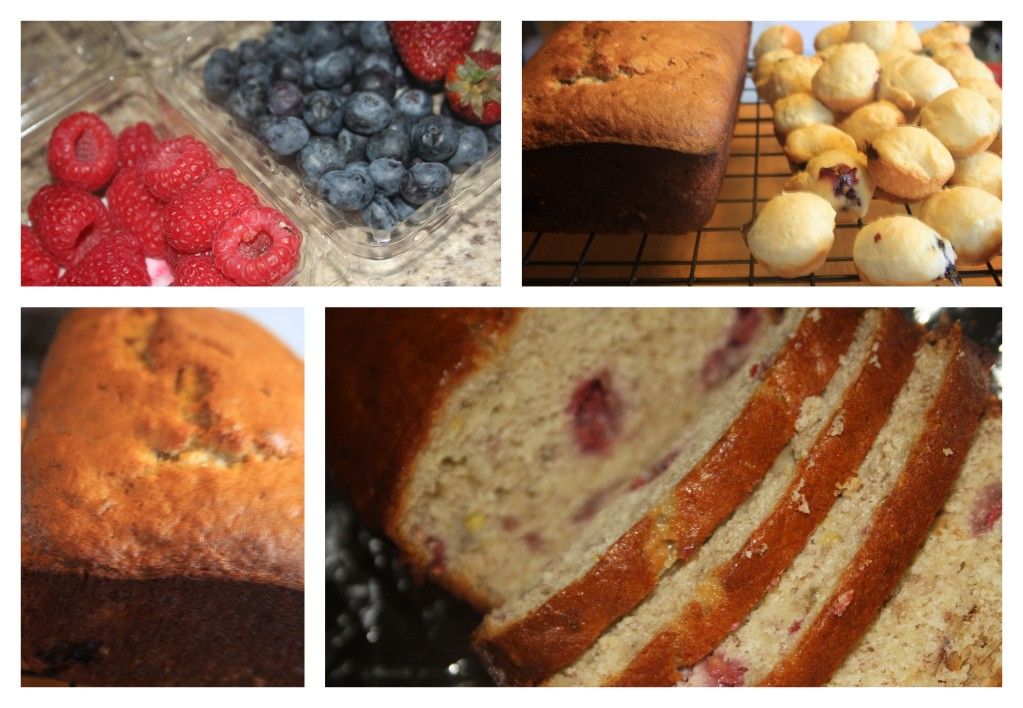
Raspberry Banana Bread

Extended Shelf Life for: Raspberries
Photobucket
Ingredients/Directions:

Preheat your oven to 350 F and grease one 9x5x3 loaf pan.

 In a small bowl (cereal bowl is reasonable) sprinkle about 1 cup overripe, mushy Raspberries with your 1-2 TBSP. of your choice sweetener. Let set.

In a large bowl, combine 2 cups All-Purpose Flour , 1 1/2 Tsp. Baking Powder, 1/2 Tsp. Baking Soda, 1/4 Tsp. Salt. Set aside.

In a medium bowl mix together 2 Eggs, 1 1/2 cups Bananas, 1 cup Sugar, and 1/2 cup Vegetable Oil Add egg and banana mixture to flour mixture, stirring until just moistened. Give raspberries a quick stir, breaking down any bigger berries, before folding into the bread batter.

Spoon batter into prepared loaf pan and transfer to the oven where it'll work a bit of chemistry and magic over the course of 55-65 minutes until a toothpick inserted in the center comes out clean.

Learn a little more and take part in some banana bread discussions here at Squidoo!

Tuesday, July 10, 2012

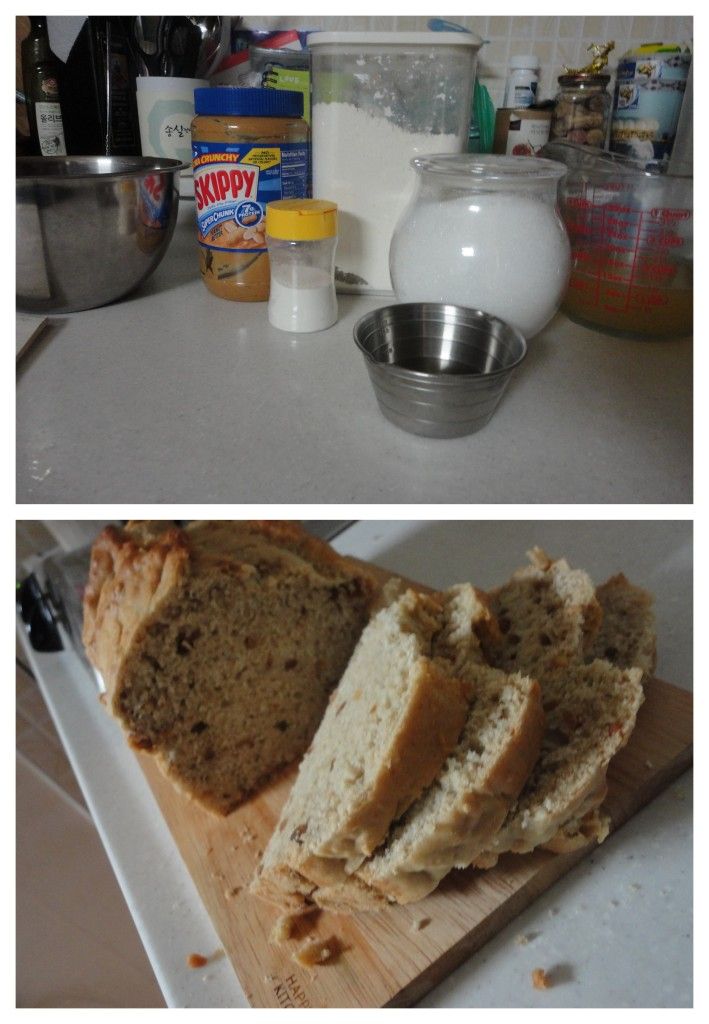
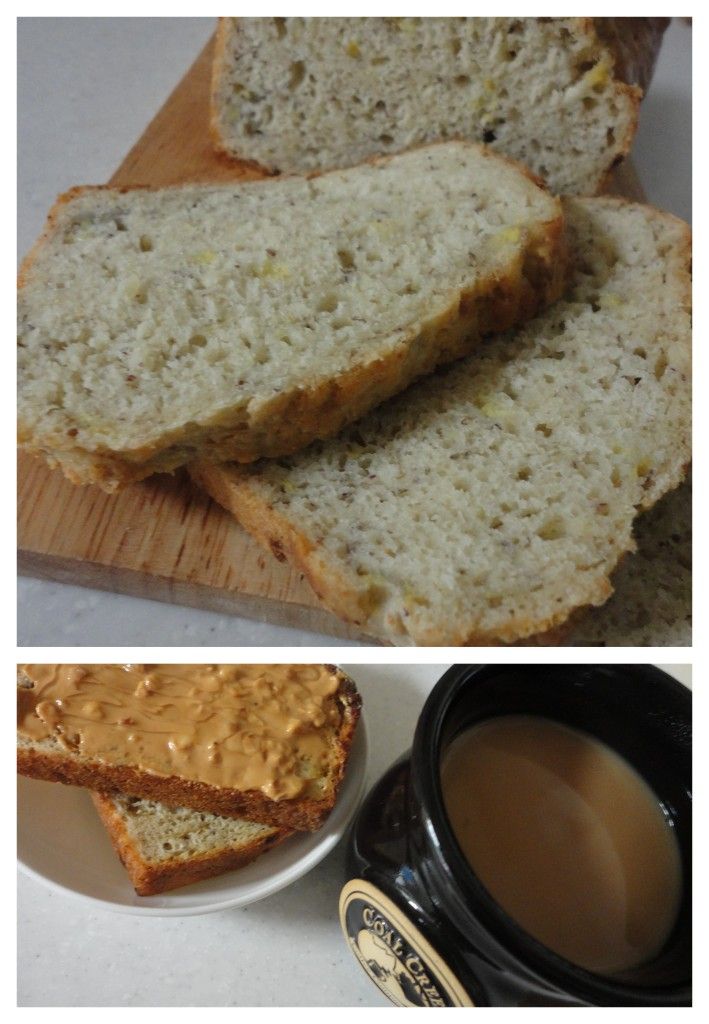
Peanut Butter Beer Bread


Photobucket

I was so impressed with how the Banana Beer Bread turned out, I thought I'd try another variation: Peanut Butter Beer Bread.

The banana variation was better, but truth be told, both were delicious and so easy to throw together!

Ingredients/Directions:

In a large bowl, mix together 3 cups Flour1 tsp. Salt3 Tbsp. Sugar, and 1 Tbsp. Baking Powder.  You will need a total of 8-12oz Flat Beer, add about one cup to dry mixture as well as about 1/2-1 cup of Peanut Butter. Add additional beer as necessary to gain the proper consistency, thick and sticky, not too runny. Pour batter into a greased loaf pan, dollop 2 tbsp. of Butter on top of the raw loaf and bake at 375 F for 30-40 minutes.

Wednesday, June 27, 2012

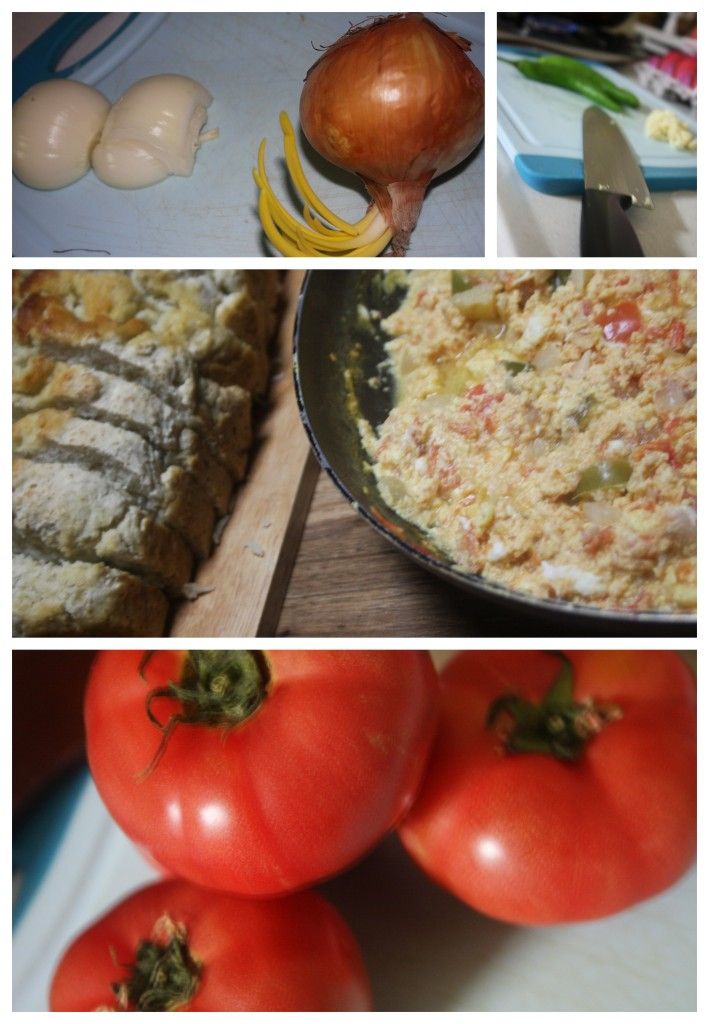
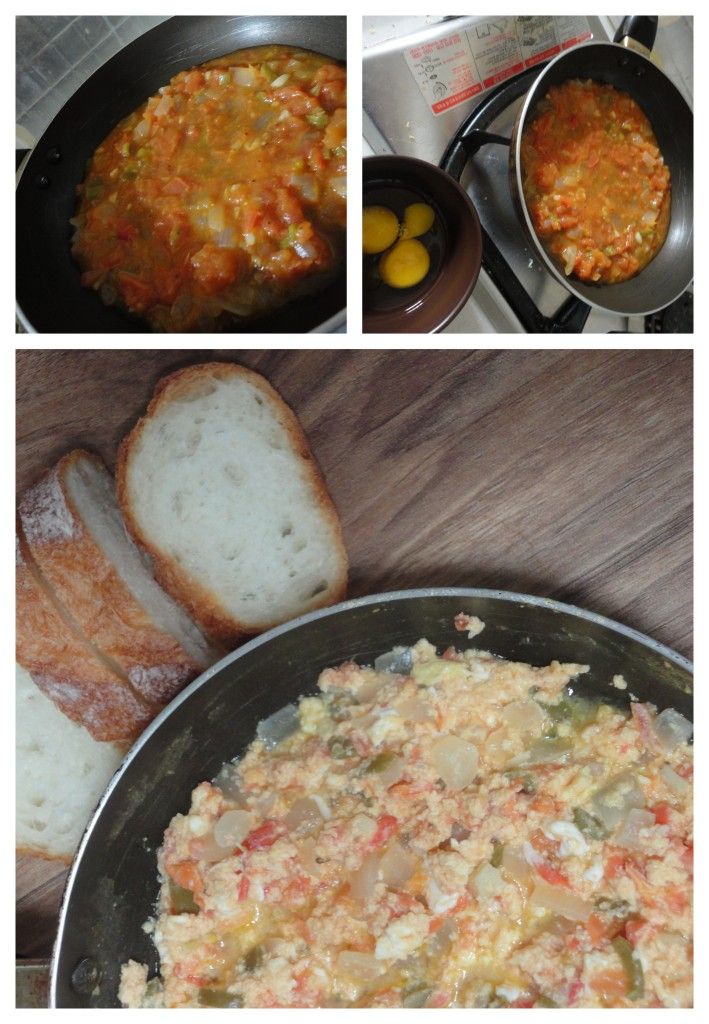
Turkish Breakfast

A while back we hosted a couple of CouchSurfer's from Turkey, although they are currently living in Northern Ireland. As always, we learned a lot and enjoyed their company immensely - and, they made a delicious breakfast which in turn inspired some re-creation efforts.

 I haven't been totally confident that my dish is anywhere near the delciousness of theirs, but I'm relatively satisfied and will continue to work out the kinks. For now, here's a general idea of this Turkish Breakfast we learned from a couple of CouchSurfers!

Photobucket
Photobucket
Photobucket

Ingredients/Directions:

In a large skillet heat a couple Tbsp. Olive Oil, saute 1 chopped Onion, 1-3 diced Green Chiles and 3-4 minced cloves of Garlic. Meanwhile, seed and chop 4-6 Tomatoes. Add the chopped tomatoes to the onion and pepper mixture as well as a dash of Cumin, Salt and Pepper. Leave this mix alone until your ready to serve up the breakfast. Before serving, re-heat the tomato mixture and whisk 3-4 eggs which you will then add to the heated tomato mixture. Let eggs set for a couple of minutes before breaking a part and continuing to cook the eggs through. Serve this mixture with crusty bread and fine cheese (Feta would be ideal but we use anything we have on hand here in the land of Kimchi). Scoop some of the egg and tomato mixture onto a slice of bread, top with a bit of cheese and place into your mouth - let out a sigh of satisfaction and repeat until the pan is clear.

Wednesday, June 13, 2012

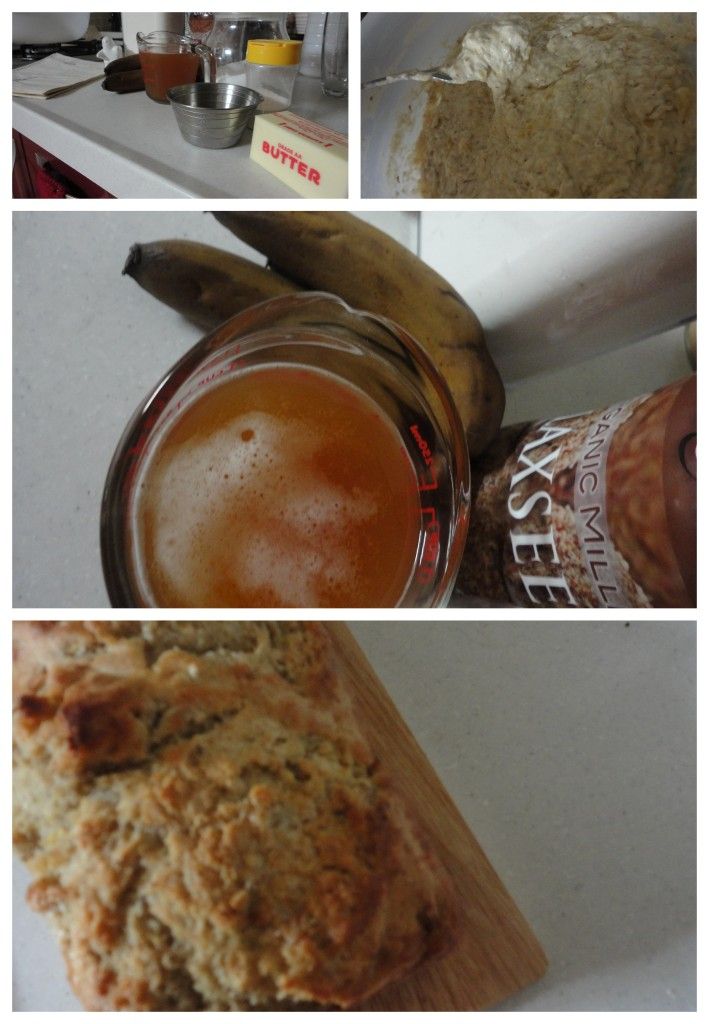
Banana Beer Bread


Photobucket
Photobucket

This just may be my crowning moment in the world of culinary goodness.

Beer Bread meets Banana Bread and it is alliterative love at first bite. 

I really had no idea how this loaf of bread would pan out, but the idea came and I had to throw it together to find out. 

It was a perfect mix of banana and beer, with an incredible meeting of the dense-ness of banana bread with the lighter, airy texture of beer/yeast breads. 

I could not have been more satisfied with the way this bread turner out - definitely helpful that I get to use my husbands home-brewed beers which are full of flavor compared to Korea's watered down brews.

Ingredients/Directions:

In a large bowl, mix together 3 cups Flour, 1 tsp. Salt, 3 Tbsp. Sugar, and 1 Tbsp. Baking Powder.  You will need a total of 8-12oz Flat Beer (I used a Belgian), add about one cup to dry mixture as well as 3 Ripe Mashed Bananas. Add additional beer as necessary to gain the proper consistency, thick and sticky, not too runny. Pour batter into a greased loaf pan, dollop 2 tbsp. of Butter on top of the raw loaf and bake at 375 F for 30-40 minutes.

Saturday, May 5, 2012

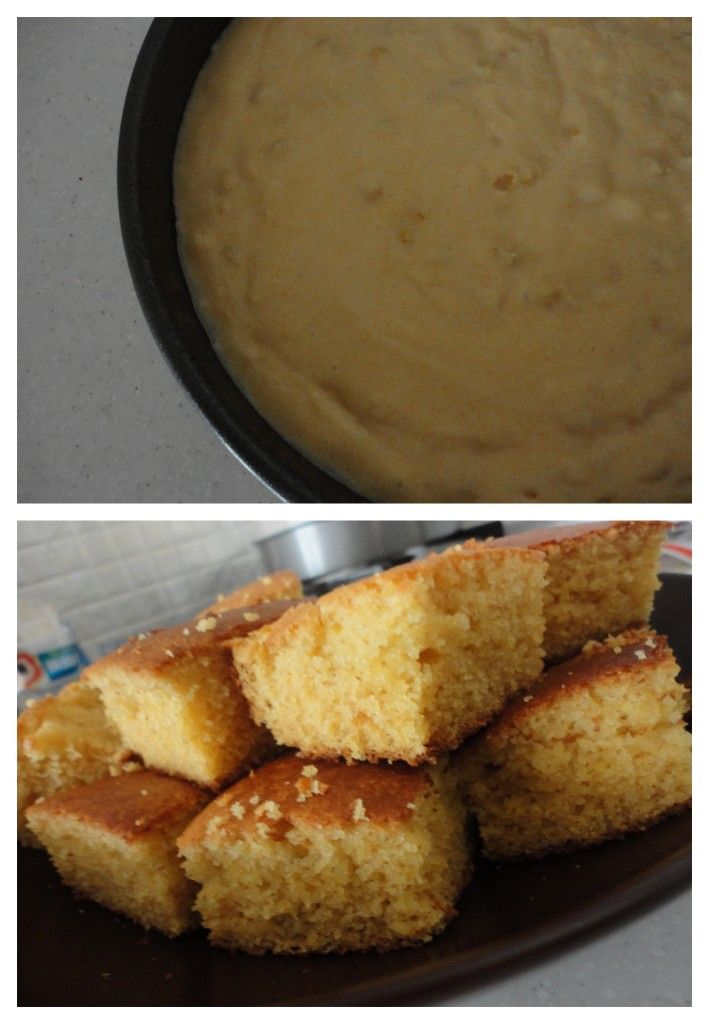
Cowboy Cornbread (Mix)

Photobucket

For the same picnic mentioned previously, I decided to whip up some cornbread.

Using the recipe from the Gooseberry Patch's Chili Cookbook.

Ingredients/Directions:

Mix together 1 cup Yellow Cornmeal, 1 cup Flour, 1/4 cup Sugar, 1 Tbsp. Baking Powder, 1 tsp. Baking Soda and 1/8 tsp. Salt. If you want to give this as a gift of save it for another day simply pour into a jar or Ziploc and save for later. Other wise, place these dry ingredients into a large bowl. Separately, whisk together 3 Tbsp. melted, cooled butter and add 1 1/3 cups buttermilk (I did 1 cup milk + 1/3 cup Yogurt), add one egg and mix thoroughly. Pour the wet mixture into the dry and stir until just combined. (If you're feeling funky throw in a few handful so corn kernels before baking). Pour into a square or round pan, bake at 425*F (218*C) for 30 minutes.

Thursday, March 29, 2012

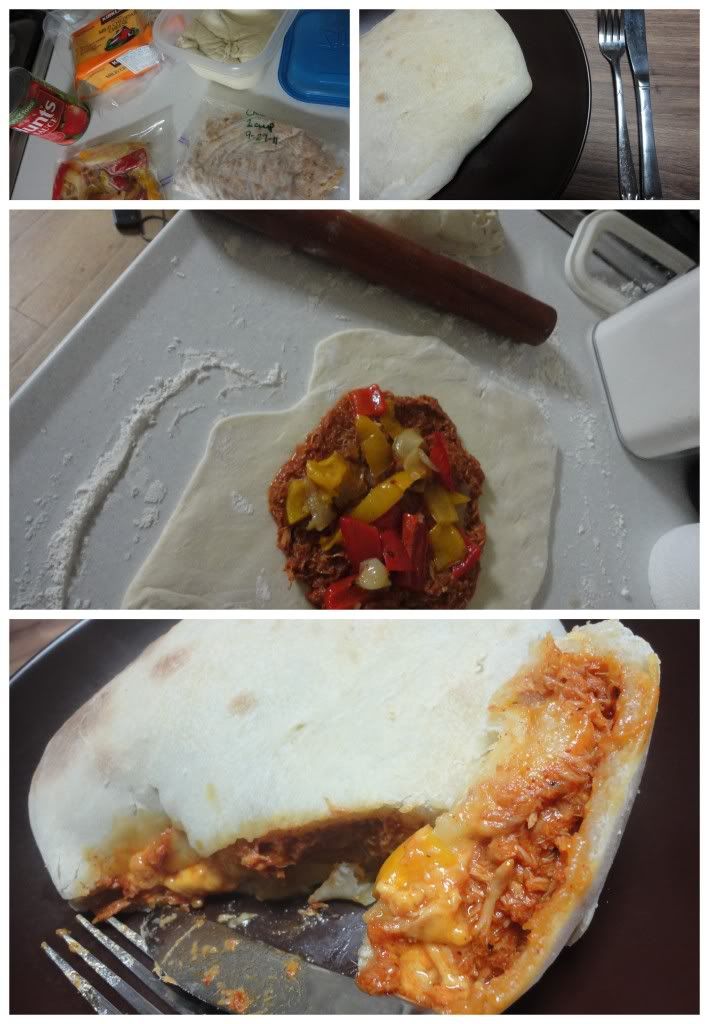
Chicken Enchilada Calzones

Photobucket

Having had some dough left over from my Basic Bread with whey, I decided calzones would be the perfect to weeknight dinner to use up a faulty yeast dough, and was I ever correct in that assessment! I also used up some of my freezer/once-a-month-cooking goods so this came together amazingly quickly and easily and absolutely deliciously.

Ingredients/Directions:
Makes 2 large Calzones

Heat in a small pan 1 cup of plain Tomato Sauce, add 2-3 Tbsp. Chili Powder, a shake or two of Cayenne Powder, Cumin, Salt and Pepper. Add 1 cup of Shredded Chicken to the 'Enchilada' Sauce.  Using half of the dough produced from the Basic Bread recipe, split into two equal portions and roll out to a circular shape. Fill each dough circle with half of the saucy chicken mixture, top with 1 cup Roasted Peppers and Onions (1/2 cup for each calzone) and sprinkle in plenty of Cheddar Cheese. Pinch edges of dough together to create a calzone or hot pocket and bake at 350* (177) for 25-35 minutes until golden brown and heated through. Enjoy with a glass of milk, or a margarita!

Sunday, March 25, 2012

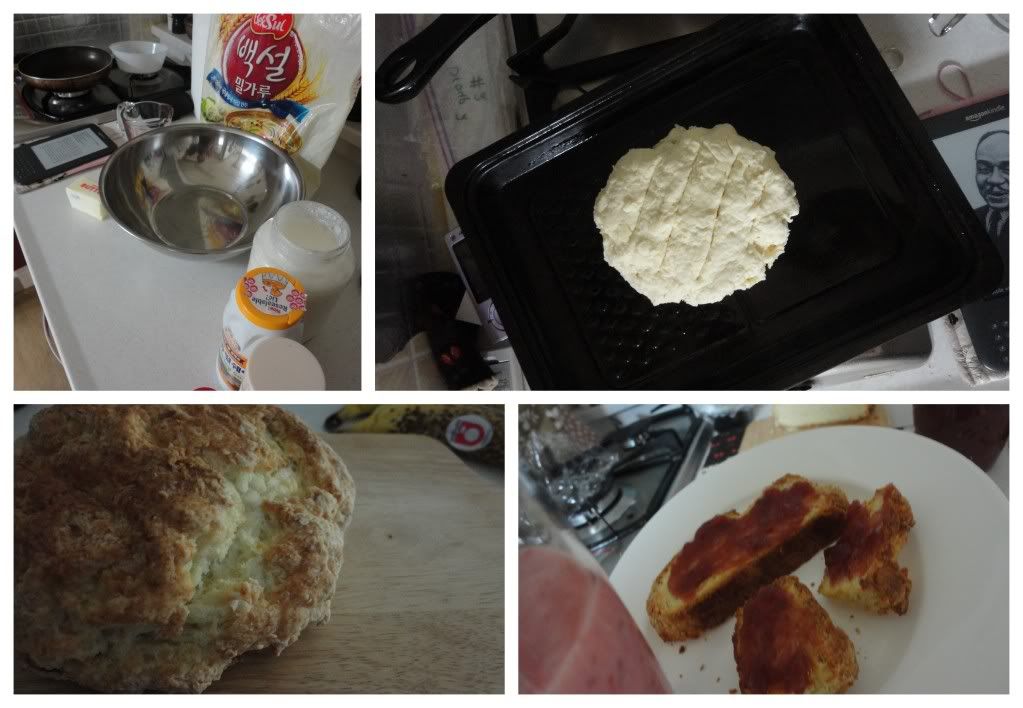
Gypsy Soda Bread

Photobucket
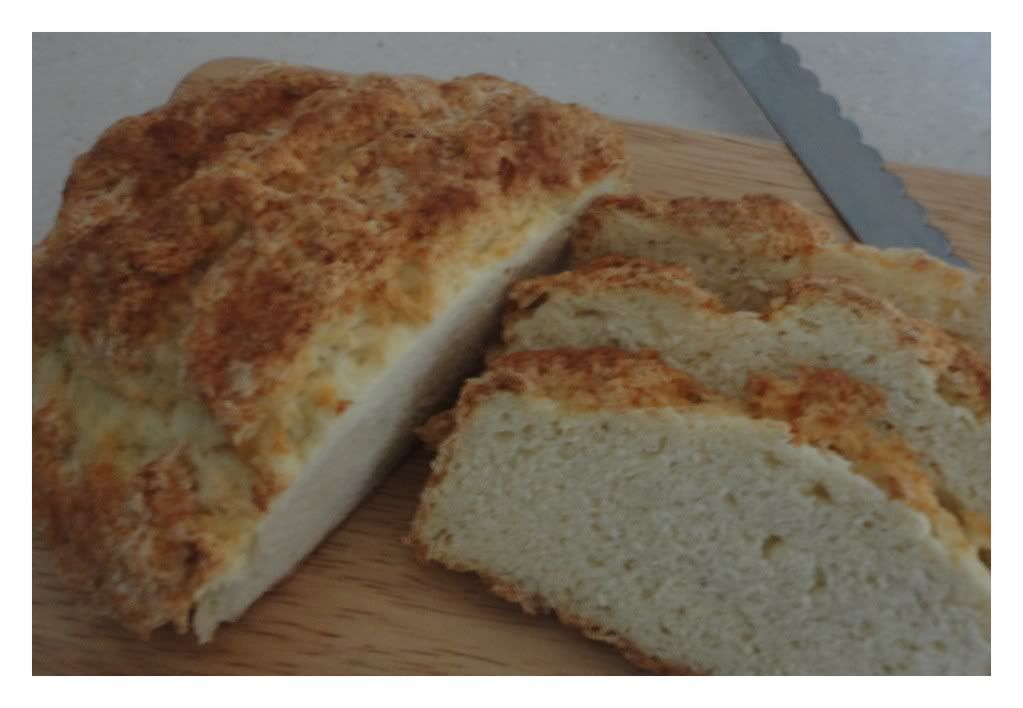
Wanting to ensure we would have breakfast to look forward to on Monday and for a last chance using up some sour-home-made-yogurt-that-was-kind-of-like-buttermilk I hit my Kindle collection of cookbooks and searched for 'buttermilk'.  Many things turned up, but the one that sounded quickest and easiest was a Soda Bread from a cookbook about Gypsy Cuisine (although, if you read the Amazon reviews some folks don't agree about the authenticity of the recipes - I know nothing about traditional or non-traditional Gypsy Cuisine...but am still calling this Gypsy Soda Bread, sorry if you find such offensive)

Ingredients/Directions:
From Gypsy Feast: Recipes and Culinary Traditions of the Romany People by Carol Wilson

Preheat oven to 400*F (204*C). In a large bowl mix 2 cups Flour, 1 tsp. Baking Soda, 1 tsp. Salt and 1/2 tsp. Cream of Tartar. Rub or cut in 2 Tbsp. Butter until well dispersed. Make a well in the center and pour in 1/2 cup Buttermilk, mix quickly until a dough is formed. Knead lightly on a floured surface and roll into a round about 1 1/2 inches thick. Mark the top with four cuts. Bake on a lightly greased baking sheet for 20 minutes, until golden and sounding hollow when tapped.
Photobucket

Basic Bread - with whey

Photobucket
If you've done any soft-cheese making or drained any yogurt (home-made) or otherwise of it's excess liquid, then you've surely found yourself with a jar or two full of whey while the curds compose the cheese or Greek style yogurt you were likely after.

But what about the whey? What can you do?

Other than pouring some into a dish for any 4 (or 3.5) legged creatures sharing space with you and your family, why not substitute the whey for the water or milk in most bread recipes?

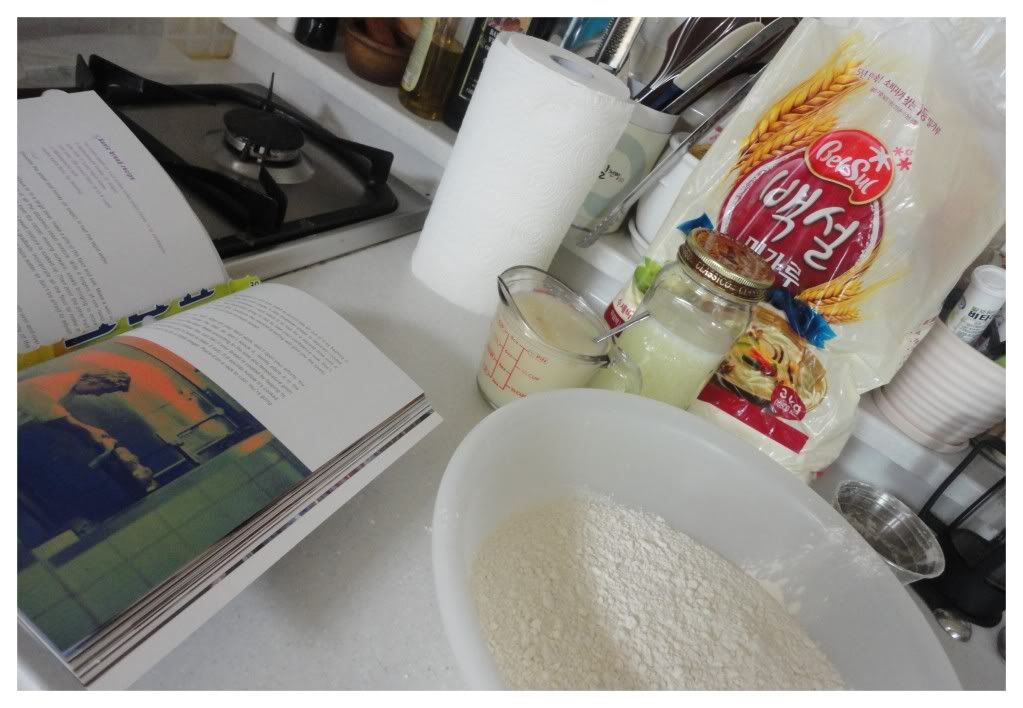
For the hubs and I's recent Belated Valentine's Tradition, I whipped up a batch of Jamie-Oliver's Basic Bread Recipe, substituting whey for water, and other than having dead yeast, the bread turned out just fine...

Have you done and cheese or yogurt making and ended up with leftover whey? What are your favorite uses for the whey?

Saturday, March 17, 2012

Sour Cream Walnut Banana Bread


Photobucket
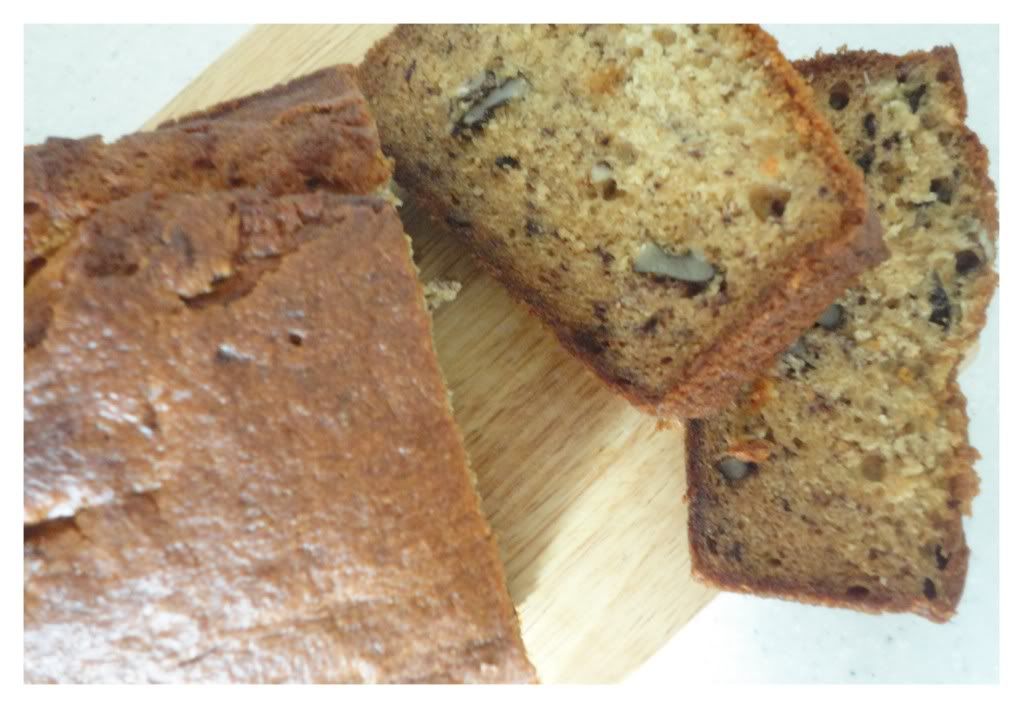
Some of my yogurt didn't turn out that well. It was a bit more like sour cream than yogurt. But of course, I don't let that phase me, I just use that as inspiration, because truthfully, there are a lot of things I'd like to do with sour cream...like make Enchiladas...or Banana Bread!

Ingredients/Directions:
Adapted from Closet Cooking

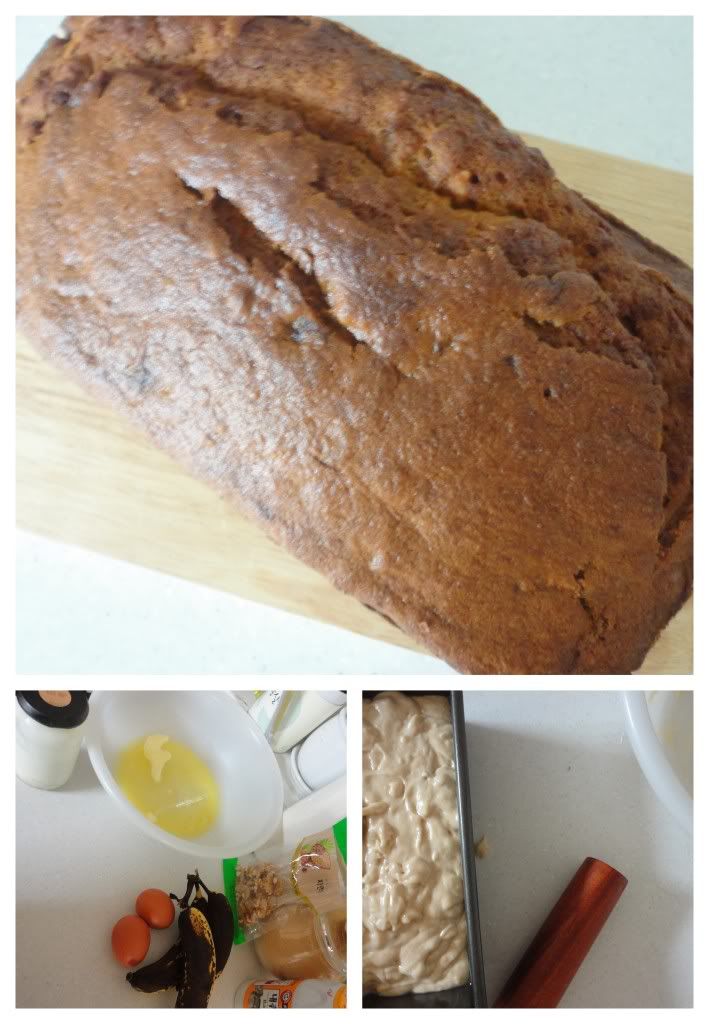
Mix together, 1 3/4 cups all-purpose flour, 1 tsp. baking soda, 1/4 tsp. salt and 1/2 tsp. cinnamon. Cream together 1/2 cup room temperatur butter and 3/4 cup brown sugar. To the butter/sugar mixture add 2 beaten eggs, 1/2 cup sour cream (or yogurt) and 3 mashed overripe bananas. Mix dry and wet ingredients together. Stir in 1/2 cup chopped walnuts. Bake in a loaf pan at 350*F (177*C) for 60-70 minutes.
Photobucket
Related Posts Plugin for WordPress, Blogger...