Showing posts with label Tomato. Show all posts

Tuesday, February 12, 2013

Refried Chili

Extended Shelf Life: Avocado

Photobucket

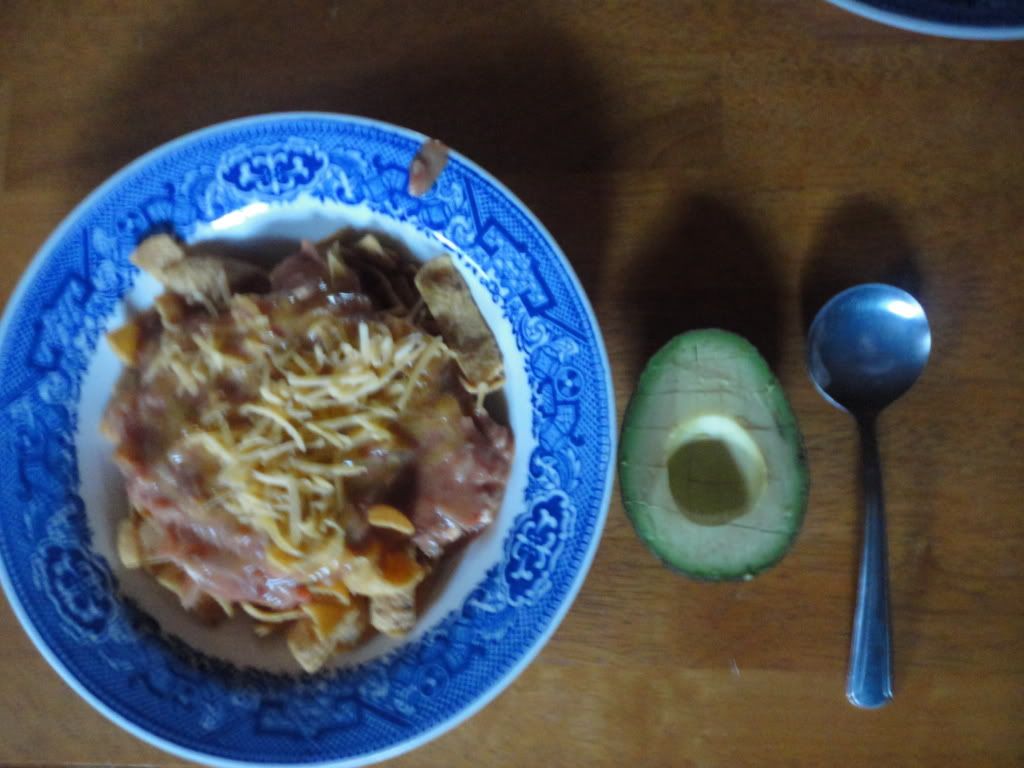
Because sometimes, even when you take crappy photos, the dish was worth documenting and making a little reminder to yourself that quick meals can be delicious and can even incorporate canned foods you'd rather not admit are in your pantry ;)

So, if you find yourself hungry with a pile of tomatoes, a few ripe avocados, a can of refried beans, a block of bream cheese, a can of tomato sauce and a ice cube of roasted jalapenos, rest assured that cooked together, served on top of Fritos with cheese and fresh avocado - it will yield a meal that you can easily enjoy.

Thursday, February 7, 2013

Pizza Experiment #7: Bacon, Mushroom and Green Onion on a Quick Beer Bread Crust

Extended Shelf Life for: Bacon, Tomato, Mushrooms

Photobucket


Interesting piece of information: On Facebook I follow a few different Pizzeria's. On the day I set out to create this pizza, one of these pizzeria's posted that the daily special was...you guessed it! A Bacon, Mushroom and Green Onion Pizza - with RED SAUCE! Unbelievable!

Anyway, I made the sauce from scratch, using the same recipe as did for Pizza Experiment #2.

I placed that sauce on top a new crust:

Quick Beer Bread Crust:

Preheat oven to 450.

Mix together 3 cups Flour, 1 Tbsp. Baking Powder and 1/2 tsp. Salt.

Slowly mix in 12 oz. Flat Beer, dough will be sticky.

Knead the dough on a floured surface. Split dough for thin crust or use as one thick crust pizza, roll out, top and bake!

From there, all I had to do was add the Toppings:

Bacon, Mushrooms, Green Onion and Mozzarella Cheese!

Easy-peasy and delicious to boot!

Sunday, January 20, 2013

Tangerine Salsa

Extended Shelf Life for: Tangerines, Tomatoes, Onions, Jalapenos
Photobucket
We've been eating tangerines, cuties, oranges with great frequency.

I've begun a major research project regarding what to do with all of the peels and have made dishes such as Avocado-Orange Pasta, pints of Orange Marmalade, Candied Orange Peels and of course Fresh Orange Juice (with a few other veggies and fruits thrown in).

But after all of these dishes...I still had fruit to use up.

So, with a taco night in the works for church, I decided to do up a batch of tangerine salsa and the results were quite tasty indeed!

Ingredients/Directions:
Adapted from Appetite for China

Roughly chop 8-10 Tangerines, 2-3 Roma Tomatoes, 1 Red Onion and 1 Jalapeno. Mix together, toss in the juice of 1 Lime. Season with Salt and Cumin.


Saturday, January 5, 2013

Pizza Experiment #3: Tomato and Preserve Onions

Extended Shelf life for: Onions and Tomatoes
Photobucket
I recently revealed one pizza crust recipe, and have yet to post any others (although I'm working on it ;) ). A few weeks back, I also let you in on the secret of delicious preserved red onions. And now, here I am, ready to throw together a new pizza! Essentially, the toppings are the same for both pizzas:

Tomato, Preserved Red Onions and Cheese.

One also received a few pepperonis.

Rather than making a sauce I simply brushed the crusts with olive oil and sprinkled with oregano.

Other than the pepperonis, the primary difference was that for one of these pizzas I sprinkled cheese on first, followed by ingredients and then a touch more cheese, where as the other was done in the more tradition: ingredients then cheese style.

It didn't make a huge difference, but I kind of liked having my vegetables surrounded by cheese and how the bottom layer of cheese was extra gooey and the top layer of cheese was a bit more golden and allowed the vegetables and toppings to 'shine' through.

So there you have, Pizza Experiment #3!
Photobucket

Wednesday, January 2, 2013

Preservation Secret: Freezing Tomatoes and Bananas

Extended Shelf Life for: Tomatoes
Photobucket
When holidays with the family come to end, it's inevitably time to start diving again ^^

Fortunately, there's always a wealth of ingredients to be had and we've been at it for so long that I've developed a few tricks of the trade and preservation secrets.

For Tomatoes:

I love to roast my tomatoes for about 20-30 minutes at about 400 F. When you take them out of the oven the skins are easy to remove and a lot of the unnecessary, seedy liquid has drained from them. At this point, I run them through a food processor or our juicer (on the mincing cycle), bag them and freeze them. I'm increasingly passionate about this process and method, especially after reading that even farmers won't eat canned tomatoes because the acid and the tin can are not a healthy combination!
Photobucket
For the Bananas:

I'm working on preserving some (the peels primarily) in the form of vinegar. However, this is about freezing, and bananas are easy to freeze. I've done two-three different things for freezing bananas.

If I plan to make banana bread, pancakes or any other mashed banana treat I simply mash the banana in a large mixing bowl then transfer to freezer bags, each containing about 2 cups of banana mash, the generally required amount for recipes of such sort.

I've also frozen banana 'coins' so that I can easily make banana ice-cream which goes fantastically well with banana (n)ice cream sandwiches!

And finally, I'll occasionally peel the banana and freeze whole to use in smoothies, although making coins would work just as well.


Bleu Cream Pasta with Bacon and Tomatos

Extended Shelf Life for: Tomatoes, Bacon, Onions, and Bleu Cheese Dressing

Photobucket

Ingredients/Directions:

Prepare bacon to your liking. (I like the oven method, as it's efficient and I don't get splattered by hot flying grease).

Meanwhile, bring a large pot of water to boil and prepare 1/2 pkg. of Pasta (about 4 oz.).

In a large-deep skillet, saute1 onion in about 2 Tbsp. of Olive Oil until translucent. Add to the pan, 4 Tbsp. of Cream Cheese and 2 Tbsp. of Butter, melt. Add 1/4 cup pasta water to the sauce followed by 3-4 Tbsp. Bleu Cheese Dressing. Heat through, add 6 Strips of Bacon, crumbled and the pasta. Finally add, 3 Roma Tomatoes, diced and heat through. Season with black pepper, serve with shredded Parmesan or Mozzarella.

Friday, November 30, 2012

One Pot Spaghetti

Extended Shelf Life for: Mushrooms, Onion, Green Pepper, Jalapeno and Tomato
Photobucket
Confession: This was not our favorite dish. BUT, I'm 99.99% certain that's because I used an un-seasoned cast iron kettle which may not have had the best reaction to tomato sauce...and because we use dumpster food. I'm quite confident, that the recipe, as printed in Better Homes and Gardens would be absolutely delicious, because as of now, that singular cookbook has only failed me when I've failed it...which leaves the blame on only one of us...and it's not the cookbook.

So, if you've got a well seasoned pot, more experience with cast-iron or planning to use a stainless steel pot, this recipe is definitely for you!

Ingredients/Directions:

In a large pot saute 1-2 cups sliced Mushrooms, 1 diced Onion, 1 diced Bell Pepper, 1 diced Jalapeno and 1 minced clove of Garlic until tender, season with salt and pepper.

Stir in 1 diced tomato, 2 cups of Chicken (or Turkey or any other) Broth, 1 3/4 cups Water, 6 oz. of Tomato Paste and Italian Seasoning. Bring to a boil before adding 6 oz. of dried, broken Spaghetti Noodles.

Return to boiling, reduce heat and simmer, uncovered for 15-20 minutes until spaghetti is desired tenderness and sauce is desired consistency.

Enjoy!

Monday, November 12, 2012

Hummus Pizza Torte

Extended Shelf Life for: Hummus, Tomato, Jalapeno, Onion

If you continue reading, you're going to discover, that this is one of my infamous posts where I give you nothing exact - just ideas and general guesstimates on how this can be created in your home. And, I'm okay with that. Because what I really want you to know is that Pizza Torte's are amazing! And you should, without a doubt, get a spring-form pan so you can make a pizza torte, because, like I said, they are amazing!

Photobucket
Ingredients/Directions (more of less):

Buy or prepare a batch of pizza dough. Personally, I love using my bread maker for this task because I know that it will have risen within a certain time, no matter what, since the bread machine can control temperature and humidity whereas my Laramie kitchen isn't always so predictable.

Split the dough ball into three equal parts.

Prepare your filling, you can do something traditional, or if you have some random bits and pieces of things to use up, like a tub of hummus, try out something like this:
  •  Saute 1 diced Onion, 2 minced Garlic Cloves and 1 diced Jalapeno in a bit of Olive Oil. When they are tender, throw in one diced Tomato for an additional one or two minutes. 
  • Add 1 tub of Hummus (that's about to expire or otherwise ~ we used a sun-dried tomato hummus, that honestly wasn't that delicious to my taste-buds, too strong, but still a good concept, trust me!)
  • Thin out with additional olive oil or water, use as your filling/sauce.
Place the first round  of pizza dough into your spring form pan, spread in half of the filling, top with cheese, repeat, finish the torte off with the final pizza dough round on top, seal up the edges, bake at 350 (probably- I'm currently in Sturgis, not with the cookbook where I got the recipe for this torte) and bake 15-20 minutes (or more) until crust is golden. Let torte sit for about 5 minutes before removing from the pan and cutting into appropriately sized serving pieces. Enjoy!
Photobucket

Tuesday, October 30, 2012

Quick and Easy: Beans and Rice

Extended Shelf Life for: Leftover Pico de Gallo
Photobucket
Sometimes, I just need to use up random leftovers, for example some leftover pico de gallo from a night with our friends and a meal of fish tacos. Since we were lacking dinner options and tortilla chips I did some quick thinking and came up with this dish.

Rice from a rice cooker.

Canned refried beans heated in a skillet with pico de gallo juice and a cilantro "ice" cube.

Rice topped with beans, cheese and pico de gallo.

There you go! Enjoy!

Thursday, October 25, 2012

Chinese Tomato and Egg with Fried Kohlrabi

Extended Shelf Life for: Tomatoes and Kholrabi
Photobucket

Chinese Style Tomato and Egg dish, much like the Eggplant and Potato Dish, this dish was inspired by our experience at a delicious Proper Chinese Restaurant in South Korea. Unfortunately, the main idea of the night was to have something to eat and I didn't do much research on how to season these eggs and the tomatoes - so mine, in ultimate simplicity, were sauteed onion and garlic followed by tomatoes and finally scrambled eggs, served on top of rice and alongside the upcoming kohlrabi home-fries. But, if you're looking for a more inspiring and flavorful Egg and Tomato dish, this recipe has all the makings of exactly what I was craving and what I so happily discovered in Daejeon, South Korea.

Photobucket
To accompany the eggs and to use up a large kohlrabi that had been gifted to me via my neighbor, I did a little Google exploration and opted for another NYT recipe, this time, rather than preserved red onions, I went for Kohlrabi Home-fries

Ingredients/Directions:

Peel and cut 1 1/2 - 2 pounds of Kohlrabi into thick sticks. Heat 2-4 Tbsp. of Oil over medium heat in a heavy skillet or cast iron pan. Meanwhile, combine 1 Tbsp. of Flour with Salt to taste and toss the Kohlrabi sticks in the mixture. Add kohlrabi to the skillet of rippling oil and cook on both sides for a few minutes until crispy. Drain on a paper towel and serve plain or with your favorite yogurt dipping sauce (if you're in need of a good yogurt sauce, check out this recipe!)

Wednesday, October 24, 2012

Beef and Chorizo Chili

Extended Shelf Life for: Peppers, Jalapenos, Tomatoes
Photobucket
When it comes to chili, I lack an official recipe. I do however have a few tricks-of-the-trade or preferences and a new discovery (or two!)

To begin, I just got a cast iron kettle and it just makes chili seem that much more delicious, amazing and perfect for the cold winter night.

Next, let me tell you that doing a combo chili which is 50% Beef and 50% Chorizo is brilliant!

Now, on to some tricks-of-the-trade.

I've just recently learned this little gem of advice that comes from my good friend SJ's grandmother:

  • When preparing ground meats, add enough water to cover the base of the kettle or skillet to the meat. As the meat cooks, the water will evaporate and you'll end up having a very uniformly ground meat to support your soup or go into your tacos. (Perhaps this isn't revolutionary to most folks, but there's just something about this perfectly ground meat that makes the chili that much more enjoyable.)

Another trick-of-the-trade, espeically for divers or gardeners:

  • If you have an abundance of peppers, go ahead and roast the whole batch in the oven until they're fragrant, run them through a food processor or a juicer with mincing capabilities, throw them in an ice cube tray and then into the freezer for future use in soups, sauces and of course chili! 
One more thing I like to do for our chili, especially when we have an abundance of tomatoes: 

  • Run fresh tomatoes through a mincing juicer or food processor rather than throwing in canned tomatoes, fresher and ultimately a bit healthier (tomatoes in cans can have dangerous interactions with the aluminum considering the acidity of tomatoes).
And finally, our personal preference when it comes to eating a bowl of chili is to add raw onions, cheese and corn chips.

Thursday, October 4, 2012

Chicken Taco Soup

Extended Shelf Life for: Tomatoes, Peppers, Onions, Avocados, Limes
Photobucket
If I am truthful, I will let you know that I remember very little about the true way in which this soup came together and as is incredibly common in this kitchen, I have no idea what amount of what went in or stayed out, etc. And I realize that makes me a poor food blogger. But here's the thing, I believe, that sometimes in the kitchen, the most important thing is knowing what goes together, to know your personal preference for how much broth to have compared to the density of other ingredients and above all else, I think what is important is to use what you have, to use it well and enjoy the results as they are...this was a delicious soup and I'm going to tell you what goes into, but as for how much and exact measurements, let go of that and just let it come together, it's a soup for goodness sake!

Ingredients/Directions:
Inspired by Rachel Ray's recipe Mexican Chicken Lime Soup

 In a stock pot or dutch oven saute 1 chopped onion in a drizzle of olive oil until tender and translucent. Add 2-3 (or more) minced Garlic Cloves and 1 minced pepper of choice (or a couple and a variety if you like spice - we have handy-dandy roasted jalapeno ice cubes which I added at the end), saute for a couple of minutes, then push to the side. Add additional olive oil if needed and begin cooking 4-6 Chicken Breasts until juices run clear. At this point, I like to take a pair of kitchen sheers and a fork and cut the breasts into bite size pieces. Add 2-cups Home Made (or store bought) Chicken Broth to the pot and bring to a boil. Run about 10 tomatoes through a juicer (but not on the juicer mode...more like mincing/blending mode) or blender and add to boiling broth. Adjust liquid according to personal preference by adding water or broth. Season with, lime juice, salt, pepper, cayenne, chili powder and cumin. Scoop into bowls top with Shredded Cheddar Cheese and slices of Avocado (or mashed avocado if they're a little ripe ;)).

Thursday, September 20, 2012

Eggplant Tomato Pasta

Extended Shelf Life for: Eggplant, Basil, Onion and Tomatoes
Photobucket
I absolutely LOVE salvaging eggplants, they have quickly become one of my favorite vegetables to experiment with and discover, this dish came together quickly and easily and left both Mike and I feeling quite content and satisfied!

Ingredients/Directions:
 
In a large skillet, heat about 2 Tbsp. Olive Oil over medium-high heat, add 2 Eggplants worth of cubes, saute about 10 minutes until tender. If needed, add additional olive oil. Saute 1/2 of a chopped Onion with eggplant for about 5 minutes, add 2-4 cloves, minced garlic, saute another 2-3 minutes. Add 6 diced Roma Tomatoes to the skillet, reduce heat and cook until tomatoes are tender and break down slightly. Mix the eggplant sauce with the pasta seasoning with salt and pepper and additional olive oil if needed. Tear fresh Basil and sprinkle over pasta mix, top with your choice of Italian cheese, enjoy!

For more on Eggplants and other recipe inspiration check out my more detailed and interactive Squidoo Lens: The Art of Salvaging {Eggplant}

Wednesday, September 19, 2012

Egyptian M'saa'a

Extended Shelf Life: Eggplant, Pepper, Tomatoes

Photobucket
My first experiences with eggplants came by way of salvaged eggplants. Since those first moments with the spongy, purple veg I've come to love experimenting and playing with eggplant. Searching through my Kindle brought to the surface this delicious eggplant casserole, it is absolutely fantastic and highly recommended!

Ingreidents/Directions:
Inspired by: Nile Style: Egyptian Style Cuisine and Culture by Amy Riolo

Preheat oven to 350 degrees F.

 Heat 1 Tbsp. Vegetable Oil in a large saucepan over medium heat. Saute 1 small Onion until translucent, 3-5 minutes. Add 1 diced Anaheim Pepper and 6 cloves minced Garlic and cook until golden and aromatic. Add 3 cups Tomatoes, 1 tsp. ground Coriander, 1 tsp. ground Cumin and salt and pepper to taste. Bring tomato mixture to a boil, cover and reduce heat, simmer for 20 minutes or until thickened.

While the tomato sauce thickens, prepare the eggplant in a large wide skillet with one inch of vegetable oil over medium-high heat. When oil is hot (a drop of water sizzles when flicked into the oil is one way to test the readiness), add the eggplant slices and fry on both sides, about five minutes, until golden and soft. Drain cooked eggplants on a wire rack or plate covered with paper towels.

Once all pieces are ready, it's time to assemble the Ma'saa'a/Lasagna/Casserole. In a 9 inch cake pan, oval casserole dish or square casserole dish simply layer ingredients starting with eggplant, followed by sauce and cheese until all the ingredients are used and the dish is full. Bake uncovered for 20-30 minutes until cheese and sauce bubbles and a crust begins to form around the edges.

Enjoy with rice or crusty bread!

For more on Eggplants and other recipe inspiration check out my more detailed and interactive Squidoo Lens: The Art of Salvaging {Eggplant}

Wednesday, September 12, 2012

Curry Spinach and Potato Soup

Extended Shelf Life: Carrots, Potatoes, Tomatoes
Photobucket
The great thing about crockpots is it's quite easy to simply throw things in and let it go to work for the day. The unfortunate thing is...when you're more than a month behind on updating the good ole blog, it's a bit difficult to remember the exact process used.

Apologies.

Ingredients/Directions:

Wash and quarter a significant number of fingerling potatoes. Also chop 1-2 carrots, and some tomatoes. Throw into the crock pot. Season with curry powder, turmeric, coriander, salt, pepper, etc. For broth, use chicken broth and coconut milk until vegetables are submerged. Cook on low 6-8 hours or high 3-5 hours. During the last 30 minutes, add washed and chopped spinach until wilted. Serve over rice or with naan or simply as soup and enjoy!

Monday, August 6, 2012

Crockpot Chicken Lentil Chili

When preparing to move to the other side of the world, there seems to be a steady realization that there are food items which have been begging to enter the home-dweller's bellies.

And so I found myself accessing my 99 or so Kindle cookbooks (all free downloads...don't worry) to find a way to use up some major lentils.

This Chicken and Lentil Chili was top notch!
Photobucket
Directions/Ingredients:
Original Recipe thanks to The Everything Healthy Cooking for Parties by Linda Larsen.

Combine 2 chopped Onions, 5 minced Cloves of Garlic and 2 chopped Carrots in the bottom of 4-5 qt. Slow Cooker. Sprinkle with a seasoning mix of 3 Tbsp. Chili Powder, 1/2 tsp. Cumin, 1 tsp. Basil, Salt and Pepper.

Top with 1 1/2 cups Dry Lentils, 1/2 cup Brown Rice and 1 lb. Chicken Breasts. Pour 3 cups Diced Tomatoes (fresh or canned) over all. In a small bowl, combine 1/2 cup Tomato Paste with 1 cup of the Chicken Stock; stir until tomato paste dissolves. Add to crockpot along with additional 3 cups Chicken Stock and 3 cups Water.

Cover and cook on low for 7-9 hours or until lentils and rice are tender and chicken is thoroughly cooked. Serve with sour cream (plain homemade yogurt) and salsa if desired.

Wednesday, June 27, 2012

Turkish Breakfast

A while back we hosted a couple of CouchSurfer's from Turkey, although they are currently living in Northern Ireland. As always, we learned a lot and enjoyed their company immensely - and, they made a delicious breakfast which in turn inspired some re-creation efforts.

 I haven't been totally confident that my dish is anywhere near the delciousness of theirs, but I'm relatively satisfied and will continue to work out the kinks. For now, here's a general idea of this Turkish Breakfast we learned from a couple of CouchSurfers!

Photobucket
Photobucket
Photobucket

Ingredients/Directions:

In a large skillet heat a couple Tbsp. Olive Oil, saute 1 chopped Onion, 1-3 diced Green Chiles and 3-4 minced cloves of Garlic. Meanwhile, seed and chop 4-6 Tomatoes. Add the chopped tomatoes to the onion and pepper mixture as well as a dash of Cumin, Salt and Pepper. Leave this mix alone until your ready to serve up the breakfast. Before serving, re-heat the tomato mixture and whisk 3-4 eggs which you will then add to the heated tomato mixture. Let eggs set for a couple of minutes before breaking a part and continuing to cook the eggs through. Serve this mixture with crusty bread and fine cheese (Feta would be ideal but we use anything we have on hand here in the land of Kimchi). Scoop some of the egg and tomato mixture onto a slice of bread, top with a bit of cheese and place into your mouth - let out a sigh of satisfaction and repeat until the pan is clear.

Tuesday, June 26, 2012

Tuna and Tomato Stuffed Baguette

Photobucket

The thing I love most about traveling, whether it's in the country where I reside or if it's an adventure which requires a seat on an airplane, is discovering new foods and combinations of old favorites.

When I did my study abroad in Granada, Spain, I lived with a host mother. Anytime my friends and I were going on an organized or spontaneous weekend outing she'd make me two Bocadillos - a simple yet always delicious baguette sandwich. No matter the occasion, I always left my home-stay with one baguette filled with an egg and cheese omelet and another baguette stuffed with tuna, tomatoes and a bit of olive oil.

I studied abroad in the fall of 2005, yet distinctly remember the joy of having these two sandwiches to munch on weekend getaways. So, 7 years later, it's time to re-create the magic!

Rather than simply slicing my baguette however, I dug out the dough and then stuffed a mixture of tuna, tomato, olive oil, basil, salt and pepper into the opening, let the olive oil have a couple minutes to soak into the bread and then enjoyed every last bite of this single meal which brings back some of my fondest Spanish memories.

Wednesday, June 20, 2012

Tomato and Basil Quinoa Salad


Photobucket

I had a bit of prepared quinoa left over after this recent casserole and spent some time considering what exciting things I could throw together. I had initially pictured a simple breakfast of a fried egg and fresh torn basil atop a pile of quinoa but soon had some tomatoes on hand.

So, I threw together a quick tomato, basil, olive oil and balsamic vinegar 'salad', let it set over night and threw it on top of this chilled quinoa grains - mixed it up and what do you know, threw an egg on top for a delicious, light and perfect dinner for a warm, Korean summer evening!

Saturday, June 9, 2012

Samgyupsal Breakfast Burritos

Photobucket

Samgyupsal is Korean three-layered pork which resembles bacon but doesn't have that cured and salty factor the American bacon possesses. Regardless of your opinion on how bacon/pork should taste, Samgyupsal is delicious as a grilled/BBQ'd meat which is the typical serving style here in South Korea - but it also makes for a nice addition to various dishes including good ole Saturday Morning Breakfast Burritos.

Also, i did these burritos up with some additional flare because it just so happened to be a day when I need to clear a few things out of the refridgerator - so while I add a common Korean meat dipping paste and a few tablespoons of ranch to my eggs, it's not really necessary, but helpful if you find yourself in need of clearing out some room in the fridge.

Ingredients/Directions:

In a large skillet, fry up some thinly sliced samgyusal until cooked through, use scissors to cut the pork into bite size pieces. If loads of fat have been rendered, drain some off, however about a Tbsp. or so will be a nice way to add flavor and non-sticking power to 1 chopped Green Pepper a handful of diced Cherry Tomatoes and 2 cloves of minced Garlic. While sauteing the pork and the veggies, beat in a seperate bowl 6-8 eggs with no more than a 1/4 cup of ranch and a Tbsp. or 2 of Korean bean paste for dipping meat. Make sure sufficient oil/fat remains in the skillet to keep the eggs from sticking before pouring it over the meat and veggies. Let egg set slightly before using a spatula to break up the egg and continue cooking. Throw the mix in a flour tortilla, top with cheese, fold it up and throw on to a hot, dry skillet to  melt the cheese and make the outside crispy. Enjoy!
Related Posts Plugin for WordPress, Blogger...