Showing posts with label Preserves. Show all posts

Sunday, January 13, 2013

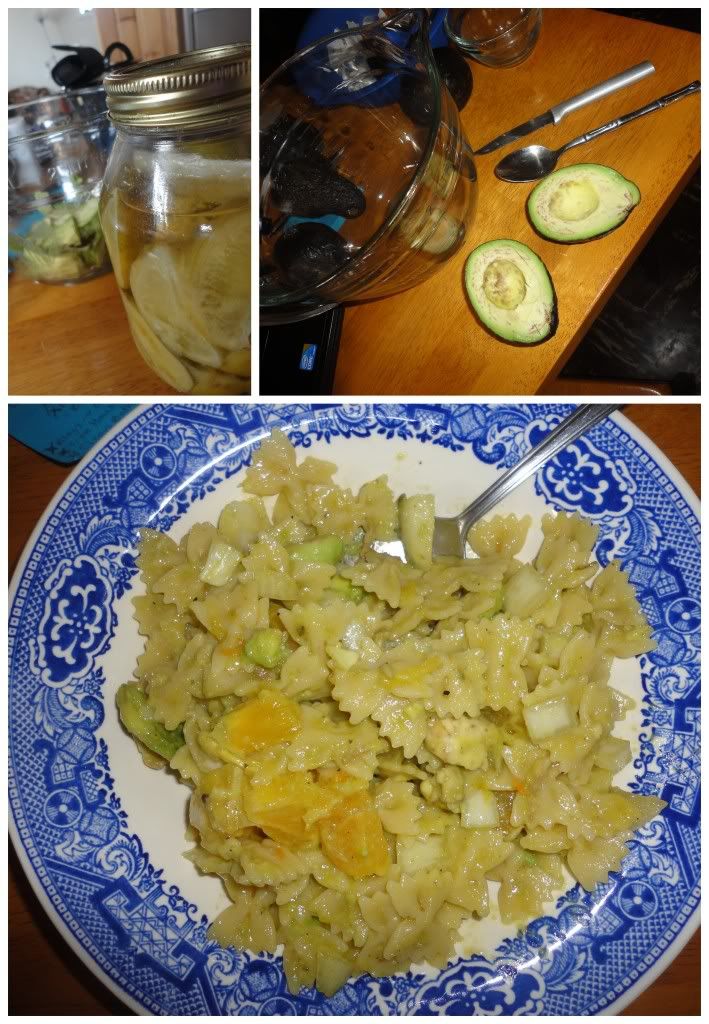
Orange-Avocado Pasta Salad

Extended Shelf Life for: Limes, Avocados, Tangerines, Onion
Photobucket
Sometimes you just throw something together quick and it works out in all the perfect ways.

Ingredients/Directions:

Prepare pasta of choice. Slice and dice an avocado, mix with juice of one lime, salt to taste, one minced onion and 2 chopped oranges which have been zested to add additional flavor to the dish. Add pasta to the avocado-orange mixture, mix - let set for a few moments before serving and devouring. Probably fits spring/summer better, but...when you dive...what can you do?

Saturday, January 12, 2013

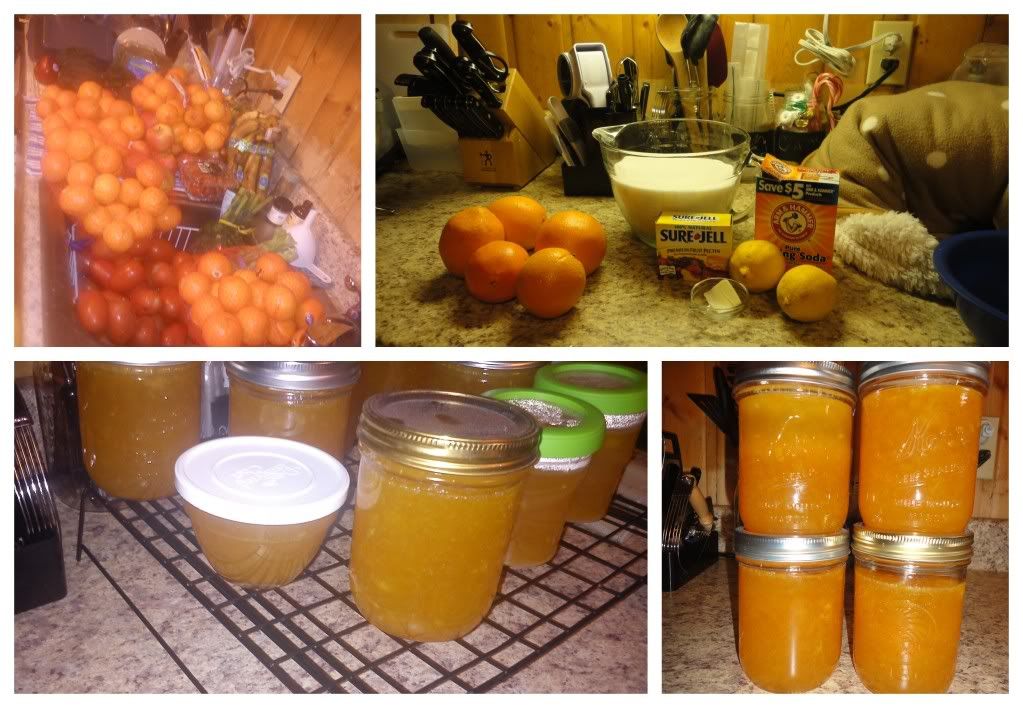
Orange Marmalade

Extended Shelf life for: Oranges
Photobucket
We dived SOOOOO many oranges recently. Bag, after bag of oranges. Why were so many oranges discarded you ask? Generally, an entire bag of something like oranges finds it's way into a dumpster because one of them is rotten. And regulations forbid opening the bag, washing the fruit and selling as bulk.

So they are tossed.

Sometimes they are retrieved.

We ate them. Juiced them. Dried out their skins. Candied their skins. And made marmalade.

This marmalade turned out better, more jelly-like, than my Lemon Marmalade, which I think is primarily due to the fact that I used pectin in this recipe. So, if you wanted to substitute lemons for the oranges in this recipe, I'm sure that would be acceptable.

Ingredients/Directions:
Doubled the recipe from One Hundred Dollars a Month

Begin boiling the water for the canning process...because it takes nearly forever. Prepare jars, lids, etc. For a double recipe I got about 6-7 pints.

Remove peels from about 8 Oranges and 1-2 Lemons. Essentially, you want the orange/yellow part without the white, pith part. Throw the peels into a large pot with 5 cups of water and 1/4 tsp. Baking Soda, bring to a boil. Reduce heat to medium-low and simmer for about 20 minutes, stirring occasionally. Meanwhile, juice your oranges and lemons - discarding the pithy-white peels. Add juice after 20 minutes and continue to simmer for another 10 minutes.

Measure 8 cups of this mixture (adding water if necessary) into a large stockpot. Stir in 2 boxes of Sure-Jell Pectin followed by 1 tsp. Butter (helps reduce foam - who knew?). Bring mixture to full boil, stirring occasionally. Stir in 8-11 cups of Sugar (to taste). Bring to a boil and boil for exactly one minute, stirring constantly. Remove from heat, skim off any foam and proceed to spoon into jars and process as you would other jams and jellies.

Let set overnight or for 24 hours, check the seals and enjoy!
 

Saturday, January 5, 2013

Pizza Experiment #3: Tomato and Preserve Onions

Extended Shelf life for: Onions and Tomatoes
Photobucket
I recently revealed one pizza crust recipe, and have yet to post any others (although I'm working on it ;) ). A few weeks back, I also let you in on the secret of delicious preserved red onions. And now, here I am, ready to throw together a new pizza! Essentially, the toppings are the same for both pizzas:

Tomato, Preserved Red Onions and Cheese.

One also received a few pepperonis.

Rather than making a sauce I simply brushed the crusts with olive oil and sprinkled with oregano.

Other than the pepperonis, the primary difference was that for one of these pizzas I sprinkled cheese on first, followed by ingredients and then a touch more cheese, where as the other was done in the more tradition: ingredients then cheese style.

It didn't make a huge difference, but I kind of liked having my vegetables surrounded by cheese and how the bottom layer of cheese was extra gooey and the top layer of cheese was a bit more golden and allowed the vegetables and toppings to 'shine' through.

So there you have, Pizza Experiment #3!
Photobucket

Crockpot Apple Butter

Extended Shelf Life for: Apples, Cutie

Unfortunately, I took no photos of this dish. However, if you want to see what it looks like at various stages, check out this recipe filled with step-by-step directions.

Essentially, you peel and core a few apples, toss in a tough of water, cinnamon, nutmeg, I added the skin of a tangerine and let it go to work in the slow-cooker for an entire day. Take out the orange peel, season with sugar to your liking, can or store in the fridge, wam-bam-thank-you-mam!

Friday, November 30, 2012

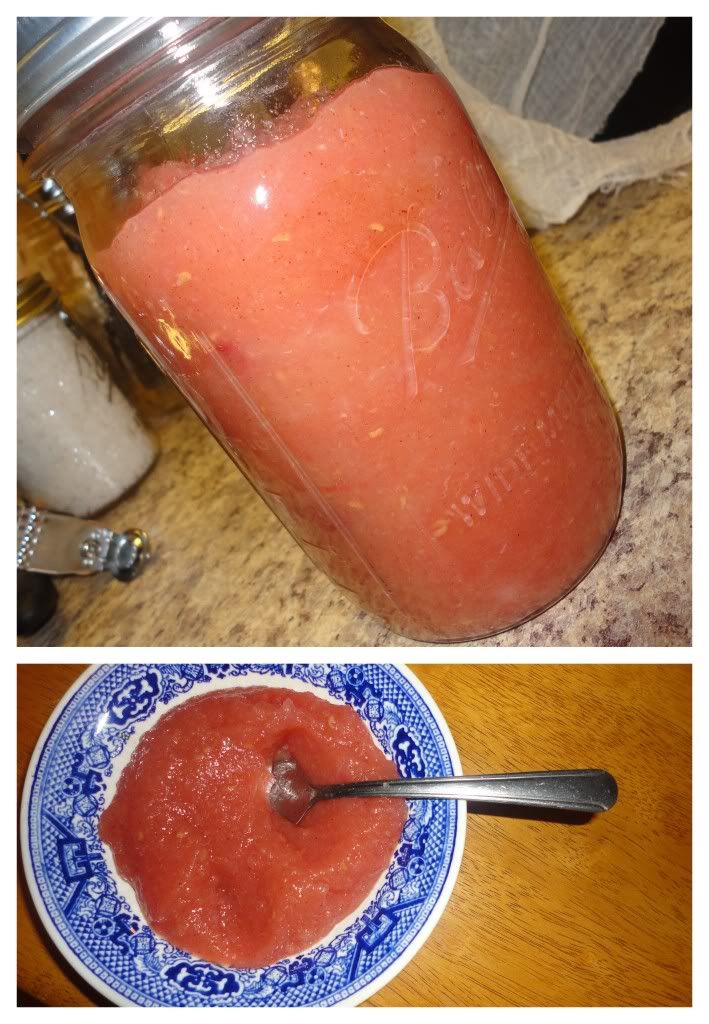
Raspberry-Applesauce

Extended Shelf Life for: Apples and Raspberries
Photobucket
Here we go! Another non-exact recipe from the kitchen of Melissa Harrington...I swear, sometimes I only blog to remember what's come out of my kitchen...oh wait, that is my primary reason for this little ole blog ;)

If you need a good applesauce recipe, I suggest you check out this page which has a nice variety including stove-top, crock-pot and oven varieties. Once you've made your applesauce, if you're wanting to add raspberries, here's the trick to the trade - wait until the last minute.

Raspberries are delicate little souls and will break down into a warm apple sauce without much begging on your part. So, before you start your applesauce, I recommend that you lightly sprinkle your raspberries with sugar, let them set while you prepare the applesauce. When the applesauce is finished, take a quick fork to the raspberries to mash them up before dumping them into the applesauce. Mix until the color is even and viola, you've got a beautiful, raspberry-flavored applesauce which, trust me, you'll love having on the breakfast table!

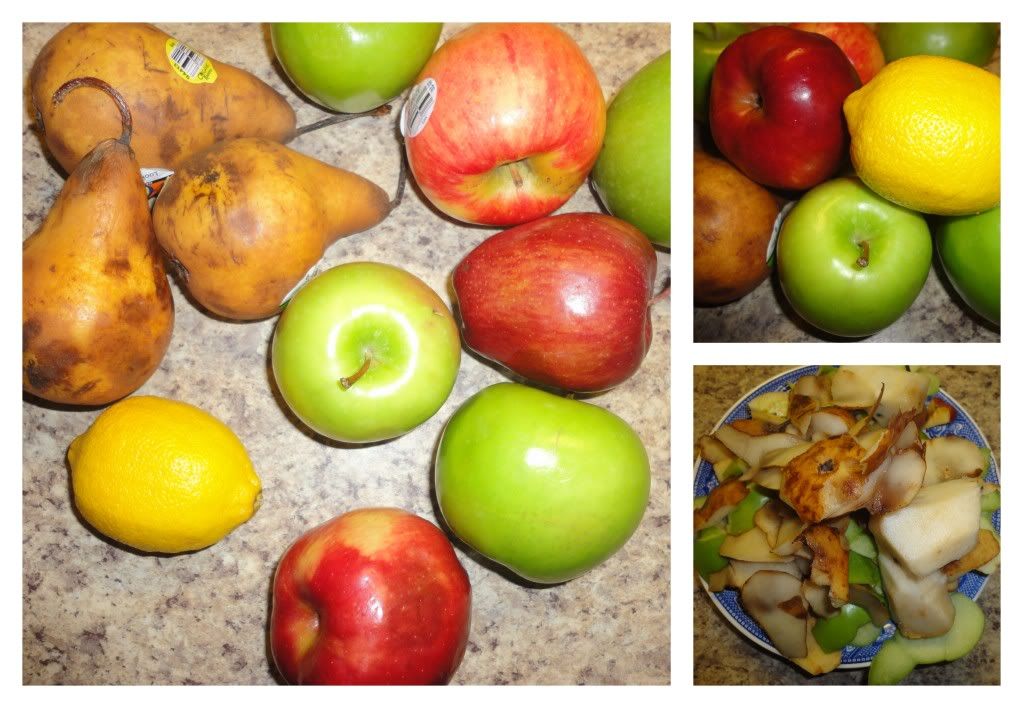
Fruit Cocktail Vinegar

Extended Shelf Life for: Pear Skins, Apple Skins and Lemon Peel
Photobucket
Recently, I made Apple Cider Vinegar, it was easy and turned out a DELICIOUS pot of vinegar of which the man and I have enjoyed a daily shot (which is beneficial in terms of boosting our immune system AND regulating our blood sugar, meaning we aren't starving 2 hours after breakfast - awweeesome!)

Anyway, in learning to make Apple Cider Vinegar, I discovered that basically the scraps of any fruit or veggie can easily and quickly be turned into a health-packed (and surprisingly delicious) vinegar product.

So, with some aging apples, pears and another few lemons I set to work with another batch of vinegar with was the cores and skins of a few pears, a few more apples and the peel of a single lemon. I put these scraps into our large crock and covered with water and sugar (one quart of water + 1/4 cup of sugar) until the peels were completely covered. Cover the crock with cheesecloth, let set in room temperature (60-70 Fahrenheit) for about a week before straining out the peels, transferring the liquid to another crock (or glass jars) and covering with cheese cloth for another 2-3 weeks until you have the degree of fermentation and vinegary taste that you love and desire. The lemon peel here makes the vinegar quite tart and sour, but completely enjoyable!

Sunday, November 11, 2012

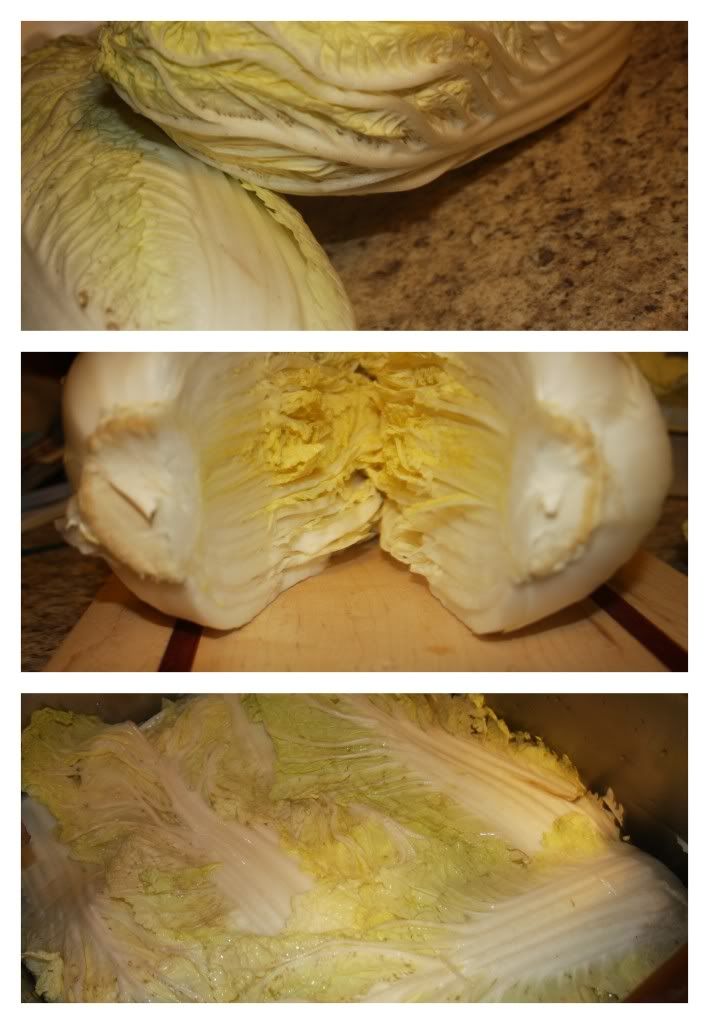
Kimchi!

If you need to extend the life of cabbage, this is a great option. However, we simply needed to have some kimchi re-enter our life and this includes nothing salvaged, except perhaps an onion.

For me, it was relatively important to prepare some kimchi in November, as November/the fall is generally the time when all the old women come out from the woodwork gathered around piles and piles of cabbage and working together to make sure the Korean staple is ready for the long winter ahead.

A few other notable mentions about my kimchi making day: It was the Korean "holiday" of Peppero Day (11-11) AND I had the great joy of being assisted by a sweet Korean family that is here on behalf of the man of the household serving an exchange as a visiting professor, making my first kimchi experience feel that much more authentic and valuable.

Now, on to Kimchi making...

There are essentially three parts to preparing Kimchi: Soaking, Making the Red Pepper Paste and Assembly. I will give you a rough sketch of each one of these parts followed by a link to a very detailed explanation of each step just in case you are in need of more photos and great explanation. 

Part 1~SOAKING:

Photobucket
Kimchi making will undoubtedly be a two day process, starting with this first step which is, in essence, preparing the cabbage by soaking it in salt water.

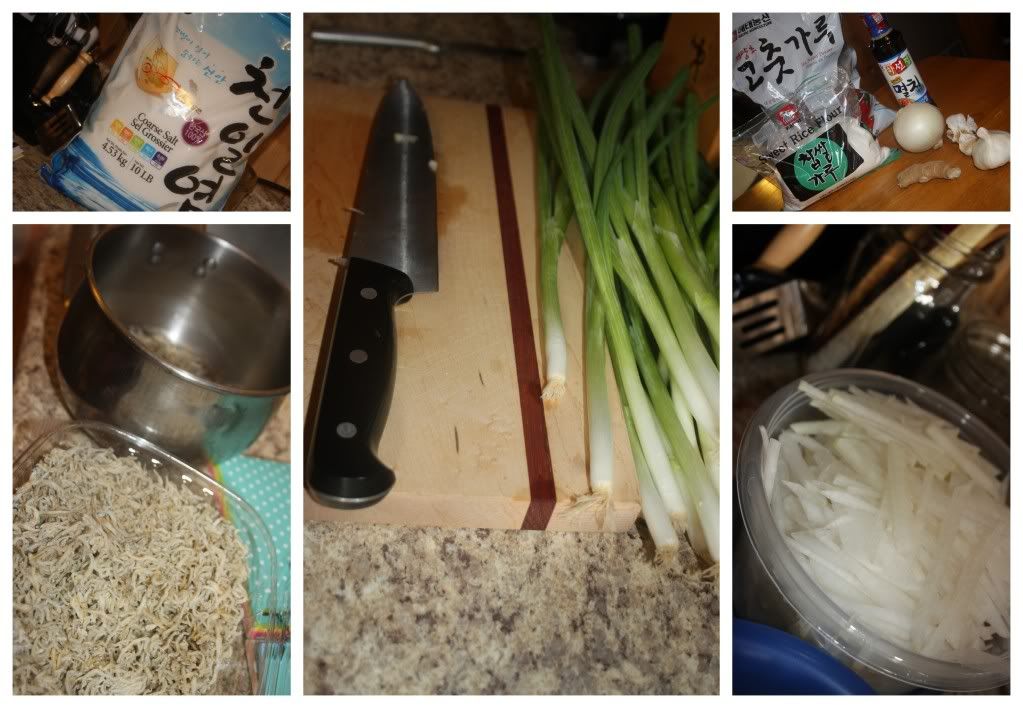
You will need:
  • Two Heads of Napa/Chinese Cabbage
  • 3 cups Coarse Sea Salt, preferably from Korea -- no joke
  • 30 cups of Water
What you will do:
  • Remove the outer 2-3 leaves from each cabbage, but don't discard!
  • Cut a 2" slit in the stem of each cabbage, carefully split heads of cabbage in half (easier than it sounds, I promise)
  • Salt each leaf of the cabbage, making sure to get plenty of salt on the thick, white parts and extra careful not to tear the leaves or disassemble the cabbage half.
  • In a deep, large container (such as the kitchen sink), dissolve 3 cups of Salt in 30 cups of Water.
  • Place each cabbage half, face-up into the water and cover with the reserved cabbage leaves.
  • Cover with plastic and use rocks, tin cans or a heavy lid to press the cabbage halves down into the water.
  • Soak for 8 hours. Flip and soak another 4 hours.
  • Check for bend-ability in the cabbage stems, when they are supple it's time to rinse (3 times), halve again (so you end up with 8 quarters of a whole cabbage) and drain (at least two hours, during which you should prepare the next step).
For greater details on soaking, check out this thorough post at Beyond Kimchee (my favorite Korean food blog!)

Part 2~MAKING THE RED PEPPER PASTE:
Photobucket
You will need:
  • A few handfuls of dried sea creatures (or one handful if you can't find multiple sea creatures or don't like sea creature flavored items - but one handful is a good idea)
  • 3 cups of Water
  • 2 Tbsp. Sweet, Glutenous Rice Flour
  • 1 Lg. Korean Radish, julienne into 1/8" matchsticks
  • 2 bunches of Green Onion
  • 4 cups of Korean Red Chili Flakes
  • 1/2 large Onion, roughly diced
  • 10 cloves Garlic
  • 2" piece of Ginger, roughly diced
  • 4 (or 2) Tbsp. Anchovy Sauce
  • 4 (or 2) Tbsp. Shrimp Sauce/Salted Shrimp
  • 1 1/2 Tbsp. Sugar
  • 2 Tbsp. toasted Sesame Seeds
What you will do:
  • Make a rice glue by boiling your handful of dried sea creatures in 3 cups of water, simmer for 10 minutes, remove from heat and let set, as is for 20 minutes. Strain off sea creatures and discard sea creatures, reserving 2 cups. Bring 1 1/2 cups of stock to boil while continuously whisking in the 2 Tbsp. of Glutenous Rice Flour until the mixture is bubbly and has thickened. Save the plain 1/2 cup stock for later.
  • In a blender or food processor, puree 1/2 large Onion, 10 cloves of Garlic, 2" piece of Ginger and reserved 1/2 cup Stock until smooth.
  • Pour 4 cups of Korean Red Chili Flakes into a large mixing bowl, add the onion mixture and cooled rice glue, anchovy sauce, salted shrimps, sugar and sesame seeds, mix.
  • Add the sliced Radish and diced Green Onions and let set for 30 minutes so the radish can extract some moisture and the mixture will be come more smooth and spreadable.
  • Taste test the sauce with a piece of cabbage to evaluate saltiness and flavor, adjust with additional fish sauce or stock for spread-ability as deemed necessary, then move on to assembly.
For greater details and more pictorial assistance, check out Cabbage Kimchee: Part Two from, yet again, Beyond Kimchee. 

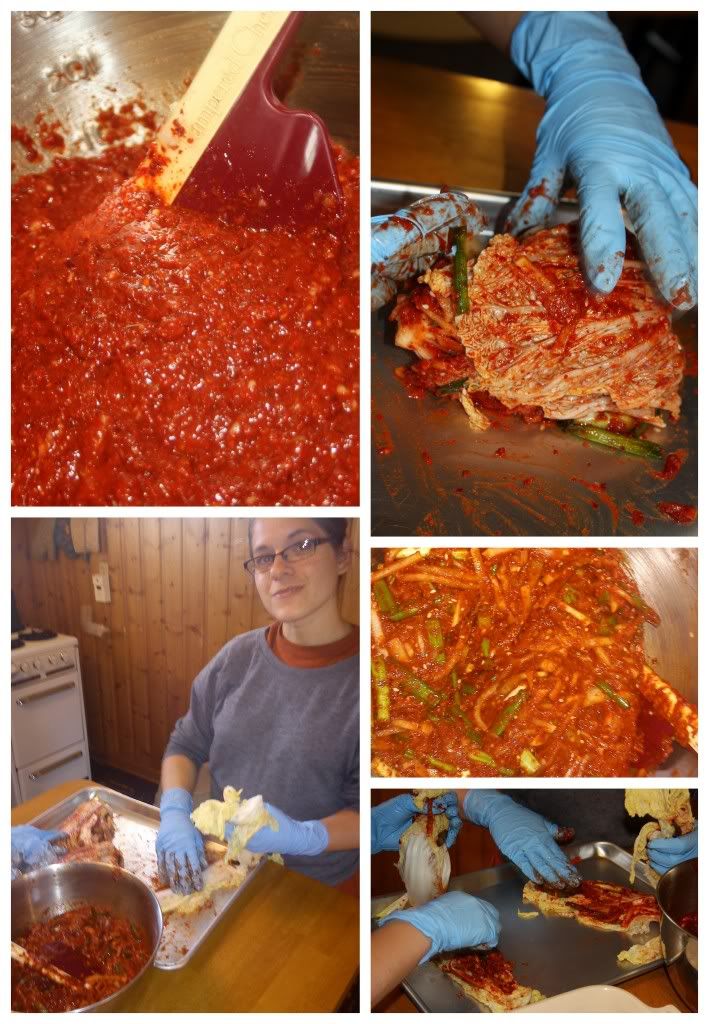
Part 3~ASSEMBLY:
Photobucket
You will need:
  • Rubber Gloves
  • A Cookie Tray or Large, shallow dish
  • Airtight containers for storage
 What you will do:
  • Gently handle each cabbage quarter and use your gloved hands to spread red chili paste between each and every leaf. Roll up the quarter, place in an airtight container. Let the kimchi sit out on the counter 2-3 days for fermentation and moisture extraction before relocating it to the refridgerator.
  • Our Korean assistants explained that the outer leaves can be used to cover a bit of the kimchi, but that it is also generally spread with red pepper paste and then cut up and eaten that day as fresh kimchi with rice, which, by the way, is delicious!
For more details on this final part of preparing your kimchi, head over to Beyond Kimchee one more time!

In our house, we really love this fermented vegetable and have been beyond satisfied with the results of this recipe and process, slightly time consuming, but if you love fermentation, spicy foods, or kimchi itself, it's well worth it!

Thursday, October 18, 2012

Salt Preserve Limes and Cubes

Extended Shelf Life for: Limes
Photobucket
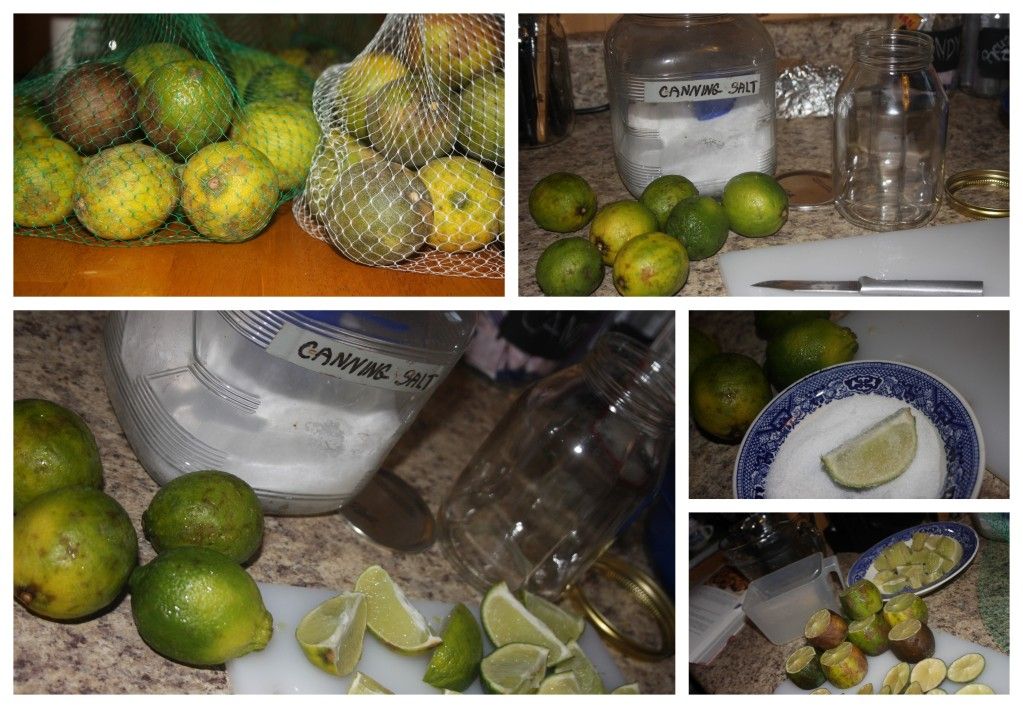
Just as we finished using up our lemons, we had a sudden abundance of limes. Not interested in zesting lime-after-lime, I hit the web and searched for other preservation options. I opted on two preservation options in term of my limes.

First, I peeled and juiced about half or 2/3's of the limes, poured the juice into ice trays, threw them in the freezer then popped the little sucker's out of their trays, transferred to a Ziploc bag and now I have about 20 tablespoons of lime juice ready and waiting to be added to salsa, soups, smoothies, margaritas, whatever the case may be.

Second, I took about a bag worth of limes, quartered them (but didn't cut all the way through), sprinkled with some salt (coarse sea salt or canning salt to be exact). Press the limes down into the jar until the jar is full and leave overnight so the limes have a chance to extract some juice. In the morning, top the jar off with fresh lime juice and store in the pantry until you have a need for some salty lime juice to flavor any of the aforementioned items or whatever you may want to add the zesty flavor of lime.

Sunday, October 14, 2012

NYT's Red Onion Preserves

Extended Shelf Life for: Onions
Photobucket
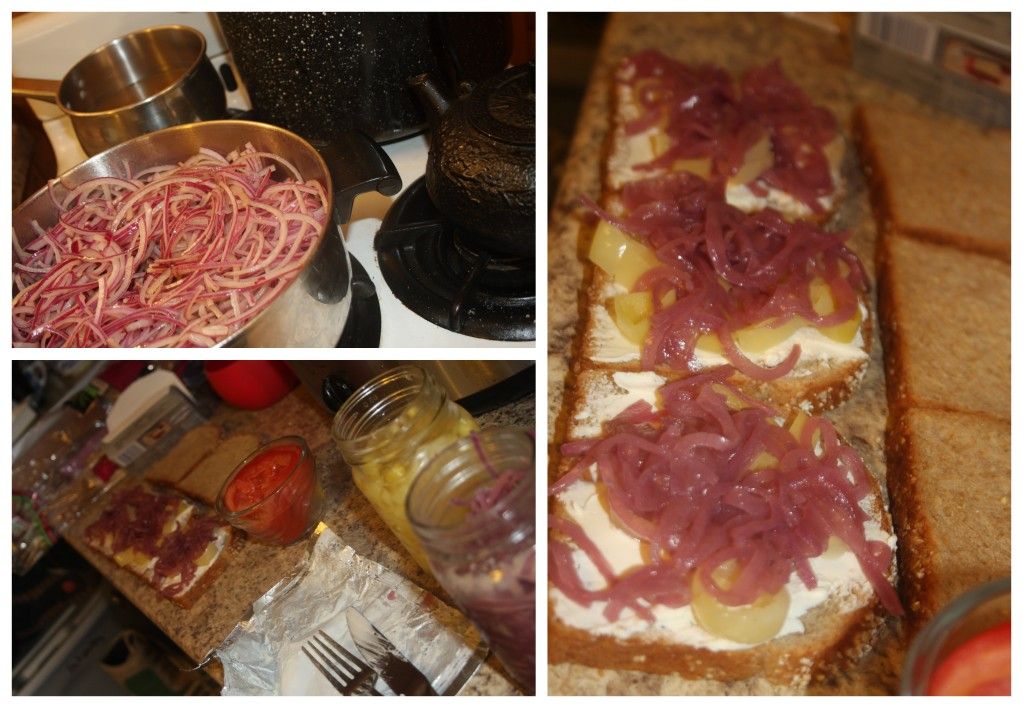
 As part of my new job, I get to assist my good friend in hosting the occasional ELL (English Language Learner) Family Night. For such an event we make sure to offer a complete meal to guests as well as helpful information for acquiring language and adjusting to a new culture. For the first family night, we served up large sub sandwiches courtesy of Wal-Mart and ended up bringing home more than a few containers of perfectly sliced, red onions. And while red onions are delicious on their own, they have an aroma which permeates all things and the upstairs kitchen was beginning to take on a rather foul odor.

So, I went to work and did what I do best, preserve them suckers!

A quick internet search revealed a 1988 New York Time's recipe for  Red Onion Preserves.

The only thing the original recipe lacks are pictures, so above you have a photo of the delicious, and I mean DELICIOUS, little onion slices and below, you'll find the recipe (in case you have an aversion to clicking on links).

Ingredients/Directions:

Peel and slice 6-7 red onions, cut in half, you'll need about 8 cups total. Heat 2 Tbsp. of butter in a heavy kettle and add the onions, 1/4 tsp. Allspice, 1 bay leaf and 1 tsp. finely grated Ginger. Cook and stir often for about 10 minutes. Stir in 3 Tbsp. Honey and 1/4 cup Red-Wine or Malt Vinegar. Cook, stirring often, for an additional 5 minutes. Let preserves cool and store in a tightly covered container for as long as you can go without eating them! They're great warmed up with meats and in omelets or as a sandwich condiment. What use will you find for Red Onion Preserves?

Saturday, October 13, 2012

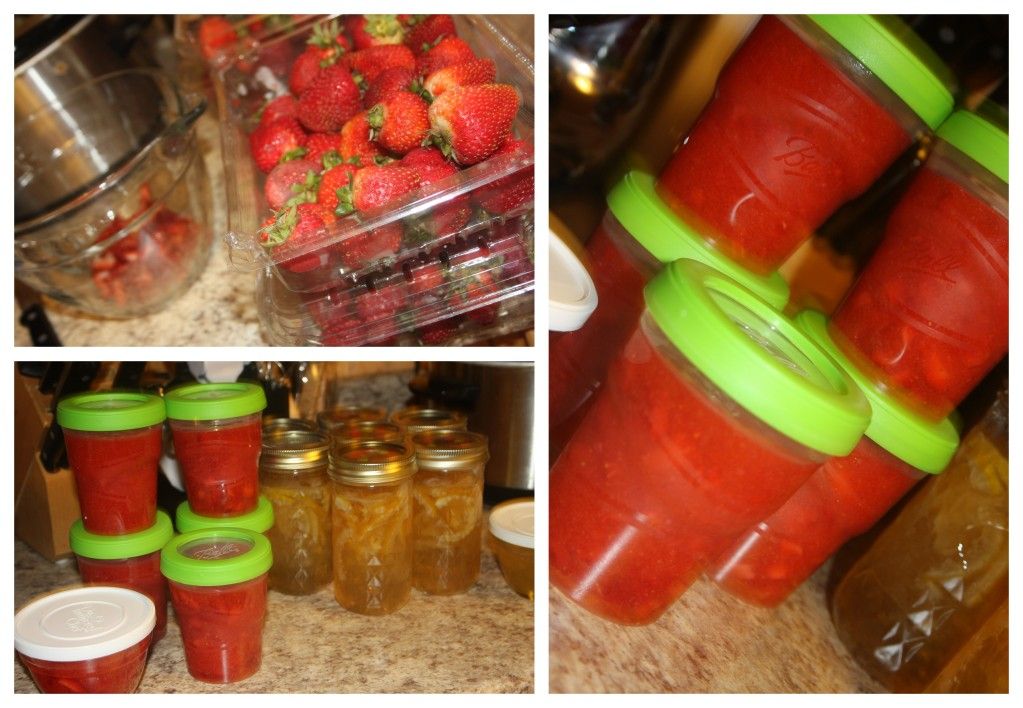
Repeat: Strawberry Freezer Jam


Photobucket
In my early salvaging days I threw a batch of this together. It's quite possibly the most delicious jam I've ever had and it's SO simple to make. Just do it!

 Ingredients:

4 cups hulled Strawberries
4 cups Sugar
1/2 tsp. finely shredded lemon peel
1 7.5 oz. package of regular powdered fruit pectin
3/4 cups water

Directions:
Use a potato masher to crush the berries until there is about 2 cups of pulp. Add sugar and lemon peel, let stand for 10 minutes. Prepare fruit pectin in pan by boiling for 1 minute, stirring constantly. Add to berry mixture; stir for three minutes when mixture is no longer grainy. Ladle into half pint freezer containers, let stand for 24 hours before placing in the freezer for up to a year.

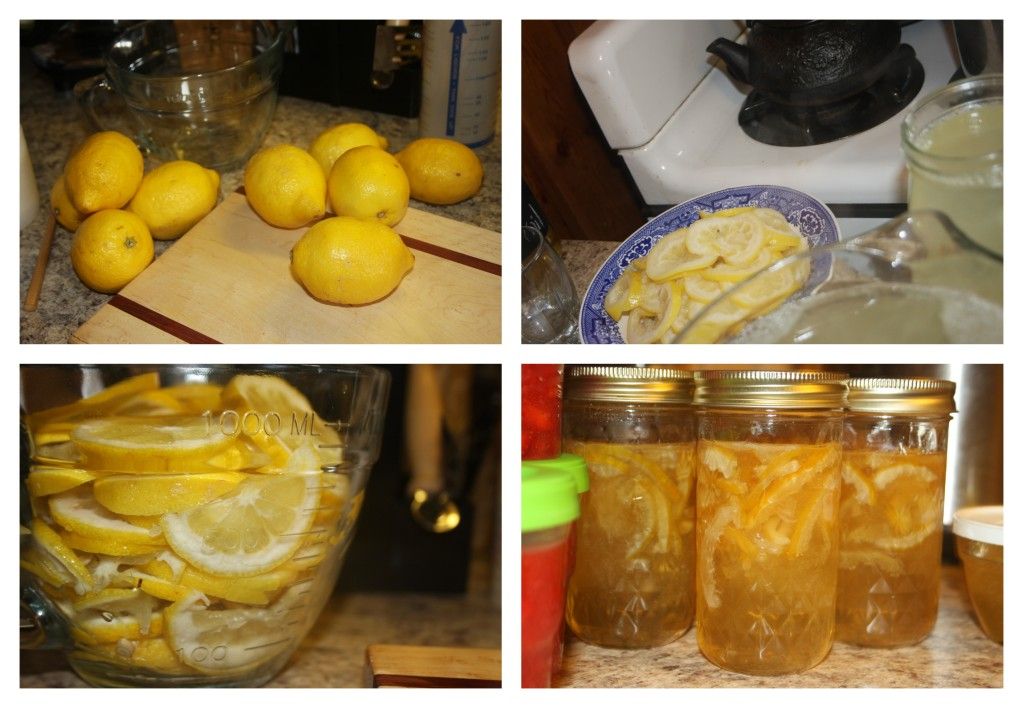
Lemon Marmalade

Extended Shelf Life for: Lemons!
Photobucket
I think lemons are the most joyful fruit available in the supermarket and hanging from trees today.

When the man a CouchSurfer came home with multiple bags filled with lemons, I was quite thrilled and being as it was 'canning' season, I went ahead and sought out a way to use up these joyful little gems in a way that they would just keep on giving.

I debated doing Lemon Curd in bulk, but with the addition of eggs, it seemed to difficult of a task and I opted rather for Lemon Marmalade. A choice I far from regret!

It was a bit tricky and time consuming and I'm not 100% certain that it is a recipe which is easily undertaken at high altitude, BUT it's still delicious and worth a shot.

Unfortunately, I can't recall exactly where I found my recipe so...just be thankful I wrote it down in my little recipe notebook!

Ingredients/Directions:

Combine 4 cups, thinly-sliced-unpeeled lemons and 3 quarts water in a large kettle or stock pot. Bring to a boil, boil for 20 minutes or until lemon peels are tender. Strain off lemon peels and re-measure water, making sure there is still a total of three quarts. Combine water, fruit peels and 8 cups of sugar in the kettle or stockpot and bring to a boil til it sheets or reaches 221 F, pour into hot sterilized jars and seal. Enjoy or give as gifts.

Saturday, September 29, 2012

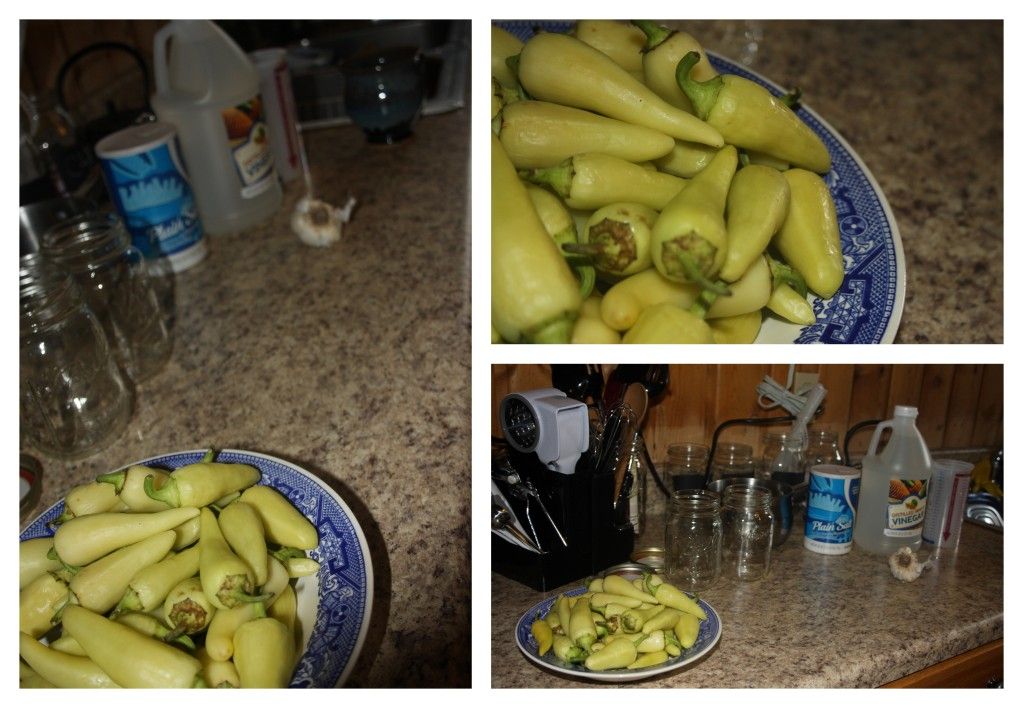
Preserving the Harvest: Pickled Peppers

Extended Shelf Life: Fresh Banana Peppers (?)
Photobucket
It's possible the man came home with a box full of small peppers and I may have got a bit excited at the possibilities since it was canning season and all... So, I went on a happy-go-lucky internet search and came across this recipe at My Man's Belly -- what happened next was spicy, tangy, delicious and perfect for sandwiches!

Ingredients/Directions:

You need a lot of peppers...I just sliced and shoved peppers into jars until I ran out of peppers, which ultimately occurred way too soon ^^ Throw 12 garlic clove halves (that means you'll need 6 garlic cloves) into the jar with the peppers. In a small saucepan bring 1 1/2 cups Water,1 1/2 cups distilled White Vinegar and 4 tsp. Salt to a boil over medium high heat. Remove from heat and pour over your peppers until they are all fully submerged. Cover and let set overnight, refrigerate and enjoy for the next 2 weeks (or more if you're a slow-eater/non-expiration-date-worrying-type-person).

Sunday, July 1, 2012

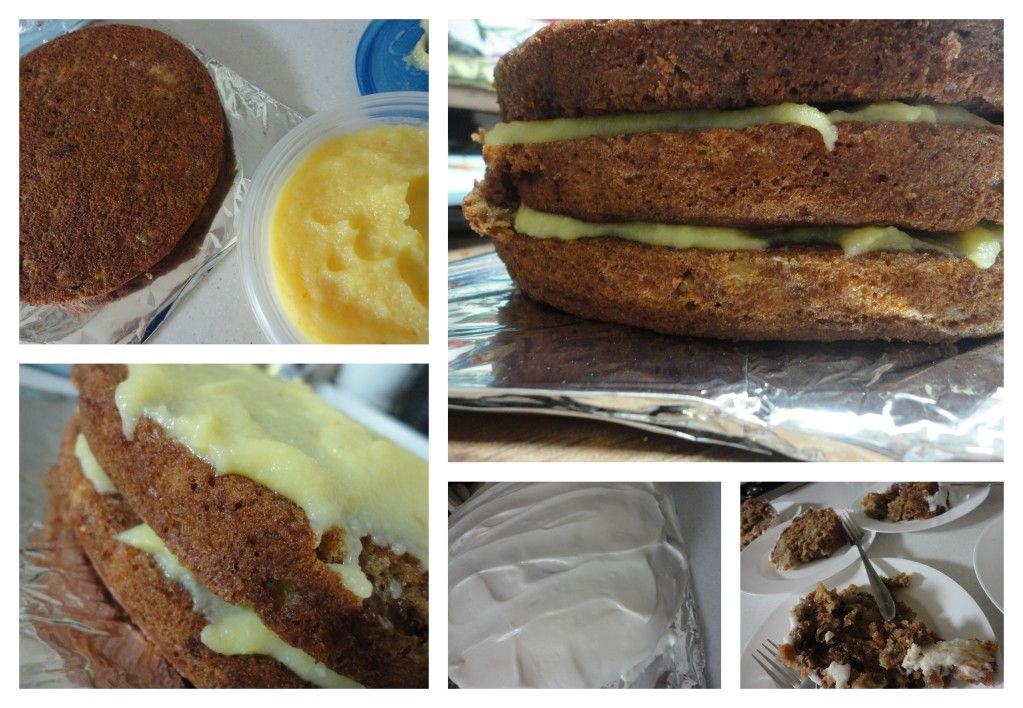
Pineapple Curd and Hummingbird Cake


Photobucket
As I began to fell like I was the master of curds and realize that it was essentially fruit juice plus eggs to make a kind of custard, I began to think it might just work with a wider variety of juices than previously considered and upon realizing I had just the right amount of pineapple juice on hand, I decided it was as good of time as any to go into experiment mode.

Turns out, substituting pineapple juice for lemon juice in a typical Lemon Curd recipe results in some deliciousness to be sure.

For true delicacy, make a Hummingbird Cake, spread some Pineapple Curd between the layers and top with either Cream Cheese Frosting or Yogurt Frosting...sure to please!

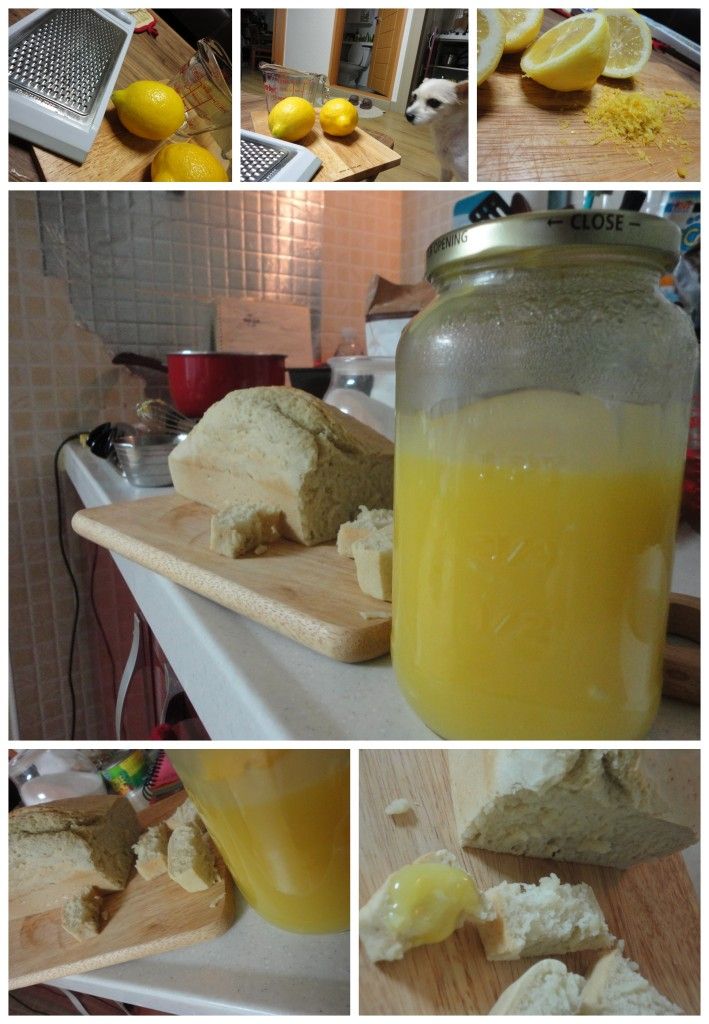
Lemon Curd


Photobucket

For Easter, I had made an Orange Curd which received rave reviews from our two 'family' members that joined us for the Easter Meal. One of the two recently began preparations for our 4th of July in South Korea celebration and requested another batch of curd. Unfortunately, oranges are out of season and unavailable at my local market, however, I was able to pick up a few lemons and used up some fake lemon juice as well to make this more tart and more sour than orange, Lemon Curd.

Ingredients/Directions:

In a small sauce pan heat 1 cup Sugar with 1 Tbsp Lemon Peel, grated and 1 cup Lemon Juice. Whisk well. Once heated, add 3 Tbsp. Butter and 3 Lg. Eggs, slightly beaten. Stir constantly until the mixture is thickened and coats the back of a spoon - about 8 minutes. Pour into glass jar or other container with cover and chill. Can be stored in the fridge for up to 2 months.

Sunday, April 8, 2012

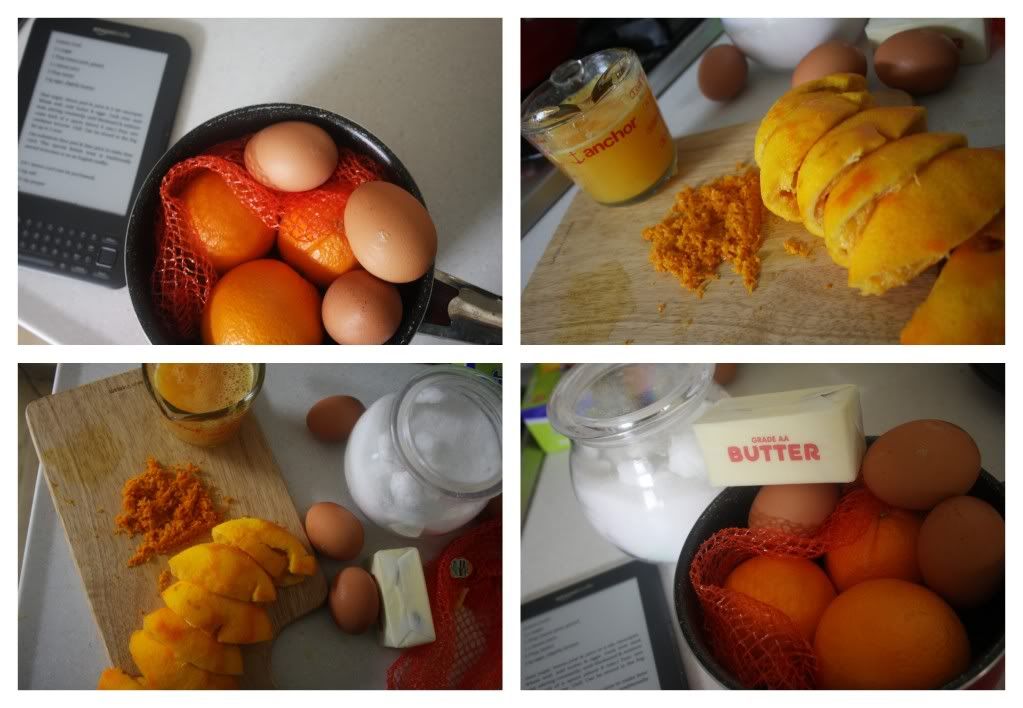
Orange Curd

Photobucket
I've been spending more time reading cookbooks from my Kindle, just to garner inspiration. In a cookbook entitled Love of Cooking: Salads by Maggie Brooks I spotted a recipe for Lemon Curd. The author then states that Lime can easily replace the lemons in the recipe...I however was lacking both Lemons and Limes and was rather fortunate to have had some oranges recently gifted to me. I decided that Lemons, Limes and Oranges share enough properties (pulp, zestable, citrus) that oranges could also be substituted in this recipe. Friends, oranges are a good and beautiful substitution in a Lemon Curd recipe.

Ingredients/Directions:

In a small sauce pan heat 1 cup Sugar with 1 Tbsp Orange Peel, grated and 1 cup Fresh Orange Juice. Whisk well. Once heated, add 3 Tbsp. Butter and 3 Lg. Eggs, slightly beaten. Stir constantly until the mixture is thickened and coats the back of a spoon - about 8 minutes. Pour into glass jar or other container with cover and chill. Can be stored in the fridge for up to 2 months.

I recommend grating all of the orange peel and allowing the surplus to air dry to be used in future dishes.

We enjoyed this curd on top of some home-made Beer Bread.

For more sweet treats, check out, Sweet as Sugar Cookies....


Wednesday, March 21, 2012

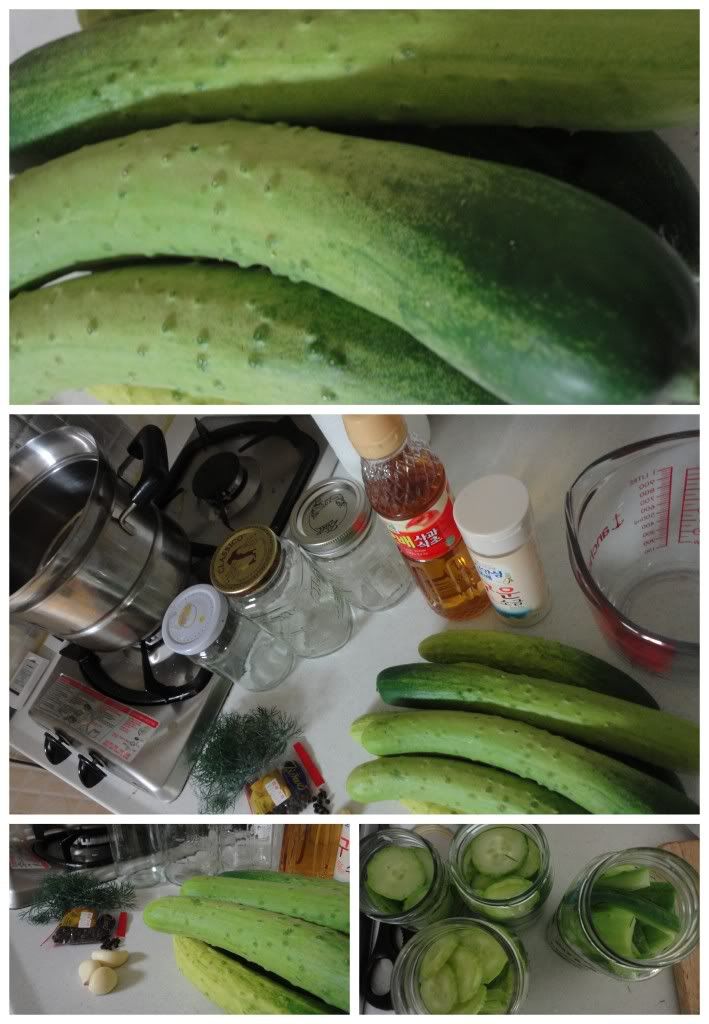
Refrigerator Dill Pickles

Photobucket
Being the 'grandma' that I am, my heart is rejoicing in having recently 'canned' some vegetables in my own home. Although I haven't invested in the full extend of canning materials while living in South Korea, I am well versed in the art of preserving and wanted to try my hand at refrigerator pickles in an attempt to use up some fresh dill, as well as to simply enjoy a crisp, tangy, non-sickly-sweet pickle.

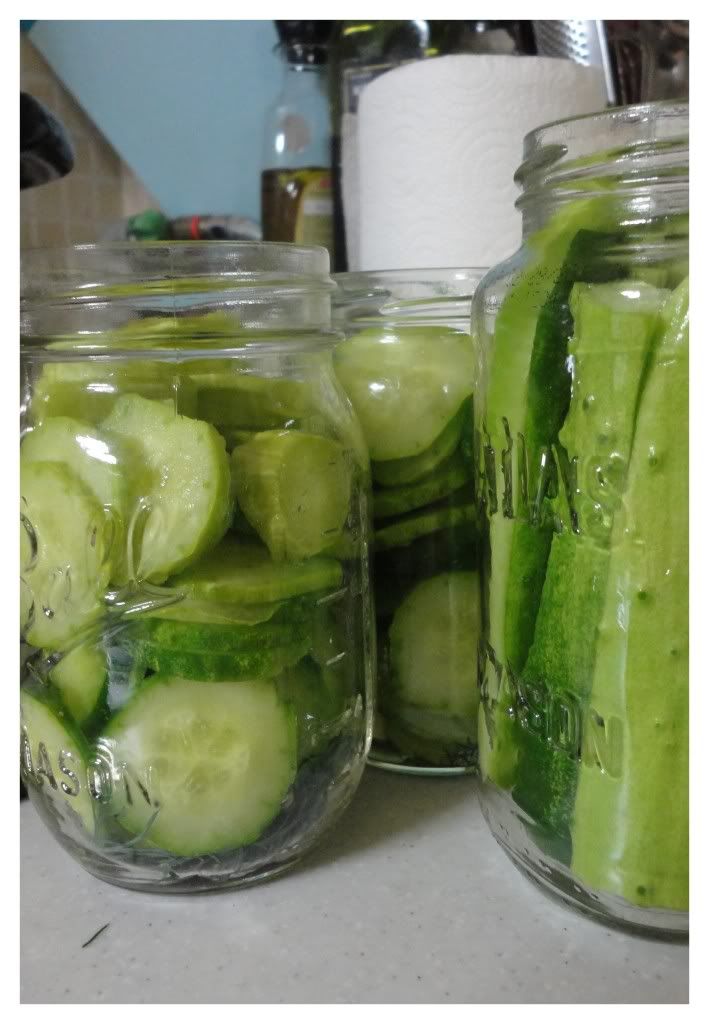
The process was quite easy and my results have been delicious. However, the original recipe called for heads of dill that had recently flowered, but not gone to seed...I did not have these nor want to wait. I should have added additional dill to compensate for flavor and done a bit more chopping of the herbs as my pickles are strong on vinegar, light on dill. Regardless, in a land of sweet pickles as a side-dish to pizza, having some cucumbers that are powerful and tangy is all right by me!

Photobucket
Ingredients/Directions:

The original recipe is for a more major canning operation than I intended to conduct, therefore, I will give measurements as the pertain to a single quart (or two pints) of refrigerator pickles, I obviously did a bit more and ended up with about 4 pint-ish jars. As I don't have canning supplies here, the majority of my jars are simply cleaned and re-used jam jars, pasta sauce jars, etc.

Sterilize as many jars as you plan to use. For a single quart you will need 1 cup of Apple Cider Vinegar, 1 cup of Water, 1 1/4 tsp. Pickling Salt (I used the best 'solar' something or other sea salt I could find in a Korean super market), 2-3 cloves of Garlic, 2 heads (or 2-3 Tbsp. freshly chopped) dill, and 1 tsp. black peppercorns. Place these spices into the quart jar (or split between two pint jars). Stuff the jars with cucumbers either sliced or speared according to your personal preference. In a small pot, simmer together the vinegar, water and salt until salt dissolves. Add brine liquid to quart jar leaving 1/2 inch of head space before putting a lid on them and letting them cool at room temperature. Enjoy the next day as an afternoon snack!

Saturday, September 17, 2011

PB&J French Toast Sandwich

Photobucket

Stuffed French Toast. A new obsession. Apparently.

Peanut Butter.
Jelly.
Bananas.
French-toasted.
Topped with Honey and Bananas.

Perfection.
Once again.


Tuesday, July 19, 2011

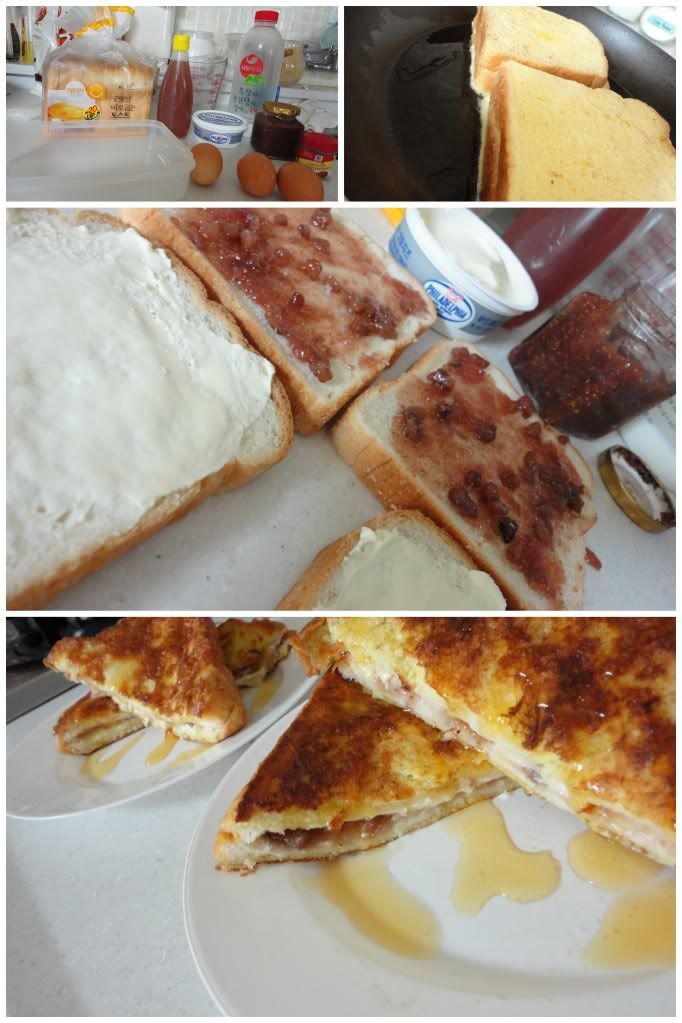
Creamy Fig French Toast Sandwich

Photobucket

Breakfast doesn't get much simpler with a touch of gourmet than this:

One piece of bread spread with Cream Cheese
One piece of bread spread with choice of preserve (I used Fig)
Sandwiched.
Dipped in egg whisked with milk and sprinkled with cinnamon.
Set in hot, oiled frying pan, cooked til done on two sides.
Smothered with honey.
Enjoyed.

Wednesday, June 29, 2011

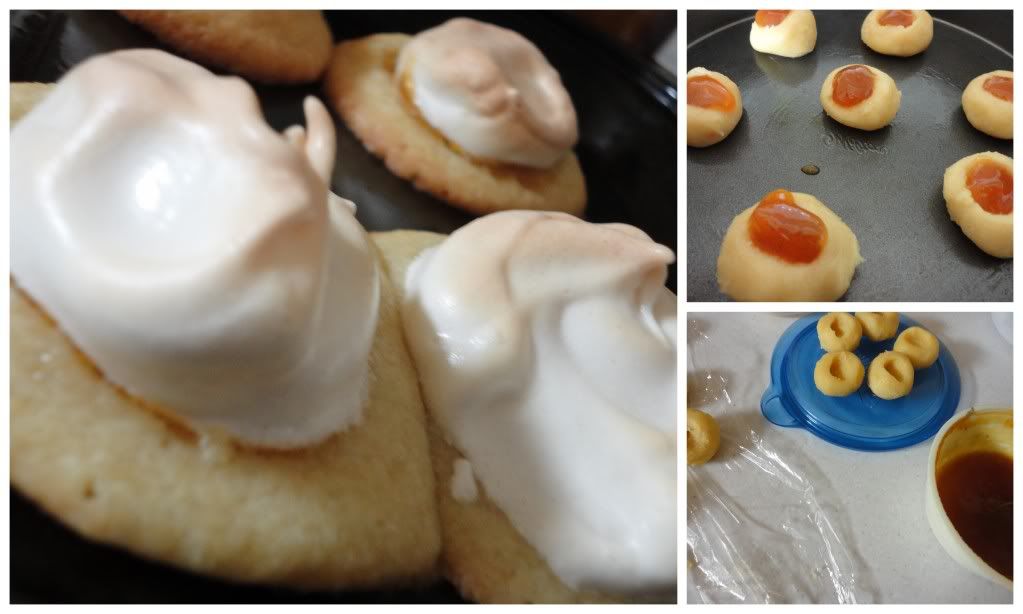
Meringue Topped Thumbprint Cookies

Photobucket

This post is not sufficient. I know it from the get go...sorry.

Here's the deal. Every one who bakes should have some stand-by recipes/concepts.

Basic Bread

Basic Hash

Basic Cookie Dough

I used what I have on hand for my Basic Cookie Dough to whip up these...

These cookies, which were satisfying, but not extraordinary and that I was truly lacking in energy to do properly...but maybe you want to them properly and just need the inspiration. So, that's what I have for you here. An inspirational post.

Here it is...

Basic Cookie Dough + Thumbprint + Jam (I used my Persimmon Jam) + Meringue Topping

Can you imagine the possibilities with lemon curd in place of the jam? It'd be like Lemon Meringue Cookie Bites. Who wouldn't enjoy that?

Tuesday, January 25, 2011

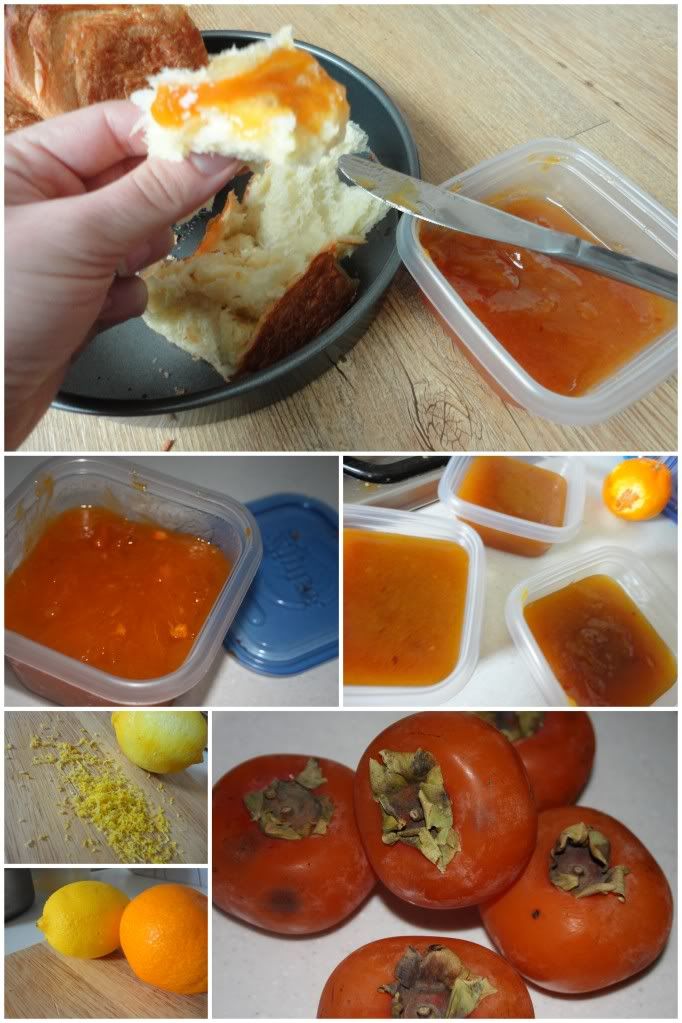
Persimmon Freezer Jam

Stumbled upon this recipe. Had some Persimmon pulp already in the freezer - recently thawed. Missed 'canning' this fall. So - I whipped up some home-made jam because it's not that hard and it's completely worth it! (By not that hard, I mean surprisingly easy and worth the effort as it can take just as little as the amount of time it takes to go to the store and buy a jar of jam - seriously).

Ingredients:


  • 5 cups pureed persimmons


  • 3 cups white sugar


  • 1/4 cup fresh lemon juice


  • 1/2 teaspoon grated orange zest


  • 1 pinch ground nutmeg

  • Directions:
    In a large saucepan over medium-high heat, combine persimmon puree, sugar, lemon juice, orange zest and nutmeg. Boil for 30 minutes, or until slightly thickened. Pour into sterilized jars and seal (or use freezer ziplocs/jam containers). Store in the freezer.

    Enjoy any way you'd enjoy your favorite jam!
    Photobucket
    Related Posts Plugin for WordPress, Blogger...