Thursday, December 27, 2012

Snicker Apple Tart

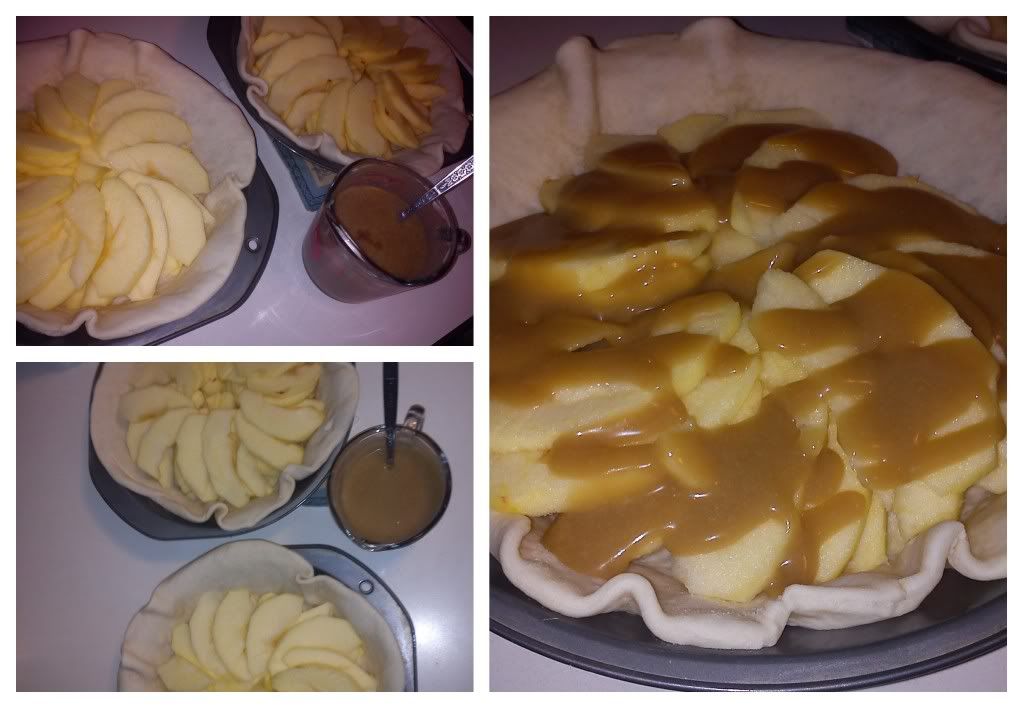
Having made delicious tortes for Thanksgiving (and subsequently Christmas Eve with the in-laws) I was eager to try out something new for 'belated Christmas' with my own folks. A bit of meandering on Pinterest soon turned up this recipe for Snicker Apple Tart and knew I had to give it a whirl.
Photobucket
I made mine in multiple steps, wanting to ensure the oven was ready and available for the holiday ham which means I left the cooked apples sitting in slightly underdone pie shells for more than a few hours which caused the crusts to be a bit soggy even after re-heating...this could be simply the time issue or an oven issue or an issue of impatience, however, were I slightly more prepared for those factors this would have been phenomenal, considering such factors, this was still damn-good ;)
Photobucket
Ingredients/Directions:

Preheat oven to 350 F.

Using a pre-made pie crust, roll out into a shallow pie plate or torte pan, prick with a fork and bake for about 8 minutes.

Meanwhile, peel and core 2 large Apples to be arranged in the pre-cooked pie shells in whatever arrangement you so desire. Over the apples, drizzle 1/4 cup Heavy Whipped Cream mixed with 4 Tbsp. Brown Sugar. Sprinkle with 1/4 cup unsalted Peanuts. Bake for 25-30 minutes.

While baking, chop 2 Snickers Bars into bite sized pieces.

When 30 minutes have passed and pie is ready, remove from oven, sprinkle with Snicker pieces and drizzle with 1/3 cup Caramel Sauce. Let set a few minutes to get melty and mingled.

Enjoy.
Wednesday, December 26, 2012

Pizza Experiment #2: Super Meat and Supreme

Not so much a recipe for extending any shelf life, this is a part of my master-mind plan to develop and master some pizza goodness....because, who doesn't love a good homemade pizza...and because, I just might need to know a solid thing or two about pizzas in the upcoming months ;)

So, after Christmas with family and gifts which would encourage this endeavor, such as a pizza stone and a new cookbook, I was ready to hit the ground running and kick pizza experimentation into full gear. With all the time and inspiration in the world, I prepared a couple of pizzas post-Christmas while the family played games and read new books, there couldn't have been a more peaceful home while dinner preparations were in the works and it's unlikely there could have been a more delighted group of folks once the pizza was prepared.

Photobucket

Pizza Crust
Ingredients/Directions:
From the Cookbook: 500 Pizzas & Flatbreads

Classified as 'basic neapolitan pizza crust', this recipe will give you enough for two 12-inch pizzas.

Begin by sprinkling 1 tsp. Active Yeast over 1 1/4 cup Warm Water. If you have a standing mixer, use the bowl for that otherwise you'll be doing it by hand in a large mixing bowl. Let water and yeast set for 5 minutes.

Add 1 tsp. Salt, then mix in a total of 3 cups of Flour, one cup at a time (it's recommended to use 2 cups bread flour and 1 cup all-purpose flour, I however, only used the latter). Kneed or mix with a dough hook once it begins to form, for about 5 minutes until the dough is smooth and elastic.

Divide dough in half and place in separate, lighly oiled bowls. Roll dough around so as to transfer a bit of oil onto the dough ball itself.

Cover bowls with flour cloth or paper towels and allow to rise for 2-3 hours until dough has doubled in size. 

When the rest of your pizza is ready to assemble, simply roll out dough, using additional flour as needed and prepare for your pizza-eating pleasure!
Photobucket

Pizza Sauce
Ingredients/Directions:
From the Cookbook: 500 Pizzas and Flatbreads

So simple, so delicious.

Heat 3 Tbsp. Olive Oil in a large, heavy frying pan, add 1 minced Garlic clove and cook 1-2 minutes. Add one 28-oz. can of Whole Tomatoes, breaking them down with a wooden spoon. Simmer for 15-20 minutes until sauce has thickened and liquid has evaporated. Season with salt, oregano, red pepper flakes and other seasonings of choice.
Photobucket

Pizza Toppings
Not rocket science...

For these experiments I prepared one pizza using the following ingredients after spooning on some sauce:

Pepperoni, Sliced Summer Sausage, Canadian Bacon, Sauteed Mushrooms and Caramelized Onions

The other pizza was similar yet different and was topped, after spooning on sauce, with:

Pepperoni, Canadian Bacon, Fresh Onions, Olives

Both were delicious and well received...what more could you ask for?

Thursday, December 20, 2012

Molasses Butterscotch Cookies

Without a doubt, these are my all time favorite holiday cookies and I am incredibly thankful to be back in a country where it is possible to buy butterscotch chips and molasses without much trouble. Not to mention, it's nice to have a wide-variety of beers and, in case you were wondering, these cookies + Blue Moon Spiced Amber Ale, are indeed a fantastic after-school snack!
Photobucket
Ingredients/Directions:

Preheat oven to 350 F.

Combine 3 cups Flour, 2 tsp. Baking Soda, 1 1/2 tsp. Cinnamon, 1 1/2 tsp. Ginger, 3/4 tsp. Cloves, and 1/2 tsp. Salt in a small bowl.

In a large mixing bowl, beat together 1 cup Butter, 1 1/2 cups Brown Sugar, 1 egg and 1/3 cup Molasses until creamy. Gradually stir in flour mixture. Fold in 1 pkg. Butterscotch Chips.
Drop batter onto cookie sheet, bake for 9-11 minutes until light, golden colored, should make 4-5 dozen delicious cookies.

Wednesday, December 19, 2012

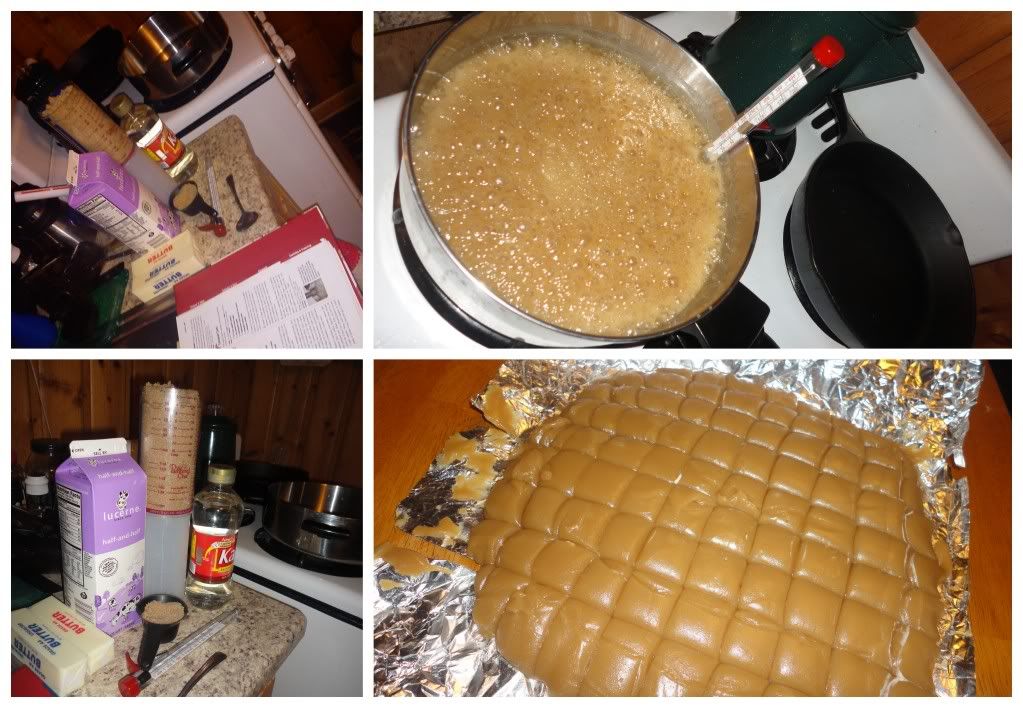
Home-made Caramels: Note to Self

Photobucket
Note-to-self:

Making caramels at high-altitude isn't as easy as simply following the directions. While the caramels were delicious...they were too soft and a pain to wrap. Try again next time.

Sunday, December 16, 2012

German Mish-mash Breakfast

Extended Shelf Life for: Bread Heels, Onions
Photobucket
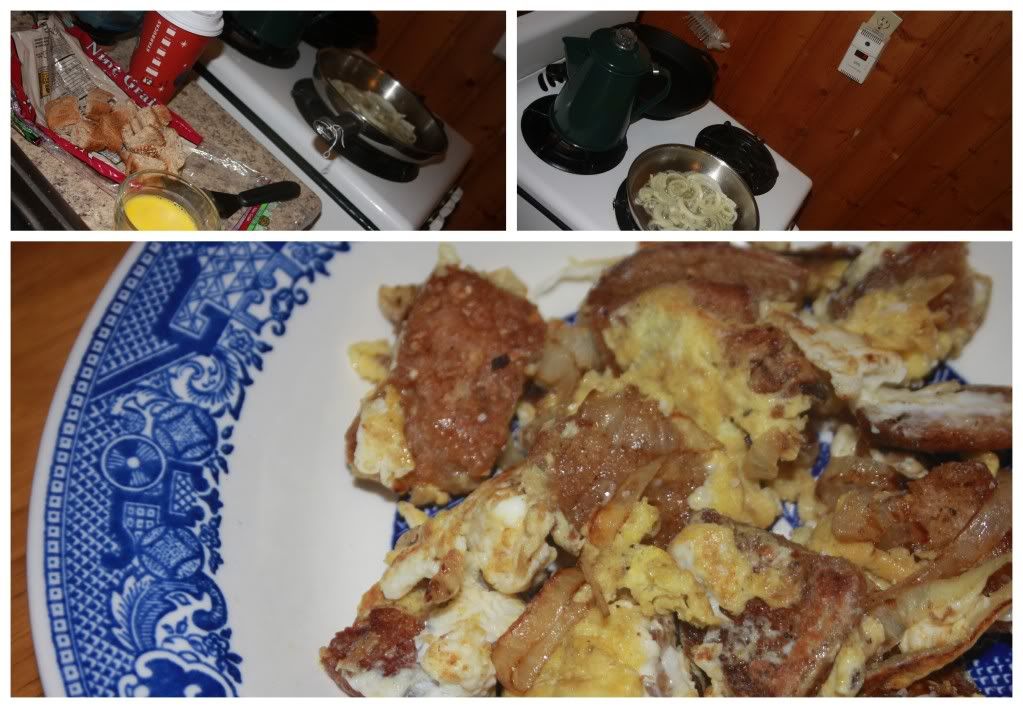
I think bread heels are slightly obnoxious...until you learn to use them in delicious ways that is.

Since I purchased the Juicer that Can do Everything, I have made my own bread crumbs simply by saving the heels in the freezer until I have enough to fill up a cookie sheet to dry out, on low heat in the oven before running them through the juicer (mincing nozzle of course, not the juicing nozzle).

However, the other day, I had a few bread heels leftover and happened to read this page on Squidoo, which has a handful of great, frugal, use-up-things-in-the-kitchen-recipes, the first of which was this German Mish-mash which was incredibly easy and so, stinkin' delicious!

Ingredients/Directions:

In a heavy skillet, melt 3 Tbsp. Butter, when it's melted, add half of a sliced onion and stir for a couple of minutes until onions are tender and little brown. Add two slices of bread that have been cubed and stir until they absorb all the butter and become little bite sized toasts. Pour in two beaten eggs, coat bread and onions, cook until eggs are no longer runny. Season with salt and pepper, enjoy!

Saturday, December 15, 2012

White Fudge with Lemon and Pecans

Extended Shelf Life for: Lemons
Photobucket
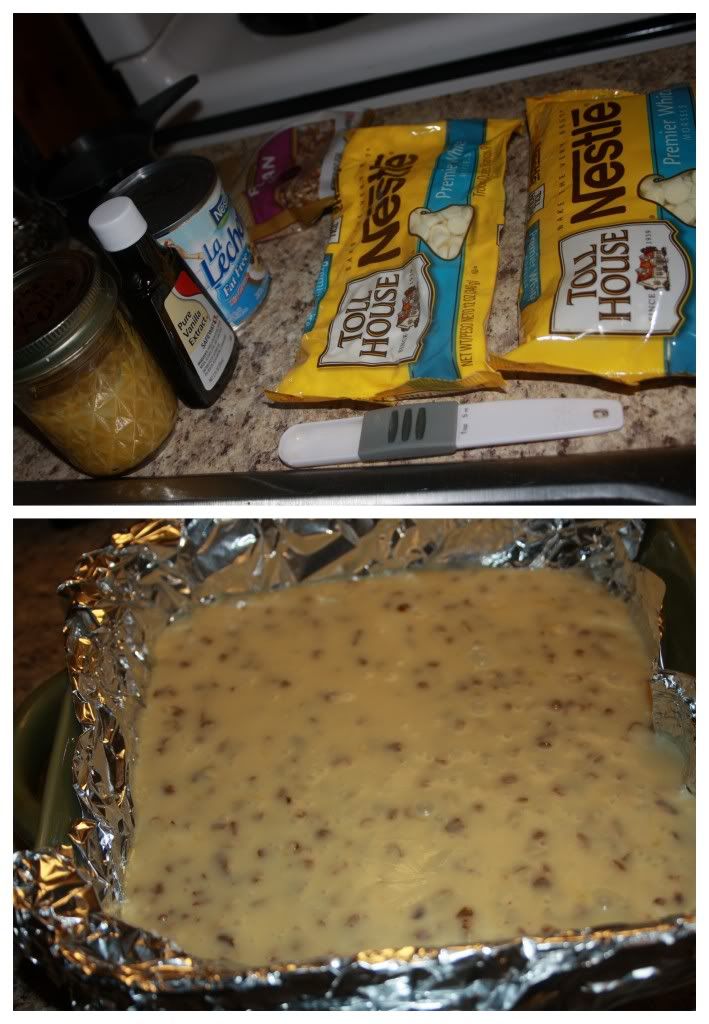
Being back in the land of Holiday snacking and gaining a few pounds in time for New Years Resolutions had me feeling a strong desire and deep urge to try my hand at some holiday candy-making. I've never done much in terms of fudge and I actually tried a few different recipes this Christmas, but high-altitude laughed in my face and my chocolate fudge was re-created into fudgy, no-bake cookies (which are always a win, so I laughed back, even harder, in the face of high altitude).

However, in the process of making candy at high altitude, I discovered this recipe for Easy White Fudge in one of my all-time favorite cookbooks: Better Homes and Gardens New Cookbook. Because we'd had an abundance of lemons at our door (aka, from the dumpster) in October, I'd learned a few tricks in regards to preserving lemons, and had a jar full of zest begging to be included with this fudge experiment, so I tweaked and altered, and what do you know? I came up with a fantastic, easy-to-make-regardless-of-altitude: White Lemon Fudge.

Ingredients/Directions:

Line a square baking dish with foil, butter or grease, set aside.

In a 2 quart saucepan cook and stir 3 cups White Chocolate Chips and 1 14oz. can of Sweetened Condensed Milk over low heat. When chocolate has melted, remove saucepan from heat and stir in 1/2 cup chopped Pecans, 2 tsp. Lemon Zest and 1 tsp. Vanilla. Cover and chill 2 hours.

Carefully remove foil from square pan, cut fudge into squares, store tightly covered for 1 week...if they'll last that long!


Friday, December 14, 2012

Pizza Experiment #1: Roasted Squash and Carmelized Onion Pizza

Extended Shelf Life for: Onions and Squash
Photobucket
In May of 2012, I decided to become a master of pie. I can do most anything in the kitchen, but I do have random fears of certain aspects, such as pastry. However, I conquered that fear and can turn out a pretty phenomenal pie (if I do say so myself).

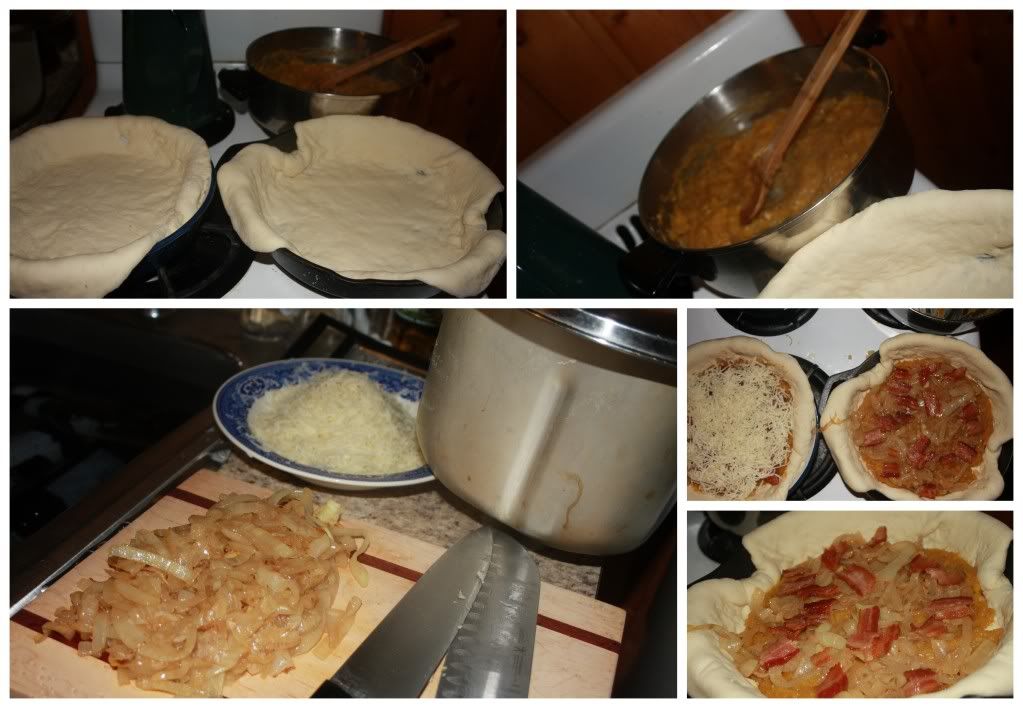
Now, late in the year of 2012, I decided to become a master of pizza pie, but not for the purpose of fear, I don't fear pizza, nor pizza crust (although, I have had to re-learn the joys of baking and cooking at high altitude). No, the art of mastering pizza is more an exercise of discovering and developing some top notch pizza topping ideas and concepts for a very specific purpose, which, I currently do not have the privilege of sharing. Suffice it to say, someday, you might get to eat one of my delicious creations...

As for this pizza, I still love the concept, but I need to work on the roasted squash 'sauce' part of the recipe, because it wasn't tops.

Ingredients/Directions:

Prepare a pizza crust. We do ours in the bread machine. I'll post various recipes later, however, for now, this is just a break down of the topping.

Slice 1 onion and caramelize in a large skillet with 2 Tbsp. butter on medium high heat. Caramelizing takes about 15-20 minutes but is worth every second.

Roast a Squash of your choosing or take out a pack of pre-roasted, pureed squash from the freezer if you so happen to have one.

Prepare 6 strips of Bacon however you choose, I prefer the oven method.

In a sauce pan or deep skillet, heat a touch of butter, throw in some garlic and rosemary for about a minute (until fragrant) and then add squash, heat through.

When your pizza crust is ready to go as well as all the other ingredients, simply top the crust with squash sauce, followed by caramelized onions and bacon bites, top with mozzarella and bake at 450 for about 10-12 minutes until crust is golden brown and cheese is melted.

I would love to prepare this in a wood-fried oven, but am discovering that a pizza stone is just as good...for now ;)

Saturday, December 8, 2012

Avocado Brownies

Extended Shelf Life for: Avocados
Photobucket
So many avocados, so little time.

It should come as no surprise that I have, yet another, avocado recipe to share here!

I made these for a potluck in late December and even whilst sitting among a homemade carrot cake, a ricotta-orange cake topped with pomegranate and preceded by numerous food items, I only brought a few of these little morsels home with me at the end of the night, which I think is a good sign.

Ingredients/Directions:
From Mary Quite Contrary Bakes

Preheat oven to 350 Fahrenheit. Grease an 8x8 or 9x9 square pan and set aside. In a bowl, whisk together 3/4 cups Flour, 1/4 cup Cocoa Powder, 1/2 tsp. Baking Powder and 1/4 tsp. Salt.

In a separate bowl, mix together 2 mashed, ripe Avocados and 8oz. Melted Chocolate. Stir in 1 cup Sugar until well combined. Add 2 eggs, 3 Tbsp. Vegetable Oil and 1 tsp. Vanilla, mix well until well combined and smooth.

Stir in flour mixture until just combined. Pour batter into pan and bake 28-32 minutes until toothpick comes out clean.

Wednesday, December 5, 2012

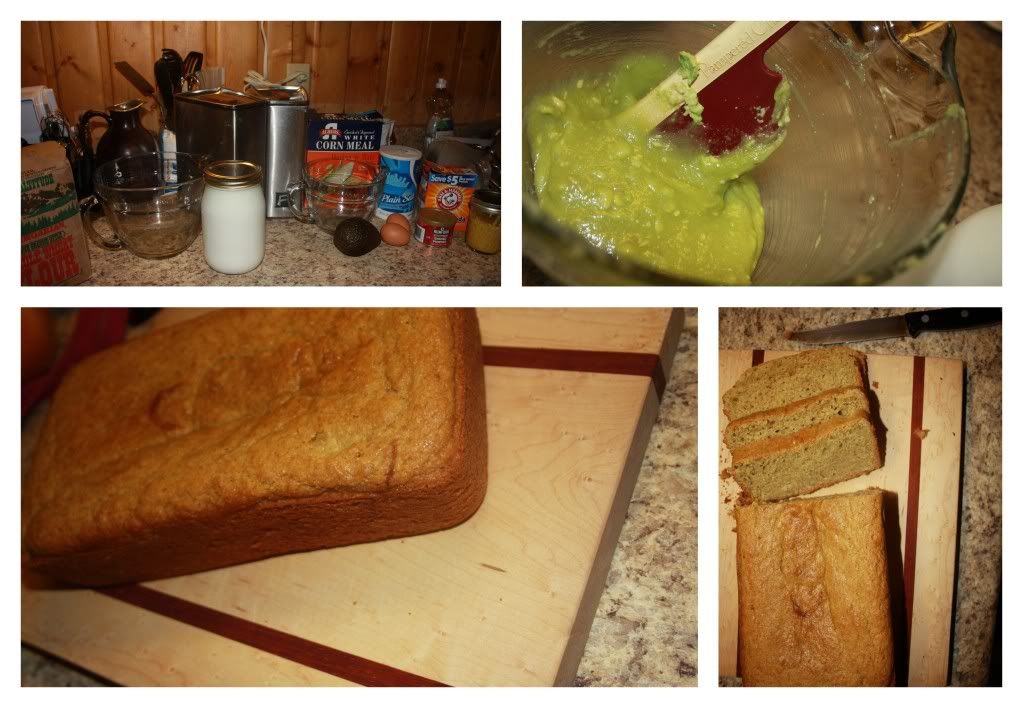
Avocado Bread

Extended Shelf Life: Avocados
Photobucket
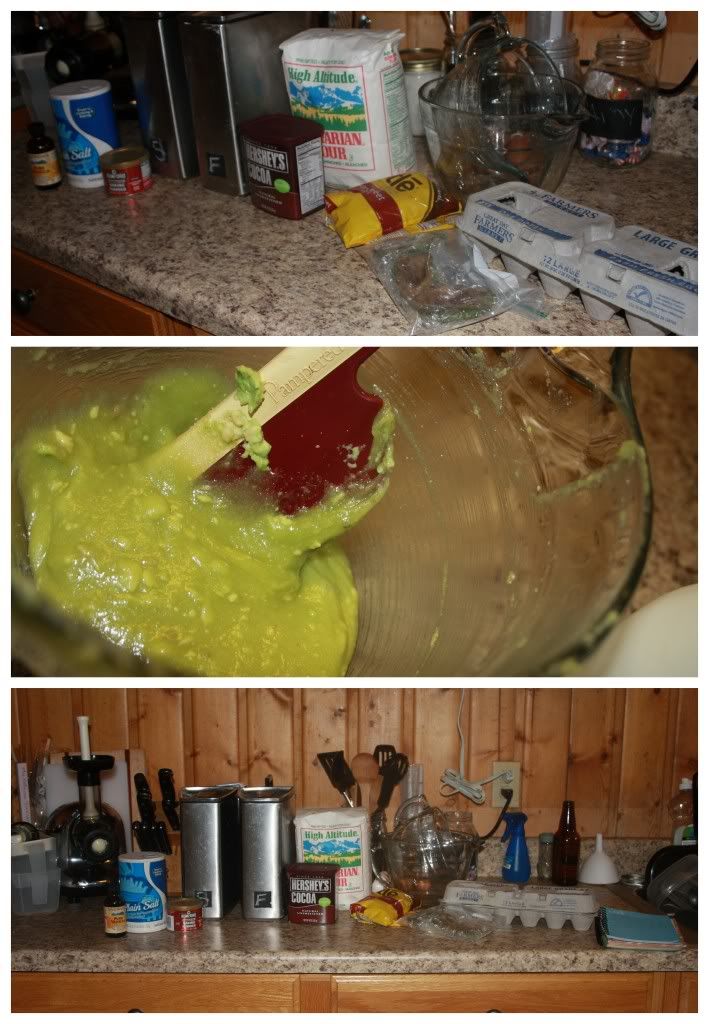
The problem, so to speak, with dumpster diving is that you never know what you're going to get, which I've come to love. However, you also never know that you just might end up with a few more avocados even though you just froze a couple dozen.

The not so problematic part of this problem is, since you've done some research on how to use avocados you'll actually be quite happy to discover that the new handful of avocados isn't in quite as bad as shape as the others and doesn't require you to add chocolate to account for color issues.

So now, you get to try a non-chocolate avocado bread, although you never really complained about having Chocolate Avocado Bread in the first place.

Ingredients/Directions:
From Fleur De-Licious

I was so intrigued by the original recipe that I didn't stray from the recipe, and I'm glad I didn't, the combination of white flour, wheat flour and corn meal was really quite amazing!

Preheat oven to 350 Fahrenheit, butter and flour a loaf pan.

In a medium bowl, whisk together 1/4 cup Corn Meal, 1 cup All Purpose Flour, 3/4 cups Wheat Flour, 1 1/2 tsp. Baking Powder, 1/4 tsp. Baking Soda and 1/4 tsp. Salt, set aside.

In a large bowl, "cream" together 2 Ripe Avocados and 1 cup Sugar with a rubber spatula. Add 2/3 cups Vegetable Oil and 2 Eggs and whisk until well combined. Whisk in 1/2 cup Buttermilk of Plain Yogurt as well as 1 tsp. Orange (or Lemon) Zest.

Add dry ingredients to Avocado Mixture until just incorporated. Pour batter into pan and bake for 40-45 minutes until golden brown and a toothpick inserted in the middle comes out clean.

Enjoy for breakfast, snack or dessert!

Ginger Snap Peas and Sausage

Extended Shelf Life for: Sugar Snap Peas
Photobucket
A recent dive left the man and I enjoying many lunch boxes filled with random leftovers and sugar snap peas or a peanut butter and jelly sandwich with sugar snap peas. It had honestly been quite some time since we'd last enjoyed this little vegetable morsel of joy and in the week of munching on these salvaged goods we were reminded just how delicious they are.

Before they earned the right to be in the dumpster, I decided to whip up a quick dinner by cooking some sausage in my cast iron skillet and tossing about 3 cups of Sugar Snap Peas in the Wok with Butter, Ginger and Garlic, Salt and Pepper to taste. Serve this all on a bed of rice and you have yourself a nice weeknight meal!

Monday, December 3, 2012

Blackberry-Orange Biscuit Rolls

Extended Shelf Life for: Blackberries, Orange
Photobucket
Sometimes, brilliant ideas are spawned from a dumpster arrival of blackberries and an orange already on the shelf, waiting to be used. And sometimes, those brilliant ideas are compounded by the fact that one of your favorite, most spectacular friends has a birthday the next day.

So you dream and ponder and before you know it your pulling Blackberry-Orange Biscuits Rolls out of the oven, drizzling them with a fine orange glaze and praising the Lord for creativity, dumpster abundance and birthdays!

Ingredients/Directions:

Preheat oven to 450 Fahrenheit.

In a bowl stir together 2 cups All Purpose Flour, 1 Tbsp. Sugar, 2 tsp. Baking Powder, 1 tsp. Orange Zest, 1/4 tsp. Salt and 1/4 tsp. Baking Soda. Cut in 1/2 cup Butter with a pastry blender until mixture is coarse and crumbly.

Make a well in center dry mix and add 6 oz. of Yogurt and 1 Tbsp. Milk, mix with a fork until just moistened.

Turn dough out onto a lightly floured surface and kneed 10-12 strokes until dough is smooth. Pat or roll dough out to 1/4 - 1/2 inch thick.

In a small bowl, sprinkle a handful or 1/2 cup of Blackberries with Sugar and mash with a fork. Sprinkle with 1-2 tsp. of Cornstarch and mix again.

Spread Blackberry mixture onto biscuit dough. Carefully roll dough as you would for cinnamon rolls.

Carefully slice the biscuit log and create biscuits that about 1/2 inch thick. Place on a lightly greased baking sheet and bake for 10-15 minutes until dough is golden brown.

For the Glaze:

In a small bowl, combine 3/4 cups Powdered Sugar with 1 tsp. Orange Zest and 3-4 tsp. of Orange Juice until you reach glazing consistency.


Pork Cutlets and Braised Purple Cabbage

Extended Shelf Life for: Red Cabbage, Onion, Bread

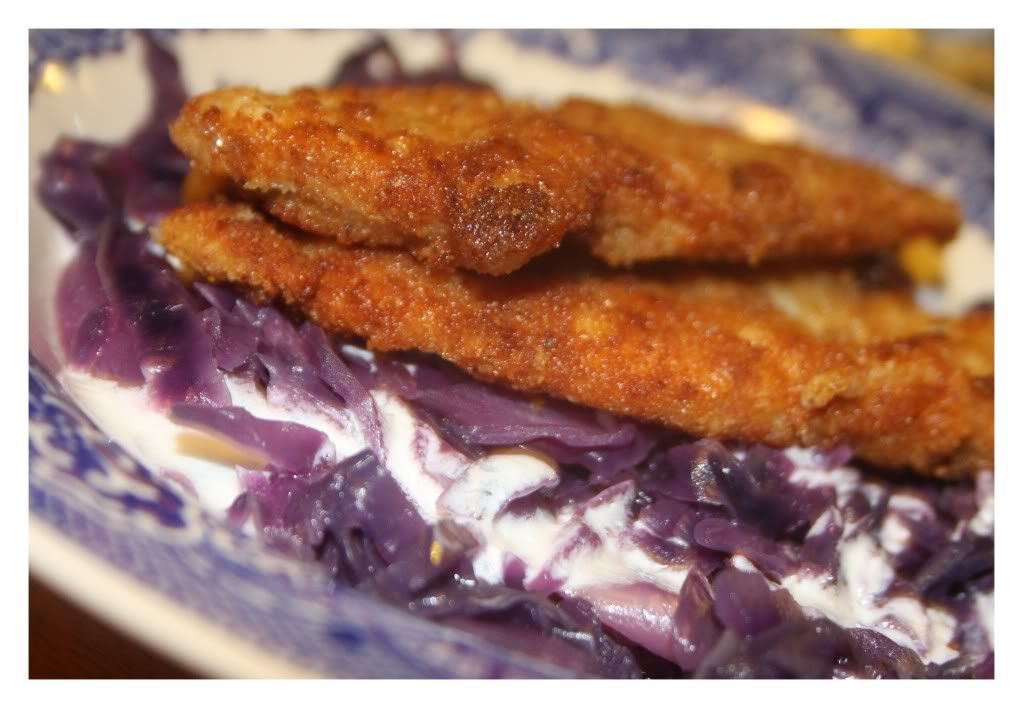
If you know the man at all, you are well aware that he is a good eater, bless his soul, because if he wasn't, I don't know what I would do. He eats a wide variety of vegetables and although he claims that the "Only thing better than meat and potatoes is meat and meat," the truth is, we eat a lot of veggie-heavy meals and even a lot of vegetarian meals, so really, his life doesn't center around meat.

This meal is not vegetarian, and it's actually kind of close to a meat and potatoes meal, but my man was so extremely satisfied by this meal that I am extremely confident that it would go over well in many homes...I think...it is still cabbage...which can be unappetizing to some.
Photobucket
Photobucket
Braised Purple Cabbage ~ Ingredients/Directions:

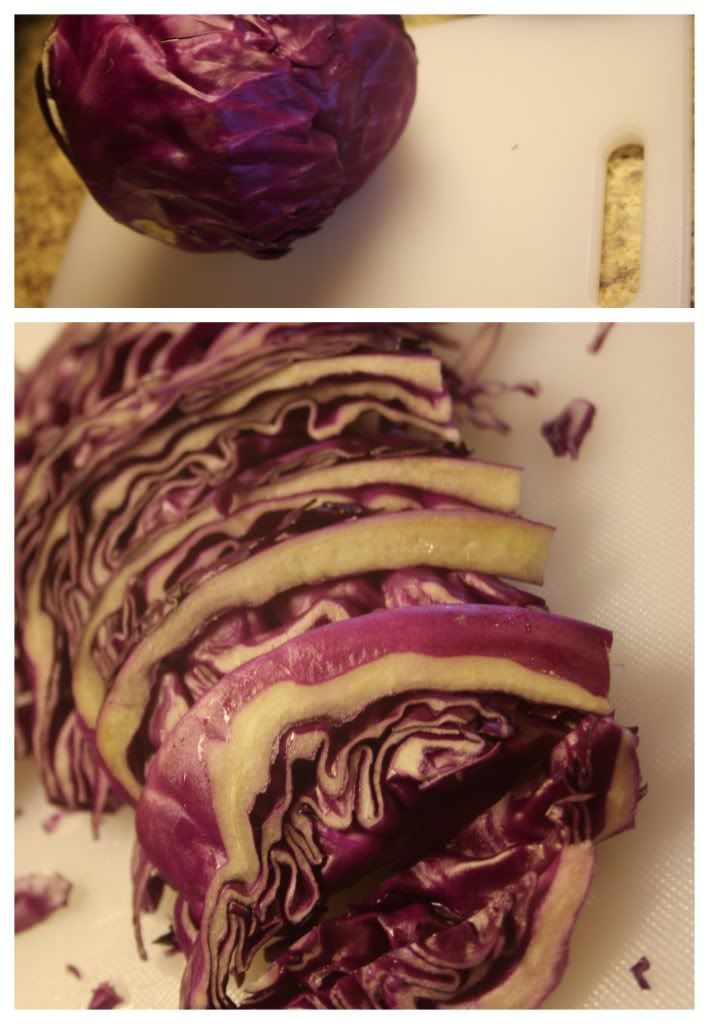
Quarter, core and thinly shred 1 head of Purple Cabbage. Soak in a large bowl of water.

Meanwhile, heat 2 Tbsp. Butter in a heavy skillet or cast iron kettle (my personal choice). Once melted and fragrant, add and saute until golden 1/4 cup finely chopped Onion.

Remove cabbage from water and add to pan along with 1 thinly sliced Apple, 1/4 cup Apple Cider Vinegar, 2 Tbsp. Honey or Sugar, and a shake of Salt.

Cover and cook over low heat, stirring occasionally for 1 - 1 1/2 hours adding hot water as needed - at the end you want moist, but not soaked cabbage. It will be sweet and tangy and perfectly accompanied by a drizzle of yogurt and topped with pork cutlets as described below!

Photobucket
Pork Cutlets ~ Ingredients/Directions:

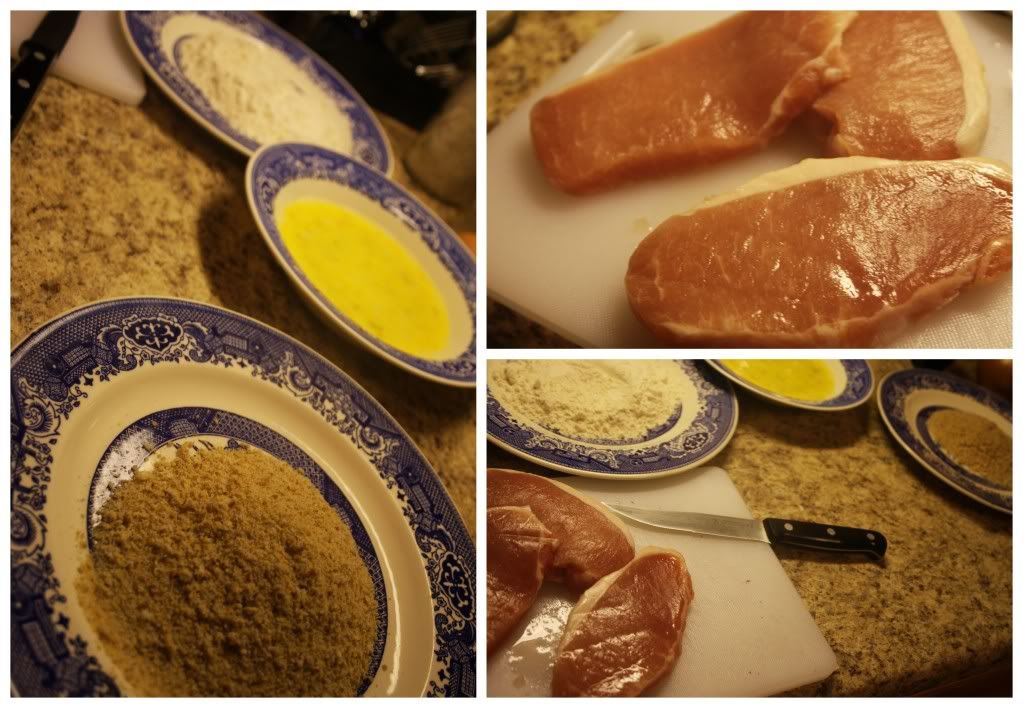
Thinly slice as many pork chops as you need to satisfy whoever will be at your table.

Heat 2-3 Tbsp. of Vegetable oil in a heavy skillet or cast iron skillet (again, my choice).

Dip each pork cutlet into a shallow bowl of flour, followed by a bowl of 2 beaten eggs and finally a bowl of bread crumbs (I made my own by saving the heels of bread, drying them in the oven and running them through our juicer on the mincing nozzle, a food processor would work as well).

Fry in the skillet for 2-3 minutes on each side, drain on a layer or two of paper towels, enjoy on a bed of braised cabbage!

Friday, November 30, 2012

Raspberry-Applesauce

Extended Shelf Life for: Apples and Raspberries
Photobucket
Here we go! Another non-exact recipe from the kitchen of Melissa Harrington...I swear, sometimes I only blog to remember what's come out of my kitchen...oh wait, that is my primary reason for this little ole blog ;)

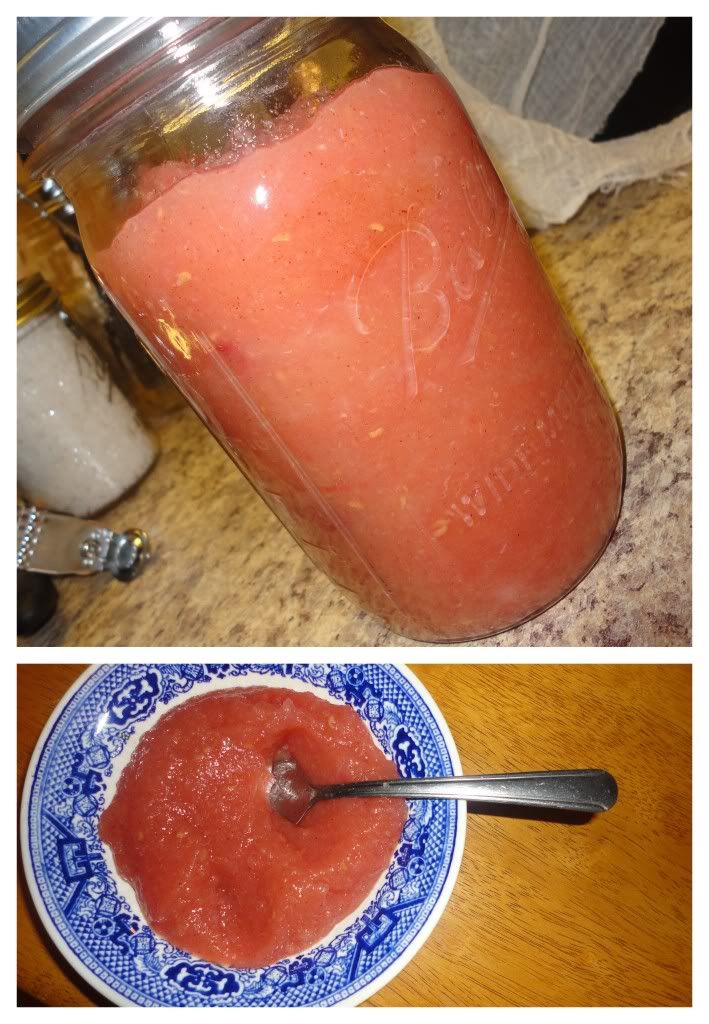
If you need a good applesauce recipe, I suggest you check out this page which has a nice variety including stove-top, crock-pot and oven varieties. Once you've made your applesauce, if you're wanting to add raspberries, here's the trick to the trade - wait until the last minute.

Raspberries are delicate little souls and will break down into a warm apple sauce without much begging on your part. So, before you start your applesauce, I recommend that you lightly sprinkle your raspberries with sugar, let them set while you prepare the applesauce. When the applesauce is finished, take a quick fork to the raspberries to mash them up before dumping them into the applesauce. Mix until the color is even and viola, you've got a beautiful, raspberry-flavored applesauce which, trust me, you'll love having on the breakfast table!

Fruit Cocktail Vinegar

Extended Shelf Life for: Pear Skins, Apple Skins and Lemon Peel
Photobucket
Recently, I made Apple Cider Vinegar, it was easy and turned out a DELICIOUS pot of vinegar of which the man and I have enjoyed a daily shot (which is beneficial in terms of boosting our immune system AND regulating our blood sugar, meaning we aren't starving 2 hours after breakfast - awweeesome!)

Anyway, in learning to make Apple Cider Vinegar, I discovered that basically the scraps of any fruit or veggie can easily and quickly be turned into a health-packed (and surprisingly delicious) vinegar product.

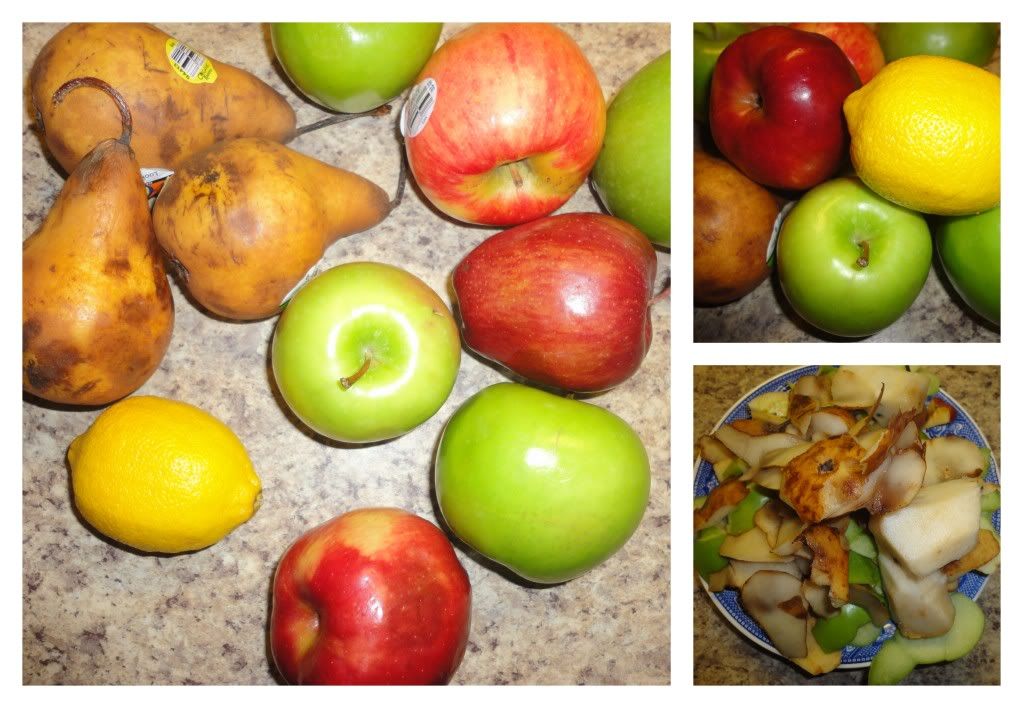
So, with some aging apples, pears and another few lemons I set to work with another batch of vinegar with was the cores and skins of a few pears, a few more apples and the peel of a single lemon. I put these scraps into our large crock and covered with water and sugar (one quart of water + 1/4 cup of sugar) until the peels were completely covered. Cover the crock with cheesecloth, let set in room temperature (60-70 Fahrenheit) for about a week before straining out the peels, transferring the liquid to another crock (or glass jars) and covering with cheese cloth for another 2-3 weeks until you have the degree of fermentation and vinegary taste that you love and desire. The lemon peel here makes the vinegar quite tart and sour, but completely enjoyable!

One Pot Spaghetti

Extended Shelf Life for: Mushrooms, Onion, Green Pepper, Jalapeno and Tomato
Photobucket
Confession: This was not our favorite dish. BUT, I'm 99.99% certain that's because I used an un-seasoned cast iron kettle which may not have had the best reaction to tomato sauce...and because we use dumpster food. I'm quite confident, that the recipe, as printed in Better Homes and Gardens would be absolutely delicious, because as of now, that singular cookbook has only failed me when I've failed it...which leaves the blame on only one of us...and it's not the cookbook.

So, if you've got a well seasoned pot, more experience with cast-iron or planning to use a stainless steel pot, this recipe is definitely for you!

Ingredients/Directions:

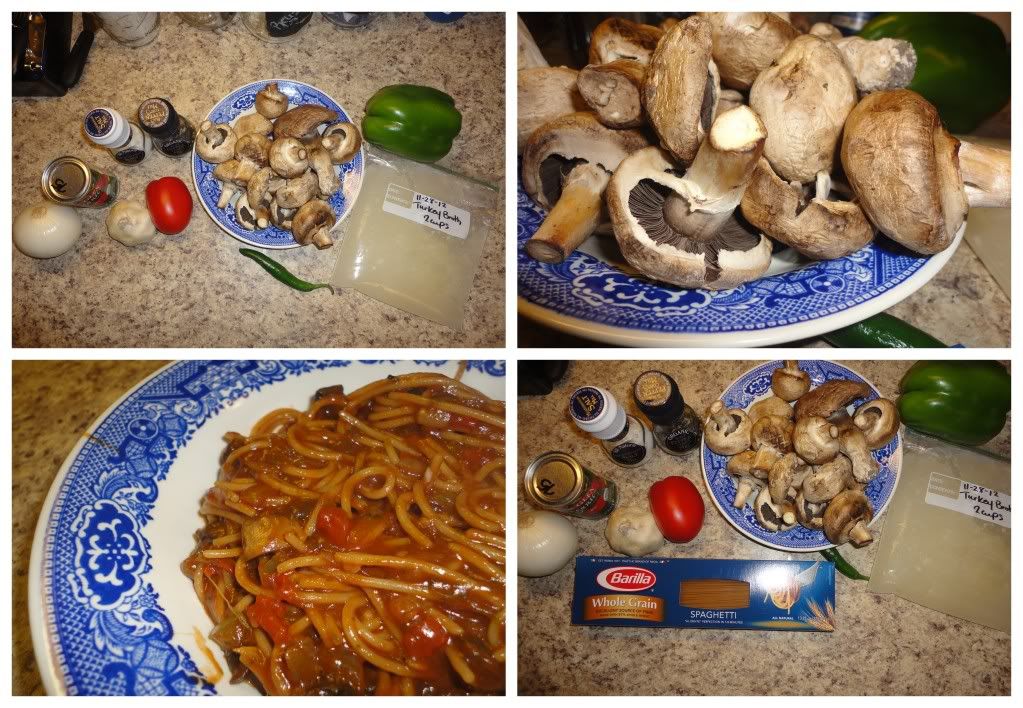
In a large pot saute 1-2 cups sliced Mushrooms, 1 diced Onion, 1 diced Bell Pepper, 1 diced Jalapeno and 1 minced clove of Garlic until tender, season with salt and pepper.

Stir in 1 diced tomato, 2 cups of Chicken (or Turkey or any other) Broth, 1 3/4 cups Water, 6 oz. of Tomato Paste and Italian Seasoning. Bring to a boil before adding 6 oz. of dried, broken Spaghetti Noodles.

Return to boiling, reduce heat and simmer, uncovered for 15-20 minutes until spaghetti is desired tenderness and sauce is desired consistency.

Enjoy!

Thursday, November 29, 2012

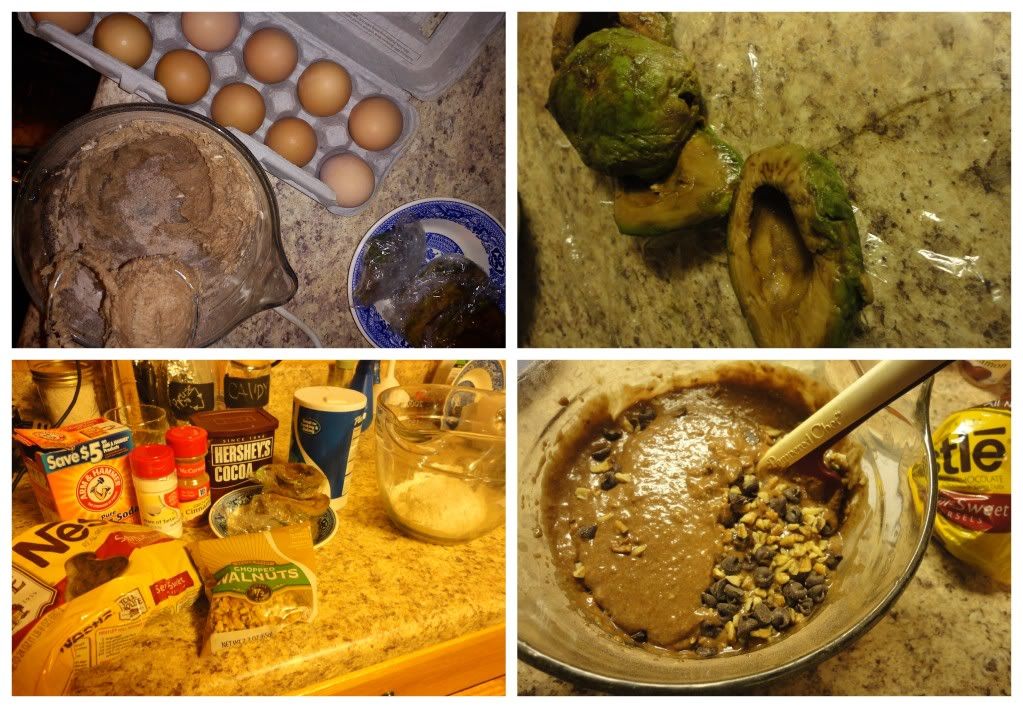
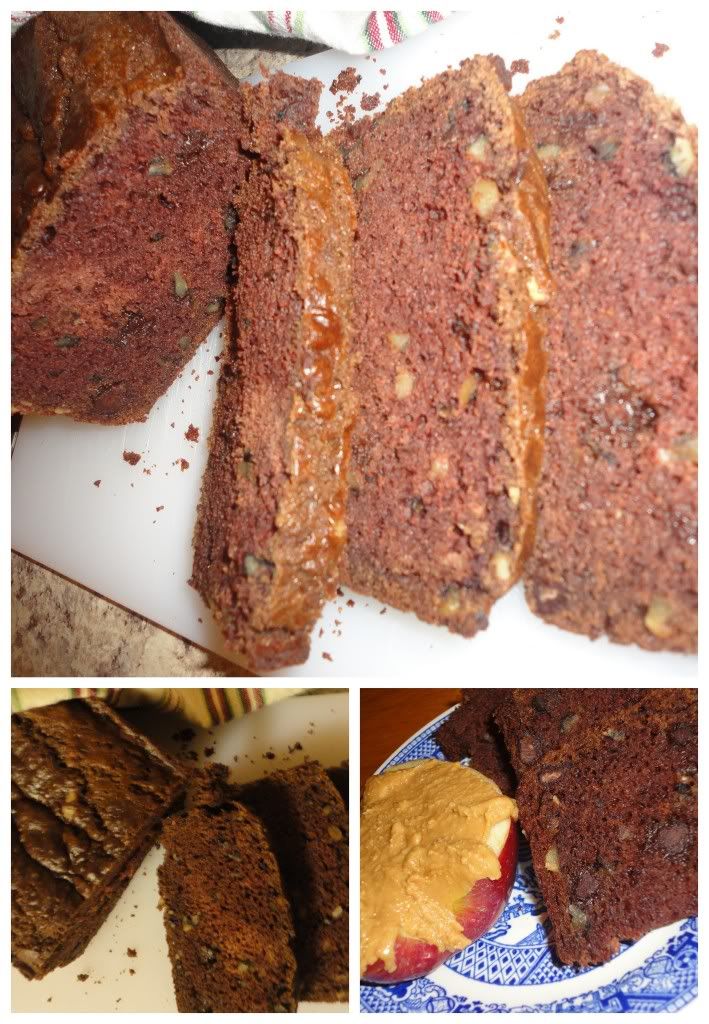
Chocolate Avocado Bread

Extended Shelf Life for: Avocados
Photobucket
Ugh... 
The problem with huge life transitions and letting your blog back up for months on end means you simply can't remember every recipe. This is one of those recipes. I have no idea where I received my inspiration or anything about anything. 
 What is important to note however is: 
a) Frozen, dumpster avocados, can in fact be turned into a delicious quick bread 
b) Frozen, dumpster avocados, can be pretty brown, which means adding chocolate is a very good idea.
c) You could probably essentially follow a recipe, such as this, and have this bread. One thing I do know, is that I didn't use banana, I just increased the avocado...so there you go.
d) I got to use farm fresh eggs from my sister's chickens, how awesome is that?!?!?
Photobucket

So, there you have it, a non-existent recipe for Chocolate Avocado Bread! But hey, at least now we all know I made it, and it can be made, right? RIGHT?!? Jeesh, I really am trying hard to be a more consistent food blogger, but I'm not sure how that's going to go...2013, I have a lot of hopes for you!

Monday, November 26, 2012

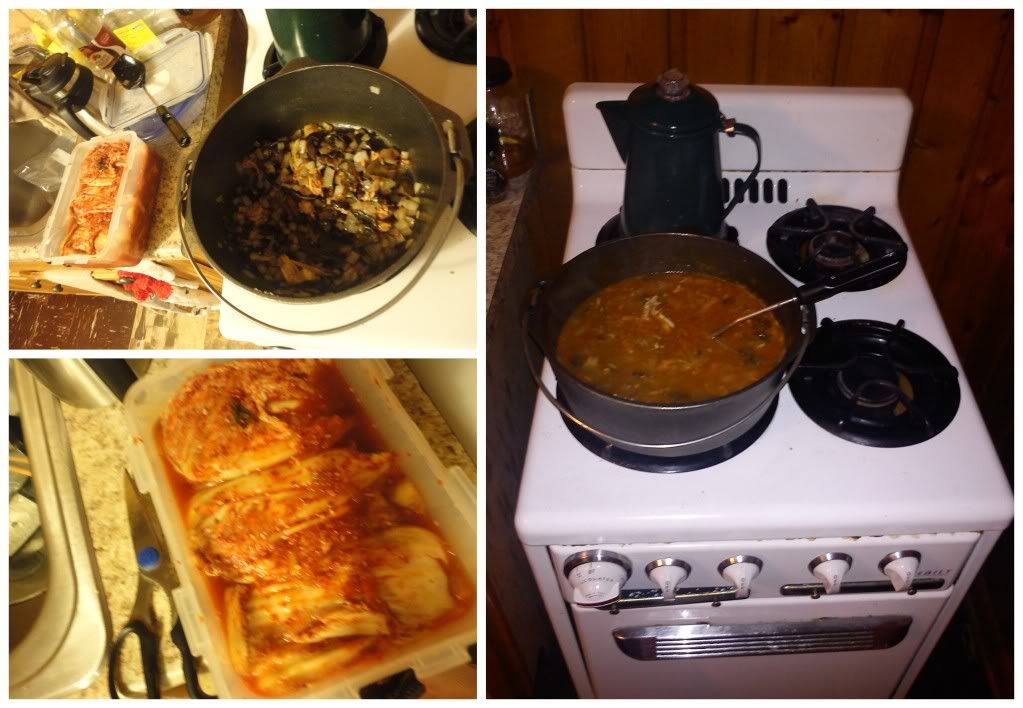
Turkey Kimchi Chigae

Extended Shelf Life for: Mushrooms, Onions and a Turkey Carcass
Photobucket
With my recently fermented kimchi and the end of the first round of Turkey eating for the Thanksgiving holiday and the winter chill setting in, I was craving some Kimchi Chigae.

However, unlike my go-to Kimchi Chigae recipe, I used my turkey carcass to make a large batch of turkey broth, much in the same way that I make chicken broth and therefore was able to use Turkey Broth and the turkey pieces to add some meat and flavor to this pot of stew.

But that's just the great thing about stews and soups in general, they're easy to substitute and recreate...

Wednesday, November 21, 2012

Cherry Pie

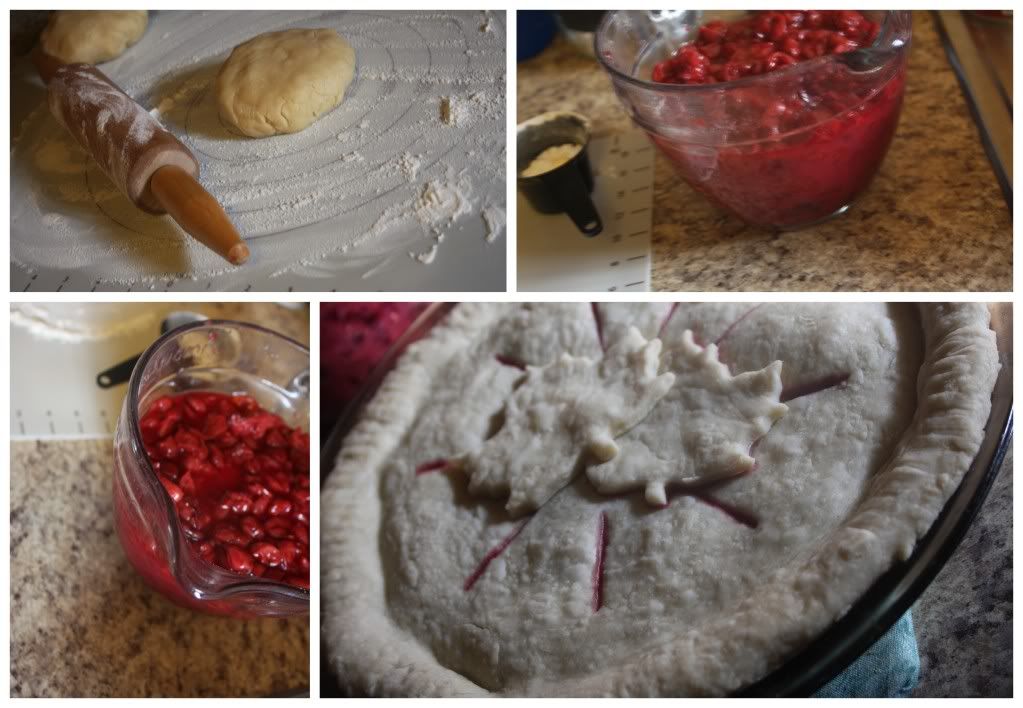
Nothing extended here, just a simple, cherry pie made with fresh cherries we bought at the farmer's market then canned, making for a quick and easy cherry pie to accompany my pie-inspired tortes for the holidays.
Photobucket
Of course I started with my go to pie crust. Then it was time to prepare the cherry filling, which, like most pie filling is basically a process of adding sugar and cornstarch and simmering until thickened.

For my cherry filling, I drained off some of the liquid, because it seemed a little over the top, threw about 4 cups of cherries and a bit of juice into a small quart pan and brought to a low simmer. From there, I simply mixed 1 cup of Sugar with 1/4 cup of Cornstarch. Pour this mix into the simmering cherry mix, stir well and heat until thickened, it's now ready to be wrapped in your pastry goodness! Use a leaf cookie cutter to add a decorative flair and pop that baby in the oven! Enjoy!

Cranberry Salsa

Extended Shelf Life for: Red Onion, Lime Juice, Jalapeno
Photobucket
A teacher at the school I work at prepared this unique salsa just before the holiday's and I knew immediate that I needed to prepare a batch and take it to our family Thanksgiving celebration. It's sweet, it's spicy and it features cranberries, can a holiday dish get any better? Yes! Because you also get to have tortilla chips at your holiday table, and who doesn't love some tortilla chips and salsa?

Ingredients/Directions:

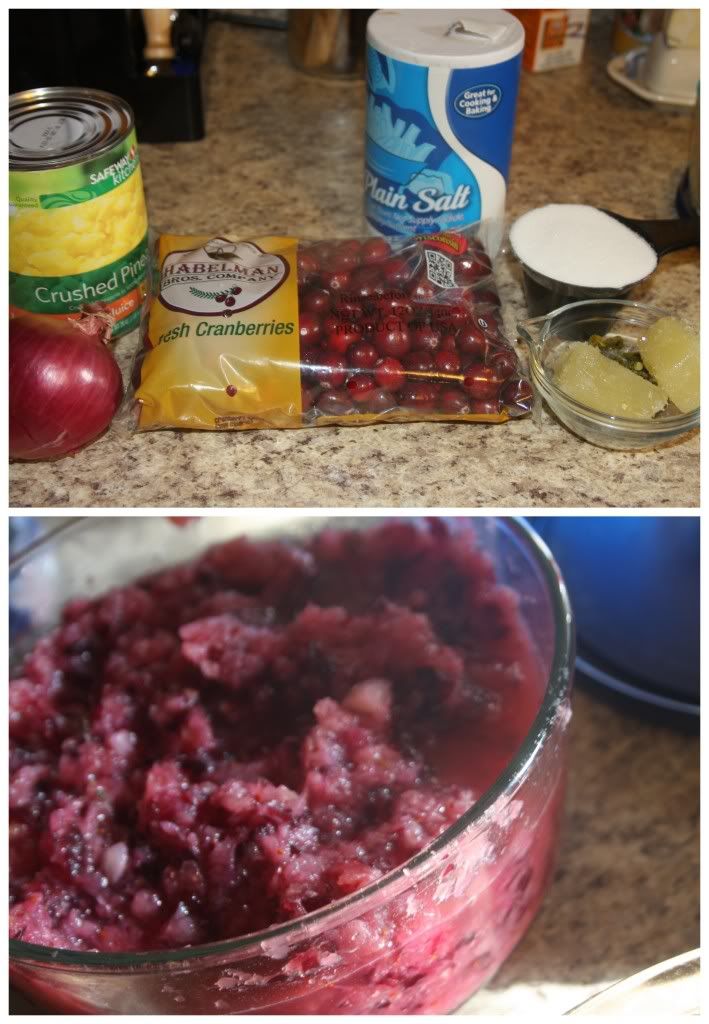
Run one package of fresh cranberries through a food processor or the mincing component of a high-quality juicer. In a medium bowl mix minced cranberries and 1/2 cup sugar. Mix in 1 drained can of Crushed Pineapple, 1 diced Jalapeno (or 1 thawed jalapeno cube if your a preserver/freezer), 2 Tbsp. Lime Juice (again, if you have frozen cubes, this is a great time to use them!), 1/2 cup chopped Red Onion and 1/2 tsp. Salt. Let set for two hours or overnight and enjoy with your favorite tortilla chips!

Tip: If you have leftovers (since it's a pretty big batch), AND you're in need of a quick lunch, make up a quick batch of brown rice (or quinoa, pasta, etc.) mix in a few large spoonfuls and you'll have a delicious and relatively nutritious lunch!

Monday, November 19, 2012

Pie-Inspired Tortes

Extended Shelf Life for: Lemons and Squash

First of all, being in the states during the holidays and partaking in holiday baking brings me so much joy!

Second of all, I've recently discovered the most amazing, fantastic use of my torte pan set and feel like I was truly 'inspired' over the holidays to make some new, delicious desserts, inspired of course by pies.

Since it was Thanksgiving, and I had recently acquired some happy little squash and pumpkins I went for a pumpkin-pie inspired torte. Additionally, since we were going to spend the holiday with my fantastic parents, and I knew that my mother loved lemon meringue, I decided to let that be the inspiration for the second torte.

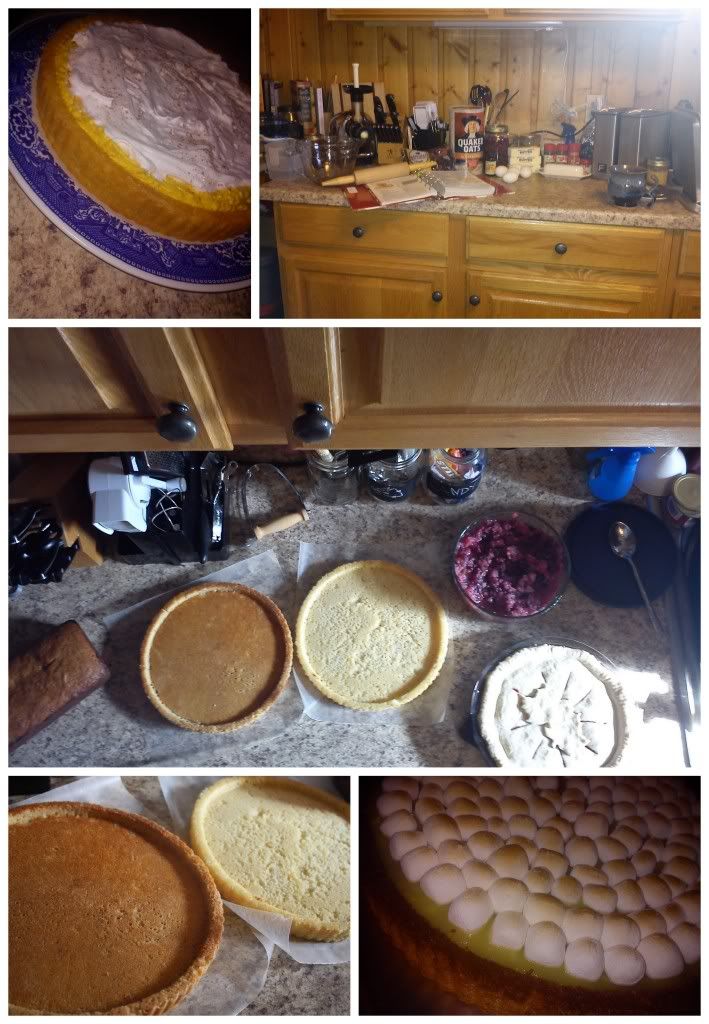
Next up was making cakes in my torte pan, a pumpkin-cream cheese filling, lemon curd, purchasing whipped cream and marshmallows and hitting the kitchen!
Photobucket
First, you'll need a cake...

Ingredients/Directions:

Set 3/4 cups butter and 3 eggs out for 30 minutes until they reach room temperature.

Grease and flour two torte pans. Preheat oven to 375 degrees F.

In a large mixing bowl combine 2 1/2 flour, 2 1/2 tsp. baking powder and 1/2 tsp. salt, set aside.

Beat butter on medium speed for about 30 seconds. Gradually add 1 3/4 cups sugar and continue to beat for 2 additional minutes. Add eggs, one at a time followed by 1 1/2 tsp. vanilla. Alternately add 1 1/4 cup milk and flour mixture until combined, split between pans.

Bake 20-25 minutes until golden brown and a toothpick inserted comes out clean. Cool for 10 minutes, remove from pans. Fill as desired.  

Note: If you are making the Pumpkin Cheesecake Torte, I recommend adding spices such as nutmeg, cinnamon, cloves and allspice to the batter. On the other hand, if you're preparing the Lemon 'almost' Meringue Pie Torte, I recommend adding a teaspoon or so of lemon zest to the batter, for added depth and flavor.

For the Pumpkin Cheesecake Torte...

Ingredients/Directions:

I simply mixed about 1 or 2 cups of Pumpkin/Squash Puree with soft cream cheese, added some brown sugar and spices such as cinnamon, nutmeg, cloves, etc. However, I recommend looking for a more precise pumpkin cheesecake dip/filling to ensure the best, fullest flavor. For some good ideas on where to start, scroll through this page I created on Squidoo, you'll find some of the best pumpkin cheesecake dips on the web!

To assemble the Pumpkin Cheesecake Torte simply plop the filling into your torte cake, spread some whipped topping on top and sprinkle with nutmeg, you're good to go!

For the Lemon Almost-Meringue Torte...

Ingredients/Directions:

Buy or prepare Lemon Curd.

Fill torte cake with lemon curd, arrange mini-marshmallows over the top in any design or amount you want to, turn on the broiler and place your marshmallow covered dish under the broiler for 3-5 minutes (they'll burn quickly...which we actually think tastes quite nice, but for presentation, golden is better). The marshmallows will get toasty and melty and you'll have an extremely delicious and tart dessert to share with all your favorite people!

Friday, November 16, 2012

Cinnamon Rolls

Nothing here needed an extended shelf life...and honestly the recipe isn't anything special or different, but sometimes, I just like to remember when I bake delicious things - this is one of those times: My first cinnamon rolls since returning to Laramie.

Grateful to have a bread machine to do the dough.
Grateful to have an oven big enough to manage a tray of these.
Grateful for Cream Cheese Frosting.
Grateful to have neighbors and friends to share them with.
Photobucket
If I just got your hopes up and you were looking for a cinnamon roll recipe, have no fear, I do have a couple posted here at 519 Kitchen:

Two recipes, one post: Overnight Cinnamon Rolls + Big Batch Cinnamon Rolls 

A Favorite and one that's easily adjusted to your personal preferences: Choco-P.B. Rolls

Monday, November 12, 2012

Hummus Pizza Torte

Extended Shelf Life for: Hummus, Tomato, Jalapeno, Onion

If you continue reading, you're going to discover, that this is one of my infamous posts where I give you nothing exact - just ideas and general guesstimates on how this can be created in your home. And, I'm okay with that. Because what I really want you to know is that Pizza Torte's are amazing! And you should, without a doubt, get a spring-form pan so you can make a pizza torte, because, like I said, they are amazing!

Photobucket
Ingredients/Directions (more of less):

Buy or prepare a batch of pizza dough. Personally, I love using my bread maker for this task because I know that it will have risen within a certain time, no matter what, since the bread machine can control temperature and humidity whereas my Laramie kitchen isn't always so predictable.

Split the dough ball into three equal parts.

Prepare your filling, you can do something traditional, or if you have some random bits and pieces of things to use up, like a tub of hummus, try out something like this:
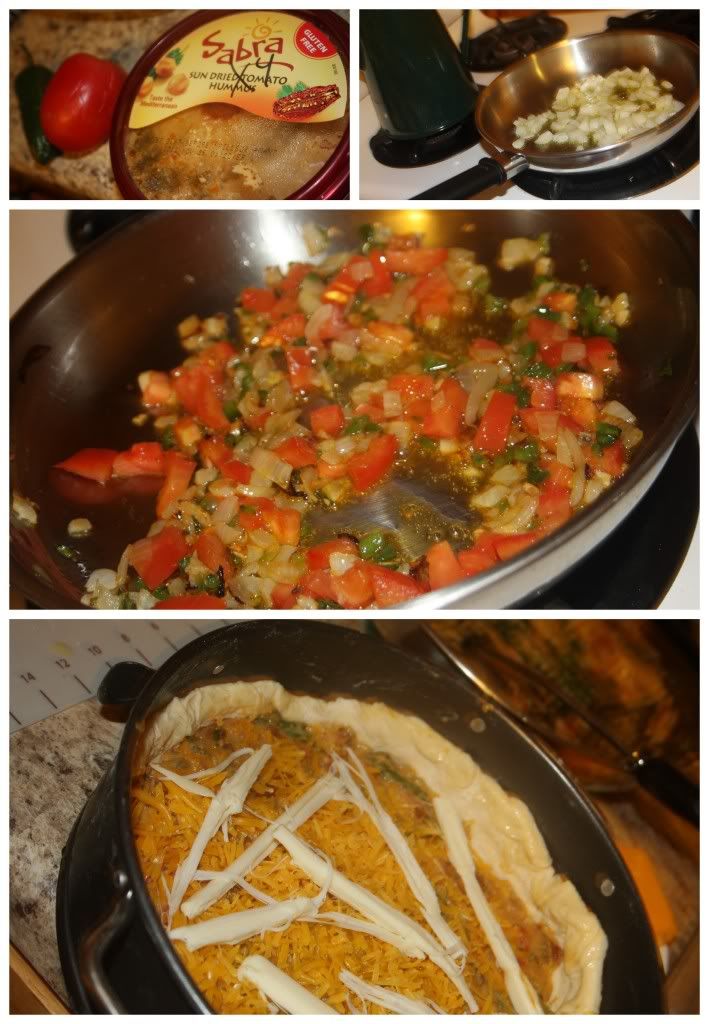
  •  Saute 1 diced Onion, 2 minced Garlic Cloves and 1 diced Jalapeno in a bit of Olive Oil. When they are tender, throw in one diced Tomato for an additional one or two minutes. 
  • Add 1 tub of Hummus (that's about to expire or otherwise ~ we used a sun-dried tomato hummus, that honestly wasn't that delicious to my taste-buds, too strong, but still a good concept, trust me!)
  • Thin out with additional olive oil or water, use as your filling/sauce.
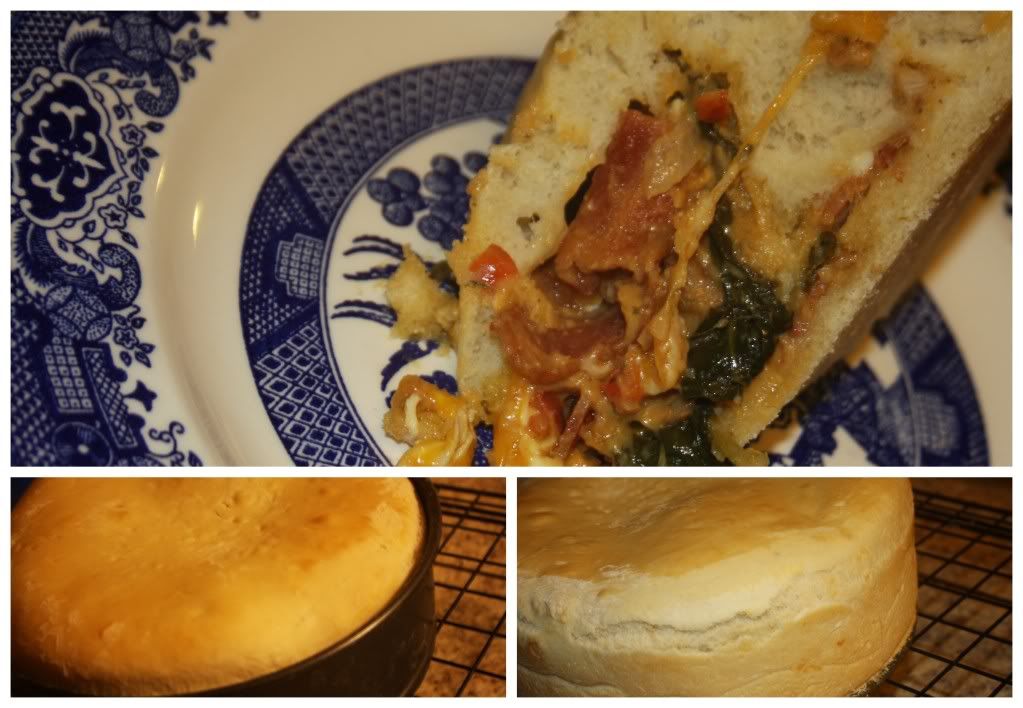
Place the first round  of pizza dough into your spring form pan, spread in half of the filling, top with cheese, repeat, finish the torte off with the final pizza dough round on top, seal up the edges, bake at 350 (probably- I'm currently in Sturgis, not with the cookbook where I got the recipe for this torte) and bake 15-20 minutes (or more) until crust is golden. Let torte sit for about 5 minutes before removing from the pan and cutting into appropriately sized serving pieces. Enjoy!
Photobucket

Sunday, November 11, 2012

Kimchi!

If you need to extend the life of cabbage, this is a great option. However, we simply needed to have some kimchi re-enter our life and this includes nothing salvaged, except perhaps an onion.

For me, it was relatively important to prepare some kimchi in November, as November/the fall is generally the time when all the old women come out from the woodwork gathered around piles and piles of cabbage and working together to make sure the Korean staple is ready for the long winter ahead.

A few other notable mentions about my kimchi making day: It was the Korean "holiday" of Peppero Day (11-11) AND I had the great joy of being assisted by a sweet Korean family that is here on behalf of the man of the household serving an exchange as a visiting professor, making my first kimchi experience feel that much more authentic and valuable.

Now, on to Kimchi making...

There are essentially three parts to preparing Kimchi: Soaking, Making the Red Pepper Paste and Assembly. I will give you a rough sketch of each one of these parts followed by a link to a very detailed explanation of each step just in case you are in need of more photos and great explanation. 

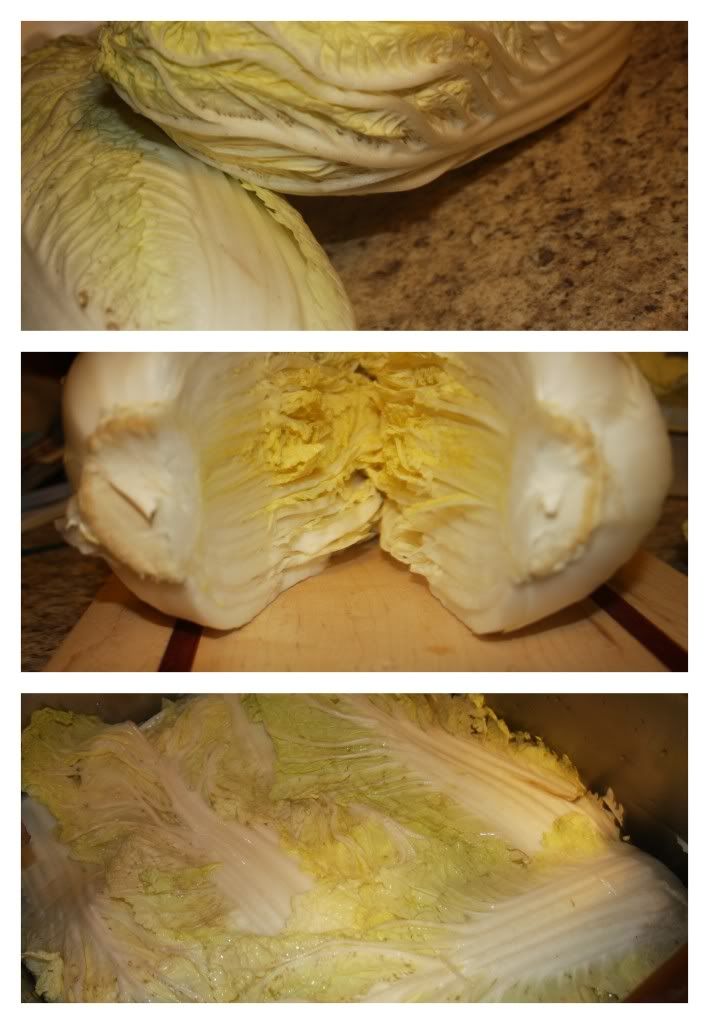
Part 1~SOAKING:

Photobucket
Kimchi making will undoubtedly be a two day process, starting with this first step which is, in essence, preparing the cabbage by soaking it in salt water.

You will need:
  • Two Heads of Napa/Chinese Cabbage
  • 3 cups Coarse Sea Salt, preferably from Korea -- no joke
  • 30 cups of Water
What you will do:
  • Remove the outer 2-3 leaves from each cabbage, but don't discard!
  • Cut a 2" slit in the stem of each cabbage, carefully split heads of cabbage in half (easier than it sounds, I promise)
  • Salt each leaf of the cabbage, making sure to get plenty of salt on the thick, white parts and extra careful not to tear the leaves or disassemble the cabbage half.
  • In a deep, large container (such as the kitchen sink), dissolve 3 cups of Salt in 30 cups of Water.
  • Place each cabbage half, face-up into the water and cover with the reserved cabbage leaves.
  • Cover with plastic and use rocks, tin cans or a heavy lid to press the cabbage halves down into the water.
  • Soak for 8 hours. Flip and soak another 4 hours.
  • Check for bend-ability in the cabbage stems, when they are supple it's time to rinse (3 times), halve again (so you end up with 8 quarters of a whole cabbage) and drain (at least two hours, during which you should prepare the next step).
For greater details on soaking, check out this thorough post at Beyond Kimchee (my favorite Korean food blog!)

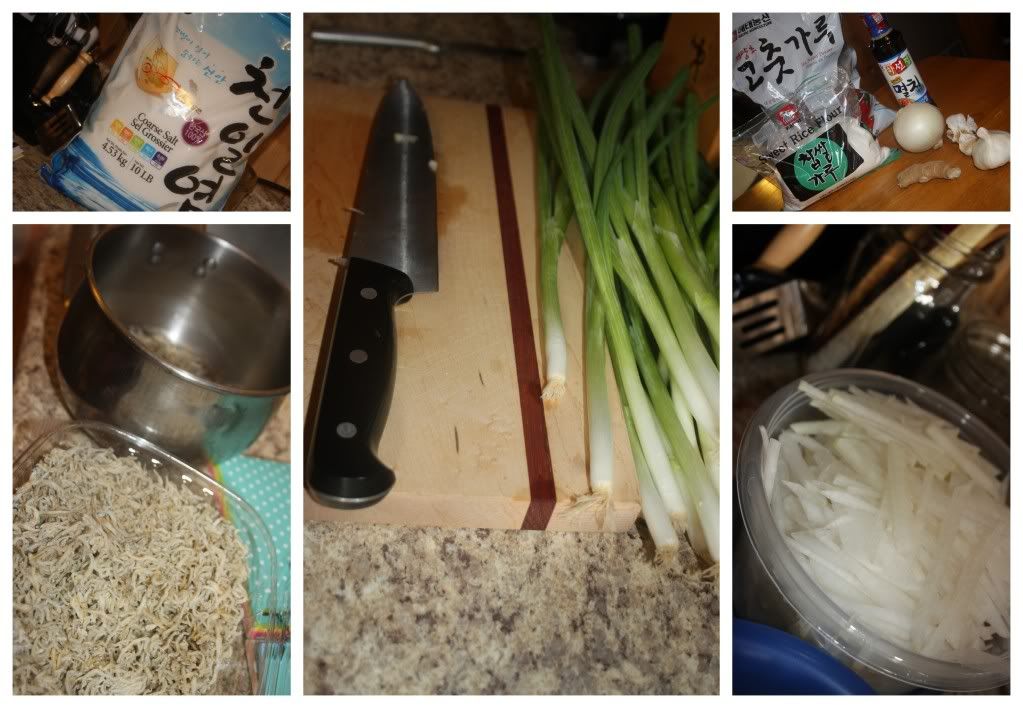
Part 2~MAKING THE RED PEPPER PASTE:
Photobucket
You will need:
  • A few handfuls of dried sea creatures (or one handful if you can't find multiple sea creatures or don't like sea creature flavored items - but one handful is a good idea)
  • 3 cups of Water
  • 2 Tbsp. Sweet, Glutenous Rice Flour
  • 1 Lg. Korean Radish, julienne into 1/8" matchsticks
  • 2 bunches of Green Onion
  • 4 cups of Korean Red Chili Flakes
  • 1/2 large Onion, roughly diced
  • 10 cloves Garlic
  • 2" piece of Ginger, roughly diced
  • 4 (or 2) Tbsp. Anchovy Sauce
  • 4 (or 2) Tbsp. Shrimp Sauce/Salted Shrimp
  • 1 1/2 Tbsp. Sugar
  • 2 Tbsp. toasted Sesame Seeds
What you will do:
  • Make a rice glue by boiling your handful of dried sea creatures in 3 cups of water, simmer for 10 minutes, remove from heat and let set, as is for 20 minutes. Strain off sea creatures and discard sea creatures, reserving 2 cups. Bring 1 1/2 cups of stock to boil while continuously whisking in the 2 Tbsp. of Glutenous Rice Flour until the mixture is bubbly and has thickened. Save the plain 1/2 cup stock for later.
  • In a blender or food processor, puree 1/2 large Onion, 10 cloves of Garlic, 2" piece of Ginger and reserved 1/2 cup Stock until smooth.
  • Pour 4 cups of Korean Red Chili Flakes into a large mixing bowl, add the onion mixture and cooled rice glue, anchovy sauce, salted shrimps, sugar and sesame seeds, mix.
  • Add the sliced Radish and diced Green Onions and let set for 30 minutes so the radish can extract some moisture and the mixture will be come more smooth and spreadable.
  • Taste test the sauce with a piece of cabbage to evaluate saltiness and flavor, adjust with additional fish sauce or stock for spread-ability as deemed necessary, then move on to assembly.
For greater details and more pictorial assistance, check out Cabbage Kimchee: Part Two from, yet again, Beyond Kimchee. 

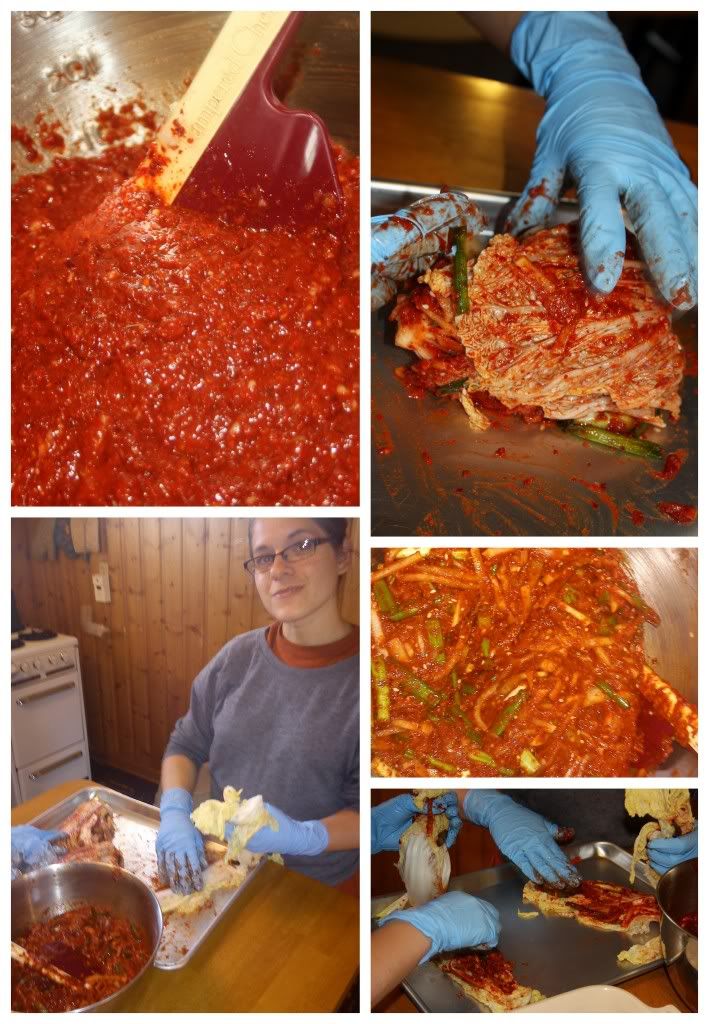
Part 3~ASSEMBLY:
Photobucket
You will need:
  • Rubber Gloves
  • A Cookie Tray or Large, shallow dish
  • Airtight containers for storage
 What you will do:
  • Gently handle each cabbage quarter and use your gloved hands to spread red chili paste between each and every leaf. Roll up the quarter, place in an airtight container. Let the kimchi sit out on the counter 2-3 days for fermentation and moisture extraction before relocating it to the refridgerator.
  • Our Korean assistants explained that the outer leaves can be used to cover a bit of the kimchi, but that it is also generally spread with red pepper paste and then cut up and eaten that day as fresh kimchi with rice, which, by the way, is delicious!
For more details on this final part of preparing your kimchi, head over to Beyond Kimchee one more time!

In our house, we really love this fermented vegetable and have been beyond satisfied with the results of this recipe and process, slightly time consuming, but if you love fermentation, spicy foods, or kimchi itself, it's well worth it!

Wednesday, November 7, 2012

Kohlrabi Pasta

Extended Shelf Life for: Kohlrabi, onion, limes and cilantro
Photobucket
Sometimes you just need to make a bulk amount of something so you can eat the rest of the week. Ultimately, the week of this dish I was craving a deliciously warm and thick soup, but that was not an option with the ingredients on hand. So, we ended up with this pasta dish which was delicious but made me wish warm weather were around the corner.

Ingredients/Directions:

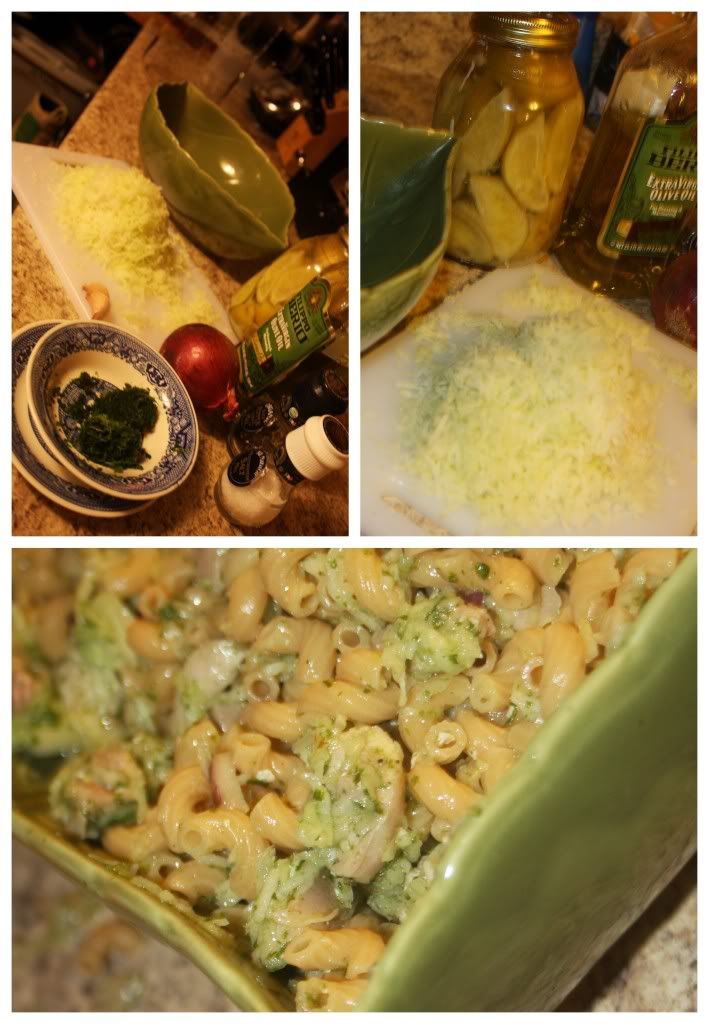
Prepare one package of Noodles such as macaroni. Shred one large Kohlrabi, season with Salt and the juice of 1 Lime. Toss in one chopped red Onion and 1 Tbsp. of packed chopped Cilantro. Mix in cooked Pasta, add salt, lime juice and black pepper to taste. Enjoy at room temperature or chilled.

Wednesday, October 31, 2012

Preservation Secret: Frozen Avocados

Extended Shelf Life for: Avocados
Photobucket
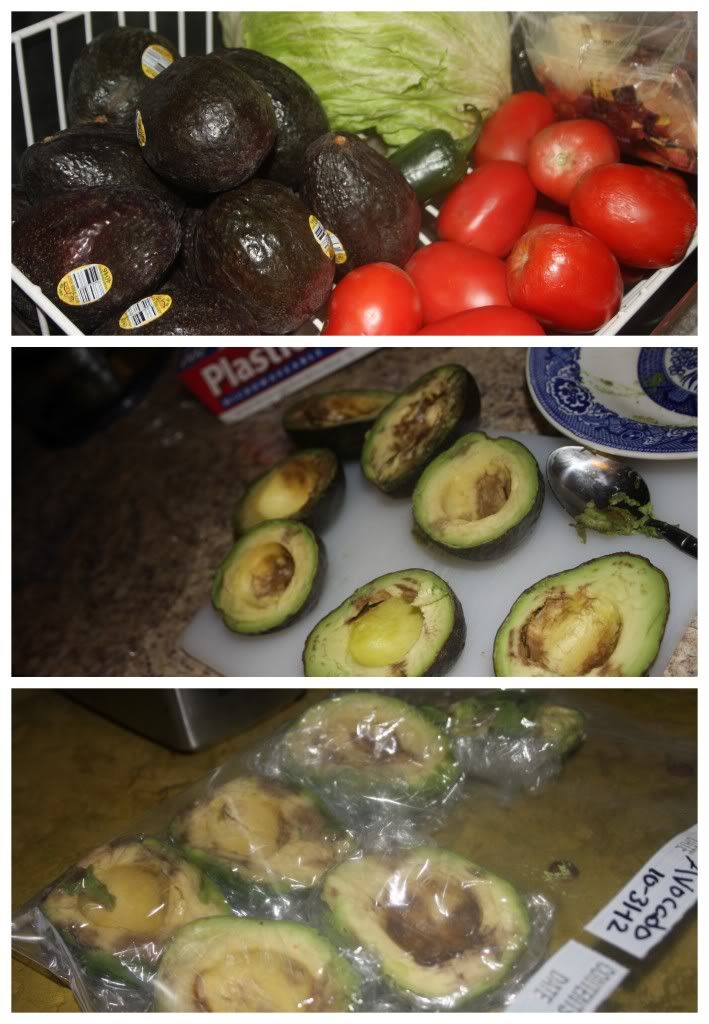
Did you know...you can freeze avocados and use them later?

You sure can! Thanks to Pinterest, I learned this lesson. Thanks to dumpster diving we had an abundance of avocados for me to give this preservation secret a shot. My avocados are definitely in worse shape than what other avocado preservers are likely to freeze, however, the process is the same.

Halve you avocado.

Remove the seed.

Scoop out the pulp.

Wrap in plastic wrap.

Place in freezer bag.

Freeze.

Use for breads, brownies or, if your avocados are relatively pretty when you freeze them, you can even make guacamole!

Tuesday, October 30, 2012

Quick and Easy: Beans and Rice

Extended Shelf Life for: Leftover Pico de Gallo
Photobucket
Sometimes, I just need to use up random leftovers, for example some leftover pico de gallo from a night with our friends and a meal of fish tacos. Since we were lacking dinner options and tortilla chips I did some quick thinking and came up with this dish.

Rice from a rice cooker.

Canned refried beans heated in a skillet with pico de gallo juice and a cilantro "ice" cube.

Rice topped with beans, cheese and pico de gallo.

There you go! Enjoy!

Thursday, October 25, 2012

Chinese Tomato and Egg with Fried Kohlrabi

Extended Shelf Life for: Tomatoes and Kholrabi
Photobucket

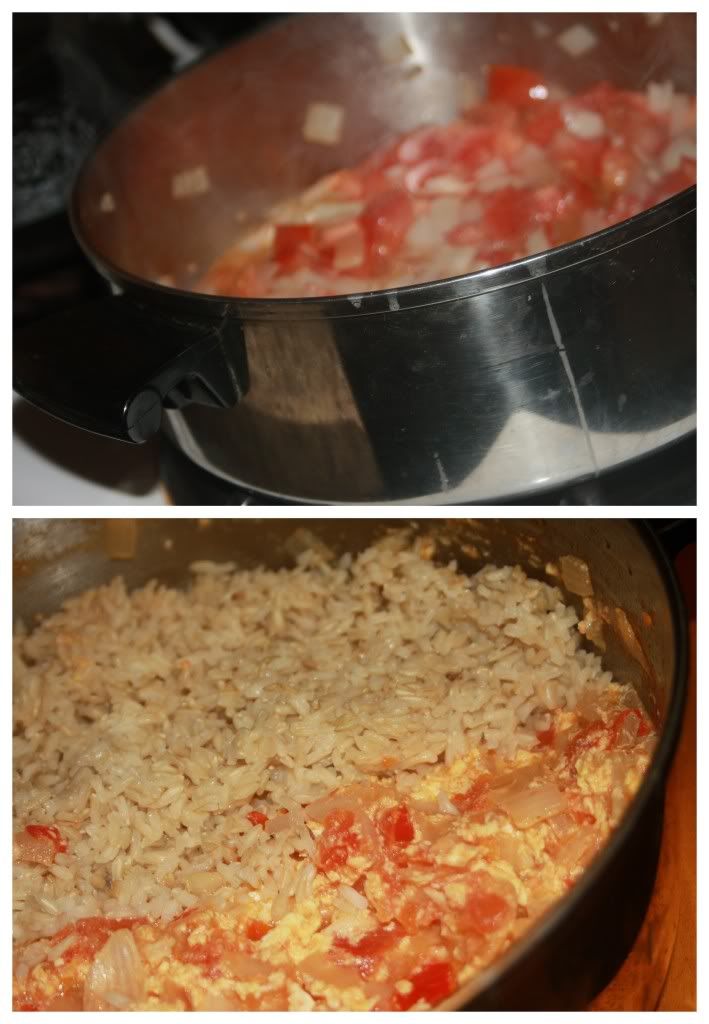
Chinese Style Tomato and Egg dish, much like the Eggplant and Potato Dish, this dish was inspired by our experience at a delicious Proper Chinese Restaurant in South Korea. Unfortunately, the main idea of the night was to have something to eat and I didn't do much research on how to season these eggs and the tomatoes - so mine, in ultimate simplicity, were sauteed onion and garlic followed by tomatoes and finally scrambled eggs, served on top of rice and alongside the upcoming kohlrabi home-fries. But, if you're looking for a more inspiring and flavorful Egg and Tomato dish, this recipe has all the makings of exactly what I was craving and what I so happily discovered in Daejeon, South Korea.

Photobucket
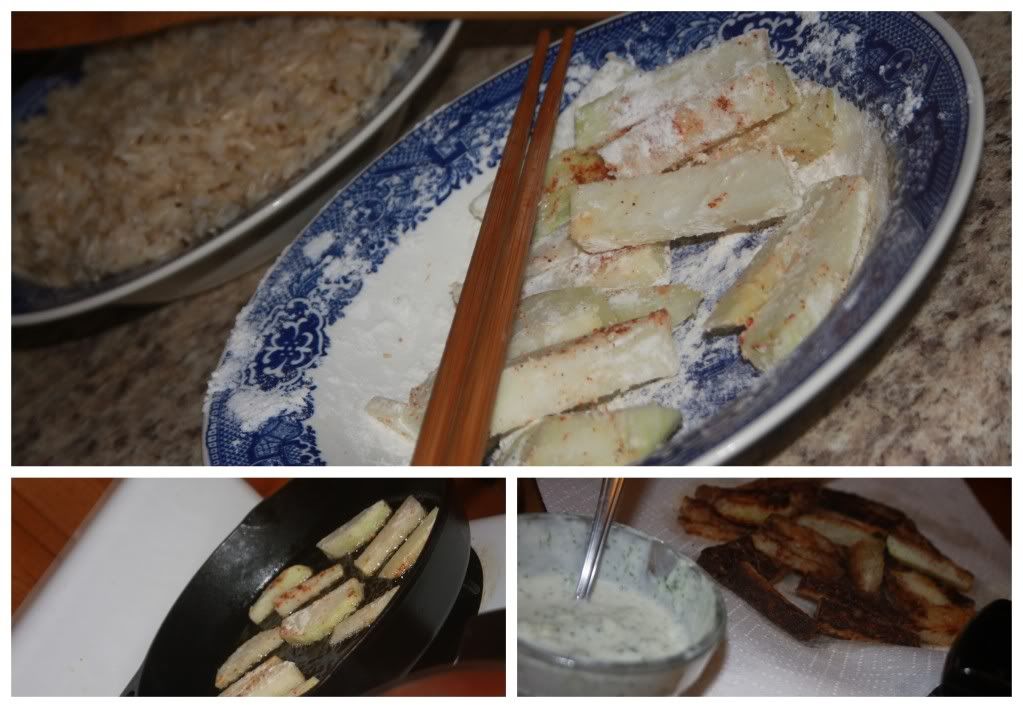
To accompany the eggs and to use up a large kohlrabi that had been gifted to me via my neighbor, I did a little Google exploration and opted for another NYT recipe, this time, rather than preserved red onions, I went for Kohlrabi Home-fries

Ingredients/Directions:

Peel and cut 1 1/2 - 2 pounds of Kohlrabi into thick sticks. Heat 2-4 Tbsp. of Oil over medium heat in a heavy skillet or cast iron pan. Meanwhile, combine 1 Tbsp. of Flour with Salt to taste and toss the Kohlrabi sticks in the mixture. Add kohlrabi to the skillet of rippling oil and cook on both sides for a few minutes until crispy. Drain on a paper towel and serve plain or with your favorite yogurt dipping sauce (if you're in need of a good yogurt sauce, check out this recipe!)

Wednesday, October 24, 2012

Peanut Butter from a Juicer


Photobucket
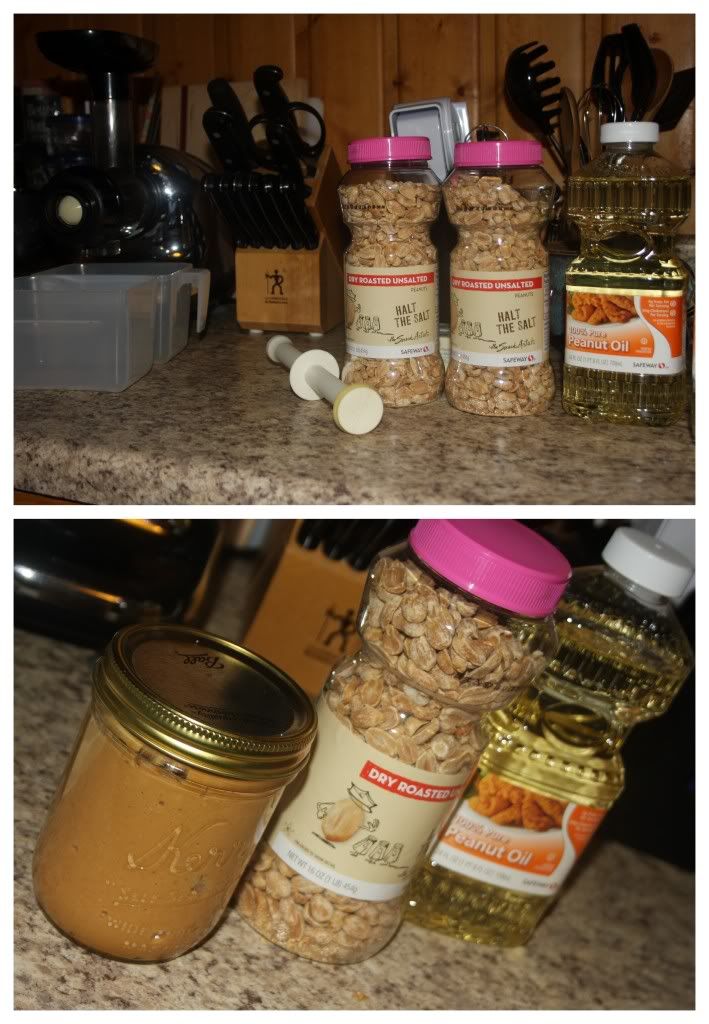
While this is not a recipe to extend the life of anything, I just thought I'd let the blog world know that I do, in deed, make peanut butter with my juicer. (Read more about the juicer we own and operate and how much I love it here!)

As for making peanut butter in a juicer, you may find it's a bit of a chore and takes some patience, but you'll end up with natural peanut butter, that's simply delicious and costs only as much as a jar of peanuts (we were able to get ours for $2.50).

To make the peanut butter, use the mincing nozzle of your juicer (or whatever is recommended by your juicer model.) and run a small handful of peanut butter through your juicer chute at a time. You'll need to run the 'butter' through multiple times as the first few runs will give you a kind of powdery peanut mess. To speed up the process and create a slightly smoother peanut butter feel free to add Peanut Oil to the powdery peanut mix. Continue running the peanut 'butter' through the juicer until you reach your desired consistency - we went at it about 8-10 times.

Enjoy as you would any other peanut butter!

Beef and Chorizo Chili

Extended Shelf Life for: Peppers, Jalapenos, Tomatoes
Photobucket
When it comes to chili, I lack an official recipe. I do however have a few tricks-of-the-trade or preferences and a new discovery (or two!)

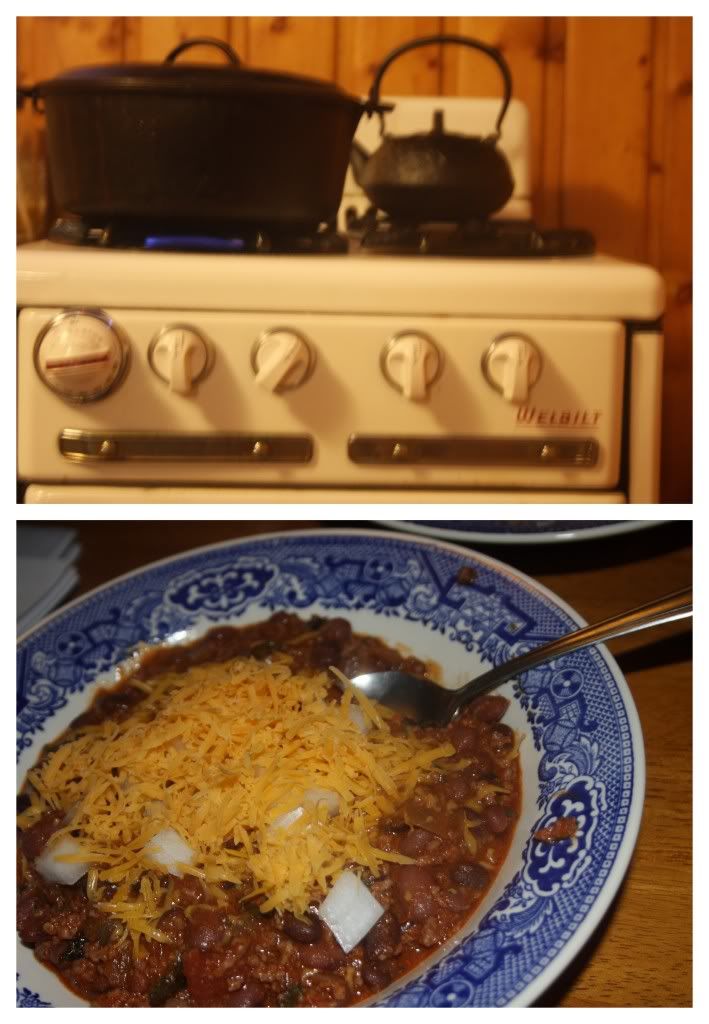
To begin, I just got a cast iron kettle and it just makes chili seem that much more delicious, amazing and perfect for the cold winter night.

Next, let me tell you that doing a combo chili which is 50% Beef and 50% Chorizo is brilliant!

Now, on to some tricks-of-the-trade.

I've just recently learned this little gem of advice that comes from my good friend SJ's grandmother:

  • When preparing ground meats, add enough water to cover the base of the kettle or skillet to the meat. As the meat cooks, the water will evaporate and you'll end up having a very uniformly ground meat to support your soup or go into your tacos. (Perhaps this isn't revolutionary to most folks, but there's just something about this perfectly ground meat that makes the chili that much more enjoyable.)

Another trick-of-the-trade, espeically for divers or gardeners:

  • If you have an abundance of peppers, go ahead and roast the whole batch in the oven until they're fragrant, run them through a food processor or a juicer with mincing capabilities, throw them in an ice cube tray and then into the freezer for future use in soups, sauces and of course chili! 
One more thing I like to do for our chili, especially when we have an abundance of tomatoes: 

  • Run fresh tomatoes through a mincing juicer or food processor rather than throwing in canned tomatoes, fresher and ultimately a bit healthier (tomatoes in cans can have dangerous interactions with the aluminum considering the acidity of tomatoes).
And finally, our personal preference when it comes to eating a bowl of chili is to add raw onions, cheese and corn chips.

Friday, October 19, 2012

Banana Chips

Extended Shelf Life for: Bananas
Photobucket
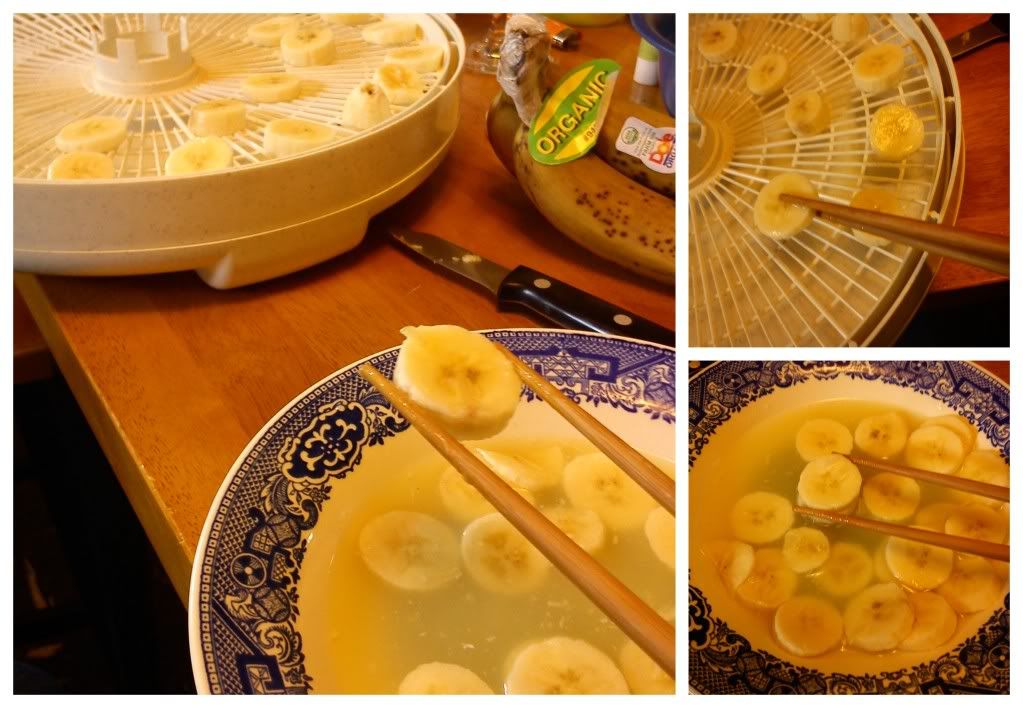
As a diver, it's pretty crucial to have a dehydrator that you love.We have one that features varying temperatures which helps to ensure the best dried products possible. When it comes to drying bananas, I've discovered that the flavor and look is better if the fruit is first dipped in orange juice or another citrus juice prior to being dried. I also recently discovered that having mad chopstick skills ensures that my fingers don't get all gunky when drying bananas! Hoo-zah!

Thursday, October 18, 2012

Salt Preserve Limes and Cubes

Extended Shelf Life for: Limes
Photobucket
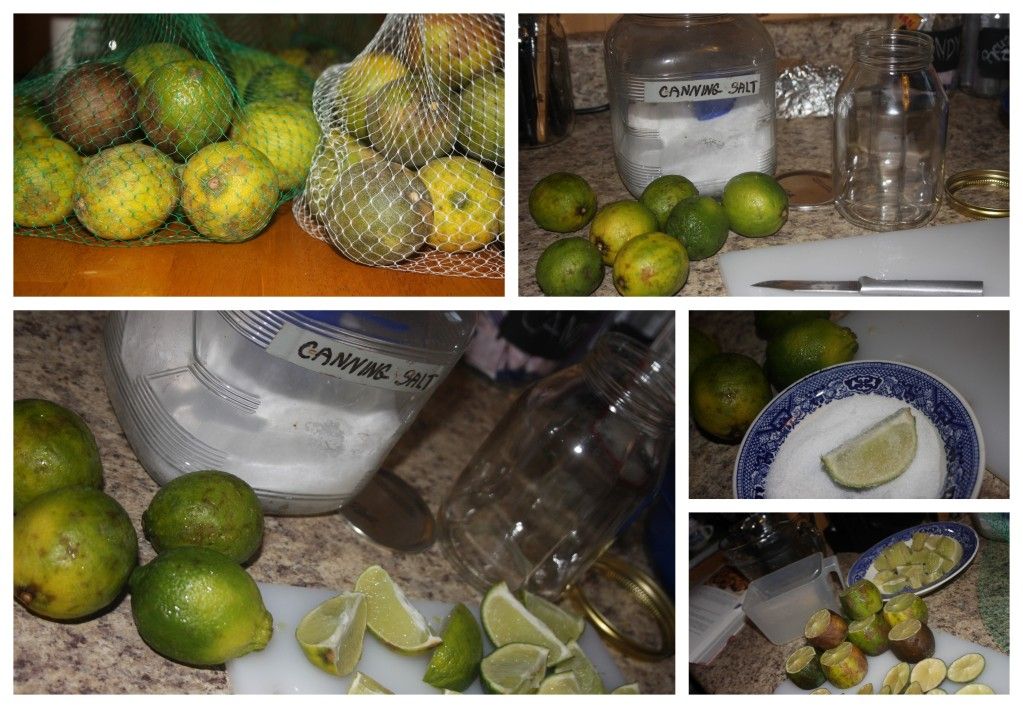
Just as we finished using up our lemons, we had a sudden abundance of limes. Not interested in zesting lime-after-lime, I hit the web and searched for other preservation options. I opted on two preservation options in term of my limes.

First, I peeled and juiced about half or 2/3's of the limes, poured the juice into ice trays, threw them in the freezer then popped the little sucker's out of their trays, transferred to a Ziploc bag and now I have about 20 tablespoons of lime juice ready and waiting to be added to salsa, soups, smoothies, margaritas, whatever the case may be.

Second, I took about a bag worth of limes, quartered them (but didn't cut all the way through), sprinkled with some salt (coarse sea salt or canning salt to be exact). Press the limes down into the jar until the jar is full and leave overnight so the limes have a chance to extract some juice. In the morning, top the jar off with fresh lime juice and store in the pantry until you have a need for some salty lime juice to flavor any of the aforementioned items or whatever you may want to add the zesty flavor of lime.

Lemon Soup and Lemon Roasted Cauliflower

Extended Shelf Life for: Lemons and Cauliflower
Photobucket
Photobucket
Ingredients/Directions: 
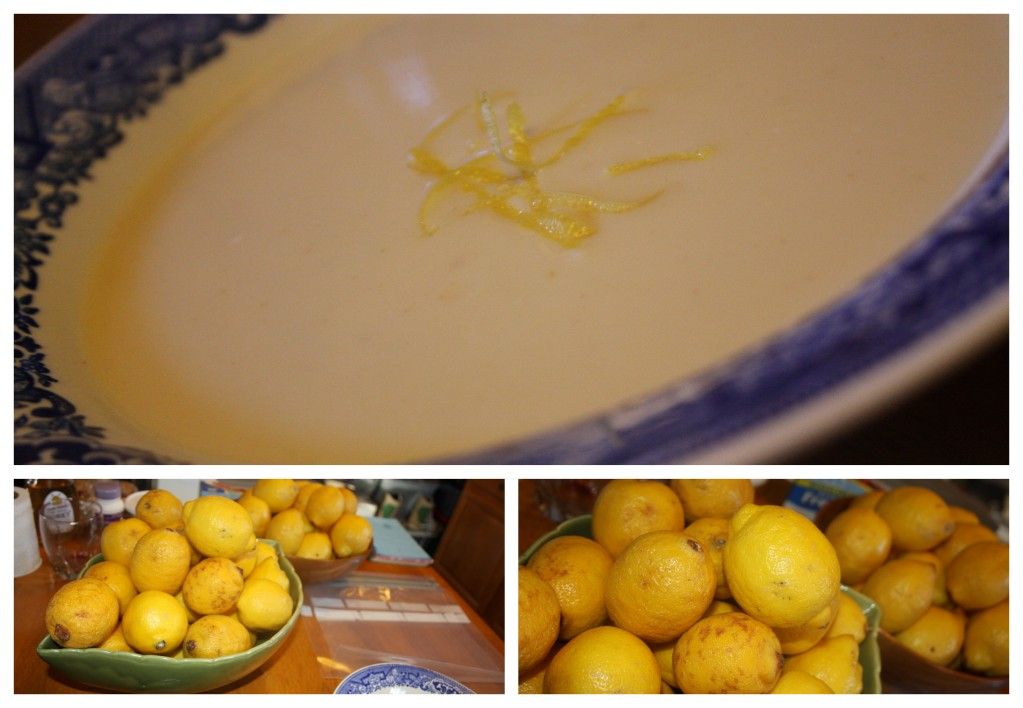
Lemon Soup recipe from Rachel Ray's 2, 4, 6, 8 Cookbook
Bring 6 cups stock to boil with lemon peel. Turn off heat and cover, allow stock and lemon peels to steep for 5 minutes, remove peel (unless you used zest). In a medium bowl, whisk together 2 eggs and 2 egg yolks with 5 tbsp. Lemon Juice and Hot Sauce. Add to egg mixture 1/2 cup of the hot stock to temper the eggs. Whisk this egg mixture into the stock, then turn the heat to low and whisk until soup thickens slightly, should take about 4-5 minutes. Season with salt and pepper and fresh parsley if available. Enjoy as an appetizer or side dish.

Roasted Vegetable recipe inspired and assisted by the Better Homes and Garden's Cookbook

Toss 1 head of Cauliflower, broken into florets, with 2 tsp. Olive Oil, 1 tsp. Lemon Juice, Salt, Pepper and Cayenne Pepper to taste. Roast in an oven heated to 450 F until tender (this factor always takes me a lot longer than I expect, so don't intend on having roasted veggies as a quick dinner).

Tuesday, October 16, 2012

Cauliflower Pancakes with Avocado Sauce

Extended Shelf Life for: Cauliflower and Avocado's
Photobucket
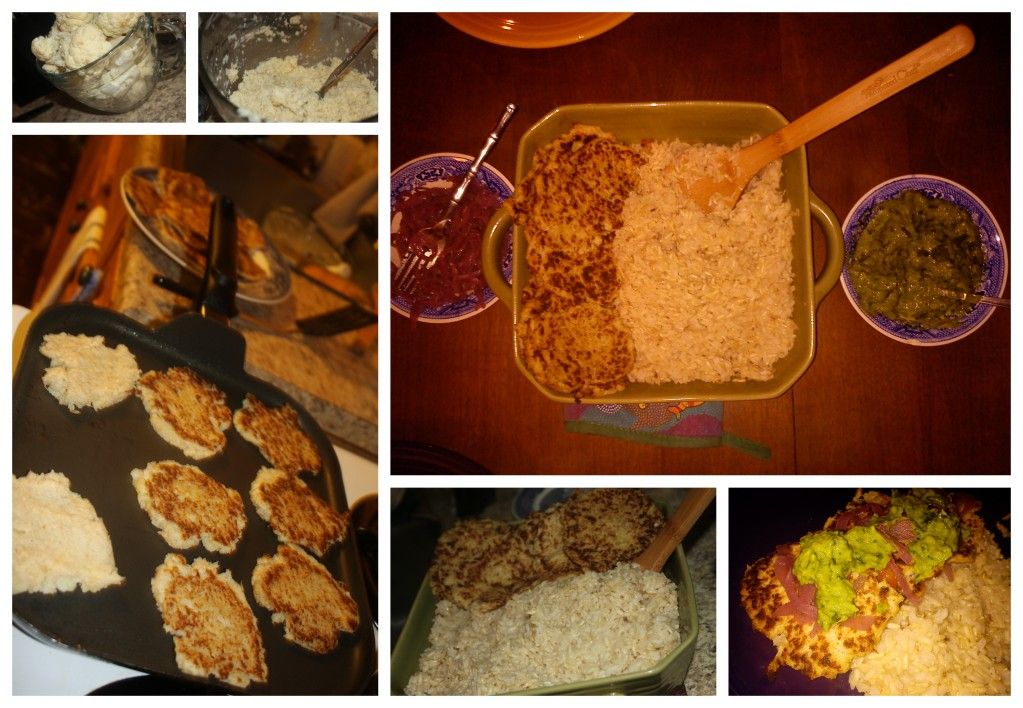
In our house, the man is not entirely convinced that cauliflower is a delicious and delectable vegetable. Which means, when it's dived or brought to us from our neighbors CSA share, I have got to do some quick thinking and make it seem as little like cauliflower as possible. Having spent enough time on Pinterest to be aware of 'cauliflower pizza crust' I quickly changed my mind when I realized that making this particular crust would require going out and purchasing cheese which, frankly, I was not interested in doing. So, I did a bit more research and finally concluded that Cauliflower Pancakes were to be the menu item, served on rice with those nice Red Onions I'd recently preserved and an Avocado Sauce, seeing how we had a few of those lying around in need of eating and using.
Photobucket

Ingredients and Directions:

Cauliflower Pancakes from About.com

In a large soup pot, boil a few inches of water before adding 1 head of Cauliflower florets. Cover, reduce heat to low and cook for about 20 minutes, until Cauliflower is tender.

Drain Cauliflower and mash with a fork, leaving a little bit of texture. Add 3 beaten Eggs and about 1/2 cup of Wheat Flour until you have a pancake-consistency batter. Season with salt and pepper.

Heat a bit of oil in a large skillet, spoon some batter onto the hot skillet. Cook about 3-4 minutes per side making sure to smash them down to ensure they are thin enough to cook all the way through. Remove from heat when they are golden on both sides and no longer floppy and doughy.

 Avocado Sauce from For the Love of Cooking

In a food processor, blender or quality juicer (which has mincing abilities) combine: 1 ripe avocado, 1/3 cup fresh Cilantro, 2 cloves Garlic, 1 Tbsp. Olive Oil, Juice from 1 Lime, Salt and Pepper to taste.

Serve Cauliflower Pancakes over rice topped with preserved red onions and avocado sauce, enjoy!

Sunday, October 14, 2012

Red Velvet Beet Brownies

Extended Shelf Life for: Beets
Photobucket
The truth is, I don't really like beets and never have any clue what to do with them when the man brings them home. Also, while I enjoy healthy alternatives, I think making brownies with lots of rich butter and sugar is acceptable and honorable - you're making brownies for goodness sake, the whole objective is to have something sinfully delicious - just don't eat a pan everyday and that's being healthy (in my book anyway).

But, back to the subject at hand, beets and brownies, a healthy alternative or a fantastic way to use up beets, this brownie recipe comes from the great, always inspirational, Vegetarian Times.

Ingredients/Directions:

Preheat your oven to 350 F and prepare a 9 inch or 8 inch square pan with cooking spray.

Process two large cooked beets in a food processor or on the mincing option of a high-quality juicer if you have one. You will need a total of one cup of beet puree total.

In a separate bowl, whisk together 1/2 cup softened or melted Butter and 1 cup Sugar, until smooth. Add 1 tsp. Vanilla, then whisk in two large Eggs.

In a small bowl, whisk together 1/2 cup Flour and 1/4 cup plus 2 Tbsp. Cocoa Powder. Fold flour mixture into beet mixture, then add 1/2 cup mini-chocolate chips.

Pour into prepared pan and bake for 30 minutes or until toothpick comes out clean. Enjoy!

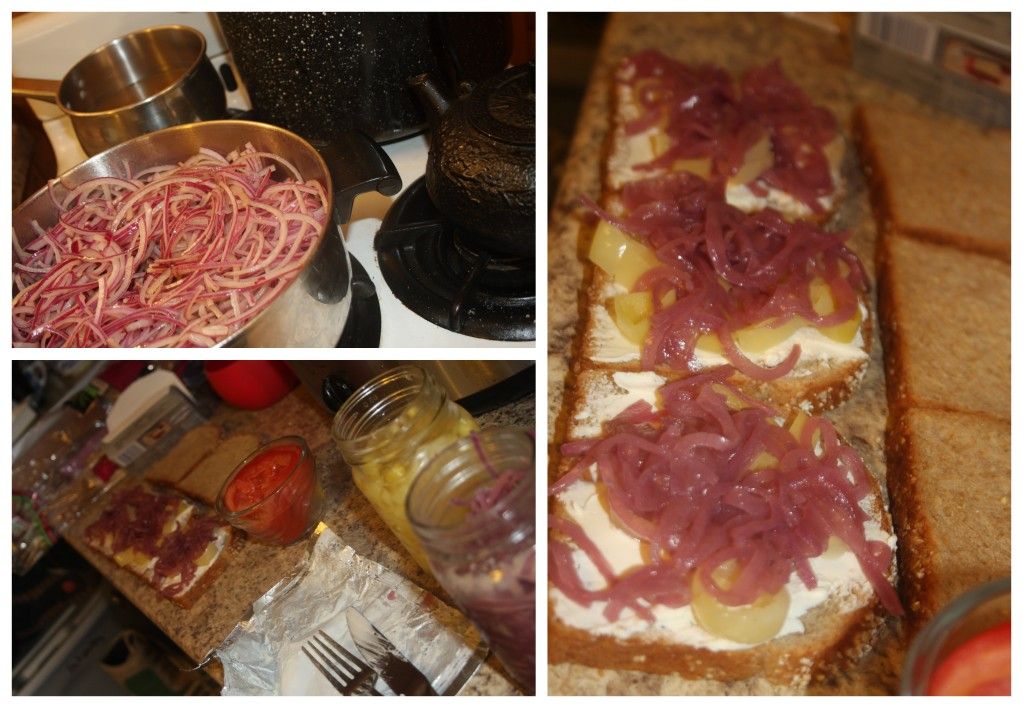
NYT's Red Onion Preserves

Extended Shelf Life for: Onions
Photobucket
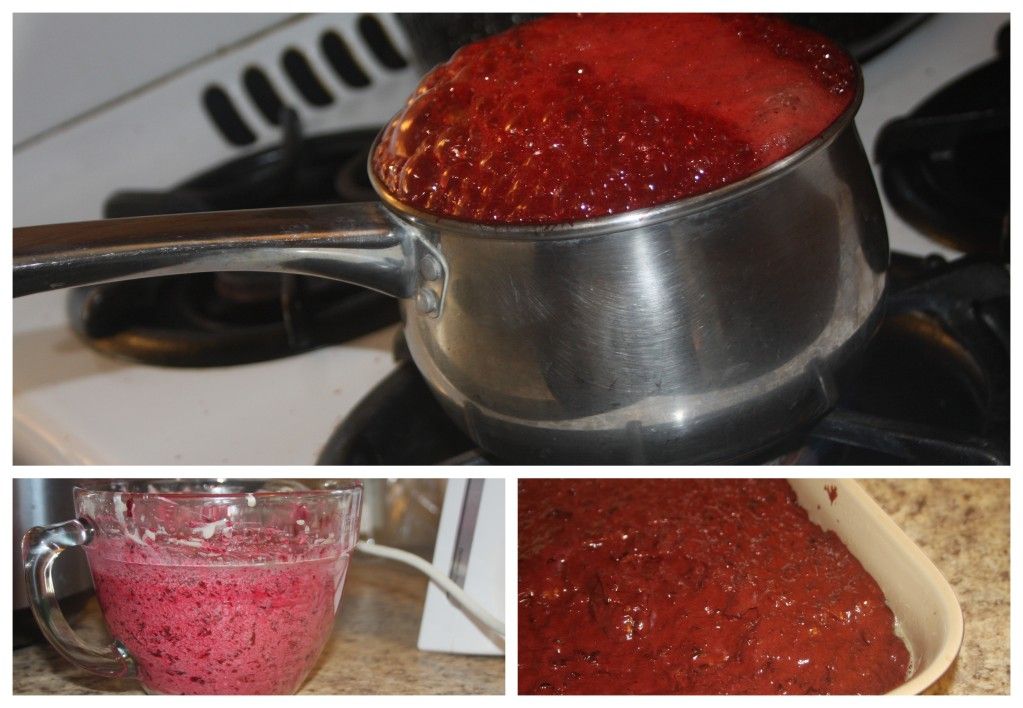
 As part of my new job, I get to assist my good friend in hosting the occasional ELL (English Language Learner) Family Night. For such an event we make sure to offer a complete meal to guests as well as helpful information for acquiring language and adjusting to a new culture. For the first family night, we served up large sub sandwiches courtesy of Wal-Mart and ended up bringing home more than a few containers of perfectly sliced, red onions. And while red onions are delicious on their own, they have an aroma which permeates all things and the upstairs kitchen was beginning to take on a rather foul odor.

So, I went to work and did what I do best, preserve them suckers!

A quick internet search revealed a 1988 New York Time's recipe for  Red Onion Preserves.

The only thing the original recipe lacks are pictures, so above you have a photo of the delicious, and I mean DELICIOUS, little onion slices and below, you'll find the recipe (in case you have an aversion to clicking on links).

Ingredients/Directions:

Peel and slice 6-7 red onions, cut in half, you'll need about 8 cups total. Heat 2 Tbsp. of butter in a heavy kettle and add the onions, 1/4 tsp. Allspice, 1 bay leaf and 1 tsp. finely grated Ginger. Cook and stir often for about 10 minutes. Stir in 3 Tbsp. Honey and 1/4 cup Red-Wine or Malt Vinegar. Cook, stirring often, for an additional 5 minutes. Let preserves cool and store in a tightly covered container for as long as you can go without eating them! They're great warmed up with meats and in omelets or as a sandwich condiment. What use will you find for Red Onion Preserves?

Saturday, October 13, 2012

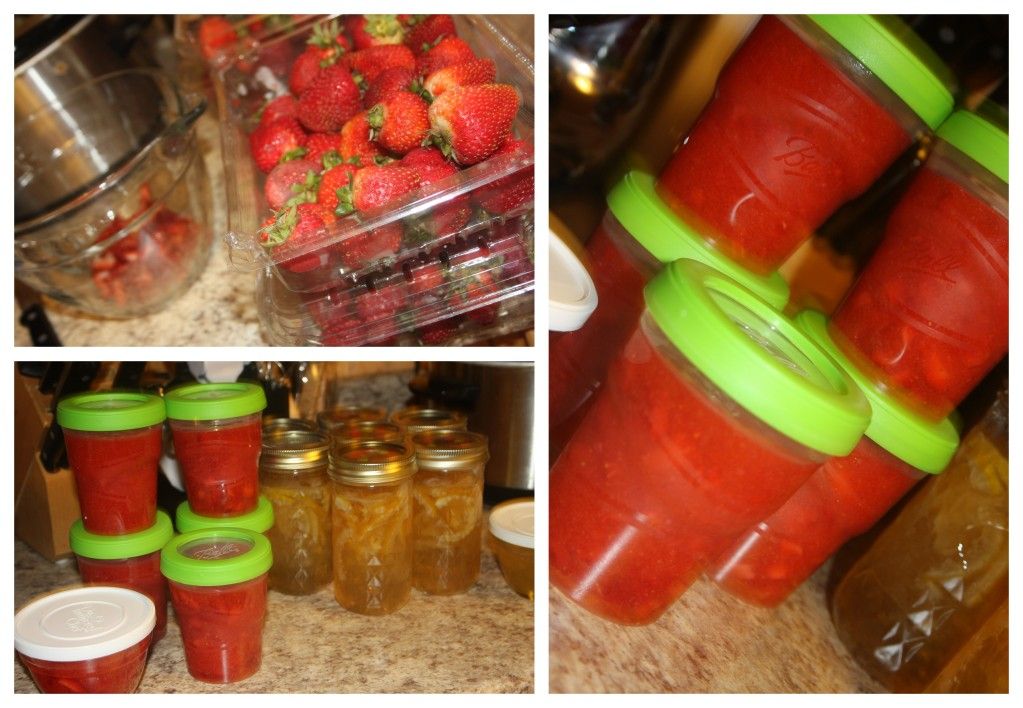
Repeat: Strawberry Freezer Jam


Photobucket
In my early salvaging days I threw a batch of this together. It's quite possibly the most delicious jam I've ever had and it's SO simple to make. Just do it!

 Ingredients:

4 cups hulled Strawberries
4 cups Sugar
1/2 tsp. finely shredded lemon peel
1 7.5 oz. package of regular powdered fruit pectin
3/4 cups water

Directions:
Use a potato masher to crush the berries until there is about 2 cups of pulp. Add sugar and lemon peel, let stand for 10 minutes. Prepare fruit pectin in pan by boiling for 1 minute, stirring constantly. Add to berry mixture; stir for three minutes when mixture is no longer grainy. Ladle into half pint freezer containers, let stand for 24 hours before placing in the freezer for up to a year.

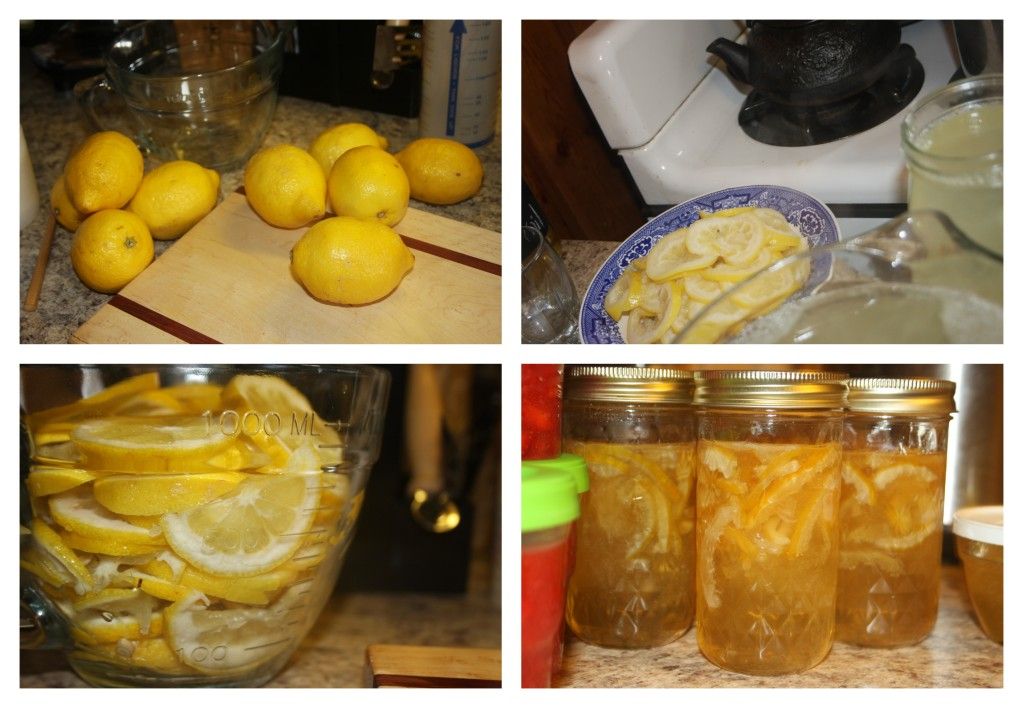
Lemon Marmalade

Extended Shelf Life for: Lemons!
Photobucket
I think lemons are the most joyful fruit available in the supermarket and hanging from trees today.

When the man a CouchSurfer came home with multiple bags filled with lemons, I was quite thrilled and being as it was 'canning' season, I went ahead and sought out a way to use up these joyful little gems in a way that they would just keep on giving.

I debated doing Lemon Curd in bulk, but with the addition of eggs, it seemed to difficult of a task and I opted rather for Lemon Marmalade. A choice I far from regret!

It was a bit tricky and time consuming and I'm not 100% certain that it is a recipe which is easily undertaken at high altitude, BUT it's still delicious and worth a shot.

Unfortunately, I can't recall exactly where I found my recipe so...just be thankful I wrote it down in my little recipe notebook!

Ingredients/Directions:

Combine 4 cups, thinly-sliced-unpeeled lemons and 3 quarts water in a large kettle or stock pot. Bring to a boil, boil for 20 minutes or until lemon peels are tender. Strain off lemon peels and re-measure water, making sure there is still a total of three quarts. Combine water, fruit peels and 8 cups of sugar in the kettle or stockpot and bring to a boil til it sheets or reaches 221 F, pour into hot sterilized jars and seal. Enjoy or give as gifts.

Thursday, October 4, 2012

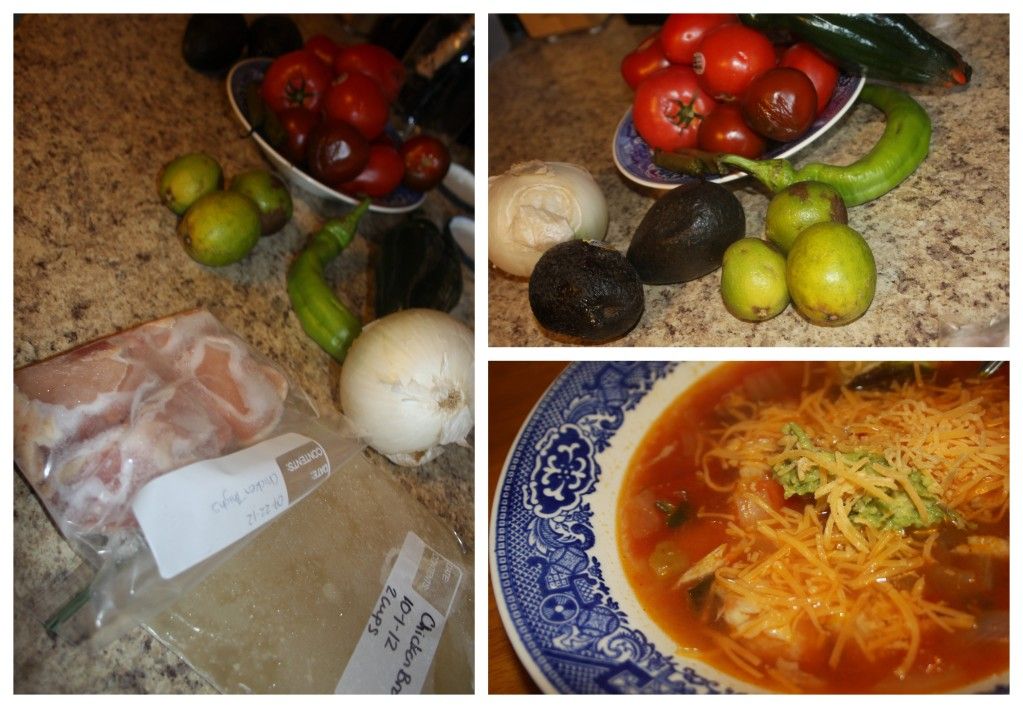
Chicken Taco Soup

Extended Shelf Life for: Tomatoes, Peppers, Onions, Avocados, Limes
Photobucket
If I am truthful, I will let you know that I remember very little about the true way in which this soup came together and as is incredibly common in this kitchen, I have no idea what amount of what went in or stayed out, etc. And I realize that makes me a poor food blogger. But here's the thing, I believe, that sometimes in the kitchen, the most important thing is knowing what goes together, to know your personal preference for how much broth to have compared to the density of other ingredients and above all else, I think what is important is to use what you have, to use it well and enjoy the results as they are...this was a delicious soup and I'm going to tell you what goes into, but as for how much and exact measurements, let go of that and just let it come together, it's a soup for goodness sake!

Ingredients/Directions:
Inspired by Rachel Ray's recipe Mexican Chicken Lime Soup

 In a stock pot or dutch oven saute 1 chopped onion in a drizzle of olive oil until tender and translucent. Add 2-3 (or more) minced Garlic Cloves and 1 minced pepper of choice (or a couple and a variety if you like spice - we have handy-dandy roasted jalapeno ice cubes which I added at the end), saute for a couple of minutes, then push to the side. Add additional olive oil if needed and begin cooking 4-6 Chicken Breasts until juices run clear. At this point, I like to take a pair of kitchen sheers and a fork and cut the breasts into bite size pieces. Add 2-cups Home Made (or store bought) Chicken Broth to the pot and bring to a boil. Run about 10 tomatoes through a juicer (but not on the juicer mode...more like mincing/blending mode) or blender and add to boiling broth. Adjust liquid according to personal preference by adding water or broth. Season with, lime juice, salt, pepper, cayenne, chili powder and cumin. Scoop into bowls top with Shredded Cheddar Cheese and slices of Avocado (or mashed avocado if they're a little ripe ;)).
Related Posts Plugin for WordPress, Blogger...