Wednesday, October 31, 2012

Preservation Secret: Frozen Avocados

Extended Shelf Life for: Avocados
Photobucket
Did you know...you can freeze avocados and use them later?

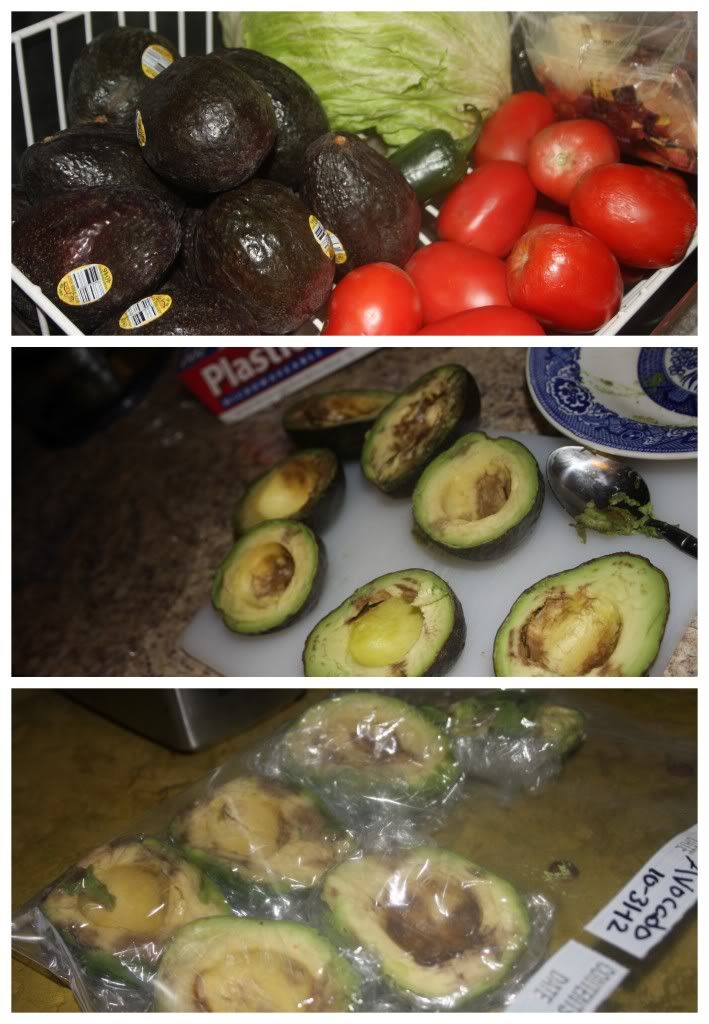
You sure can! Thanks to Pinterest, I learned this lesson. Thanks to dumpster diving we had an abundance of avocados for me to give this preservation secret a shot. My avocados are definitely in worse shape than what other avocado preservers are likely to freeze, however, the process is the same.

Halve you avocado.

Remove the seed.

Scoop out the pulp.

Wrap in plastic wrap.

Place in freezer bag.

Freeze.

Use for breads, brownies or, if your avocados are relatively pretty when you freeze them, you can even make guacamole!

Tuesday, October 30, 2012

Quick and Easy: Beans and Rice

Extended Shelf Life for: Leftover Pico de Gallo
Photobucket
Sometimes, I just need to use up random leftovers, for example some leftover pico de gallo from a night with our friends and a meal of fish tacos. Since we were lacking dinner options and tortilla chips I did some quick thinking and came up with this dish.

Rice from a rice cooker.

Canned refried beans heated in a skillet with pico de gallo juice and a cilantro "ice" cube.

Rice topped with beans, cheese and pico de gallo.

There you go! Enjoy!

Thursday, October 25, 2012

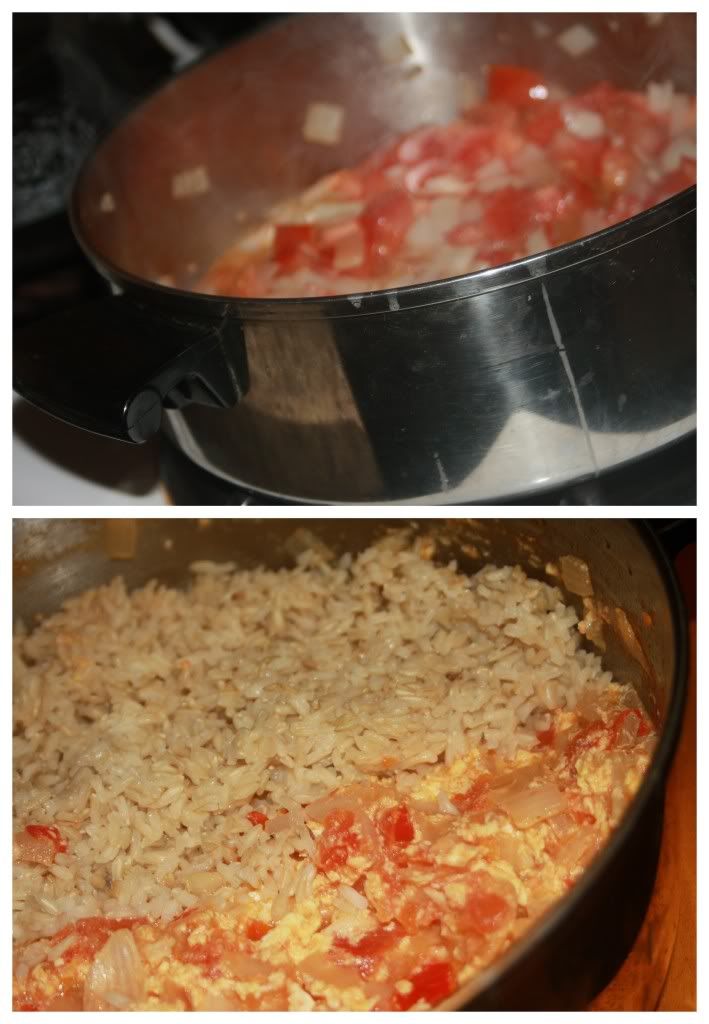
Chinese Tomato and Egg with Fried Kohlrabi

Extended Shelf Life for: Tomatoes and Kholrabi
Photobucket

Chinese Style Tomato and Egg dish, much like the Eggplant and Potato Dish, this dish was inspired by our experience at a delicious Proper Chinese Restaurant in South Korea. Unfortunately, the main idea of the night was to have something to eat and I didn't do much research on how to season these eggs and the tomatoes - so mine, in ultimate simplicity, were sauteed onion and garlic followed by tomatoes and finally scrambled eggs, served on top of rice and alongside the upcoming kohlrabi home-fries. But, if you're looking for a more inspiring and flavorful Egg and Tomato dish, this recipe has all the makings of exactly what I was craving and what I so happily discovered in Daejeon, South Korea.

Photobucket
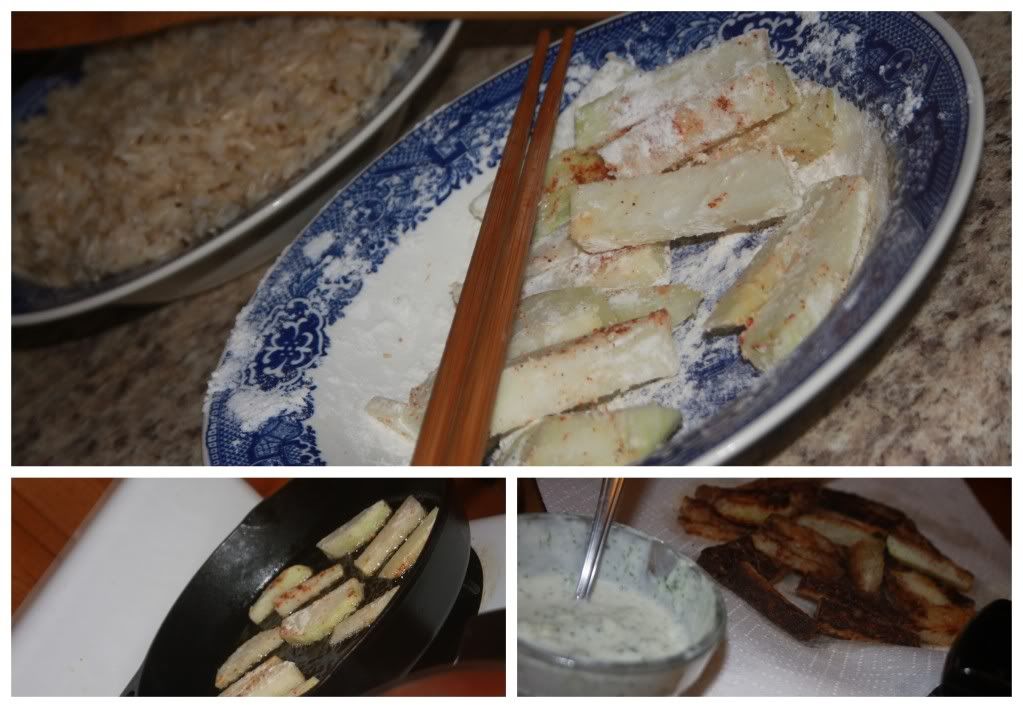
To accompany the eggs and to use up a large kohlrabi that had been gifted to me via my neighbor, I did a little Google exploration and opted for another NYT recipe, this time, rather than preserved red onions, I went for Kohlrabi Home-fries

Ingredients/Directions:

Peel and cut 1 1/2 - 2 pounds of Kohlrabi into thick sticks. Heat 2-4 Tbsp. of Oil over medium heat in a heavy skillet or cast iron pan. Meanwhile, combine 1 Tbsp. of Flour with Salt to taste and toss the Kohlrabi sticks in the mixture. Add kohlrabi to the skillet of rippling oil and cook on both sides for a few minutes until crispy. Drain on a paper towel and serve plain or with your favorite yogurt dipping sauce (if you're in need of a good yogurt sauce, check out this recipe!)

Wednesday, October 24, 2012

Peanut Butter from a Juicer


Photobucket
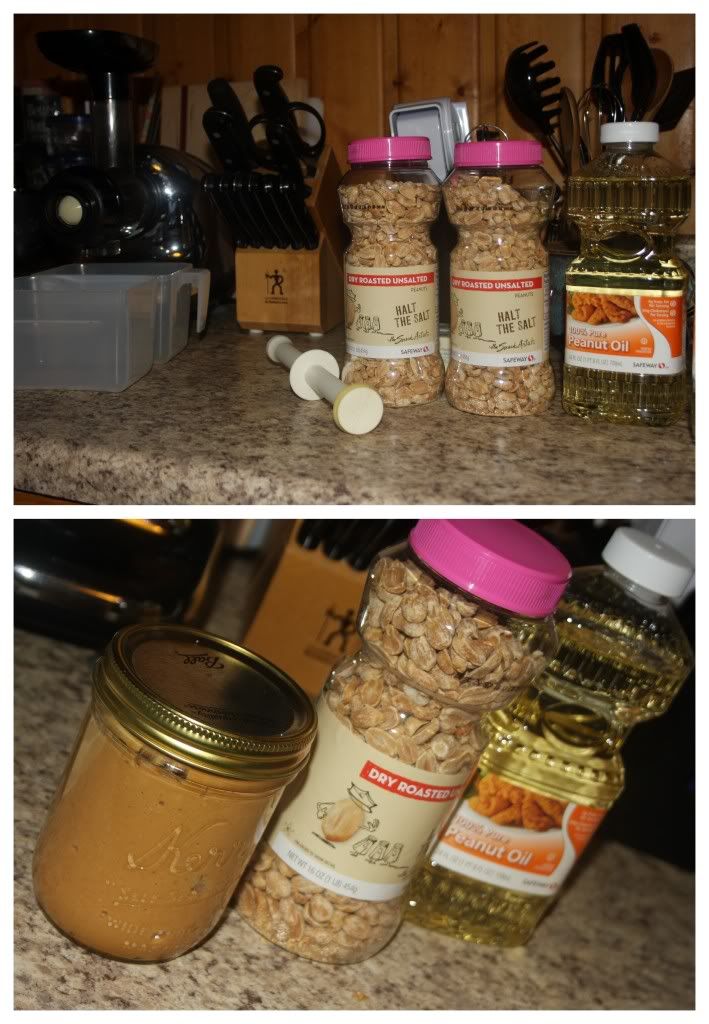
While this is not a recipe to extend the life of anything, I just thought I'd let the blog world know that I do, in deed, make peanut butter with my juicer. (Read more about the juicer we own and operate and how much I love it here!)

As for making peanut butter in a juicer, you may find it's a bit of a chore and takes some patience, but you'll end up with natural peanut butter, that's simply delicious and costs only as much as a jar of peanuts (we were able to get ours for $2.50).

To make the peanut butter, use the mincing nozzle of your juicer (or whatever is recommended by your juicer model.) and run a small handful of peanut butter through your juicer chute at a time. You'll need to run the 'butter' through multiple times as the first few runs will give you a kind of powdery peanut mess. To speed up the process and create a slightly smoother peanut butter feel free to add Peanut Oil to the powdery peanut mix. Continue running the peanut 'butter' through the juicer until you reach your desired consistency - we went at it about 8-10 times.

Enjoy as you would any other peanut butter!

Beef and Chorizo Chili

Extended Shelf Life for: Peppers, Jalapenos, Tomatoes
Photobucket
When it comes to chili, I lack an official recipe. I do however have a few tricks-of-the-trade or preferences and a new discovery (or two!)

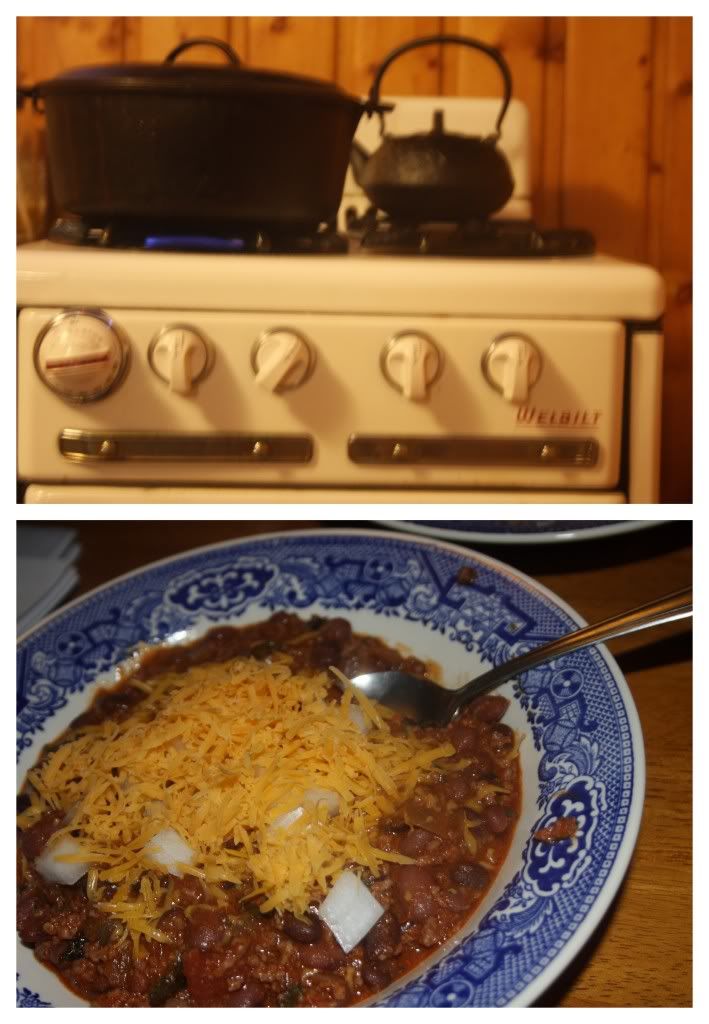
To begin, I just got a cast iron kettle and it just makes chili seem that much more delicious, amazing and perfect for the cold winter night.

Next, let me tell you that doing a combo chili which is 50% Beef and 50% Chorizo is brilliant!

Now, on to some tricks-of-the-trade.

I've just recently learned this little gem of advice that comes from my good friend SJ's grandmother:

  • When preparing ground meats, add enough water to cover the base of the kettle or skillet to the meat. As the meat cooks, the water will evaporate and you'll end up having a very uniformly ground meat to support your soup or go into your tacos. (Perhaps this isn't revolutionary to most folks, but there's just something about this perfectly ground meat that makes the chili that much more enjoyable.)

Another trick-of-the-trade, espeically for divers or gardeners:

  • If you have an abundance of peppers, go ahead and roast the whole batch in the oven until they're fragrant, run them through a food processor or a juicer with mincing capabilities, throw them in an ice cube tray and then into the freezer for future use in soups, sauces and of course chili! 
One more thing I like to do for our chili, especially when we have an abundance of tomatoes: 

  • Run fresh tomatoes through a mincing juicer or food processor rather than throwing in canned tomatoes, fresher and ultimately a bit healthier (tomatoes in cans can have dangerous interactions with the aluminum considering the acidity of tomatoes).
And finally, our personal preference when it comes to eating a bowl of chili is to add raw onions, cheese and corn chips.

Friday, October 19, 2012

Banana Chips

Extended Shelf Life for: Bananas
Photobucket
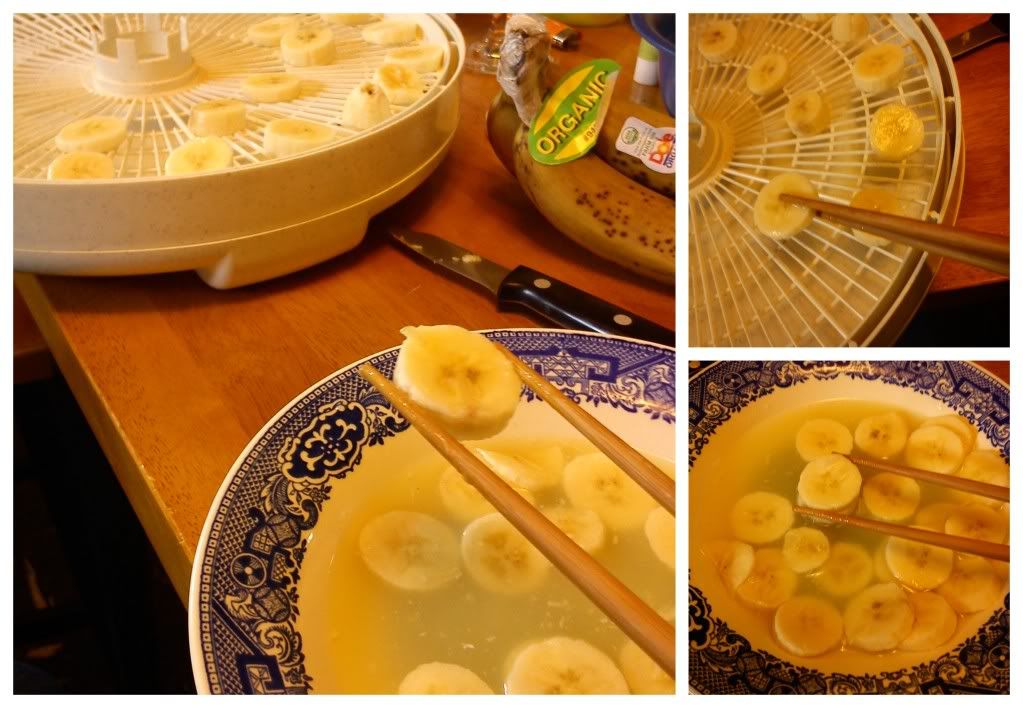
As a diver, it's pretty crucial to have a dehydrator that you love.We have one that features varying temperatures which helps to ensure the best dried products possible. When it comes to drying bananas, I've discovered that the flavor and look is better if the fruit is first dipped in orange juice or another citrus juice prior to being dried. I also recently discovered that having mad chopstick skills ensures that my fingers don't get all gunky when drying bananas! Hoo-zah!

Thursday, October 18, 2012

Salt Preserve Limes and Cubes

Extended Shelf Life for: Limes
Photobucket
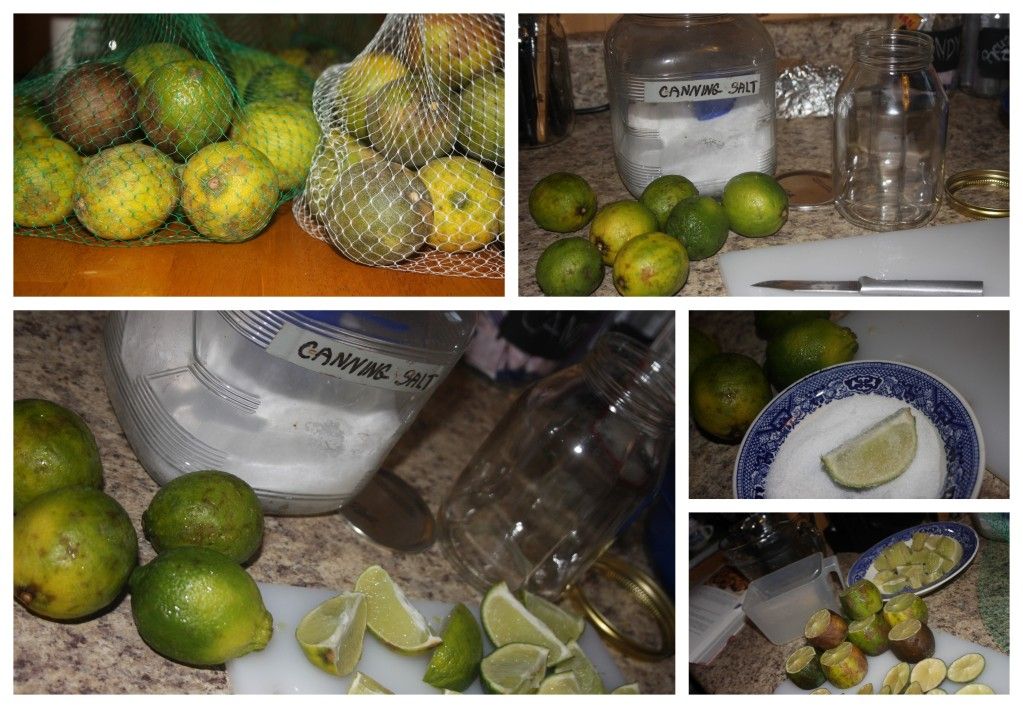
Just as we finished using up our lemons, we had a sudden abundance of limes. Not interested in zesting lime-after-lime, I hit the web and searched for other preservation options. I opted on two preservation options in term of my limes.

First, I peeled and juiced about half or 2/3's of the limes, poured the juice into ice trays, threw them in the freezer then popped the little sucker's out of their trays, transferred to a Ziploc bag and now I have about 20 tablespoons of lime juice ready and waiting to be added to salsa, soups, smoothies, margaritas, whatever the case may be.

Second, I took about a bag worth of limes, quartered them (but didn't cut all the way through), sprinkled with some salt (coarse sea salt or canning salt to be exact). Press the limes down into the jar until the jar is full and leave overnight so the limes have a chance to extract some juice. In the morning, top the jar off with fresh lime juice and store in the pantry until you have a need for some salty lime juice to flavor any of the aforementioned items or whatever you may want to add the zesty flavor of lime.

Lemon Soup and Lemon Roasted Cauliflower

Extended Shelf Life for: Lemons and Cauliflower
Photobucket
Photobucket
Ingredients/Directions: 
Lemon Soup recipe from Rachel Ray's 2, 4, 6, 8 Cookbook
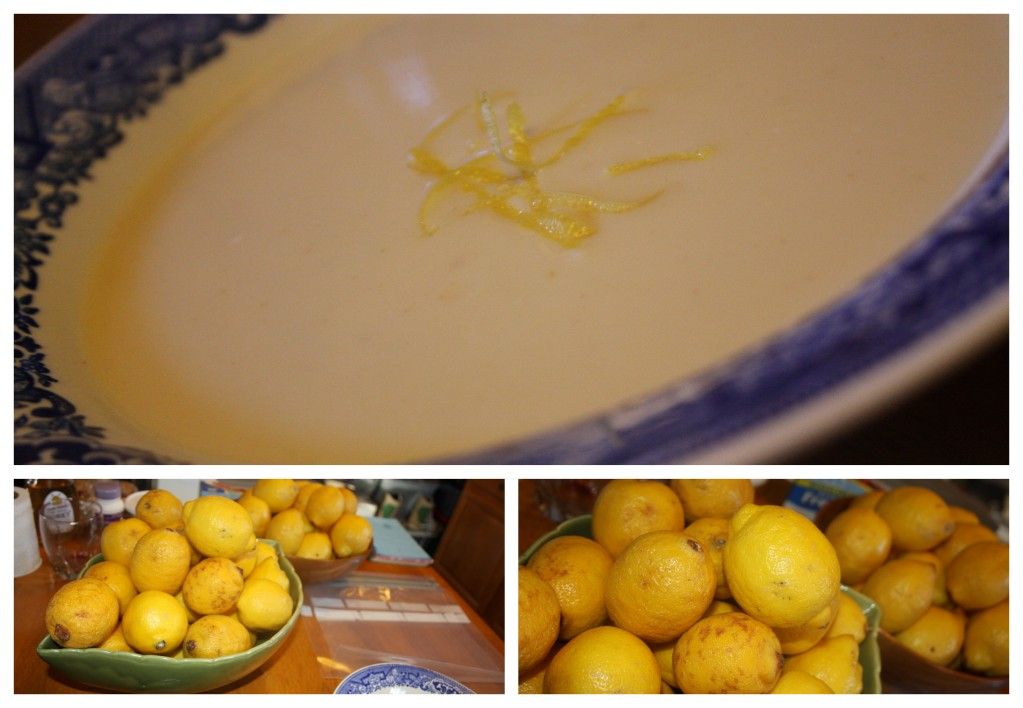
Bring 6 cups stock to boil with lemon peel. Turn off heat and cover, allow stock and lemon peels to steep for 5 minutes, remove peel (unless you used zest). In a medium bowl, whisk together 2 eggs and 2 egg yolks with 5 tbsp. Lemon Juice and Hot Sauce. Add to egg mixture 1/2 cup of the hot stock to temper the eggs. Whisk this egg mixture into the stock, then turn the heat to low and whisk until soup thickens slightly, should take about 4-5 minutes. Season with salt and pepper and fresh parsley if available. Enjoy as an appetizer or side dish.

Roasted Vegetable recipe inspired and assisted by the Better Homes and Garden's Cookbook

Toss 1 head of Cauliflower, broken into florets, with 2 tsp. Olive Oil, 1 tsp. Lemon Juice, Salt, Pepper and Cayenne Pepper to taste. Roast in an oven heated to 450 F until tender (this factor always takes me a lot longer than I expect, so don't intend on having roasted veggies as a quick dinner).

Tuesday, October 16, 2012

Cauliflower Pancakes with Avocado Sauce

Extended Shelf Life for: Cauliflower and Avocado's
Photobucket
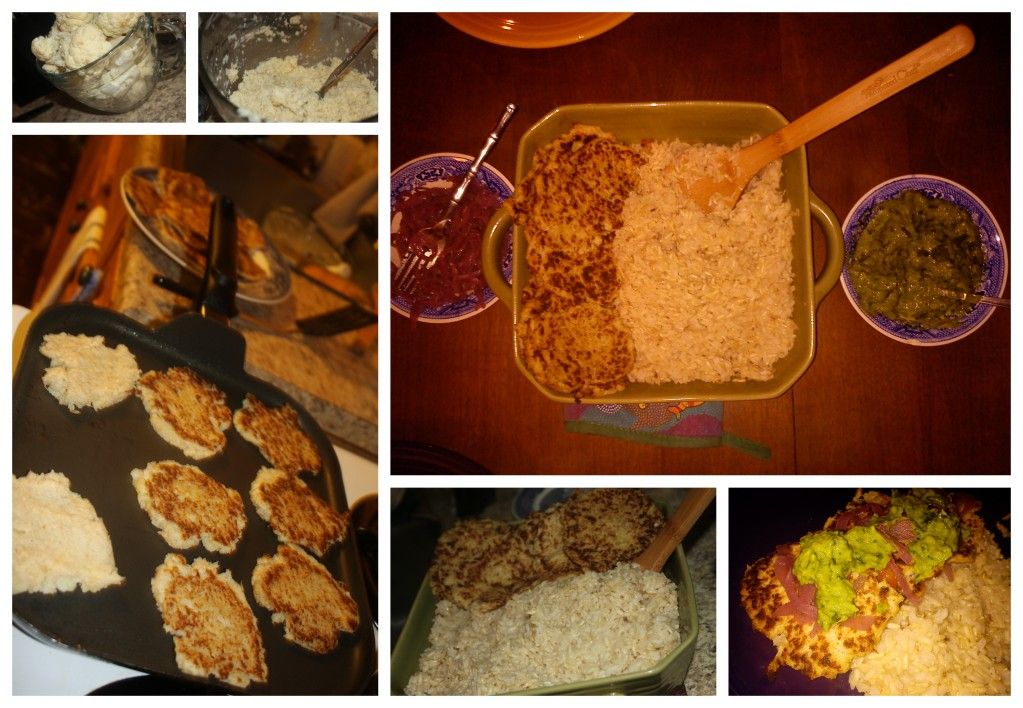
In our house, the man is not entirely convinced that cauliflower is a delicious and delectable vegetable. Which means, when it's dived or brought to us from our neighbors CSA share, I have got to do some quick thinking and make it seem as little like cauliflower as possible. Having spent enough time on Pinterest to be aware of 'cauliflower pizza crust' I quickly changed my mind when I realized that making this particular crust would require going out and purchasing cheese which, frankly, I was not interested in doing. So, I did a bit more research and finally concluded that Cauliflower Pancakes were to be the menu item, served on rice with those nice Red Onions I'd recently preserved and an Avocado Sauce, seeing how we had a few of those lying around in need of eating and using.
Photobucket

Ingredients and Directions:

Cauliflower Pancakes from About.com

In a large soup pot, boil a few inches of water before adding 1 head of Cauliflower florets. Cover, reduce heat to low and cook for about 20 minutes, until Cauliflower is tender.

Drain Cauliflower and mash with a fork, leaving a little bit of texture. Add 3 beaten Eggs and about 1/2 cup of Wheat Flour until you have a pancake-consistency batter. Season with salt and pepper.

Heat a bit of oil in a large skillet, spoon some batter onto the hot skillet. Cook about 3-4 minutes per side making sure to smash them down to ensure they are thin enough to cook all the way through. Remove from heat when they are golden on both sides and no longer floppy and doughy.

 Avocado Sauce from For the Love of Cooking

In a food processor, blender or quality juicer (which has mincing abilities) combine: 1 ripe avocado, 1/3 cup fresh Cilantro, 2 cloves Garlic, 1 Tbsp. Olive Oil, Juice from 1 Lime, Salt and Pepper to taste.

Serve Cauliflower Pancakes over rice topped with preserved red onions and avocado sauce, enjoy!

Sunday, October 14, 2012

Red Velvet Beet Brownies

Extended Shelf Life for: Beets
Photobucket
The truth is, I don't really like beets and never have any clue what to do with them when the man brings them home. Also, while I enjoy healthy alternatives, I think making brownies with lots of rich butter and sugar is acceptable and honorable - you're making brownies for goodness sake, the whole objective is to have something sinfully delicious - just don't eat a pan everyday and that's being healthy (in my book anyway).

But, back to the subject at hand, beets and brownies, a healthy alternative or a fantastic way to use up beets, this brownie recipe comes from the great, always inspirational, Vegetarian Times.

Ingredients/Directions:

Preheat your oven to 350 F and prepare a 9 inch or 8 inch square pan with cooking spray.

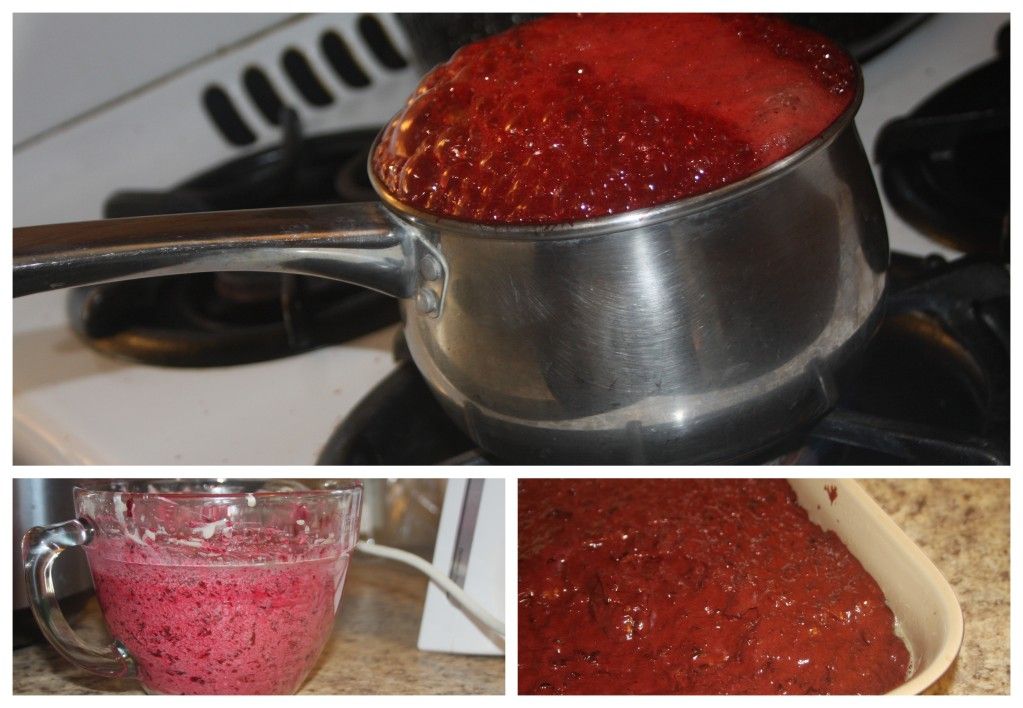
Process two large cooked beets in a food processor or on the mincing option of a high-quality juicer if you have one. You will need a total of one cup of beet puree total.

In a separate bowl, whisk together 1/2 cup softened or melted Butter and 1 cup Sugar, until smooth. Add 1 tsp. Vanilla, then whisk in two large Eggs.

In a small bowl, whisk together 1/2 cup Flour and 1/4 cup plus 2 Tbsp. Cocoa Powder. Fold flour mixture into beet mixture, then add 1/2 cup mini-chocolate chips.

Pour into prepared pan and bake for 30 minutes or until toothpick comes out clean. Enjoy!

NYT's Red Onion Preserves

Extended Shelf Life for: Onions
Photobucket
 As part of my new job, I get to assist my good friend in hosting the occasional ELL (English Language Learner) Family Night. For such an event we make sure to offer a complete meal to guests as well as helpful information for acquiring language and adjusting to a new culture. For the first family night, we served up large sub sandwiches courtesy of Wal-Mart and ended up bringing home more than a few containers of perfectly sliced, red onions. And while red onions are delicious on their own, they have an aroma which permeates all things and the upstairs kitchen was beginning to take on a rather foul odor.

So, I went to work and did what I do best, preserve them suckers!

A quick internet search revealed a 1988 New York Time's recipe for  Red Onion Preserves.

The only thing the original recipe lacks are pictures, so above you have a photo of the delicious, and I mean DELICIOUS, little onion slices and below, you'll find the recipe (in case you have an aversion to clicking on links).

Ingredients/Directions:

Peel and slice 6-7 red onions, cut in half, you'll need about 8 cups total. Heat 2 Tbsp. of butter in a heavy kettle and add the onions, 1/4 tsp. Allspice, 1 bay leaf and 1 tsp. finely grated Ginger. Cook and stir often for about 10 minutes. Stir in 3 Tbsp. Honey and 1/4 cup Red-Wine or Malt Vinegar. Cook, stirring often, for an additional 5 minutes. Let preserves cool and store in a tightly covered container for as long as you can go without eating them! They're great warmed up with meats and in omelets or as a sandwich condiment. What use will you find for Red Onion Preserves?

Saturday, October 13, 2012

Repeat: Strawberry Freezer Jam


Photobucket
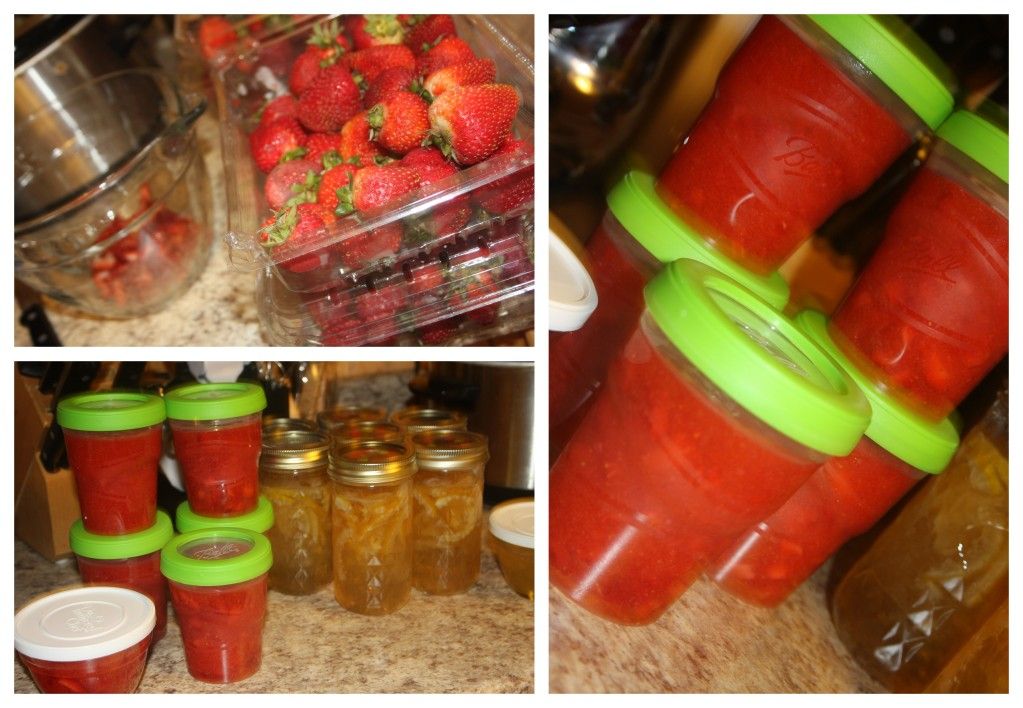
In my early salvaging days I threw a batch of this together. It's quite possibly the most delicious jam I've ever had and it's SO simple to make. Just do it!

 Ingredients:

4 cups hulled Strawberries
4 cups Sugar
1/2 tsp. finely shredded lemon peel
1 7.5 oz. package of regular powdered fruit pectin
3/4 cups water

Directions:
Use a potato masher to crush the berries until there is about 2 cups of pulp. Add sugar and lemon peel, let stand for 10 minutes. Prepare fruit pectin in pan by boiling for 1 minute, stirring constantly. Add to berry mixture; stir for three minutes when mixture is no longer grainy. Ladle into half pint freezer containers, let stand for 24 hours before placing in the freezer for up to a year.

Lemon Marmalade

Extended Shelf Life for: Lemons!
Photobucket
I think lemons are the most joyful fruit available in the supermarket and hanging from trees today.

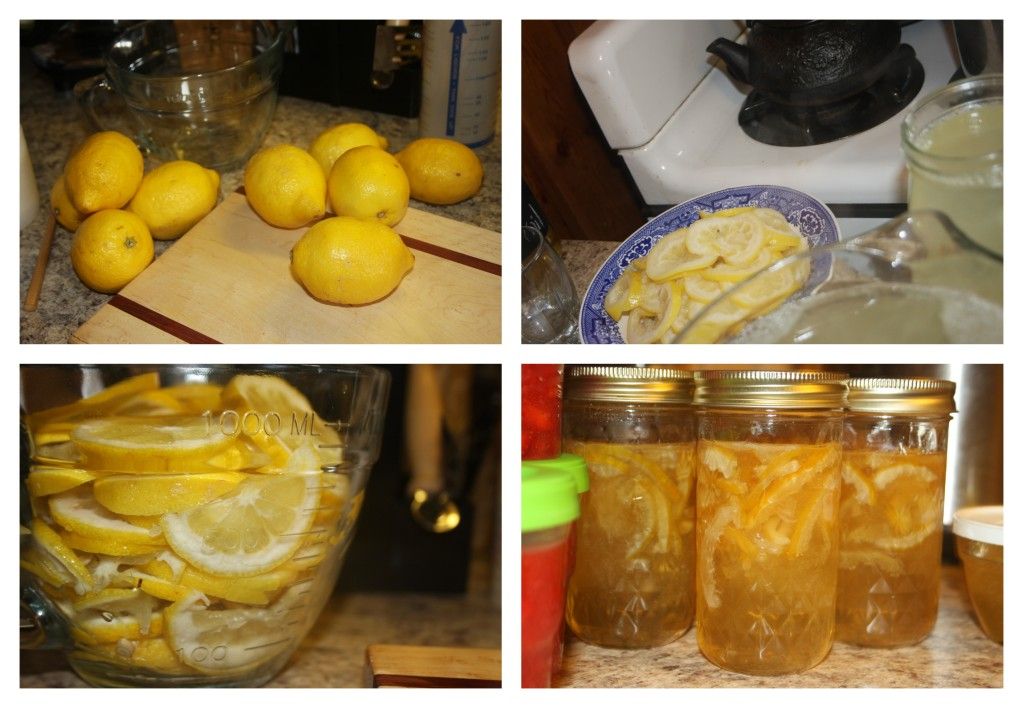
When the man a CouchSurfer came home with multiple bags filled with lemons, I was quite thrilled and being as it was 'canning' season, I went ahead and sought out a way to use up these joyful little gems in a way that they would just keep on giving.

I debated doing Lemon Curd in bulk, but with the addition of eggs, it seemed to difficult of a task and I opted rather for Lemon Marmalade. A choice I far from regret!

It was a bit tricky and time consuming and I'm not 100% certain that it is a recipe which is easily undertaken at high altitude, BUT it's still delicious and worth a shot.

Unfortunately, I can't recall exactly where I found my recipe so...just be thankful I wrote it down in my little recipe notebook!

Ingredients/Directions:

Combine 4 cups, thinly-sliced-unpeeled lemons and 3 quarts water in a large kettle or stock pot. Bring to a boil, boil for 20 minutes or until lemon peels are tender. Strain off lemon peels and re-measure water, making sure there is still a total of three quarts. Combine water, fruit peels and 8 cups of sugar in the kettle or stockpot and bring to a boil til it sheets or reaches 221 F, pour into hot sterilized jars and seal. Enjoy or give as gifts.

Thursday, October 4, 2012

Chicken Taco Soup

Extended Shelf Life for: Tomatoes, Peppers, Onions, Avocados, Limes
Photobucket
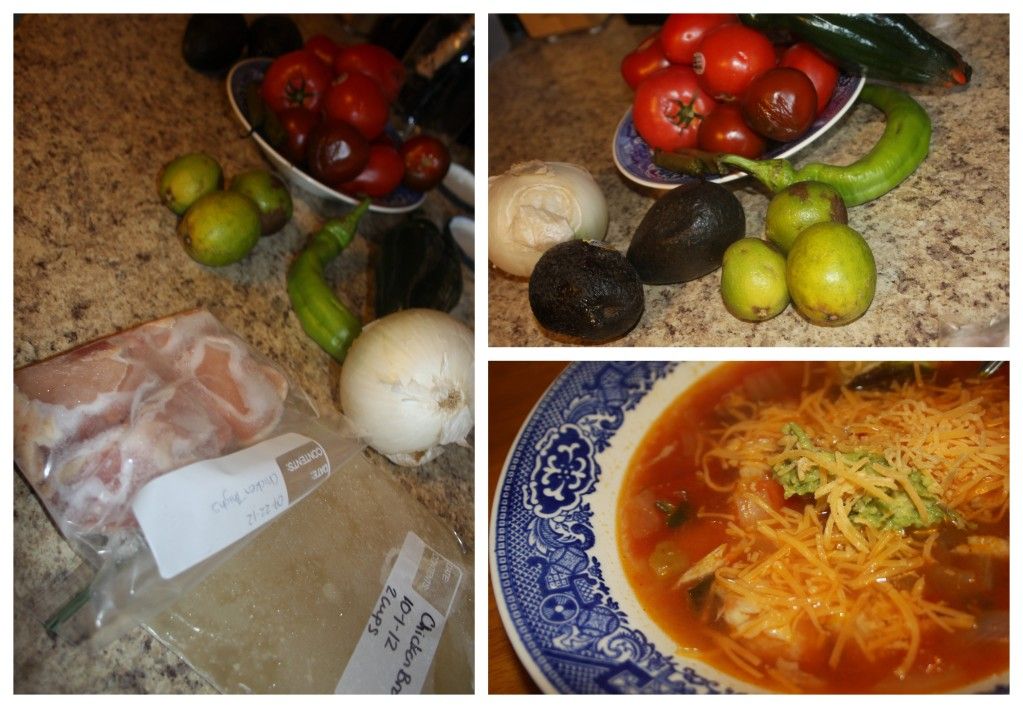
If I am truthful, I will let you know that I remember very little about the true way in which this soup came together and as is incredibly common in this kitchen, I have no idea what amount of what went in or stayed out, etc. And I realize that makes me a poor food blogger. But here's the thing, I believe, that sometimes in the kitchen, the most important thing is knowing what goes together, to know your personal preference for how much broth to have compared to the density of other ingredients and above all else, I think what is important is to use what you have, to use it well and enjoy the results as they are...this was a delicious soup and I'm going to tell you what goes into, but as for how much and exact measurements, let go of that and just let it come together, it's a soup for goodness sake!

Ingredients/Directions:
Inspired by Rachel Ray's recipe Mexican Chicken Lime Soup

 In a stock pot or dutch oven saute 1 chopped onion in a drizzle of olive oil until tender and translucent. Add 2-3 (or more) minced Garlic Cloves and 1 minced pepper of choice (or a couple and a variety if you like spice - we have handy-dandy roasted jalapeno ice cubes which I added at the end), saute for a couple of minutes, then push to the side. Add additional olive oil if needed and begin cooking 4-6 Chicken Breasts until juices run clear. At this point, I like to take a pair of kitchen sheers and a fork and cut the breasts into bite size pieces. Add 2-cups Home Made (or store bought) Chicken Broth to the pot and bring to a boil. Run about 10 tomatoes through a juicer (but not on the juicer mode...more like mincing/blending mode) or blender and add to boiling broth. Adjust liquid according to personal preference by adding water or broth. Season with, lime juice, salt, pepper, cayenne, chili powder and cumin. Scoop into bowls top with Shredded Cheddar Cheese and slices of Avocado (or mashed avocado if they're a little ripe ;)).
Wednesday, October 3, 2012

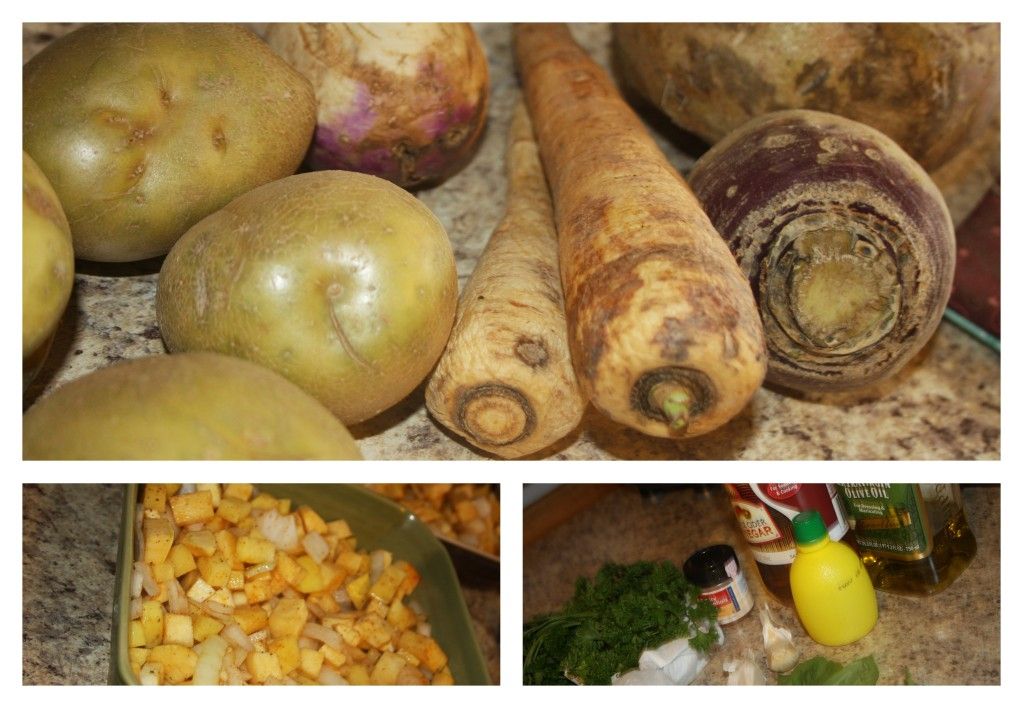
Roasted Roots and Chimichurri

Extended Shelf Life for: Roots and Parsley
Photobucket
Roasted veggies are roasted veggies and honestly, I have no secrets...I could use some tips actually on how to get the perfect roasted veggies without waiting an hour and a half, but perhaps the answer to that lies more in leaving high elevation than anything else...or having a more efficient oven, who knows...

What I can offer however, is a recipe for Chimichurri - a sauce which I have dreamt about and considered for years, every time we receive an abundance of parsley, I think, hmmm, I should really try that recipe for Chimichurri sauce. Well folks, I finally have and let me tell you, totally worth it and honestly, should have been done a long time ago!

Ingredients/Directions:

In a food processor, blender or your awesome multipurpose juicer combine 1 1/4 cups Italian Parsley, 1/4 cup Olive Oil, 2 Tbsp. Fresh Oregano or Basil, 2 Tbsp. Onion, 3-4 peeled Garlic Cloves, 2 Tbsp. Apple Cider Vinegar (or Red Wine Vinegar), and 1 Tbsp. Lemon Juice - pulse in food processor or blender, or run through juicer until you reach a nice, saucy consistency. Cover and chill a minimum of 2 hours before serving, should last up to 1 week or a little more if you 'daring'!

Tuesday, October 2, 2012

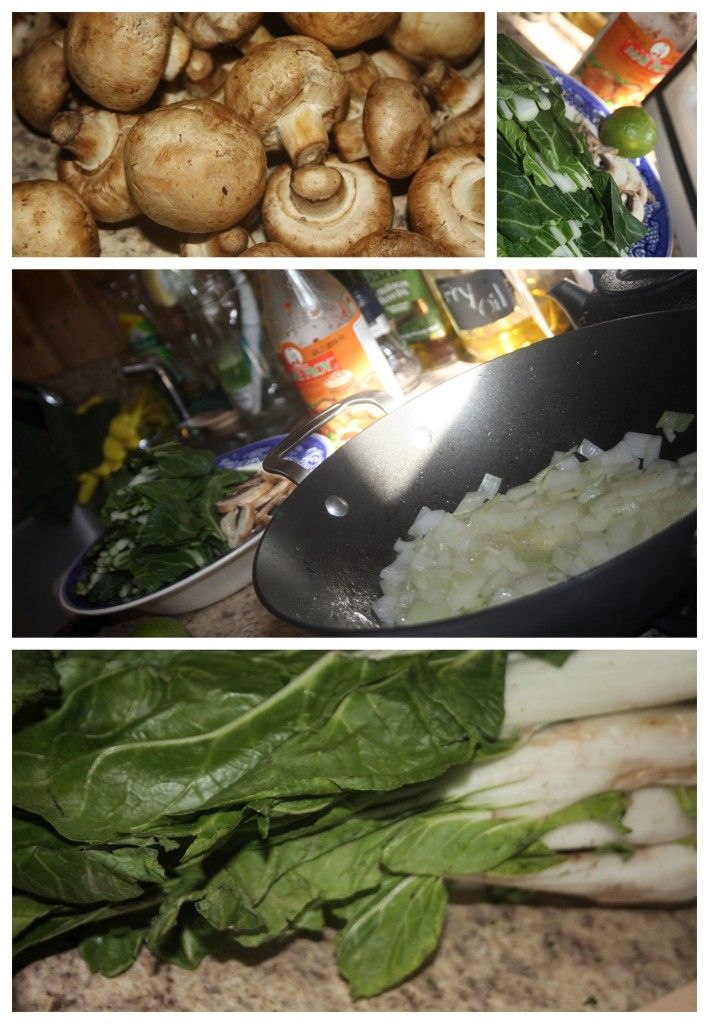
Stir-Fry for the Man

Extended Shelf Life for: Mushrooms, Lime, Onion, Bok Choy

Photobucket
Sometimes, I go out to dinner with friends but still manage to throw something together for my man.

Unfortunately, I don't know how delicious this dish was or wasn't, but I can give you a quick run down in case you're in need of some stir-fry action.

This particular stir-fry began with sauteed onions, followed by mushrooms (add a touch of butter at this point because mushrooms are always better with butter), garlic and finally bok choy. We had some sweet and spicy Thai sauce leftover in the refrigerator which I used to add some kick and flavor, serve over rice and cross-your-fingers that it will be enjoyed while you head out to enjoy dinner with friends!

Monday, October 1, 2012

Juicer Favorites/Experiments gone Well

Extended Shelf Life: Apples, Grapes, Bok Choy, Carrots, Pomegranate
Photobucket
Photobucket
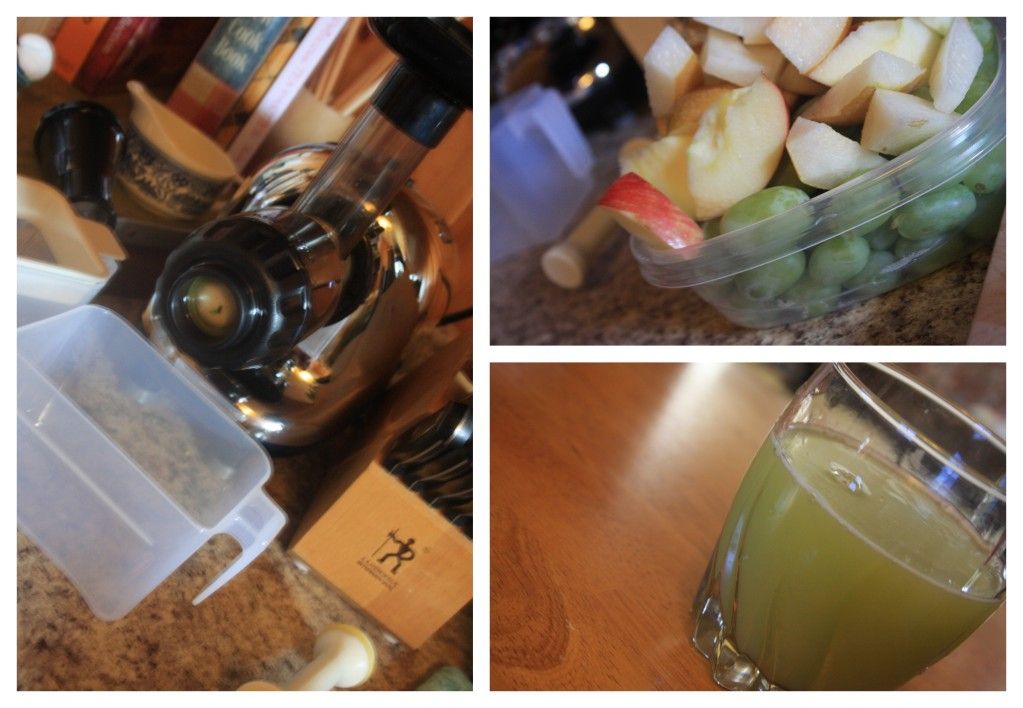
Since returning to Laramie, we opted to make a fairly grand purchase of an Omega J8500 Juicer and it has been revolutionary!

I'm confident you'll be seeing a lot of juicer related recipes popping up as we're discovering all kinds of uses for the appliance (if you're feeling a bit impatient and want to learn more now, check out this page about my experience with the Juicer).

For now, know that a combination of Apples, Grapes and Bok Choy is quite amazing!

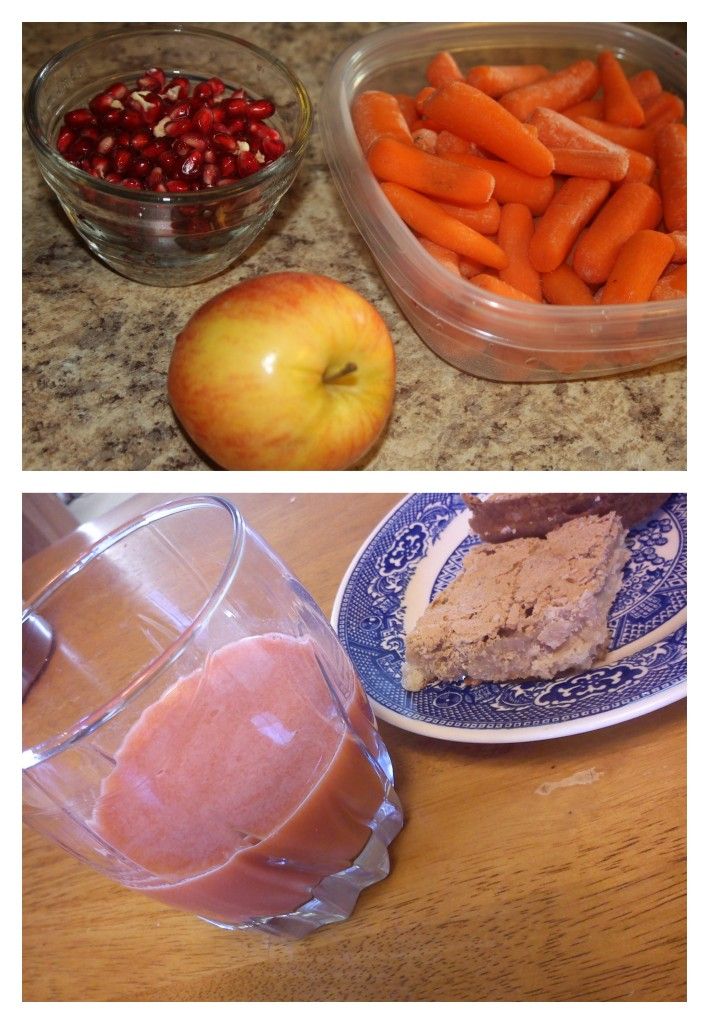
Equally amazing is a combination of Apples, Carrots and Pomegranate.
Related Posts Plugin for WordPress, Blogger...