Friday, November 30, 2012

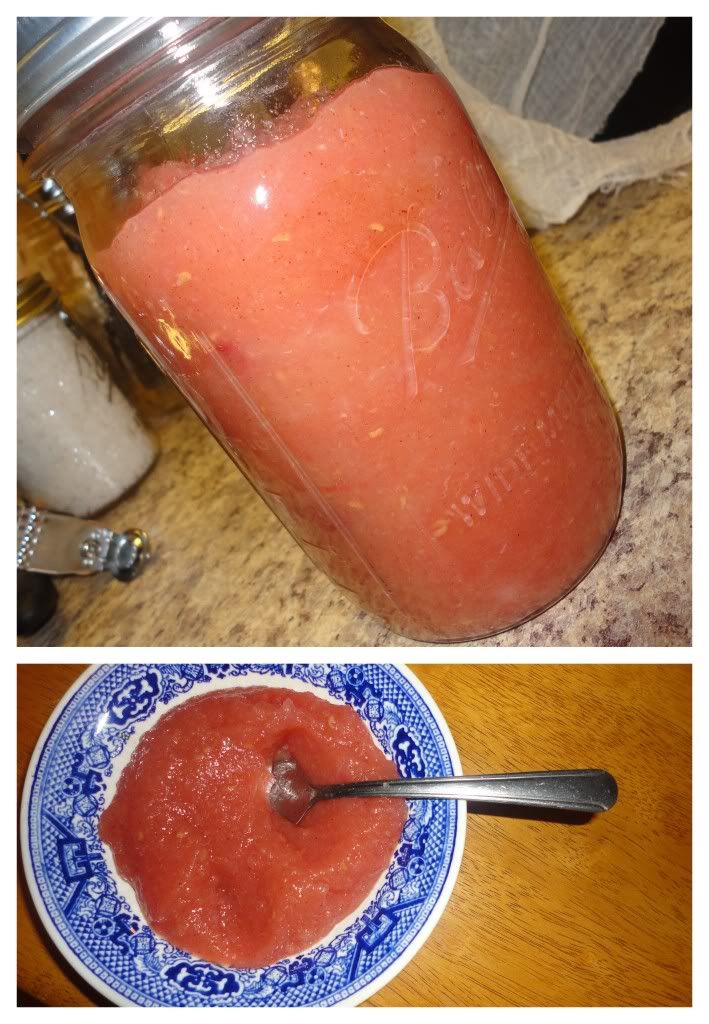
Raspberry-Applesauce

Extended Shelf Life for: Apples and Raspberries
Photobucket
Here we go! Another non-exact recipe from the kitchen of Melissa Harrington...I swear, sometimes I only blog to remember what's come out of my kitchen...oh wait, that is my primary reason for this little ole blog ;)

If you need a good applesauce recipe, I suggest you check out this page which has a nice variety including stove-top, crock-pot and oven varieties. Once you've made your applesauce, if you're wanting to add raspberries, here's the trick to the trade - wait until the last minute.

Raspberries are delicate little souls and will break down into a warm apple sauce without much begging on your part. So, before you start your applesauce, I recommend that you lightly sprinkle your raspberries with sugar, let them set while you prepare the applesauce. When the applesauce is finished, take a quick fork to the raspberries to mash them up before dumping them into the applesauce. Mix until the color is even and viola, you've got a beautiful, raspberry-flavored applesauce which, trust me, you'll love having on the breakfast table!

Fruit Cocktail Vinegar

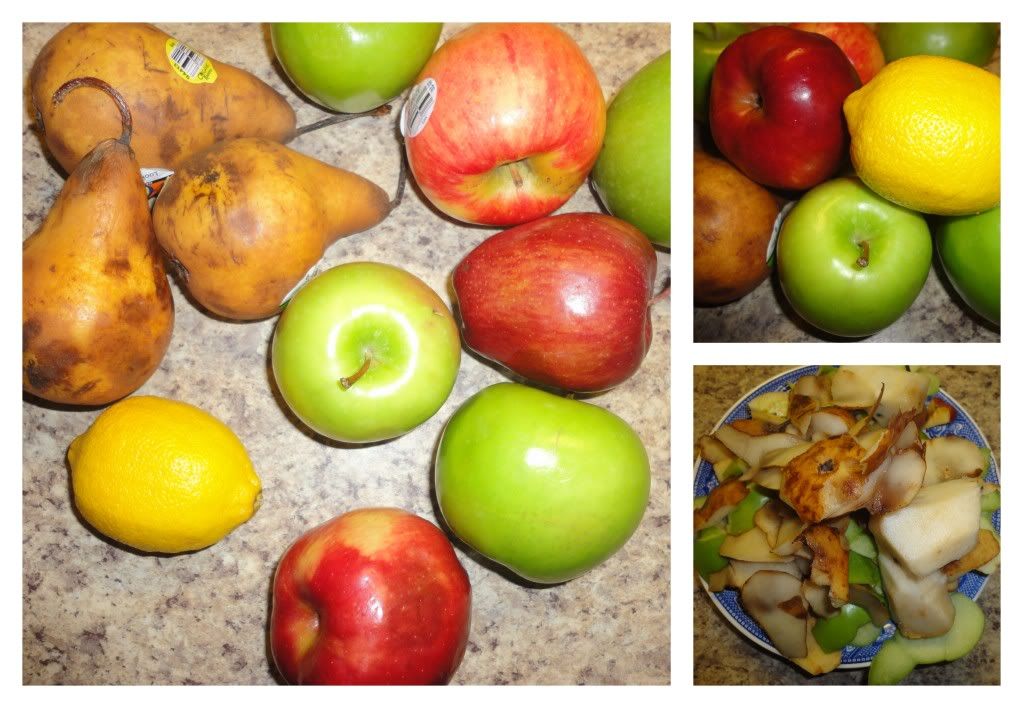
Extended Shelf Life for: Pear Skins, Apple Skins and Lemon Peel
Photobucket
Recently, I made Apple Cider Vinegar, it was easy and turned out a DELICIOUS pot of vinegar of which the man and I have enjoyed a daily shot (which is beneficial in terms of boosting our immune system AND regulating our blood sugar, meaning we aren't starving 2 hours after breakfast - awweeesome!)

Anyway, in learning to make Apple Cider Vinegar, I discovered that basically the scraps of any fruit or veggie can easily and quickly be turned into a health-packed (and surprisingly delicious) vinegar product.

So, with some aging apples, pears and another few lemons I set to work with another batch of vinegar with was the cores and skins of a few pears, a few more apples and the peel of a single lemon. I put these scraps into our large crock and covered with water and sugar (one quart of water + 1/4 cup of sugar) until the peels were completely covered. Cover the crock with cheesecloth, let set in room temperature (60-70 Fahrenheit) for about a week before straining out the peels, transferring the liquid to another crock (or glass jars) and covering with cheese cloth for another 2-3 weeks until you have the degree of fermentation and vinegary taste that you love and desire. The lemon peel here makes the vinegar quite tart and sour, but completely enjoyable!

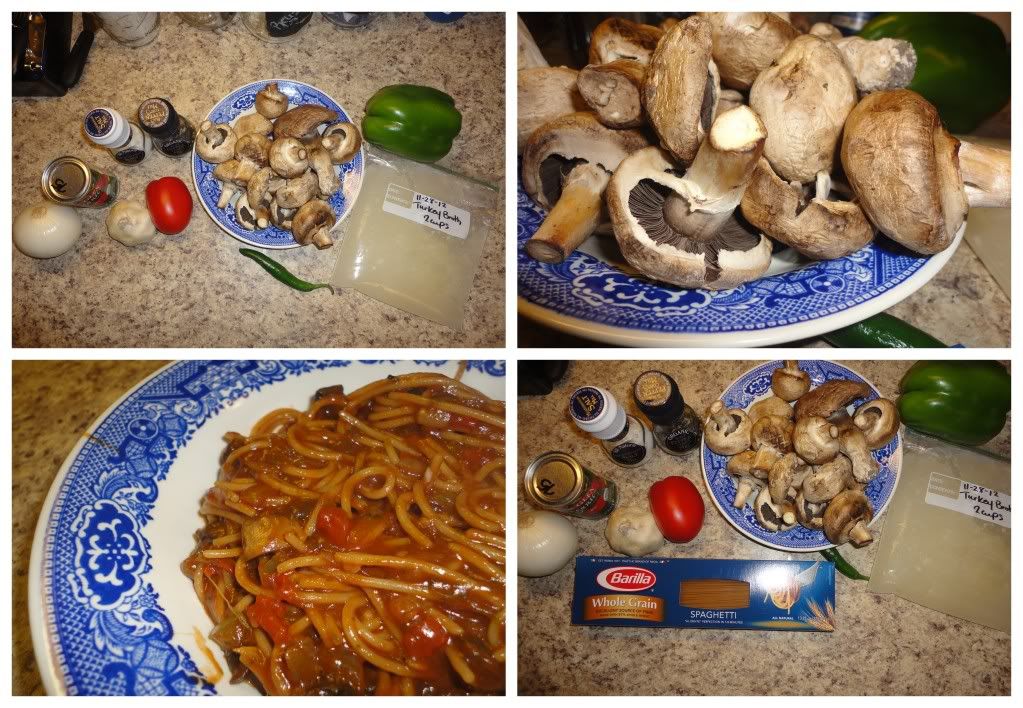
One Pot Spaghetti

Extended Shelf Life for: Mushrooms, Onion, Green Pepper, Jalapeno and Tomato
Photobucket
Confession: This was not our favorite dish. BUT, I'm 99.99% certain that's because I used an un-seasoned cast iron kettle which may not have had the best reaction to tomato sauce...and because we use dumpster food. I'm quite confident, that the recipe, as printed in Better Homes and Gardens would be absolutely delicious, because as of now, that singular cookbook has only failed me when I've failed it...which leaves the blame on only one of us...and it's not the cookbook.

So, if you've got a well seasoned pot, more experience with cast-iron or planning to use a stainless steel pot, this recipe is definitely for you!

Ingredients/Directions:

In a large pot saute 1-2 cups sliced Mushrooms, 1 diced Onion, 1 diced Bell Pepper, 1 diced Jalapeno and 1 minced clove of Garlic until tender, season with salt and pepper.

Stir in 1 diced tomato, 2 cups of Chicken (or Turkey or any other) Broth, 1 3/4 cups Water, 6 oz. of Tomato Paste and Italian Seasoning. Bring to a boil before adding 6 oz. of dried, broken Spaghetti Noodles.

Return to boiling, reduce heat and simmer, uncovered for 15-20 minutes until spaghetti is desired tenderness and sauce is desired consistency.

Enjoy!

Thursday, November 29, 2012

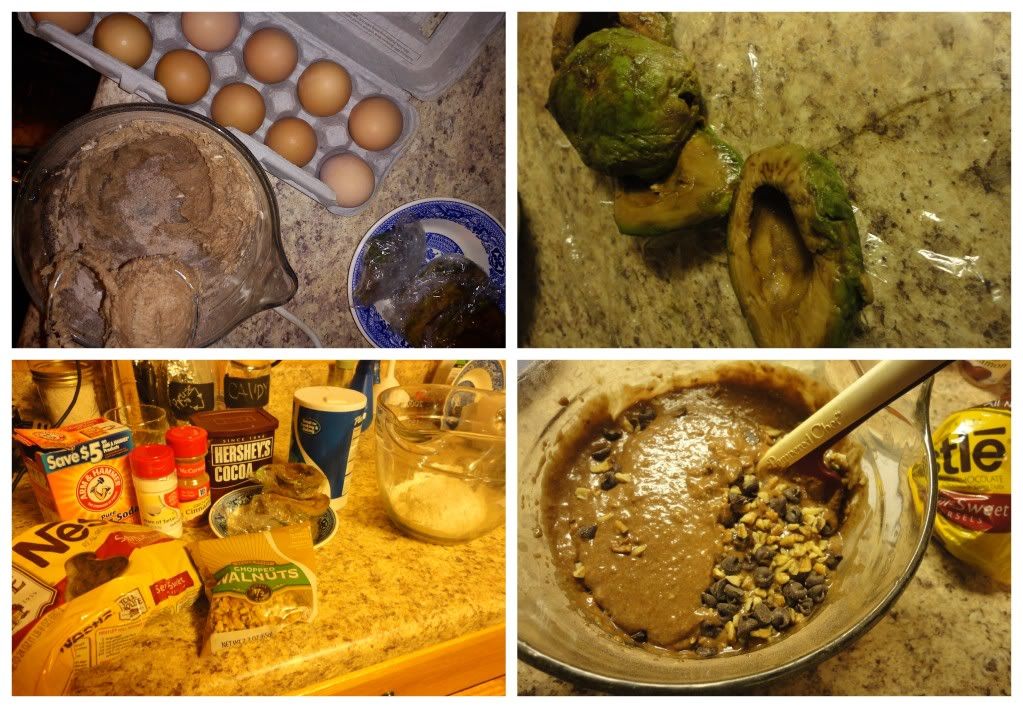
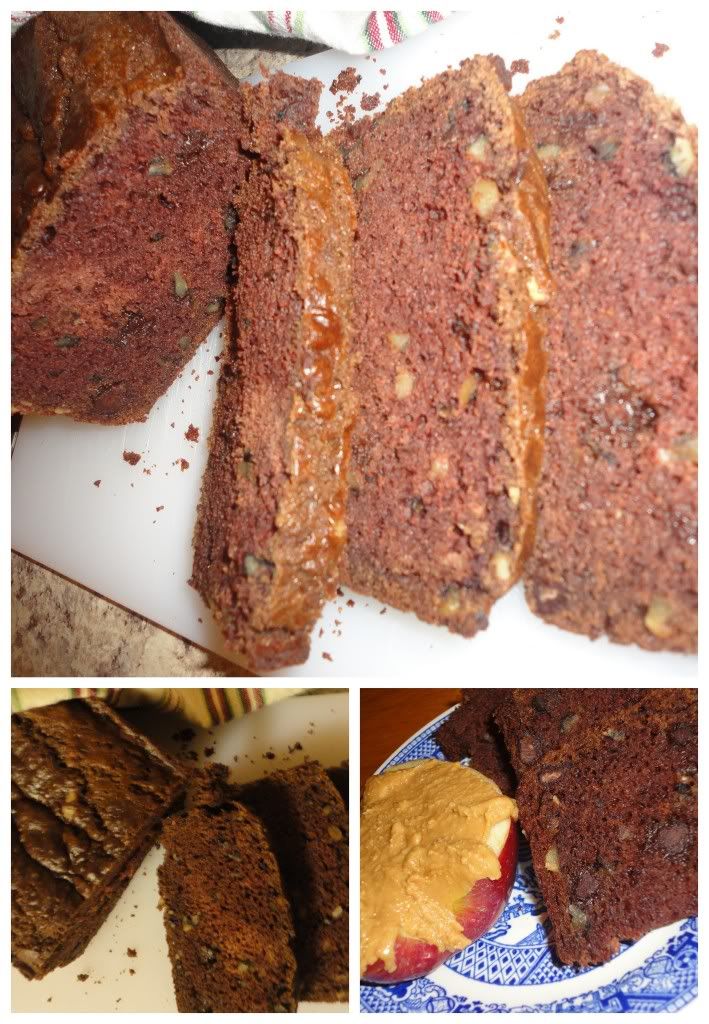
Chocolate Avocado Bread

Extended Shelf Life for: Avocados
Photobucket
Ugh... 
The problem with huge life transitions and letting your blog back up for months on end means you simply can't remember every recipe. This is one of those recipes. I have no idea where I received my inspiration or anything about anything. 
 What is important to note however is: 
a) Frozen, dumpster avocados, can in fact be turned into a delicious quick bread 
b) Frozen, dumpster avocados, can be pretty brown, which means adding chocolate is a very good idea.
c) You could probably essentially follow a recipe, such as this, and have this bread. One thing I do know, is that I didn't use banana, I just increased the avocado...so there you go.
d) I got to use farm fresh eggs from my sister's chickens, how awesome is that?!?!?
Photobucket

So, there you have it, a non-existent recipe for Chocolate Avocado Bread! But hey, at least now we all know I made it, and it can be made, right? RIGHT?!? Jeesh, I really am trying hard to be a more consistent food blogger, but I'm not sure how that's going to go...2013, I have a lot of hopes for you!

Monday, November 26, 2012

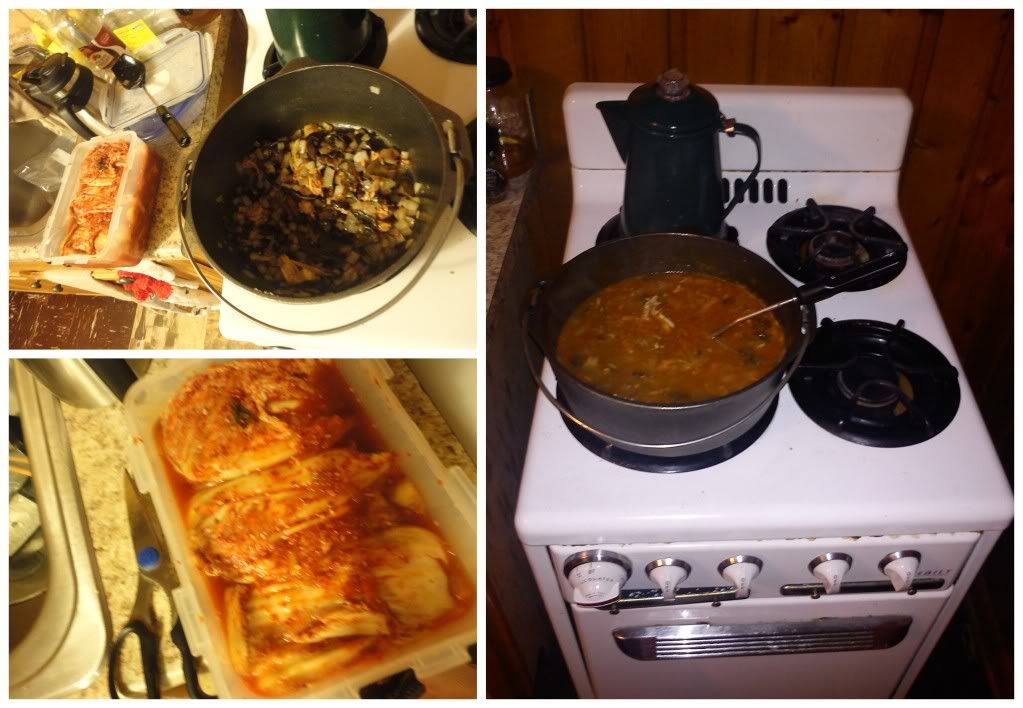
Turkey Kimchi Chigae

Extended Shelf Life for: Mushrooms, Onions and a Turkey Carcass
Photobucket
With my recently fermented kimchi and the end of the first round of Turkey eating for the Thanksgiving holiday and the winter chill setting in, I was craving some Kimchi Chigae.

However, unlike my go-to Kimchi Chigae recipe, I used my turkey carcass to make a large batch of turkey broth, much in the same way that I make chicken broth and therefore was able to use Turkey Broth and the turkey pieces to add some meat and flavor to this pot of stew.

But that's just the great thing about stews and soups in general, they're easy to substitute and recreate...

Wednesday, November 21, 2012

Cherry Pie

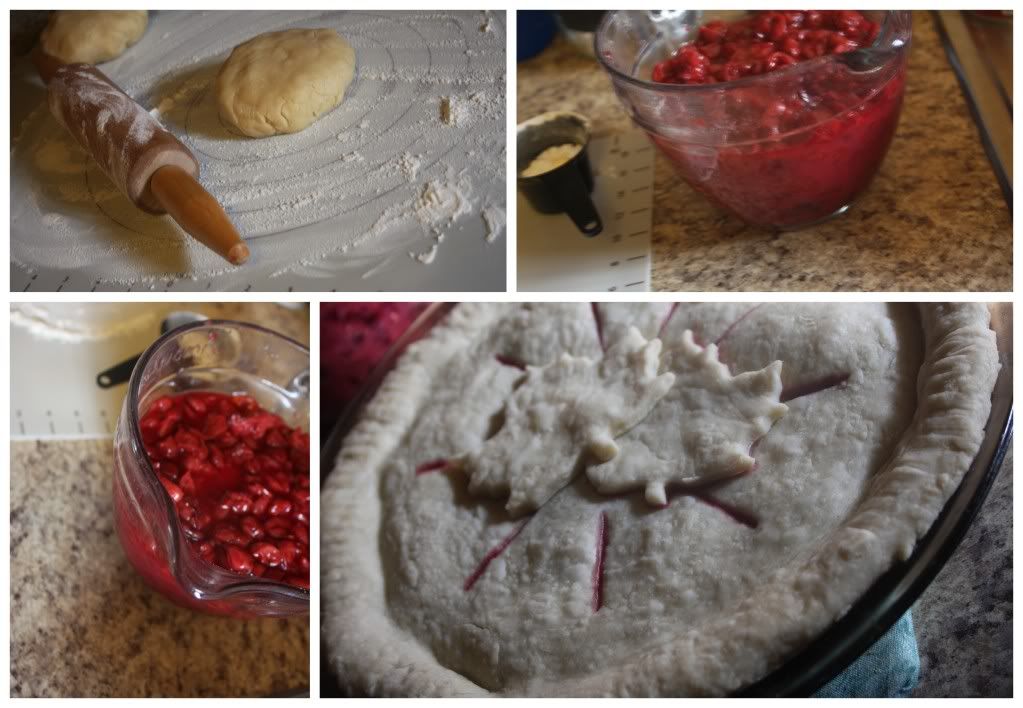
Nothing extended here, just a simple, cherry pie made with fresh cherries we bought at the farmer's market then canned, making for a quick and easy cherry pie to accompany my pie-inspired tortes for the holidays.
Photobucket
Of course I started with my go to pie crust. Then it was time to prepare the cherry filling, which, like most pie filling is basically a process of adding sugar and cornstarch and simmering until thickened.

For my cherry filling, I drained off some of the liquid, because it seemed a little over the top, threw about 4 cups of cherries and a bit of juice into a small quart pan and brought to a low simmer. From there, I simply mixed 1 cup of Sugar with 1/4 cup of Cornstarch. Pour this mix into the simmering cherry mix, stir well and heat until thickened, it's now ready to be wrapped in your pastry goodness! Use a leaf cookie cutter to add a decorative flair and pop that baby in the oven! Enjoy!

Cranberry Salsa

Extended Shelf Life for: Red Onion, Lime Juice, Jalapeno
Photobucket
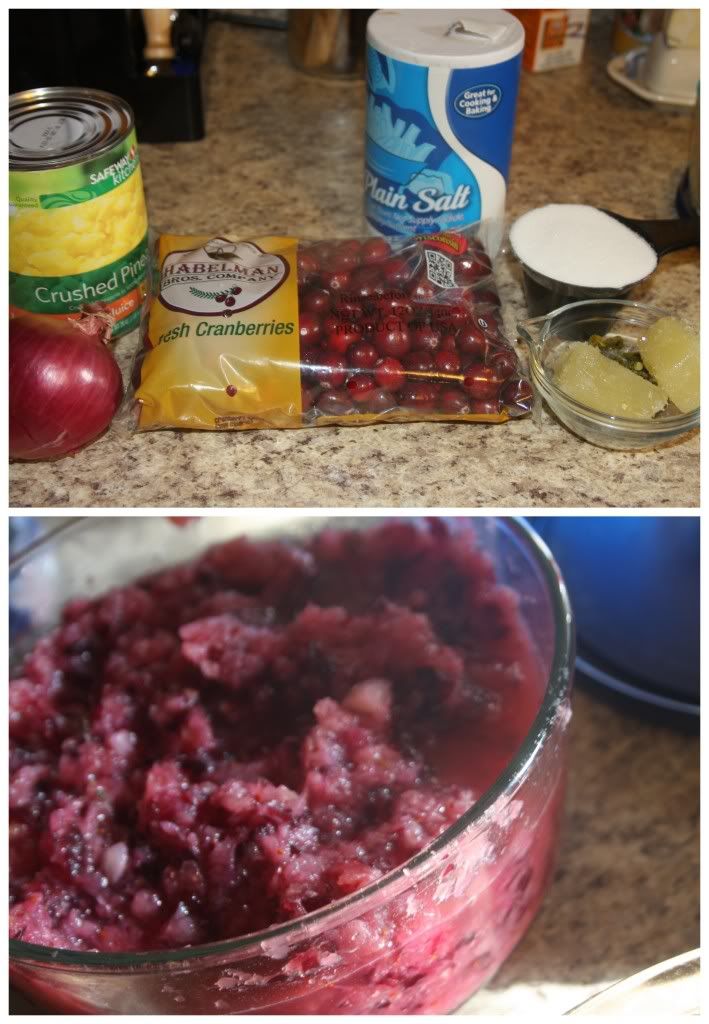
A teacher at the school I work at prepared this unique salsa just before the holiday's and I knew immediate that I needed to prepare a batch and take it to our family Thanksgiving celebration. It's sweet, it's spicy and it features cranberries, can a holiday dish get any better? Yes! Because you also get to have tortilla chips at your holiday table, and who doesn't love some tortilla chips and salsa?

Ingredients/Directions:

Run one package of fresh cranberries through a food processor or the mincing component of a high-quality juicer. In a medium bowl mix minced cranberries and 1/2 cup sugar. Mix in 1 drained can of Crushed Pineapple, 1 diced Jalapeno (or 1 thawed jalapeno cube if your a preserver/freezer), 2 Tbsp. Lime Juice (again, if you have frozen cubes, this is a great time to use them!), 1/2 cup chopped Red Onion and 1/2 tsp. Salt. Let set for two hours or overnight and enjoy with your favorite tortilla chips!

Tip: If you have leftovers (since it's a pretty big batch), AND you're in need of a quick lunch, make up a quick batch of brown rice (or quinoa, pasta, etc.) mix in a few large spoonfuls and you'll have a delicious and relatively nutritious lunch!

Monday, November 19, 2012

Pie-Inspired Tortes

Extended Shelf Life for: Lemons and Squash

First of all, being in the states during the holidays and partaking in holiday baking brings me so much joy!

Second of all, I've recently discovered the most amazing, fantastic use of my torte pan set and feel like I was truly 'inspired' over the holidays to make some new, delicious desserts, inspired of course by pies.

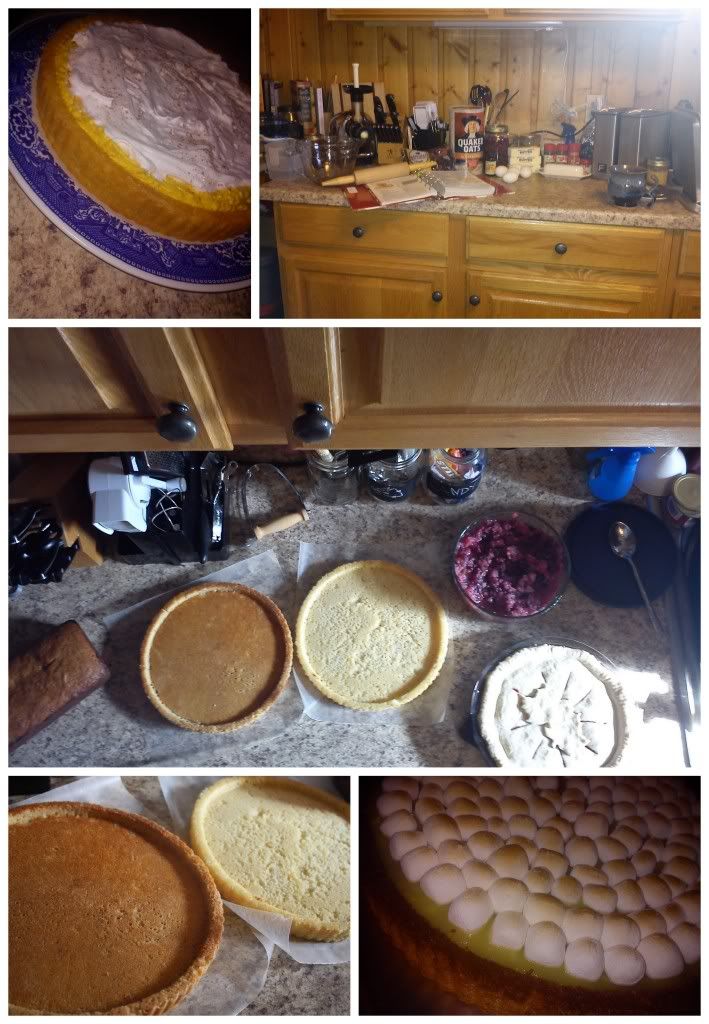
Since it was Thanksgiving, and I had recently acquired some happy little squash and pumpkins I went for a pumpkin-pie inspired torte. Additionally, since we were going to spend the holiday with my fantastic parents, and I knew that my mother loved lemon meringue, I decided to let that be the inspiration for the second torte.

Next up was making cakes in my torte pan, a pumpkin-cream cheese filling, lemon curd, purchasing whipped cream and marshmallows and hitting the kitchen!
Photobucket
First, you'll need a cake...

Ingredients/Directions:

Set 3/4 cups butter and 3 eggs out for 30 minutes until they reach room temperature.

Grease and flour two torte pans. Preheat oven to 375 degrees F.

In a large mixing bowl combine 2 1/2 flour, 2 1/2 tsp. baking powder and 1/2 tsp. salt, set aside.

Beat butter on medium speed for about 30 seconds. Gradually add 1 3/4 cups sugar and continue to beat for 2 additional minutes. Add eggs, one at a time followed by 1 1/2 tsp. vanilla. Alternately add 1 1/4 cup milk and flour mixture until combined, split between pans.

Bake 20-25 minutes until golden brown and a toothpick inserted comes out clean. Cool for 10 minutes, remove from pans. Fill as desired.  

Note: If you are making the Pumpkin Cheesecake Torte, I recommend adding spices such as nutmeg, cinnamon, cloves and allspice to the batter. On the other hand, if you're preparing the Lemon 'almost' Meringue Pie Torte, I recommend adding a teaspoon or so of lemon zest to the batter, for added depth and flavor.

For the Pumpkin Cheesecake Torte...

Ingredients/Directions:

I simply mixed about 1 or 2 cups of Pumpkin/Squash Puree with soft cream cheese, added some brown sugar and spices such as cinnamon, nutmeg, cloves, etc. However, I recommend looking for a more precise pumpkin cheesecake dip/filling to ensure the best, fullest flavor. For some good ideas on where to start, scroll through this page I created on Squidoo, you'll find some of the best pumpkin cheesecake dips on the web!

To assemble the Pumpkin Cheesecake Torte simply plop the filling into your torte cake, spread some whipped topping on top and sprinkle with nutmeg, you're good to go!

For the Lemon Almost-Meringue Torte...

Ingredients/Directions:

Buy or prepare Lemon Curd.

Fill torte cake with lemon curd, arrange mini-marshmallows over the top in any design or amount you want to, turn on the broiler and place your marshmallow covered dish under the broiler for 3-5 minutes (they'll burn quickly...which we actually think tastes quite nice, but for presentation, golden is better). The marshmallows will get toasty and melty and you'll have an extremely delicious and tart dessert to share with all your favorite people!
Friday, November 16, 2012

Cinnamon Rolls

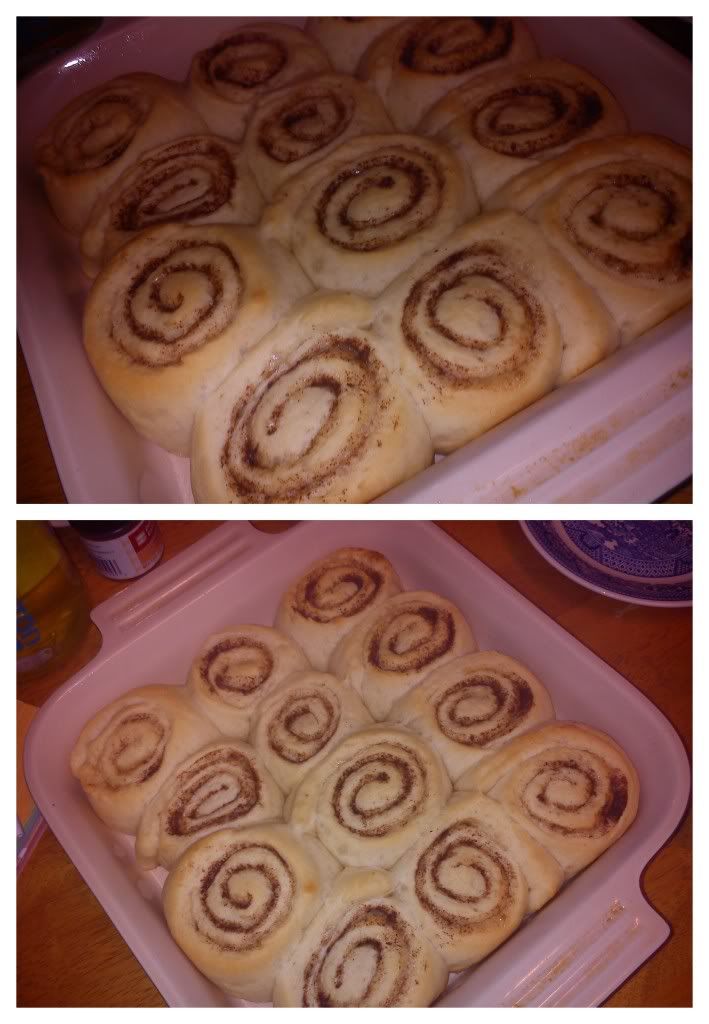
Nothing here needed an extended shelf life...and honestly the recipe isn't anything special or different, but sometimes, I just like to remember when I bake delicious things - this is one of those times: My first cinnamon rolls since returning to Laramie.

Grateful to have a bread machine to do the dough.
Grateful to have an oven big enough to manage a tray of these.
Grateful for Cream Cheese Frosting.
Grateful to have neighbors and friends to share them with.
Photobucket
If I just got your hopes up and you were looking for a cinnamon roll recipe, have no fear, I do have a couple posted here at 519 Kitchen:

Two recipes, one post: Overnight Cinnamon Rolls + Big Batch Cinnamon Rolls 

A Favorite and one that's easily adjusted to your personal preferences: Choco-P.B. Rolls

Monday, November 12, 2012

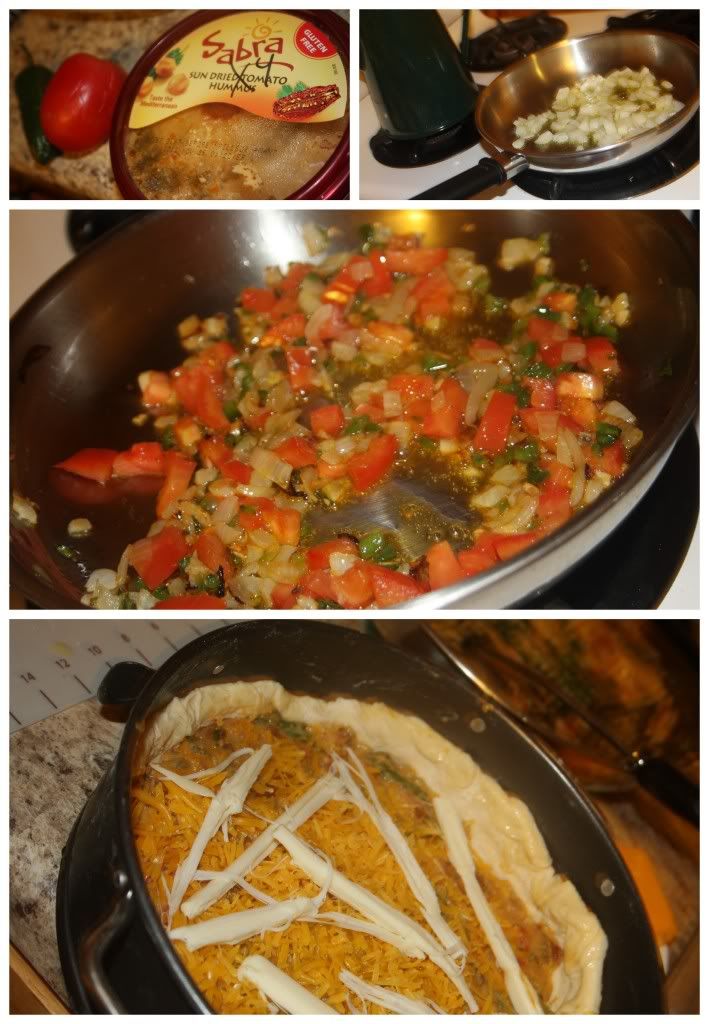
Hummus Pizza Torte

Extended Shelf Life for: Hummus, Tomato, Jalapeno, Onion

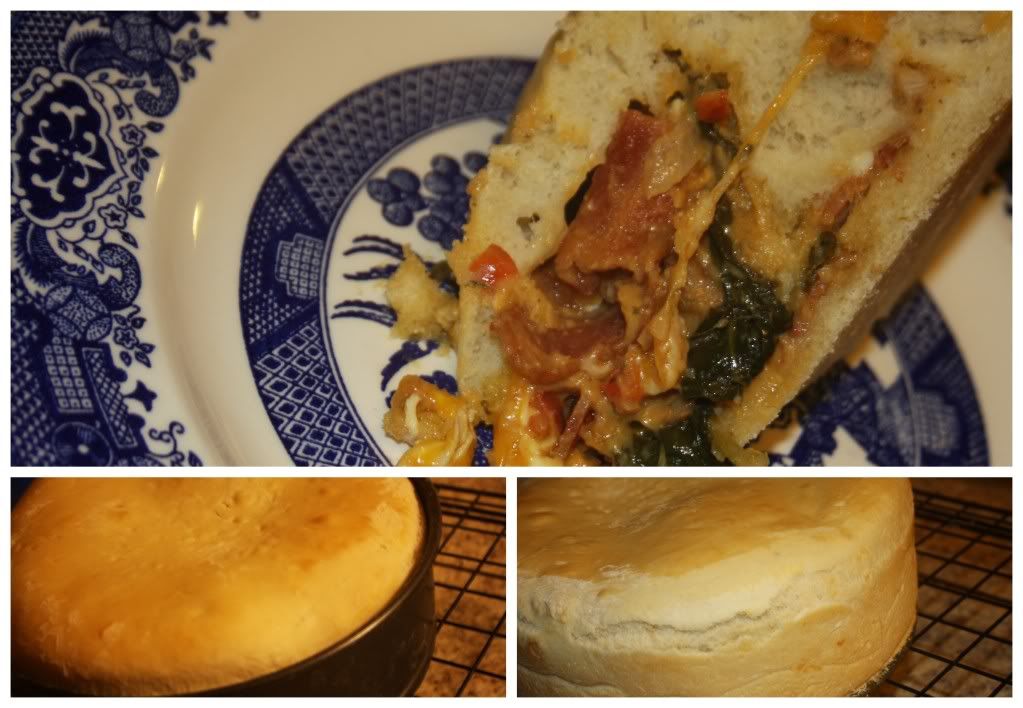
If you continue reading, you're going to discover, that this is one of my infamous posts where I give you nothing exact - just ideas and general guesstimates on how this can be created in your home. And, I'm okay with that. Because what I really want you to know is that Pizza Torte's are amazing! And you should, without a doubt, get a spring-form pan so you can make a pizza torte, because, like I said, they are amazing!

Photobucket
Ingredients/Directions (more of less):

Buy or prepare a batch of pizza dough. Personally, I love using my bread maker for this task because I know that it will have risen within a certain time, no matter what, since the bread machine can control temperature and humidity whereas my Laramie kitchen isn't always so predictable.

Split the dough ball into three equal parts.

Prepare your filling, you can do something traditional, or if you have some random bits and pieces of things to use up, like a tub of hummus, try out something like this:
  •  Saute 1 diced Onion, 2 minced Garlic Cloves and 1 diced Jalapeno in a bit of Olive Oil. When they are tender, throw in one diced Tomato for an additional one or two minutes. 
  • Add 1 tub of Hummus (that's about to expire or otherwise ~ we used a sun-dried tomato hummus, that honestly wasn't that delicious to my taste-buds, too strong, but still a good concept, trust me!)
  • Thin out with additional olive oil or water, use as your filling/sauce.
Place the first round  of pizza dough into your spring form pan, spread in half of the filling, top with cheese, repeat, finish the torte off with the final pizza dough round on top, seal up the edges, bake at 350 (probably- I'm currently in Sturgis, not with the cookbook where I got the recipe for this torte) and bake 15-20 minutes (or more) until crust is golden. Let torte sit for about 5 minutes before removing from the pan and cutting into appropriately sized serving pieces. Enjoy!
Photobucket

Sunday, November 11, 2012

Kimchi!

If you need to extend the life of cabbage, this is a great option. However, we simply needed to have some kimchi re-enter our life and this includes nothing salvaged, except perhaps an onion.

For me, it was relatively important to prepare some kimchi in November, as November/the fall is generally the time when all the old women come out from the woodwork gathered around piles and piles of cabbage and working together to make sure the Korean staple is ready for the long winter ahead.

A few other notable mentions about my kimchi making day: It was the Korean "holiday" of Peppero Day (11-11) AND I had the great joy of being assisted by a sweet Korean family that is here on behalf of the man of the household serving an exchange as a visiting professor, making my first kimchi experience feel that much more authentic and valuable.

Now, on to Kimchi making...

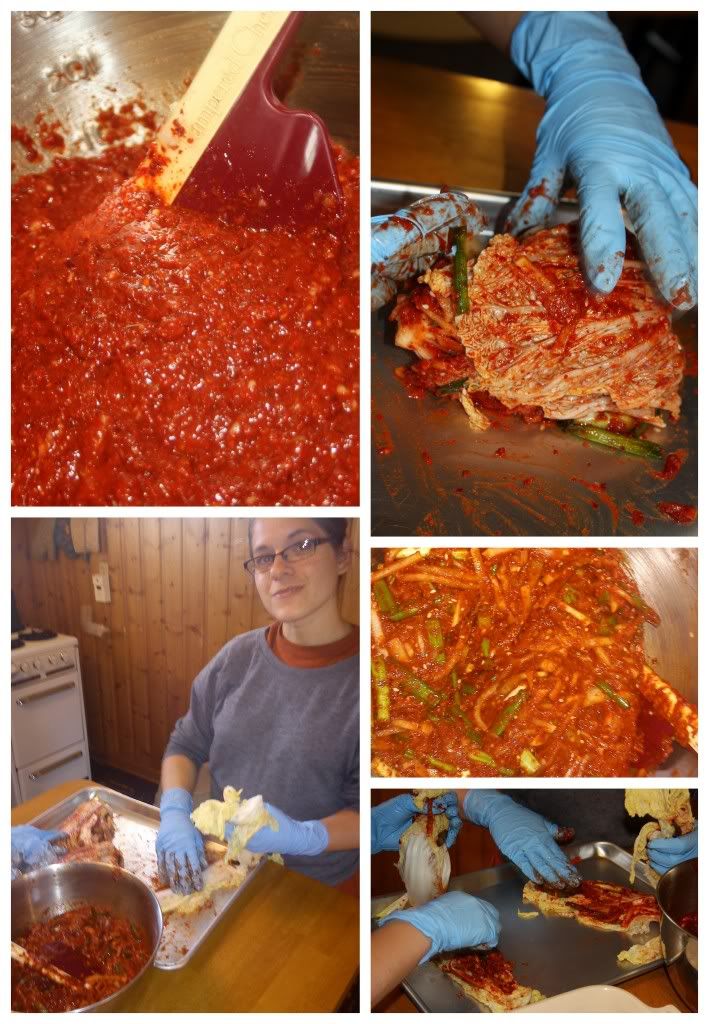
There are essentially three parts to preparing Kimchi: Soaking, Making the Red Pepper Paste and Assembly. I will give you a rough sketch of each one of these parts followed by a link to a very detailed explanation of each step just in case you are in need of more photos and great explanation. 

Part 1~SOAKING:

Photobucket
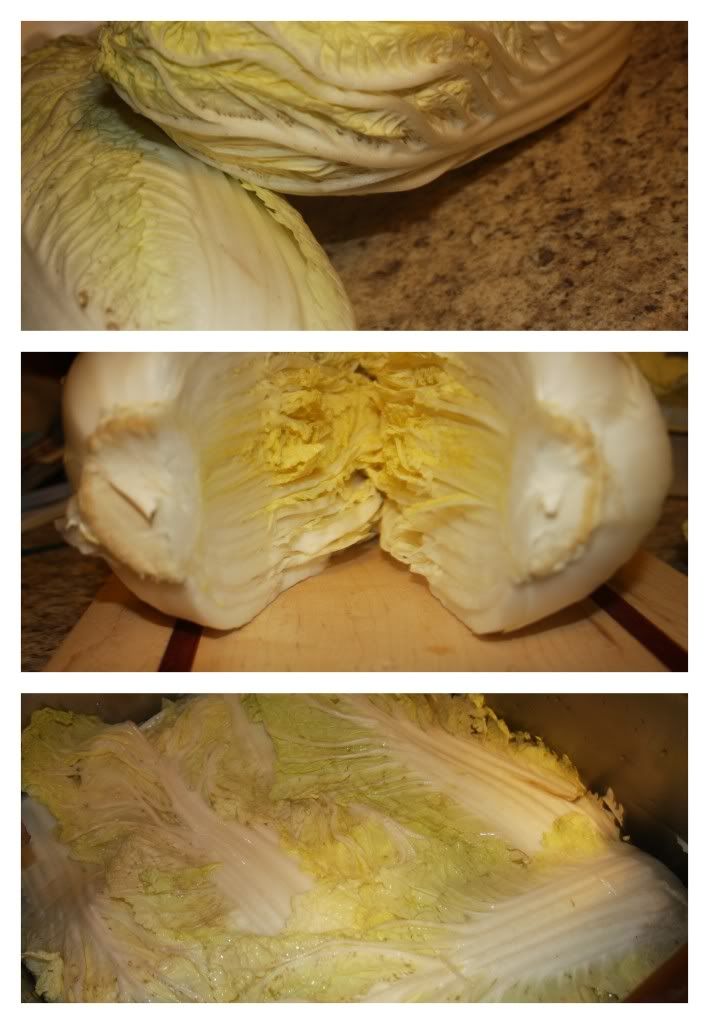
Kimchi making will undoubtedly be a two day process, starting with this first step which is, in essence, preparing the cabbage by soaking it in salt water.

You will need:
  • Two Heads of Napa/Chinese Cabbage
  • 3 cups Coarse Sea Salt, preferably from Korea -- no joke
  • 30 cups of Water
What you will do:
  • Remove the outer 2-3 leaves from each cabbage, but don't discard!
  • Cut a 2" slit in the stem of each cabbage, carefully split heads of cabbage in half (easier than it sounds, I promise)
  • Salt each leaf of the cabbage, making sure to get plenty of salt on the thick, white parts and extra careful not to tear the leaves or disassemble the cabbage half.
  • In a deep, large container (such as the kitchen sink), dissolve 3 cups of Salt in 30 cups of Water.
  • Place each cabbage half, face-up into the water and cover with the reserved cabbage leaves.
  • Cover with plastic and use rocks, tin cans or a heavy lid to press the cabbage halves down into the water.
  • Soak for 8 hours. Flip and soak another 4 hours.
  • Check for bend-ability in the cabbage stems, when they are supple it's time to rinse (3 times), halve again (so you end up with 8 quarters of a whole cabbage) and drain (at least two hours, during which you should prepare the next step).
For greater details on soaking, check out this thorough post at Beyond Kimchee (my favorite Korean food blog!)

Part 2~MAKING THE RED PEPPER PASTE:
Photobucket
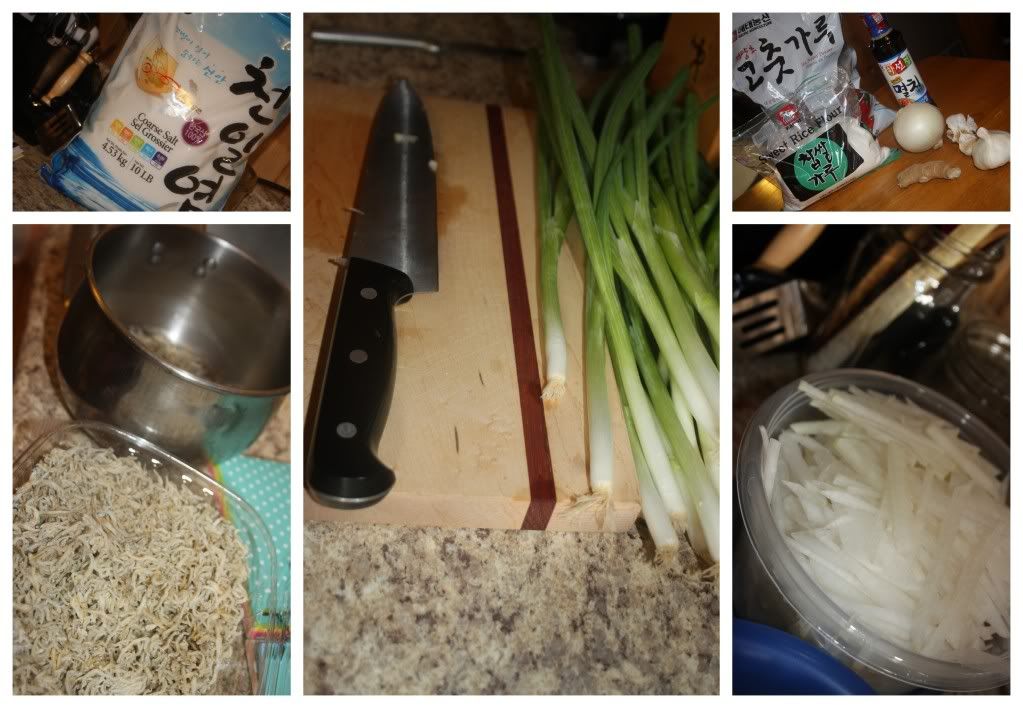
You will need:
  • A few handfuls of dried sea creatures (or one handful if you can't find multiple sea creatures or don't like sea creature flavored items - but one handful is a good idea)
  • 3 cups of Water
  • 2 Tbsp. Sweet, Glutenous Rice Flour
  • 1 Lg. Korean Radish, julienne into 1/8" matchsticks
  • 2 bunches of Green Onion
  • 4 cups of Korean Red Chili Flakes
  • 1/2 large Onion, roughly diced
  • 10 cloves Garlic
  • 2" piece of Ginger, roughly diced
  • 4 (or 2) Tbsp. Anchovy Sauce
  • 4 (or 2) Tbsp. Shrimp Sauce/Salted Shrimp
  • 1 1/2 Tbsp. Sugar
  • 2 Tbsp. toasted Sesame Seeds
What you will do:
  • Make a rice glue by boiling your handful of dried sea creatures in 3 cups of water, simmer for 10 minutes, remove from heat and let set, as is for 20 minutes. Strain off sea creatures and discard sea creatures, reserving 2 cups. Bring 1 1/2 cups of stock to boil while continuously whisking in the 2 Tbsp. of Glutenous Rice Flour until the mixture is bubbly and has thickened. Save the plain 1/2 cup stock for later.
  • In a blender or food processor, puree 1/2 large Onion, 10 cloves of Garlic, 2" piece of Ginger and reserved 1/2 cup Stock until smooth.
  • Pour 4 cups of Korean Red Chili Flakes into a large mixing bowl, add the onion mixture and cooled rice glue, anchovy sauce, salted shrimps, sugar and sesame seeds, mix.
  • Add the sliced Radish and diced Green Onions and let set for 30 minutes so the radish can extract some moisture and the mixture will be come more smooth and spreadable.
  • Taste test the sauce with a piece of cabbage to evaluate saltiness and flavor, adjust with additional fish sauce or stock for spread-ability as deemed necessary, then move on to assembly.
For greater details and more pictorial assistance, check out Cabbage Kimchee: Part Two from, yet again, Beyond Kimchee. 

Part 3~ASSEMBLY:
Photobucket
You will need:
  • Rubber Gloves
  • A Cookie Tray or Large, shallow dish
  • Airtight containers for storage
 What you will do:
  • Gently handle each cabbage quarter and use your gloved hands to spread red chili paste between each and every leaf. Roll up the quarter, place in an airtight container. Let the kimchi sit out on the counter 2-3 days for fermentation and moisture extraction before relocating it to the refridgerator.
  • Our Korean assistants explained that the outer leaves can be used to cover a bit of the kimchi, but that it is also generally spread with red pepper paste and then cut up and eaten that day as fresh kimchi with rice, which, by the way, is delicious!
For more details on this final part of preparing your kimchi, head over to Beyond Kimchee one more time!

In our house, we really love this fermented vegetable and have been beyond satisfied with the results of this recipe and process, slightly time consuming, but if you love fermentation, spicy foods, or kimchi itself, it's well worth it!

Wednesday, November 7, 2012

Kohlrabi Pasta

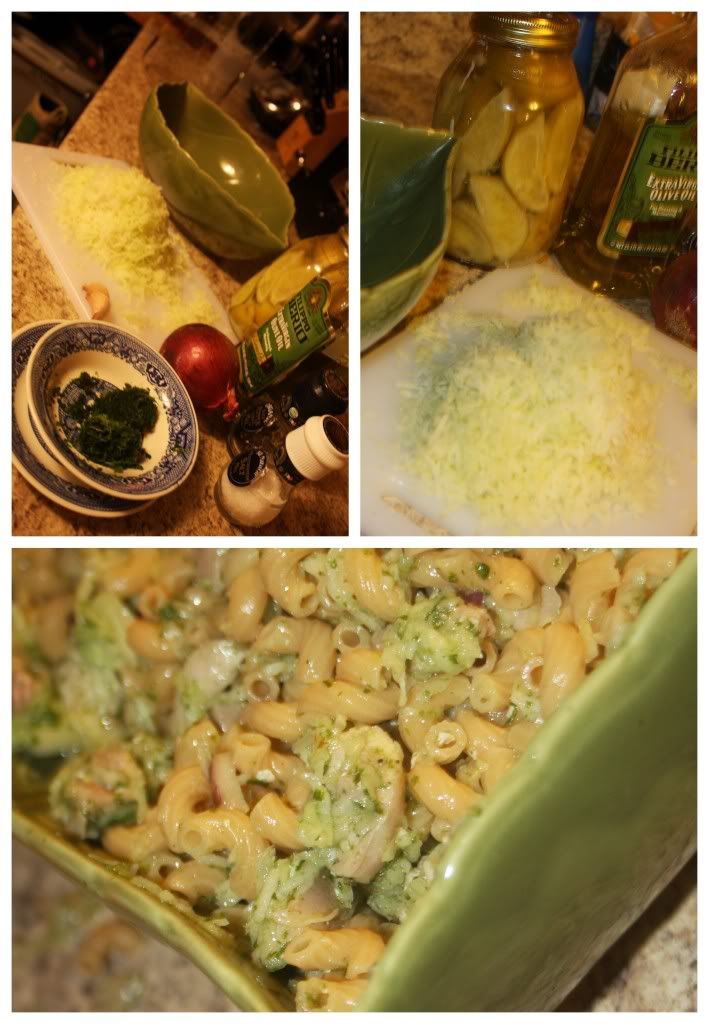
Extended Shelf Life for: Kohlrabi, onion, limes and cilantro
Photobucket
Sometimes you just need to make a bulk amount of something so you can eat the rest of the week. Ultimately, the week of this dish I was craving a deliciously warm and thick soup, but that was not an option with the ingredients on hand. So, we ended up with this pasta dish which was delicious but made me wish warm weather were around the corner.

Ingredients/Directions:

Prepare one package of Noodles such as macaroni. Shred one large Kohlrabi, season with Salt and the juice of 1 Lime. Toss in one chopped red Onion and 1 Tbsp. of packed chopped Cilantro. Mix in cooked Pasta, add salt, lime juice and black pepper to taste. Enjoy at room temperature or chilled.
Related Posts Plugin for WordPress, Blogger...