Thursday, January 24, 2013

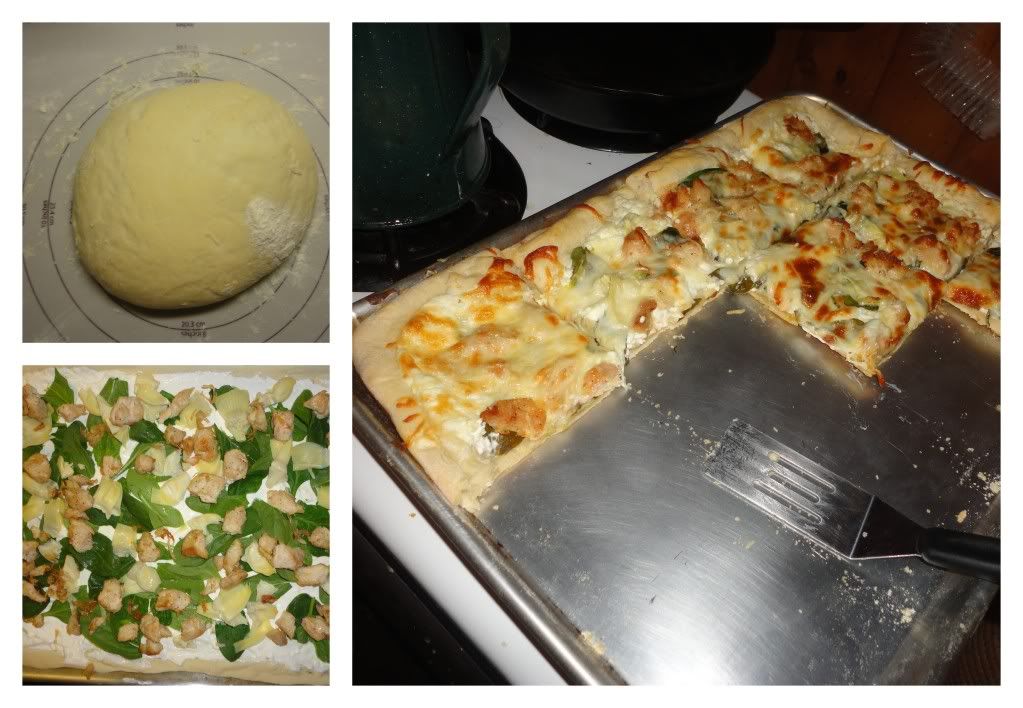
Pizza Experiment #5: Spinach Artichoke Dip Inspired

If you're going to choose to experimenting with one thing or another, you really can't go wrong with Pizza! We've enjoyed loads of pizza experiments and I think I'm getting better and coming up with ideas as well as critiquing each pizza.

I didn't love this sauce, but also knew from the beginning that I wouldn't recreate in the exact same way, ever again. I would have liked to use only Cream Cheese for the 'sauce', but I had some plain yogurt that need to be moved out of the refrigerator, therefore, it went into the mix...and then I had to pile it on, not entirely ideal. Regardless of all the small things I would change given the opportunity, I truly enjoyed this pizza pie and will continue to work with this concept.
Photobucket
Pizza Crust: Bread Machine

Using the bread machine to prepare the dough for pizza crust is an easy way to ensure proper rising, etc.

According to manufacturer recommendation place the following items into your bread machine:

1 1/2 cups Water, 1/4 cup Olive Oil, 3 1/2 cups Flour, 1 Tbsp. Sugar, 1 1/2 tsp. Salt and 2 tsp. Yeast.

Set to dough cycle. Upon cycle completion divide dough based on number of desired pizzas. Flatten each ball and knead a few times, cover with a damp towel for 30 minutes until dough has increased by 20 percent. Roll out and prepare as desire

Toppings: Spinach Artichoke Inspired

Spread crust with a whipped, softened Cream Cheese. Top with Pan Cooked Chicken, Artichoke Hearts, Spinach, Mozzarella and Parmesan. Bake at 450 for 10-15 minutes until cheese is golden and bubbly. Enjoy as part of a budding Family Pizza Night tradition.
White Chocolate Orange No-Bake Cookies

Extended Shelf Life for: Oranges
Photobucket
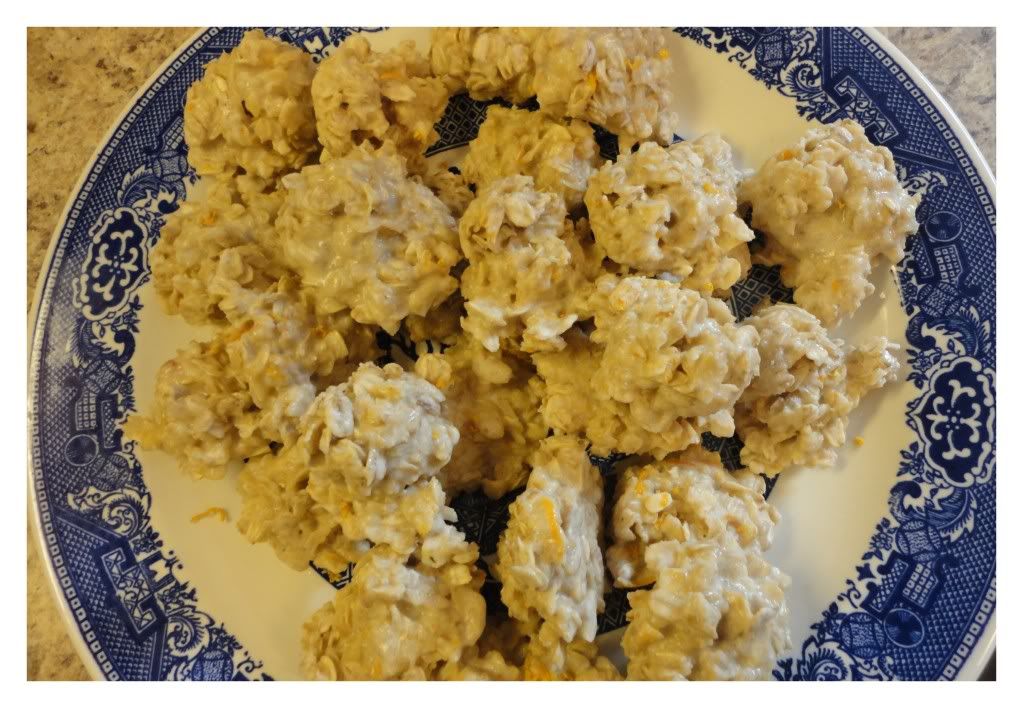
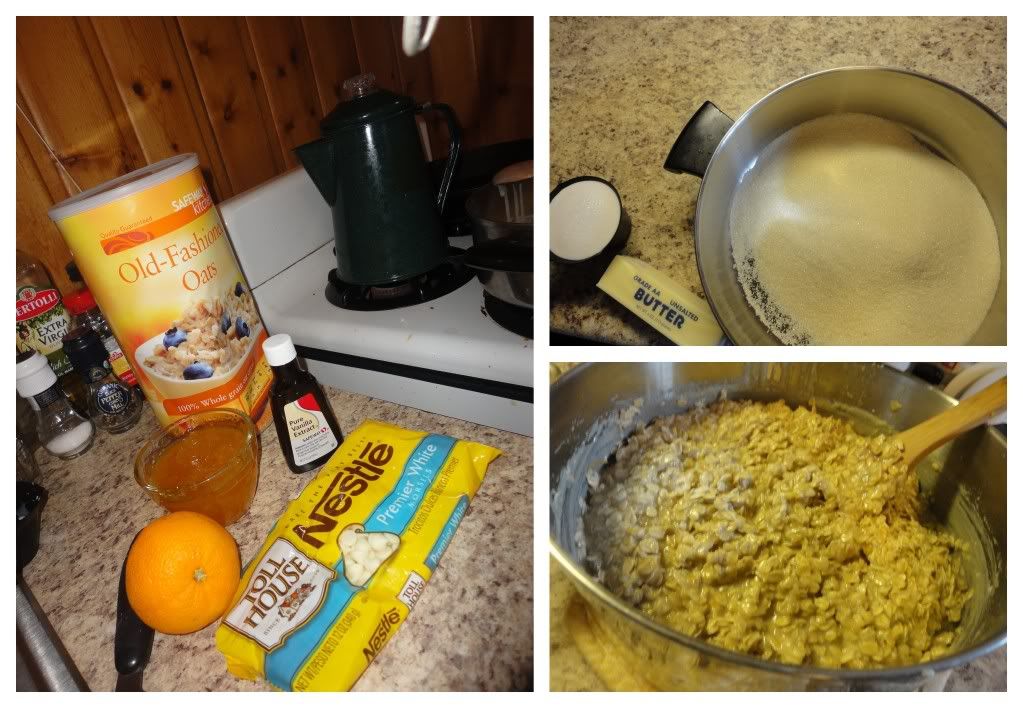
With the raging success of my Cookies and Cream No-Bake Cookies, and my undying love with kitchen experiments AND the open field for experimenting with No-Bake cookies (seriously, why aren't there more variations?) I'm on the go with new and exciting ways to enjoy a no-bake cookie which, excitedly are gluten free, making them a great go-to for potlucks and other events where all my dear GF friends may be present.

These White Chocolate Orange No-Bake Cookies are, without a doubt, delectable and delicious and a variation on no-bakes that will please many a palate, especially if you happen to have a non-chocolate loving friend, such as I do.

If you have happened by these cookies after already enjoying the Cookies and Cream No-Bake, I hope you'll find this variation just as enjoyable!
Photobucket
Ingredients/Directions:

In a medium saucepan melt 1/2 cup Butter, 1/2 cup Milk and 1 3/4 cups Sugar together. Once mixture has come together remove from heat and stir in 1 bag of White Chocolate Chips until melted. Stir in 3 Tbsp. Orange Marmalade, 1 Tbsp. Fresh Orange Zest and 1 tsp. Vanilla. Add about 3 cups of Rolled Oats, add additional oats until mixture is thick and each oat is covered. Drop by the teaspoon or tablespoon full onto wax paper covered cookie sheets, refrigerate overnight or for 1-2 hours. Enjoy!

Wednesday, January 23, 2013

Cheese and Onion Enchiladas

Extended Shelf Life for: Onions

Photobucket
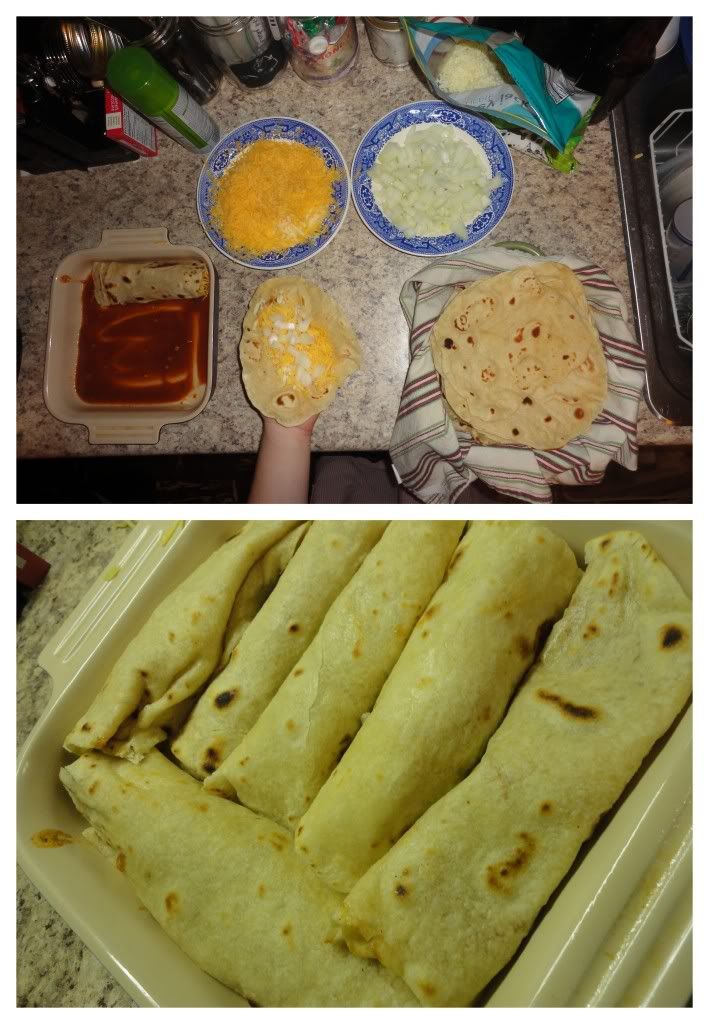
With fresh, Bacon Fat Tortillas, ready to go, it was time to kick a Mexican food craving in the rear and enjoy some home-made enchiladas. These guys were not even close to being a disappointment! Only bummer of the whole meal was not having enough Chile Powder to make this enchilada sauce correctly, regardless, a few extra shakes of Cayenne Pepper and a short prayer were all that was needed to thoroughly enjoy this weeknight meal.

Ingredients/Directions:

Spread a bit of Enchilada Sauce on the bottom of a 9x13 pan (or have two square pans ready to go) then begin filling each tortilla with a small handful of Onions (sauteed if that's your preference - we're not opposed to raw, so I left them that way), Cheese and a touch of Enchilada Sauce. Arrange tortillas in the pan, once it's full spread remaining Enchilada Sauce over the top, sprinkle with cheese and bake at 350 for 30 minutes or until cheese is melty and sauce is bubbly. Enjoy!

Bacon Fat Tortillas

Extended Shelf Life for: Bacon Fat
Photobucket
When the Bacon Delivery-Man had the misfortune of dumping his good near Laramie and the towns people enjoyed the gift of free bacon, I decided it was 100% necessary to look into saving bacon fat and what possibilities may be had.

There were many recommendations to use the delicious fat to fry up eggs, add flavor to beans and grease various pans depending on the dish.

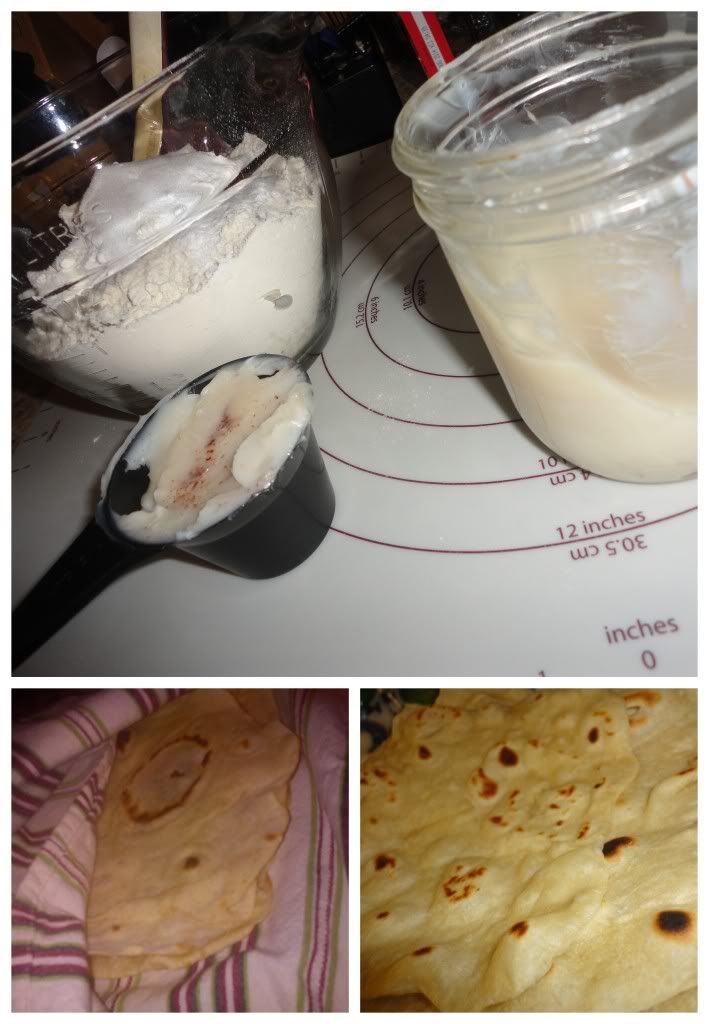
Knowing that the best tortillas are in fact made with lard, I opted to throw some of my refrigerated bacon grease into a double batch of tortillas and quite satisfied with the results!

Ingredients/Directions:
From The Joy of Cooking

This recipe is for a single batch, although I doubled my batch with no problems.

Mix together 2 cups Flour, 1 tsp. Baking Powder, 1 tsp. Salt, 1/4 cup Bacon Fat and 3/4 cups Hot Water. Knead (or mix with dough hook) until  dough is smooth. Divide dough into 8 equal parts, let set for 20 minutes, covered.

Roll out each dough ball into a 6-8 inch tortilla.

Heat a large non-stick or cast-iron skillet over medium heat. Cook about 30 seconds on the first side, 15 seconds on second side until bubbly, browned and delicious looking! Enjoy as is or with your favorite filling.

Sunday, January 20, 2013

Tangerine Salsa

Extended Shelf Life for: Tangerines, Tomatoes, Onions, Jalapenos
Photobucket
We've been eating tangerines, cuties, oranges with great frequency.

I've begun a major research project regarding what to do with all of the peels and have made dishes such as Avocado-Orange Pasta, pints of Orange Marmalade, Candied Orange Peels and of course Fresh Orange Juice (with a few other veggies and fruits thrown in).

But after all of these dishes...I still had fruit to use up.

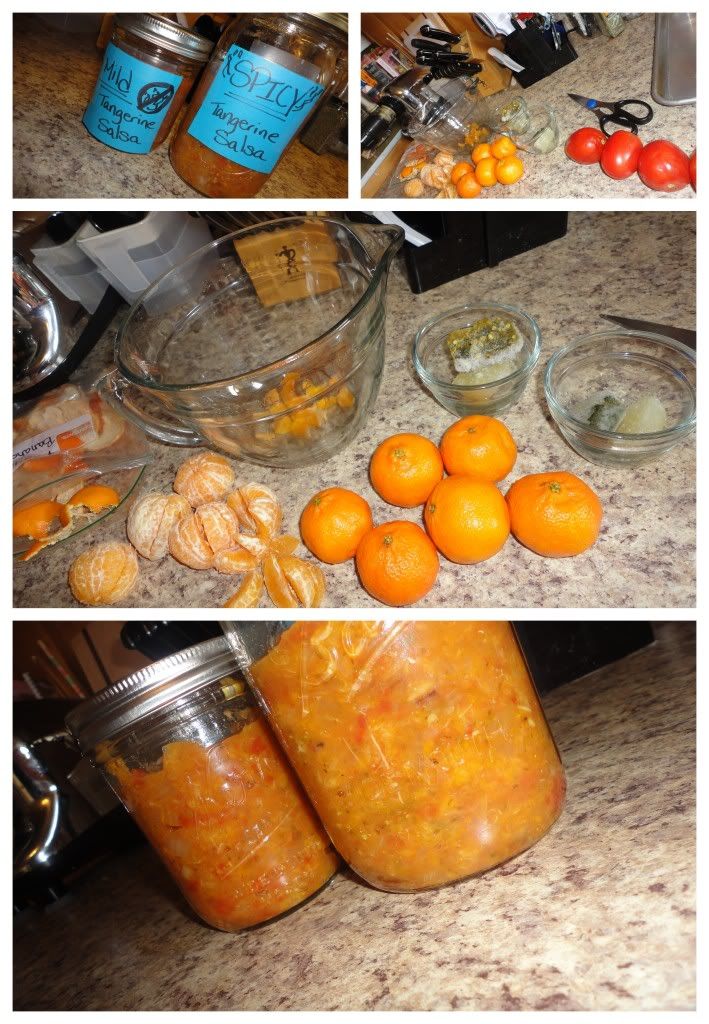
So, with a taco night in the works for church, I decided to do up a batch of tangerine salsa and the results were quite tasty indeed!

Ingredients/Directions:
Adapted from Appetite for China

Roughly chop 8-10 Tangerines, 2-3 Roma Tomatoes, 1 Red Onion and 1 Jalapeno. Mix together, toss in the juice of 1 Lime. Season with Salt and Cumin.


Blackberry Coffee Cake

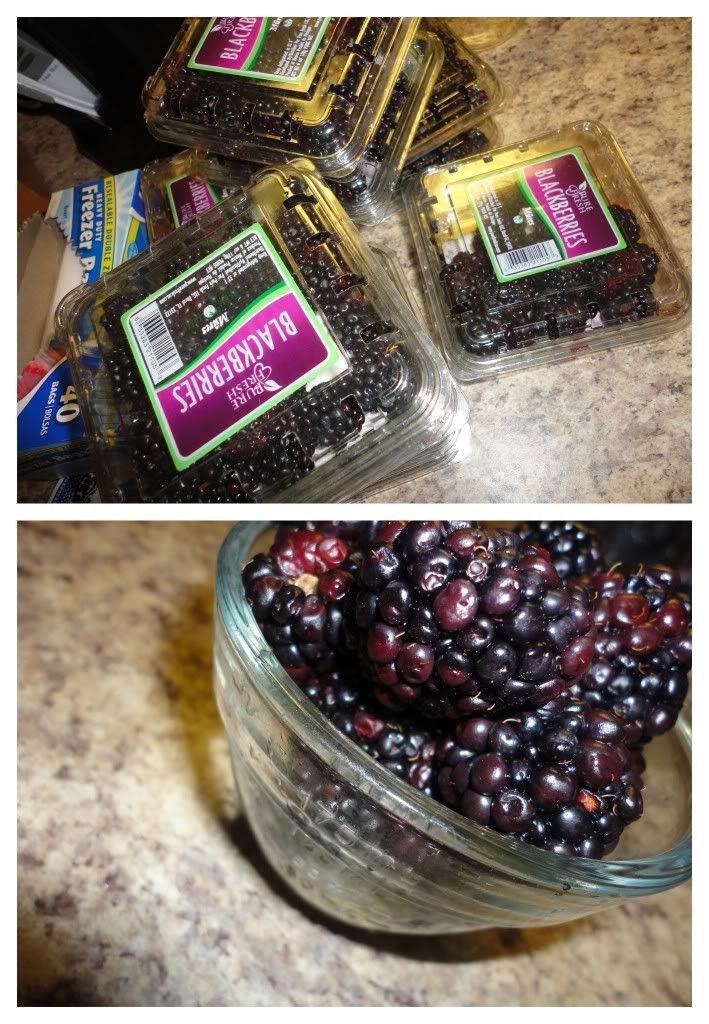
Extended Shelf Life for: Blackberries
Photobucket
 We're still flying high on the recent salvaging of blackberries and every time I pull out a bag from the freezer, my heart rejoices and my taste buds wait in anticipation.

While I love berry dishes and cooking berry filled pies, cobblers or smoothies, we don't often spend money on fresh berries...because, well, we don't often spend money on any fresh produce :)

But berries only come around so often and when they do, it truly is a treat, so waking up a few mornings to enjoy this Blackberry Coffee Cake has definitely put me on cloud nine!

Ingredients/Directions:
From Better Homes and Gardens Cookbook

In a medium saucepan combine 1 1/2-2 cups fresh or frozen Blackberries and 1/4 cup Water. Bring to a boil, reduce heat and simmer about 5 minutes until fruit is tender. Combine 1/4 cup Sugar and 2 Tbsp. Cornstarch and stir into fruit. Cook and stir over medium heat until mixture is thickened and bubbly. Cook and stir an additional 2 minutes, then set aside.

Preheat oven to 350 F. In a medium bowl combine 1 1/2 cups flour, 3/4 cups Sugar, 1/2 tsp. Baking Powder and 1/4 tsp. Baking Soda. Cut in 1/4 cup Butter until mixture is coarse. Make a well in the center, set aside.

In a small bowl combine 1 beaten Egg, 1/2 cup Buttermilk and 1/2 tsp. Vanilla. Add this mixture, all at once, to the flour mixture. Stir until just moistened, batter should be lumpy.

Spread half of the batter in an un-greased square baking pan. Spread fruit filling on top and drop remaining batter in small mounds on top of fruit filling.

In another small bowl, stir together 1/4 cup Flour and 1/4 Cup Sugar. Cut in 2 Tbsp. Butter until misture is coarse, sprinkle over coffee cake.

Bake for 40-45 minutes until golden. Cool slightly, serve warm.

Saturday, January 19, 2013

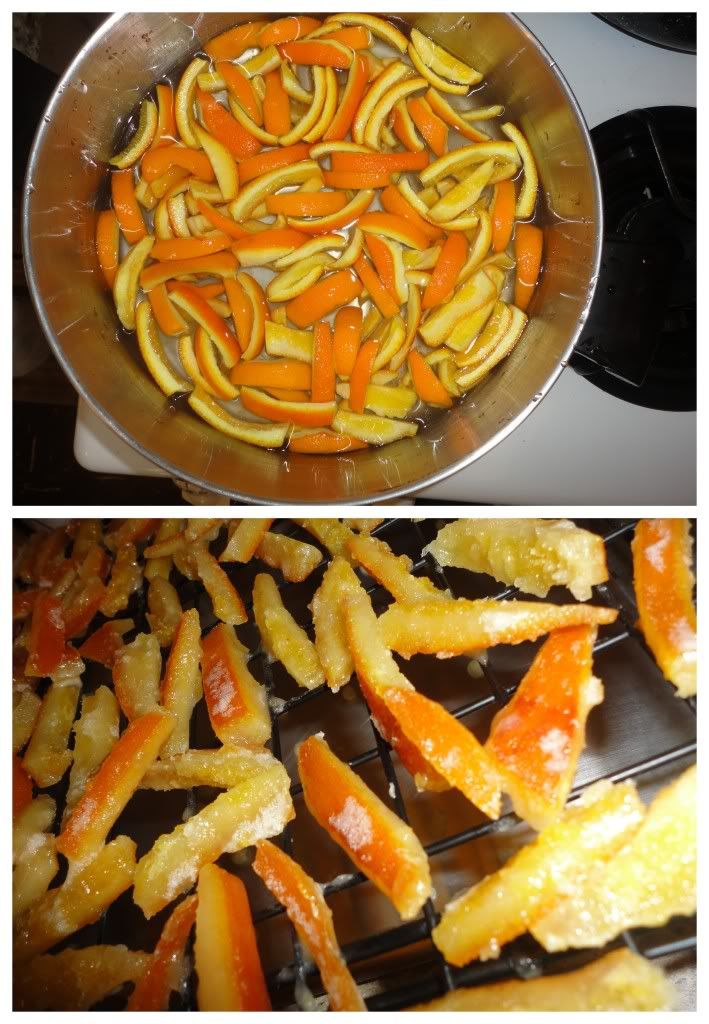
Candied Orange Peels

Extended Shelf life for: Oranges (peels, specifically)
Photobucket

Holy Oranges Batman! Our house has been the location of many an experiment and lately, oranges are finding themselves all over the place.

Being who I am, there's no way I can let that many orange peels pass through my hands without trying to figure out a creative, delicious use for them.

Rather than zesting the buggers and saving them for future use, like I did with my lemons, I decided it was time to candy some citrus peels and the results have been quite tasty...I'm sure, dipped in chocolate, they'd be even better, however we're just enjoying them as is.

Thanks to a beautifully titled blog: Use Real Butter, I used this recipe and turned out a delectable little treat!

Ingredients/Directions:

Remove the lovely little orange part of the 8 oranges from the bitter white pithy part of the orange. Since I have a hard-core juicer, I simply use a paring knife to slice off thin layers of the peel, finish removing the white pithy part and proceed to throw the the pulp into the juicer...if you want other suggestions, check out the original blog post...because it's late, I'm behind on blogging and...she did a real nice job explaining things ^^

Once you have lovely orange peels, throw them in a pot with cold water, bring to a boil, strain and repeat - you should do this a total of three times to eek out some of the bitterness.

With your oranges in the strainer, it's time to get into the real deal of making candied orange peels. Bring 3 cups of Sugar and 1 cup of Water to a boil over high heat until you reach 230 F. Add the orange peels, reduce to a simmer and simmer until translucent (30-75 minutes depending primarily on elevation). Remove peels from syrup and set on a rack to dry 4-5 hours or over night. If you wish to roll them in additional sugar at this point, you are more than welcome to do so. Otherwise, enjoy as is after a few hours or temper some chocolate and dip away!

Friday, January 18, 2013

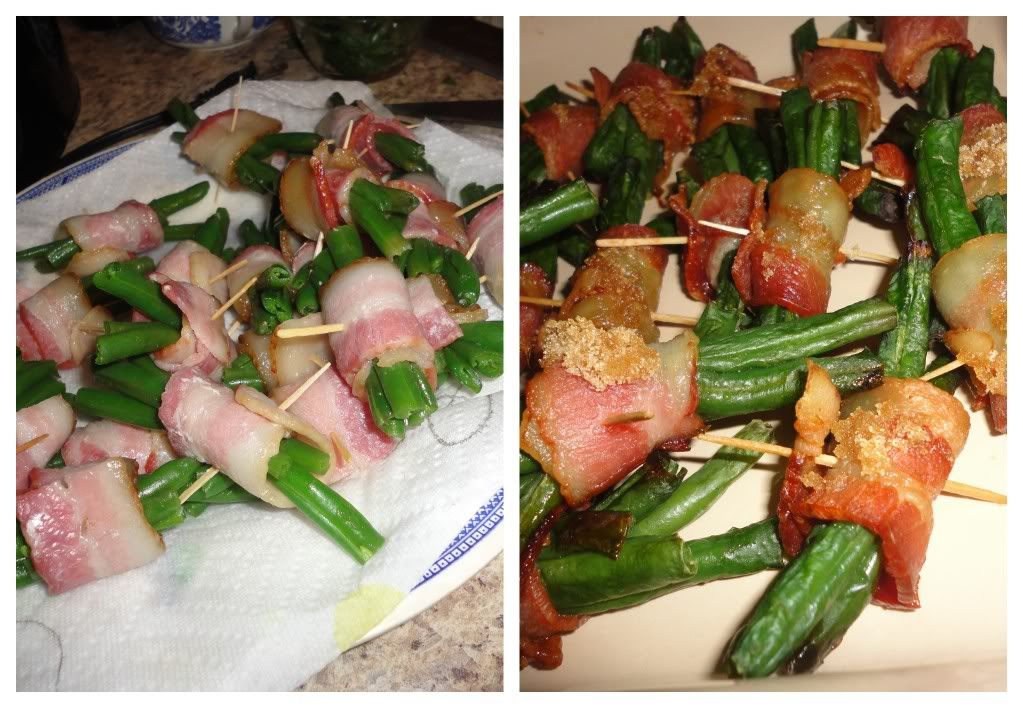
Bacon Wrapped Green Beans

Extended Shelf Life for: Bacon and Green Beans
Photobucket
Did you know a truck full of bacon semi-recently 'crashed' near Laramie? Not sure about all the damage, what I do know is that a LOT of Laramie residents ended up with a LOT of free bacon!

And we recently salvaged a lot of green beans...which the man does not love.

So, when I had the opportunity to put the two together and serve them up to friends, I figured I couldn't go wrong. And, truth be told, these were delicious!

I recommend putting some aluminum foil down for easy clean-up, because these can get a bit messy, but they are ultimately easy to put together and oh-so-delcious.

Simply wrap green beans in bacon, drizzle with soy sauce, butter and brown sugar, bake until bacon is fully cooked and the smells are intoxicating - enjoy!

Wednesday, January 16, 2013

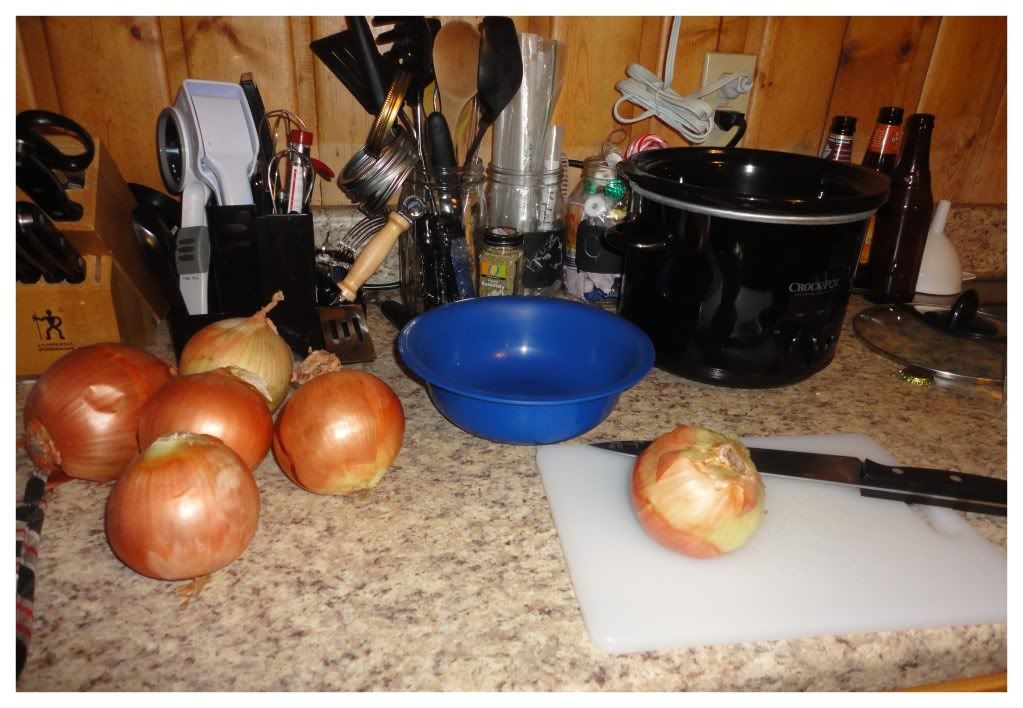
Slow-Cooker Caramelized Onions

Extended Shelf Life for: Onions

Photobucket
I'm wanting caramelized onions to play a major role in my pizza experiments, so I figured I should try out this slow-cooker trick I saw on Pinterest recently.  I'm not sure I love the outcome...but I'm also not sure that I hate it...and what I really mean is that I think stove-top caramelization is more flavorful, but it takes time and patience. This method is quick and when you're simply adding the onions to other dishes and/or covering them with cheese anyway...it might just be the perfect way to get a bunch of delicious caramelized onions.


Ingredients/Directions:

Fill the slow-cooker with onions. I had a 3-quart crock filled with about 3-4 sliced onions. Top with 2-3 Tbsp. Butter of Olive Oil. Set on low for 12-14 hours. Store in a glass jar in the refrigerator, use as needed for sandwiches, salads, pizza, etc

For more awesome ways to use onions, check this out!

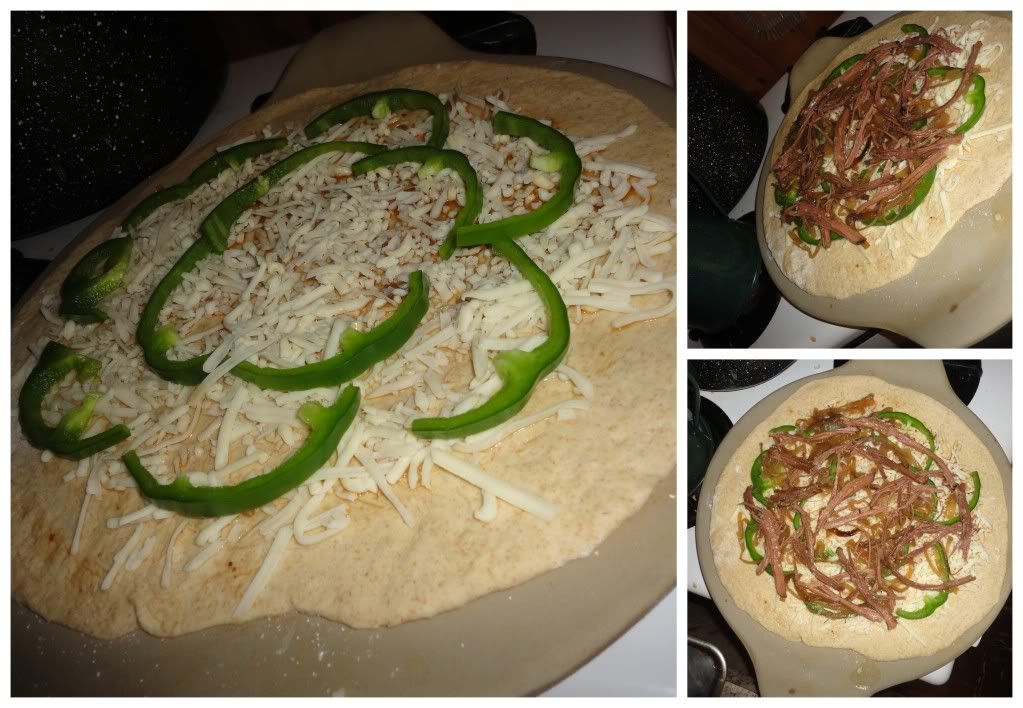
Pizza Experiment #4: French-Philly Pizza

Extended Shelf Life for: Onions

I realize we've only had a small handful of pizza experiments...but I think this one may be a favorite, a winner, winner - pizza dinner! With French Dips and Philly Cheesesteak Sandwiches serving as my inspiration, we enjoyed these pizzas which we're perfect in every way!

Photobucket


A few key points:

The recipe for the roast beef is known as the Best Beef Dips Ever, and they are, and they are easy. One roast, 1 cup of Soy Sauce, 6 cups of Water, Garlic, Rosemary, a Slow-Cooker and 8-10 hours on low. I recommend preparing the roast a day or two before preparing the pizza, just for the flavors to gain intensity.

Photobucket


The toppings:

Best Beef Dip Roast Beef, Green Pepper, Caramelized Onions, Mushrooms and Monteray Jack Cheese. When the pizza's finished, serve with a small bowl of Au Jus for dipping.


Monday, January 14, 2013

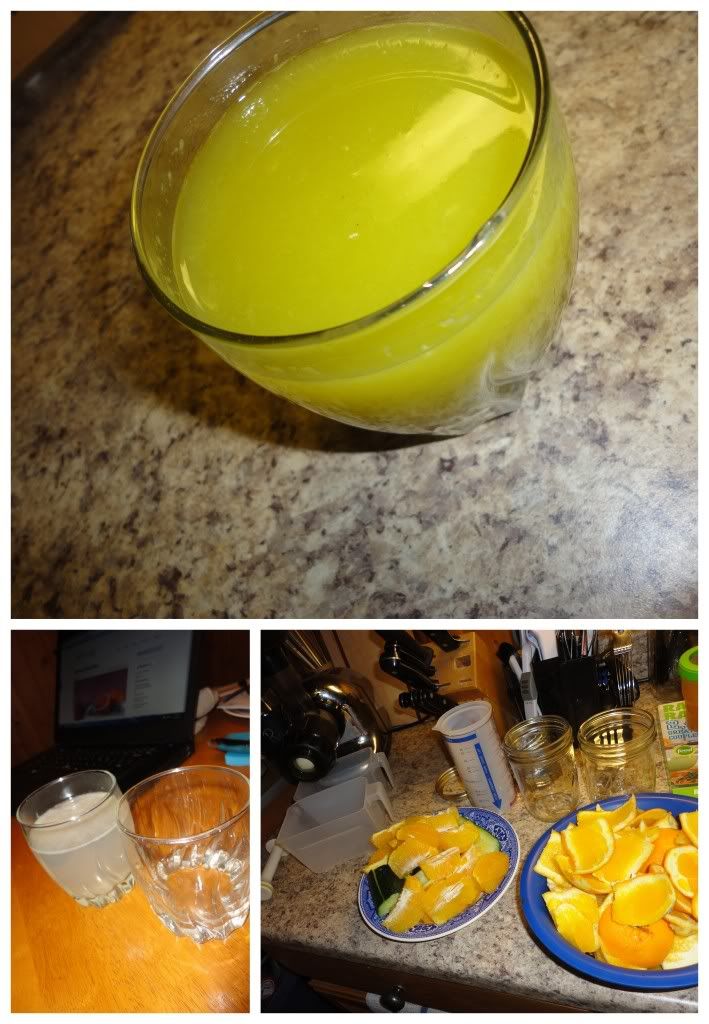
Detox Juice: Cucumber, Orange and Mango

Extended Shelf Life for: Cucumber, Orange, Mango
Photobucket


I stumbled across this post in search of ways to use up the ridiculous amount of oranges that are lying around our home. I'm not opposed to nutty-health quarks, so I was all in on trying out a detox and since Mike didn't argue, we went ahead and went for it.

The post I read essentially recommended a single day detox which would begin in the morning with a glass of water mixed with the juice of one time to more-or-less prime the system. The rest of the day is enjoyed drinking water, herbal teas and 3 cups of fresh juice - your choice but she recommends sticking with the same throughout the entire day.

In our house, on our first detox attempt our mix was: Cucumber, mango and orange - quite delicious and a beautiful green color to boot.

In general, the day went better than anticipated, although I was ready for bed at 8:00 pm and definitely ready to get to eating the next day. However, I felt good, like my body was being given the chance to let go of some of the junk which I inevitably eat on a more-than-I'd-like-to-admit basis.

Whether you opt to try out a detox or simply want a new juice recipe, we definitely enjoyed this combination of fruits and vegetables!

Sunday, January 13, 2013

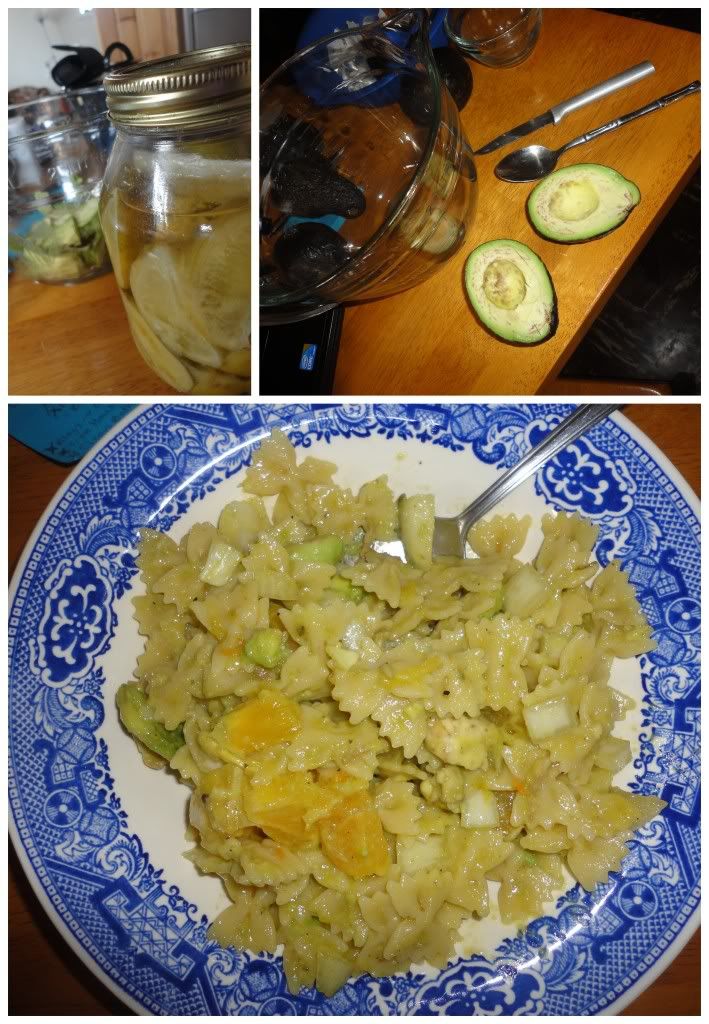
Orange-Avocado Pasta Salad

Extended Shelf Life for: Limes, Avocados, Tangerines, Onion
Photobucket
Sometimes you just throw something together quick and it works out in all the perfect ways.

Ingredients/Directions:

Prepare pasta of choice. Slice and dice an avocado, mix with juice of one lime, salt to taste, one minced onion and 2 chopped oranges which have been zested to add additional flavor to the dish. Add pasta to the avocado-orange mixture, mix - let set for a few moments before serving and devouring. Probably fits spring/summer better, but...when you dive...what can you do?

Saturday, January 12, 2013

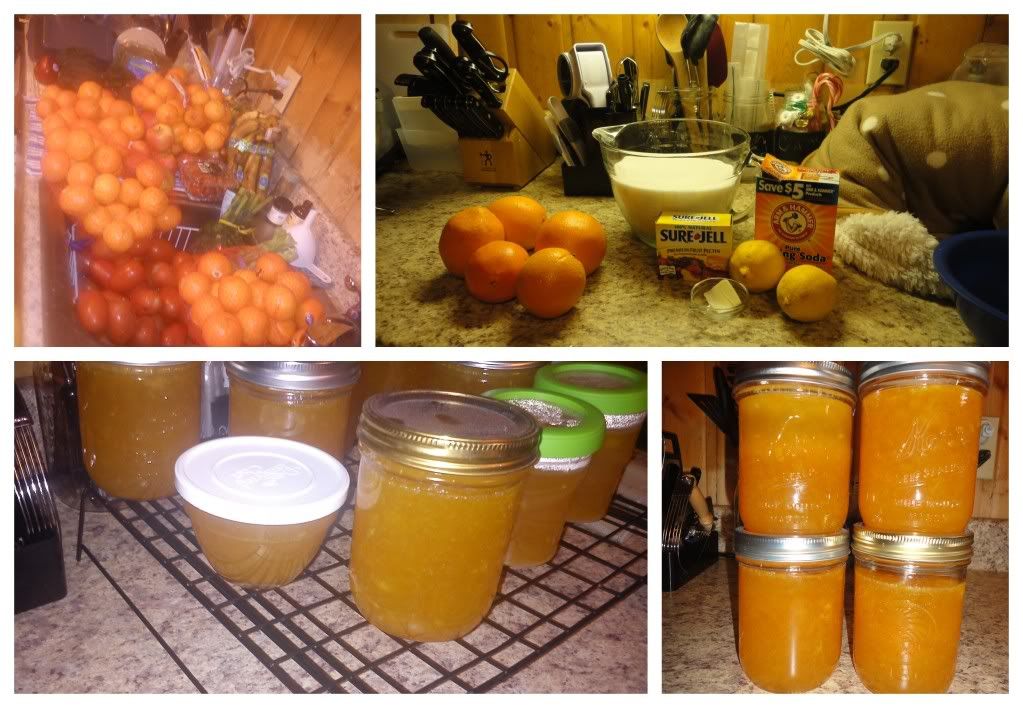
Orange Marmalade

Extended Shelf life for: Oranges
Photobucket
We dived SOOOOO many oranges recently. Bag, after bag of oranges. Why were so many oranges discarded you ask? Generally, an entire bag of something like oranges finds it's way into a dumpster because one of them is rotten. And regulations forbid opening the bag, washing the fruit and selling as bulk.

So they are tossed.

Sometimes they are retrieved.

We ate them. Juiced them. Dried out their skins. Candied their skins. And made marmalade.

This marmalade turned out better, more jelly-like, than my Lemon Marmalade, which I think is primarily due to the fact that I used pectin in this recipe. So, if you wanted to substitute lemons for the oranges in this recipe, I'm sure that would be acceptable.

Ingredients/Directions:
Doubled the recipe from One Hundred Dollars a Month

Begin boiling the water for the canning process...because it takes nearly forever. Prepare jars, lids, etc. For a double recipe I got about 6-7 pints.

Remove peels from about 8 Oranges and 1-2 Lemons. Essentially, you want the orange/yellow part without the white, pith part. Throw the peels into a large pot with 5 cups of water and 1/4 tsp. Baking Soda, bring to a boil. Reduce heat to medium-low and simmer for about 20 minutes, stirring occasionally. Meanwhile, juice your oranges and lemons - discarding the pithy-white peels. Add juice after 20 minutes and continue to simmer for another 10 minutes.

Measure 8 cups of this mixture (adding water if necessary) into a large stockpot. Stir in 2 boxes of Sure-Jell Pectin followed by 1 tsp. Butter (helps reduce foam - who knew?). Bring mixture to full boil, stirring occasionally. Stir in 8-11 cups of Sugar (to taste). Bring to a boil and boil for exactly one minute, stirring constantly. Remove from heat, skim off any foam and proceed to spoon into jars and process as you would other jams and jellies.

Let set overnight or for 24 hours, check the seals and enjoy!


Friday, January 11, 2013

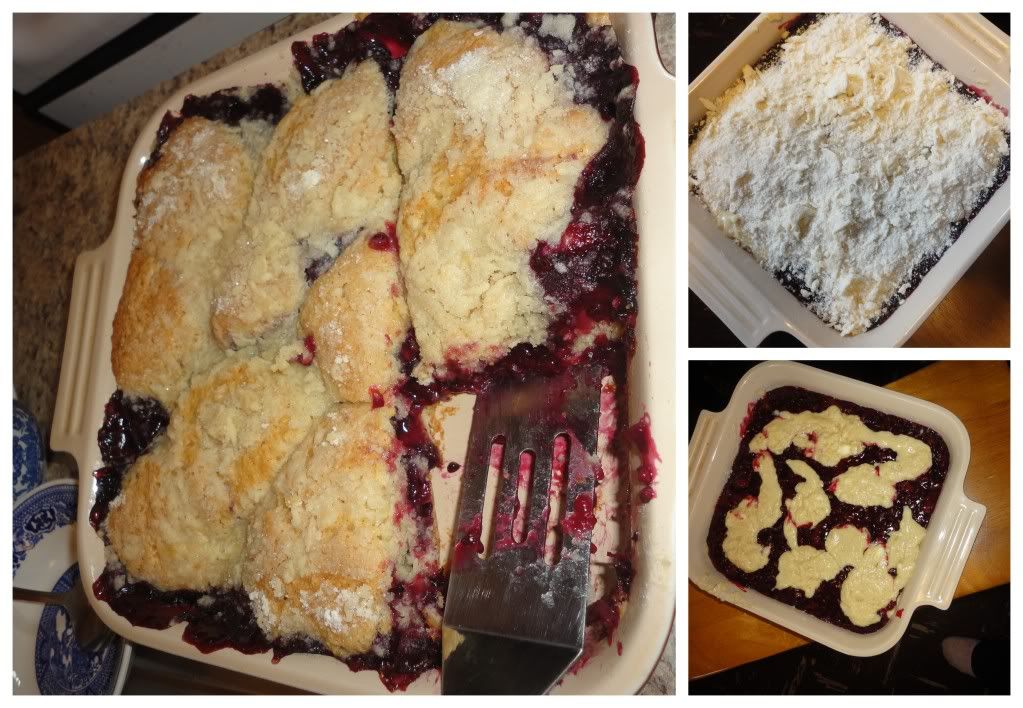
Blackberry Cobbler

Extended Shelf life for: Blackberries
Photobucket
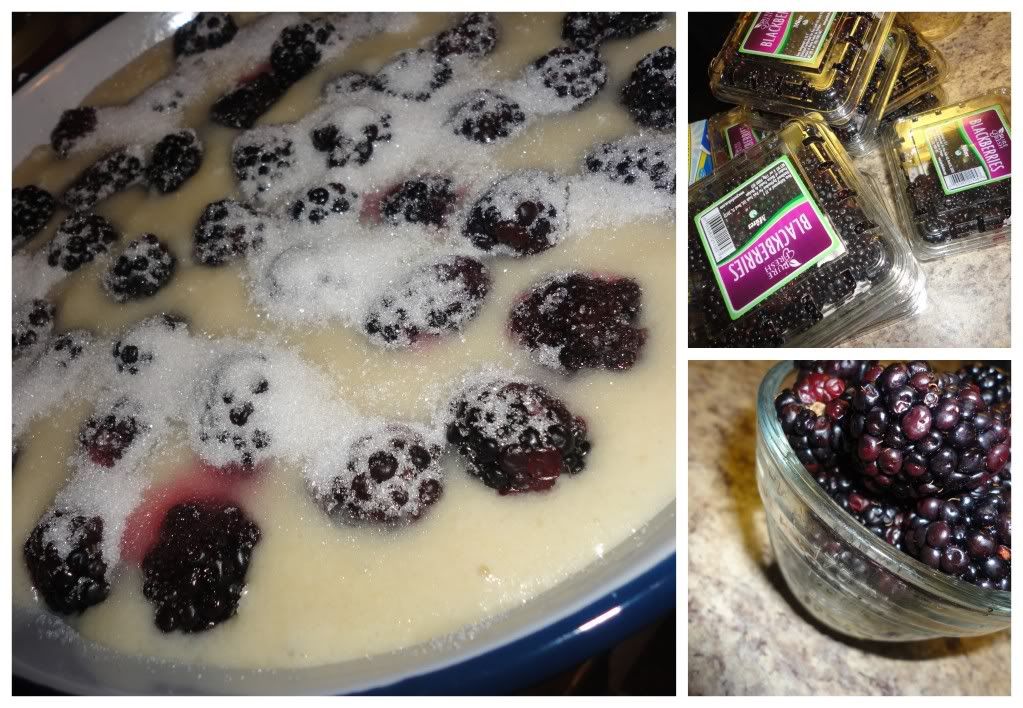
Normally, we dive a lot of potatoes and onions and a few other random produce items. Rarely we dive blackberries. Very rarely we dive an entire flat of blackberries. And even more rarely do we dive such an immense amount of berries and find that they are all incredibly edible! Would you believe that out of all these pints of blackberries I only threw two away? Unbelievable!

Of course, in these moments, my heart is truly torn: there's the heart that is thrilled to be cooking, chefing and crafting with blackberries and then there's the part of my heart that's devastated that I live in a society that can justify waste to this degree.
Photobucket
But of course, when life hands you blackberries you do a little victory dance and hit up the world-wide-web to find the best there is in Blackberry Cobbler's and it's not long before you find yourself on the doorstep of The Pioneer Woman.

The recipe I used is exactly the recipe posted by The Pioneer Woman (because who changes one of her recipes? Seriously?

But of course, I'll type it out in that special way I have ;)

Ingredients/Directions:

Melt 1 stick of butter. In a mixing bowl, stir together 1 cup Sugar and 1 cup Self-Rising Flour (make your own by adding 1 1/2 tsp. Baking Powder and 1/2 tsp. Salt). Slowly whisk in 1 cup milk. Add melted butter and whisk together.

Butter a baking dish.

Wash and pat dry 1 pint (2 cups of Blackberries). Pour batter into buttered dish, drop berries on top, sprinkle up to 1/4 cup additional sugar on top. Bake for 1 hour at 350 until golden and bubbly. Enjoy as is or with Vanilla Ice Cream (could you believe we dived ice cream the same week as blackberries! what luck, eh?)

Thursday, January 10, 2013

Blueberry Vinegar

Extended Shelf Life for: Blueberries
Photobucket
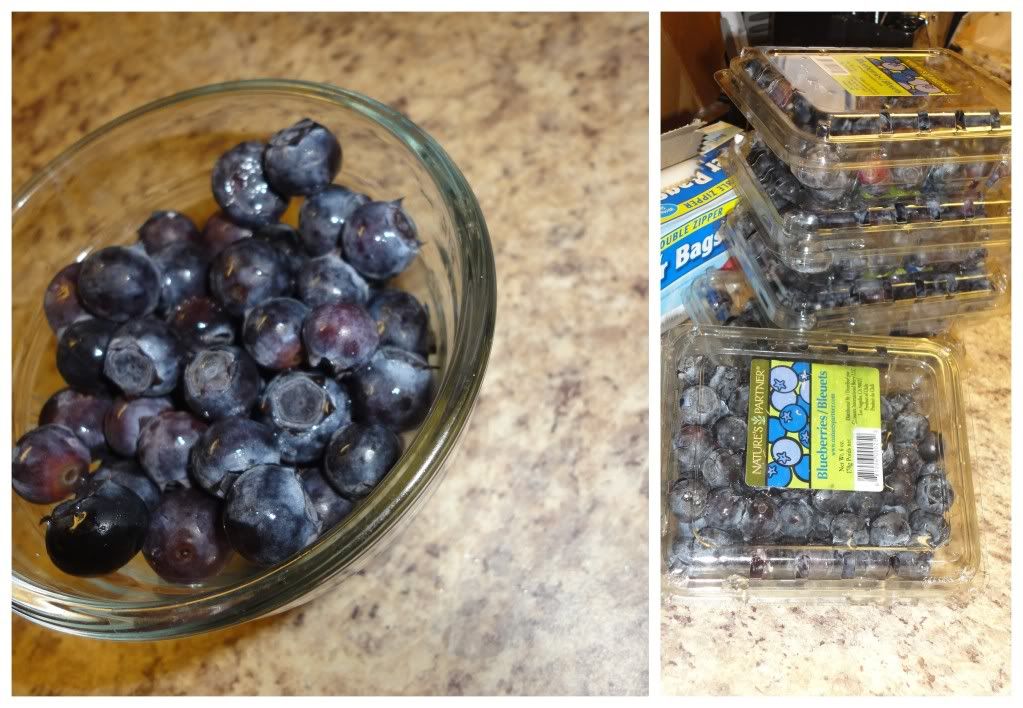
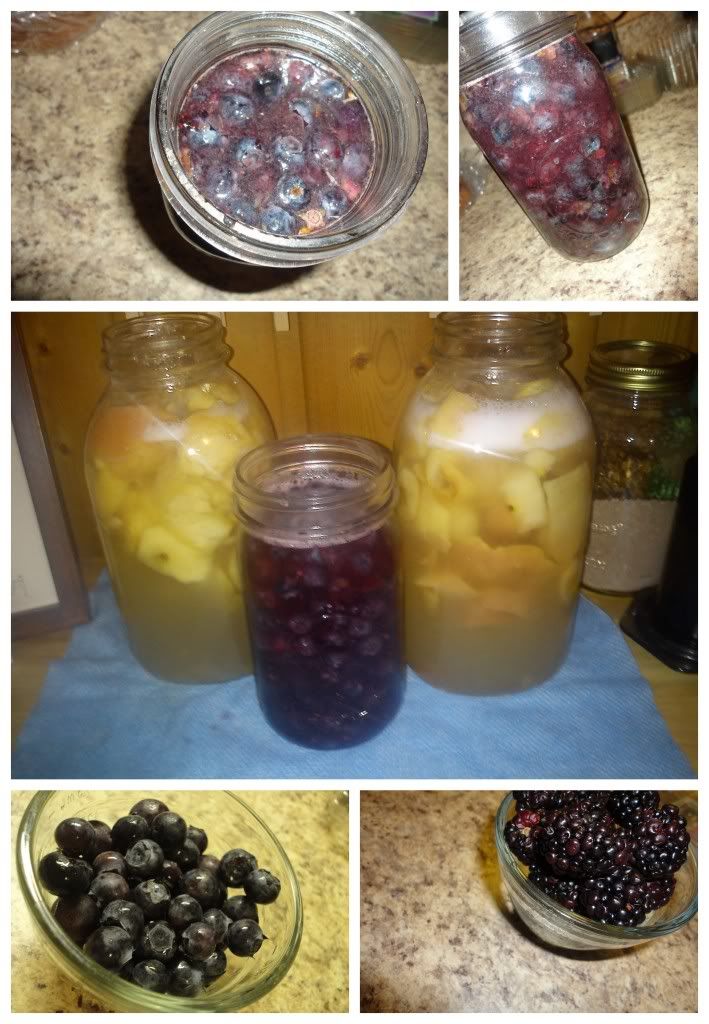
I did this the same as all the other vinegars. Although I used the whole berry rather than just the skins. Some were also moldy, so I'm not sure how it'll turn out, but if it's good - it's going to be a friggin-fantastic dressing addition, right?

Peels/Fruit + 1 quart of water to 1/4 cup of dissolved Sugar until fruit is covered + Cheesecloth and room-temperature for a week = Step one Vinegar Making

Strain Fruit + Cover with Cheesecloth for 2-3 weeks until it's obviously vinegar = VINEGAR!!!

I'll be sure to update on the results once it's finished.

Photobucket


From the Archives:

January 10th, 2012: No Bake Cookies
January 10th, 2012: Ddeok-guk

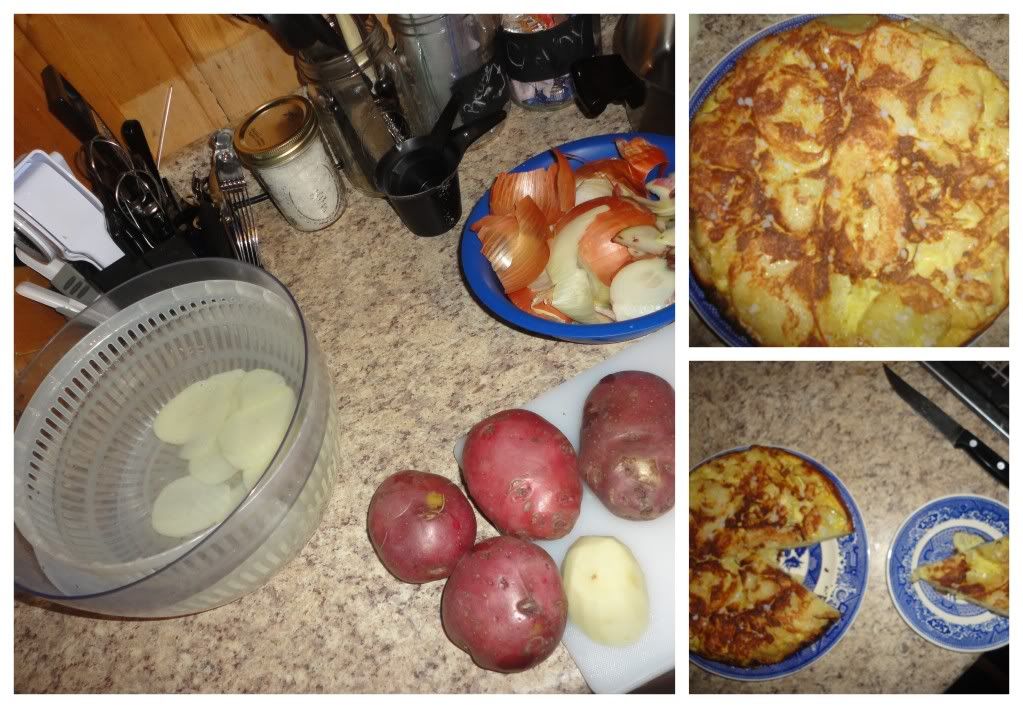
Spanish Tortilla with Red Potatoes

Extended Shelf Life for: Potatoes and Onions
Photobucket
One of the greatest aspects of world travel (or even traveling domestically/regionally/locally) is the discovery of new foods. Even better is choosing to prepare these dishes, enjoy them post-travels and allow your taste-buds to trigger memories of those adventures you just recently enjoyed.

For me, Spain was the first time I left the comfort of the mother land, the first time I found myself surrounded by the unknown. And subsequently, the first time I had a Spanish style tortilla.

Considering the ridiculous amount of potatoes and onions we've had in our pantry, I figured a quick and easy meal that would also take me on a trip to one of my first country-lovers, would be a Spanish Tortilla.

I did some research and checked out the recipe from Smitten Kitchen and the Grumpiest Hippie, used what I had and came up with something along these lines ;)

Ingredients/Directions:

Peel and thinly slice 5-6 medium Red Potatoes, throw in a bowl of water with a dash of lemon juice to prevent browning.  Peel and thinly slice 1 Onion. In a large bowl, whisk together 6 Eggs, season with salt and pepper. Stir the potatoes and onions into the eggs, let set for 25-20 minutes. Heat 1/4-1/2 cup of Olive Oil in a cast iron (or specialized tortilla pan) and pour in the egg mixture...and now things get tricky and I am no expert (may you want to refer to the two referenced recipes at this time). Anyway, let it cook long enough to set throughout the bottom half but not so long as to burn it...I burned mine a little bit... Flip and cook the other side. Serve warm or at room temperature. May serve with hot sauce, chopped tomatoes, a drizzle of olive oil or sea salt (or any combination thereof). Enjoy!

From the Archives:

January 10th, 2012: No Bake Cookies
January 10th, 2012: Ddeok-guk

Wednesday, January 9, 2013

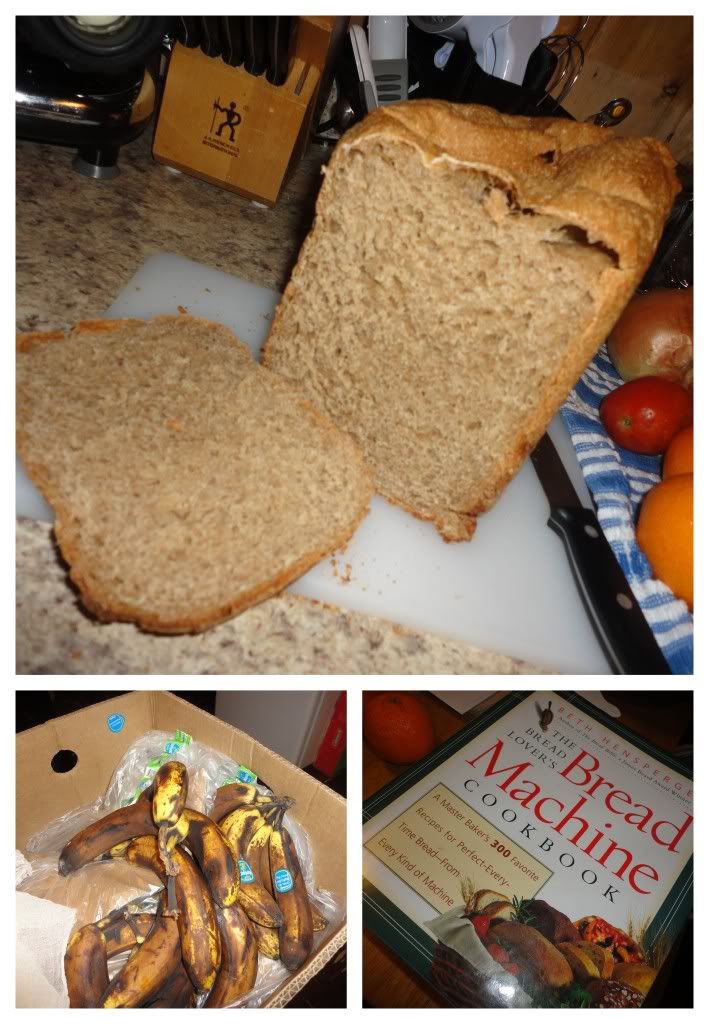
Banana Sandwich Loaf: for the Bread Machine

Extended Shelf Life for: Bananas

I don't know if you were able to make necessary assumptions, however we had a recent influx of bananas and after I preserved them every way I know how and took a chance on Banana Vinegar, I still had a few 'fresh' ones to use and opted to break out the ole bread maker and do a fine yeast bread.

Before I dish out the recipe, let me tell you that if you own and use a bread machine, you should get your hands on the cookbook: The Bread Lover's Bread Machine Cookbook. Seriously, if you've struggled with baking bread in a bread machine (especially at high altitude) this book will revolutionize your world and make bread machine baking a breeze! It's probably fantastic even if you're not at high altitude...yep, I'm sure it is actually.

Anyway, here is a recipe I made recently from this book (without any high altitude adjustments, however, if you go here, you'll find some helpful tips for high altitude), and it was a winner, especially with my recent Crockpot Apple Butter -- oh the joys of home-made things!
Photobucket
Ingredients/Directions:

Place the following ingredients into  the bread pan according to manufacturer's directions (mine requires all the wet ingredients to go in first, followed by dry).

1 cup water, 1 Tbsp. Vegetable Oil, 1 ripe Banana (cut into chunks), 3 cups Bread Flour (or all-purpose flour), 1/4 cup dry Buttermilk Powder (or plain milk powder), 1 Tbsp. Vital Wheat Gluten, 1 1/2 tsp. Salt, 2 tsp. Yeast. Set crust to medium and begin Basic Cycle. When cycle is finished, remove from pan, cool and slice! (This is for the 1 1/2-lb. Loaf).

Tuesday, January 8, 2013

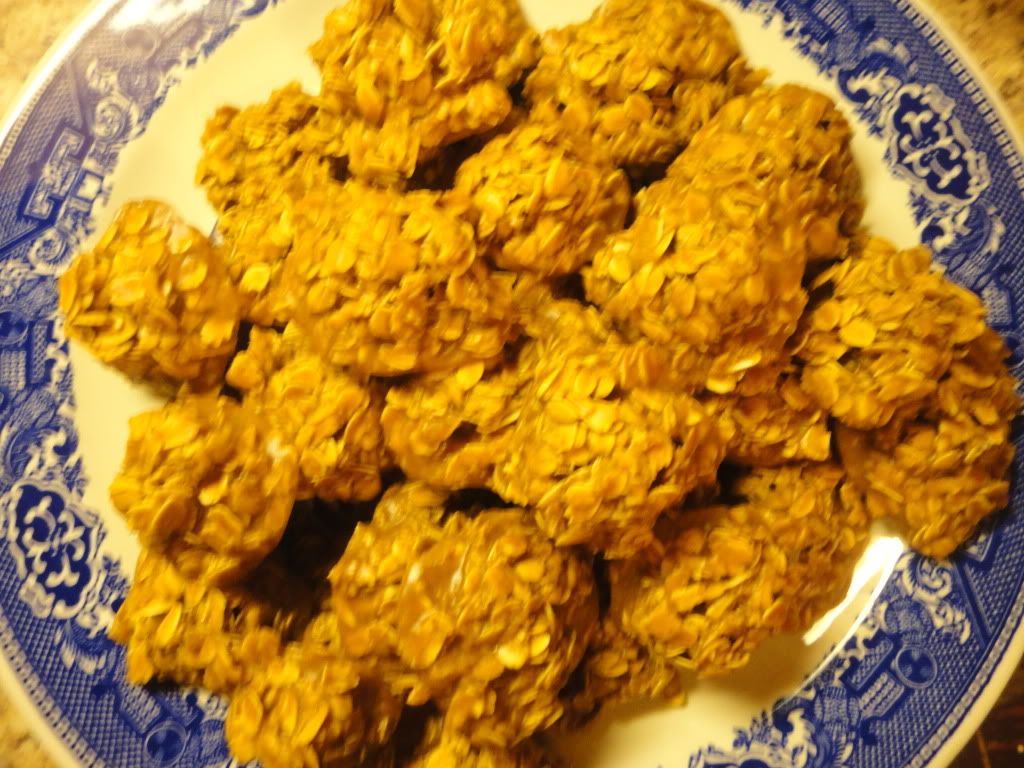
Butterscotch Molasses No Bake Cookies

Photobucket


Ingredients/Directions:

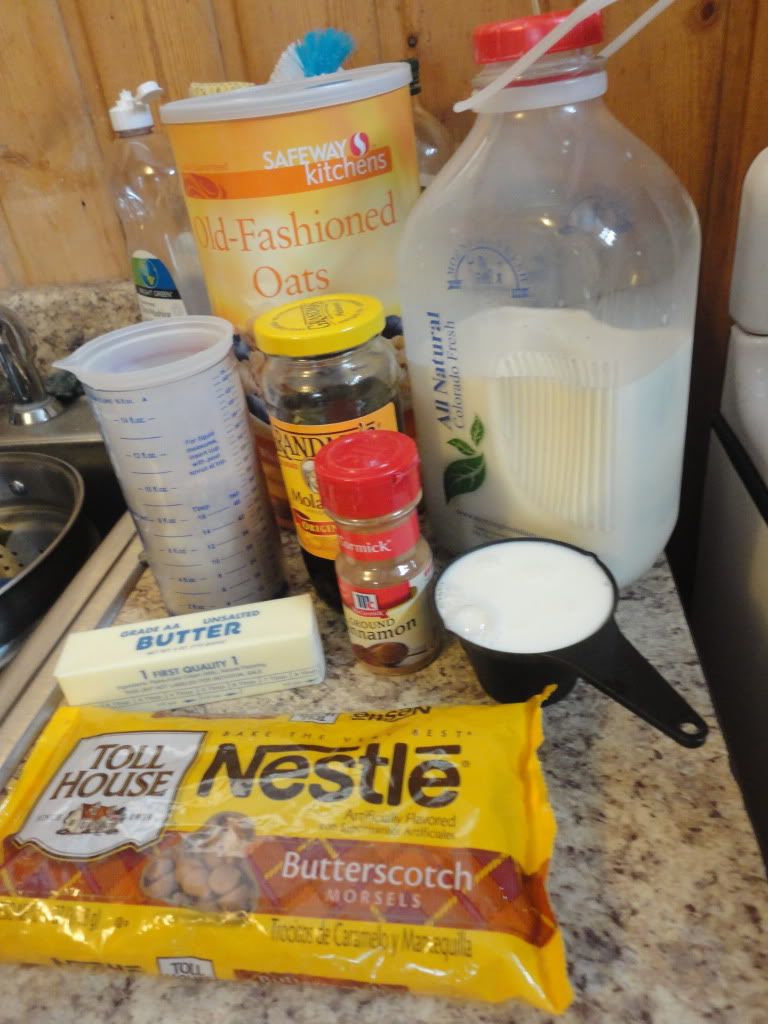
In a medium saucepan melt 1/2 cup Butter, 1/2 cup Milk, 1/2 cup Molasses, and 1 1/4 cups Sugar together. Once mixture has come together remove from heat and stir in 1 bag of Butterscotch Chips until melted. Stir in 1 tsp. Vanilla and a dash of Ginger. Add about 3 cups of Rolled Oats, add additional oats until mixture is thick and each oat is covered. Drop by the teaspoon or tablespoon full onto wax paper covered cookie sheets, refrigerate overnight or for 1-2 hours. Enjoy!

Photobucket

Sunday, January 6, 2013

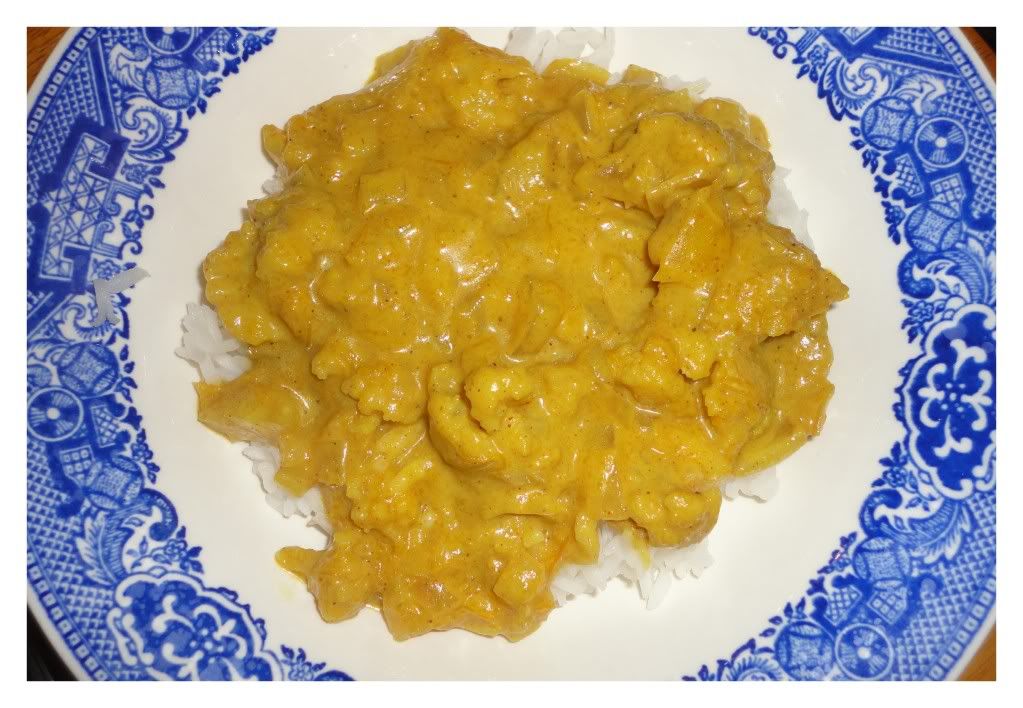
Pumpkin Cauliflower Curry

Extended Shelf Life for: Pumpkin, Cauliflower
Photobucket
Sometimes, I just put things together because it makes sense in my head and I look at a handful of recipes just to be sure it's worked out in somebody else's head at some point in history and then I simply go for it.

This is one of those recipes, so you know what that means...I didn't measure.

Except, I kind of did because I'd already frozen the cauliflower (1 cup) and pureed pumpkin (2 cups) and I used a single, normal sized can of coconut milk (maybe 14-16oz?) The part I didn't measure then, was of course the spices...go figure. But here's what I used, lots of curry, some cumin, cayenne, a dash of cinnamon, and salt. If I would have had other Indian spices, I would have used them as well, such as turmeric or graham-masala. Then, I simmered it all on the stove top, prepared some rice and we had a ridiculously quick, delicious dinner, just like that!

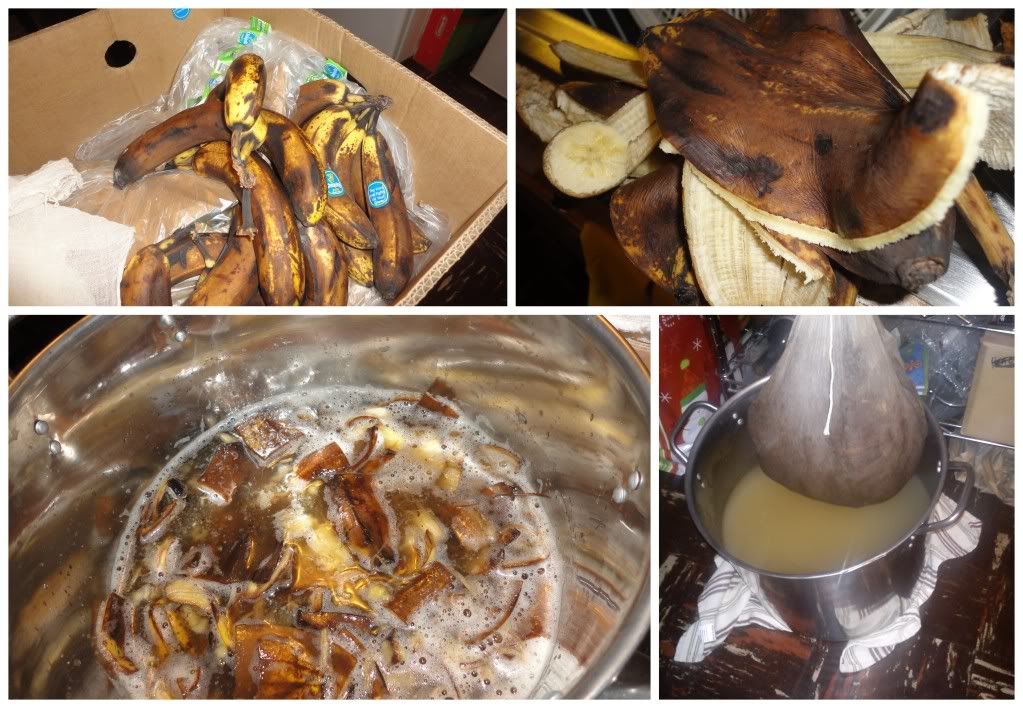
Banana Vinegar

Extended Shelf life for: Bananas (peels specifically)

Much like apple cider vinegar and fruit cocktail vinegar, Banana Vinegar is simply the mixing of banana peels with a 1 quart to 1/4 cup sugar water mix until full. One week of fermenting as is followed by straining and a few more weeks of fermentation and you should wind up with a nice vinegar.

Photobucket

However, at this point, I'm not too confident that this vinegar is going to turn out well. It smells stranger than previous vinegars and has had a really eerie white gunk floating on the top...so, I'll keep you posted!

Saturday, January 5, 2013

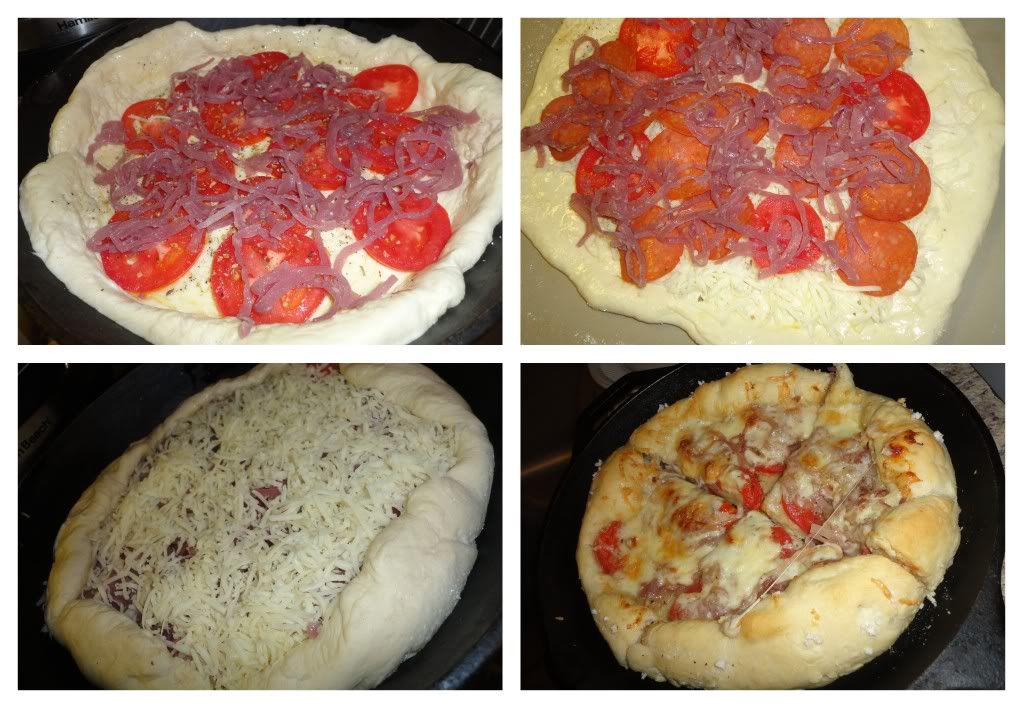
Pizza Experiment #3: Tomato and Preserve Onions

Extended Shelf life for: Onions and Tomatoes
Photobucket
I recently revealed one pizza crust recipe, and have yet to post any others (although I'm working on it ;) ). A few weeks back, I also let you in on the secret of delicious preserved red onions. And now, here I am, ready to throw together a new pizza! Essentially, the toppings are the same for both pizzas:

Tomato, Preserved Red Onions and Cheese.

One also received a few pepperonis.

Rather than making a sauce I simply brushed the crusts with olive oil and sprinkled with oregano.

Other than the pepperonis, the primary difference was that for one of these pizzas I sprinkled cheese on first, followed by ingredients and then a touch more cheese, where as the other was done in the more tradition: ingredients then cheese style.

It didn't make a huge difference, but I kind of liked having my vegetables surrounded by cheese and how the bottom layer of cheese was extra gooey and the top layer of cheese was a bit more golden and allowed the vegetables and toppings to 'shine' through.

So there you have, Pizza Experiment #3!
Photobucket

Crockpot Apple Butter

Extended Shelf Life for: Apples, Cutie

Unfortunately, I took no photos of this dish. However, if you want to see what it looks like at various stages, check out this recipe filled with step-by-step directions.

Essentially, you peel and core a few apples, toss in a tough of water, cinnamon, nutmeg, I added the skin of a tangerine and let it go to work in the slow-cooker for an entire day. Take out the orange peel, season with sugar to your liking, can or store in the fridge, wam-bam-thank-you-mam!

Thursday, January 3, 2013

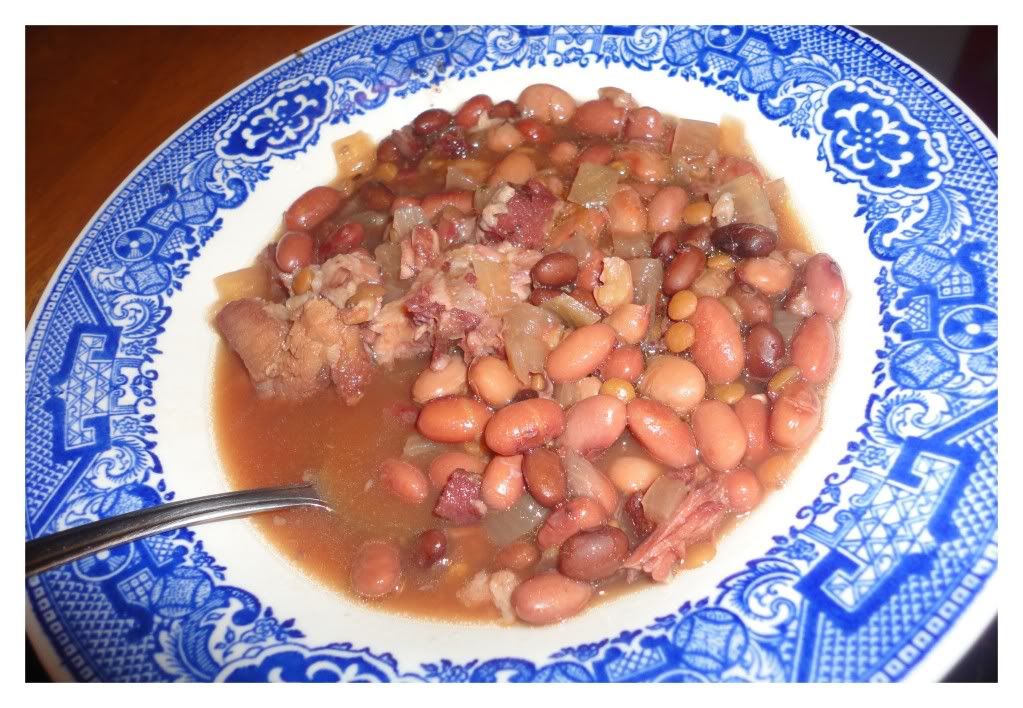
Ham and Beans

Extended Shelf Life for: Ham Bone
Photobucket
After the Christmas meal in Sturgis, I was the lucky winner to receive the ham bone! I was truly thrilled and new that we would be enjoying a simple, quick to assemble soup within a few days of the new year.

Since I primarily use dry beans these days I let about three cups of beans soak over night - I used a combination of kidney, pinto and even some lentils.

In the morning, I threw in a diced onion, the ham bone and additional water and left it on low for the day. Upon returning home I merely had to add some additional spices which I deemed necessary at the time (and currently can't recall) and a single can of tomato sauce just for funsies!


Wednesday, January 2, 2013

Preservation Secret: Freezing Tomatoes and Bananas

Extended Shelf Life for: Tomatoes
Photobucket
When holidays with the family come to end, it's inevitably time to start diving again ^^

Fortunately, there's always a wealth of ingredients to be had and we've been at it for so long that I've developed a few tricks of the trade and preservation secrets.

For Tomatoes:

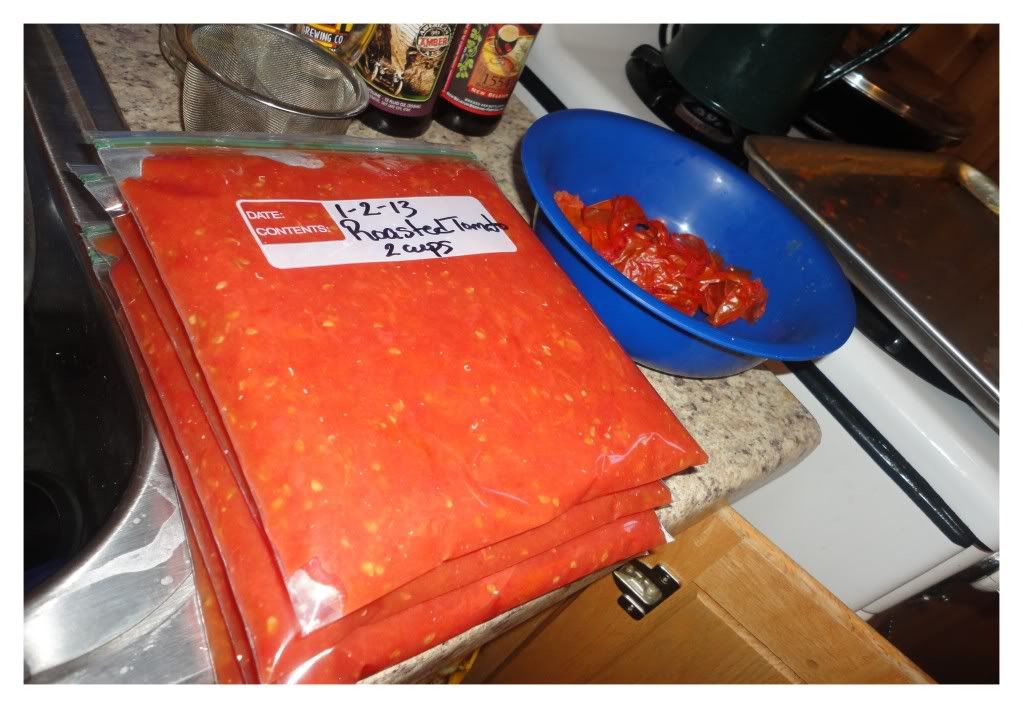
I love to roast my tomatoes for about 20-30 minutes at about 400 F. When you take them out of the oven the skins are easy to remove and a lot of the unnecessary, seedy liquid has drained from them. At this point, I run them through a food processor or our juicer (on the mincing cycle), bag them and freeze them. I'm increasingly passionate about this process and method, especially after reading that even farmers won't eat canned tomatoes because the acid and the tin can are not a healthy combination!
Photobucket
For the Bananas:

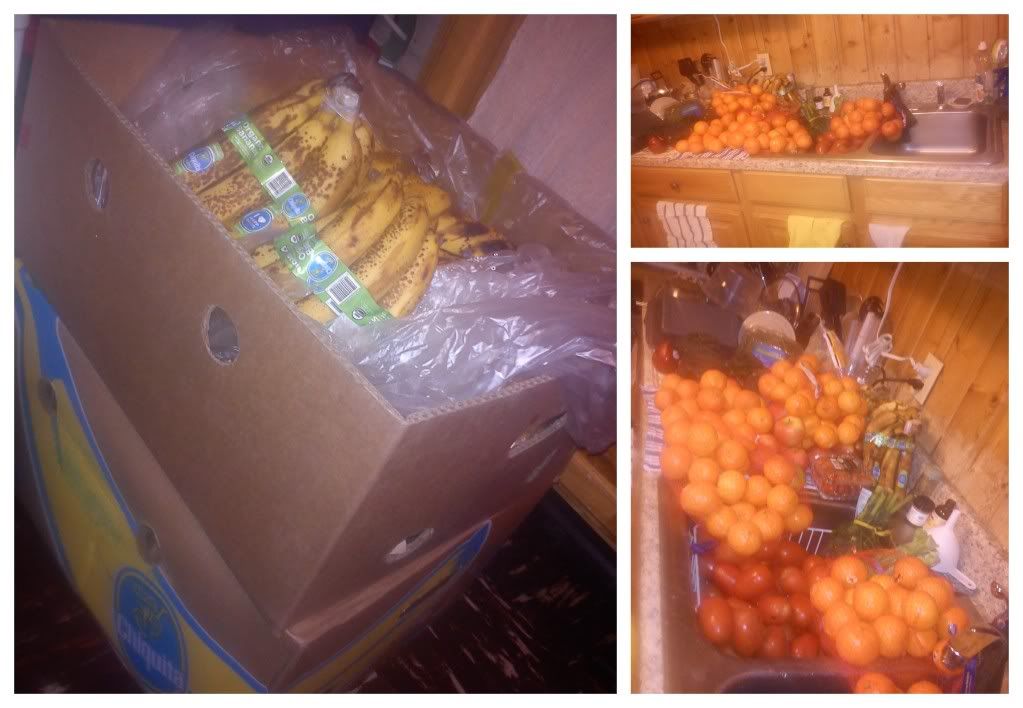
I'm working on preserving some (the peels primarily) in the form of vinegar. However, this is about freezing, and bananas are easy to freeze. I've done two-three different things for freezing bananas.

If I plan to make banana bread, pancakes or any other mashed banana treat I simply mash the banana in a large mixing bowl then transfer to freezer bags, each containing about 2 cups of banana mash, the generally required amount for recipes of such sort.

I've also frozen banana 'coins' so that I can easily make banana ice-cream which goes fantastically well with banana (n)ice cream sandwiches!

And finally, I'll occasionally peel the banana and freeze whole to use in smoothies, although making coins would work just as well.


Bleu Cream Pasta with Bacon and Tomatos

Extended Shelf Life for: Tomatoes, Bacon, Onions, and Bleu Cheese Dressing

Photobucket

Ingredients/Directions:

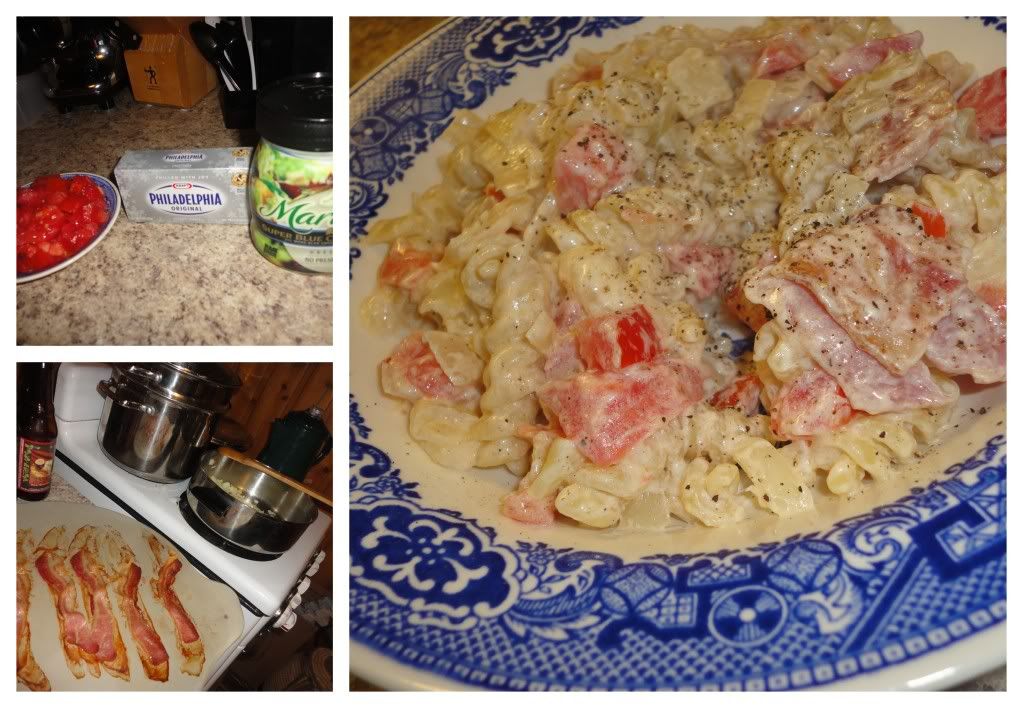
Prepare bacon to your liking. (I like the oven method, as it's efficient and I don't get splattered by hot flying grease).

Meanwhile, bring a large pot of water to boil and prepare 1/2 pkg. of Pasta (about 4 oz.).

In a large-deep skillet, saute1 onion in about 2 Tbsp. of Olive Oil until translucent. Add to the pan, 4 Tbsp. of Cream Cheese and 2 Tbsp. of Butter, melt. Add 1/4 cup pasta water to the sauce followed by 3-4 Tbsp. Bleu Cheese Dressing. Heat through, add 6 Strips of Bacon, crumbled and the pasta. Finally add, 3 Roma Tomatoes, diced and heat through. Season with black pepper, serve with shredded Parmesan or Mozzarella.

Tuesday, January 1, 2013

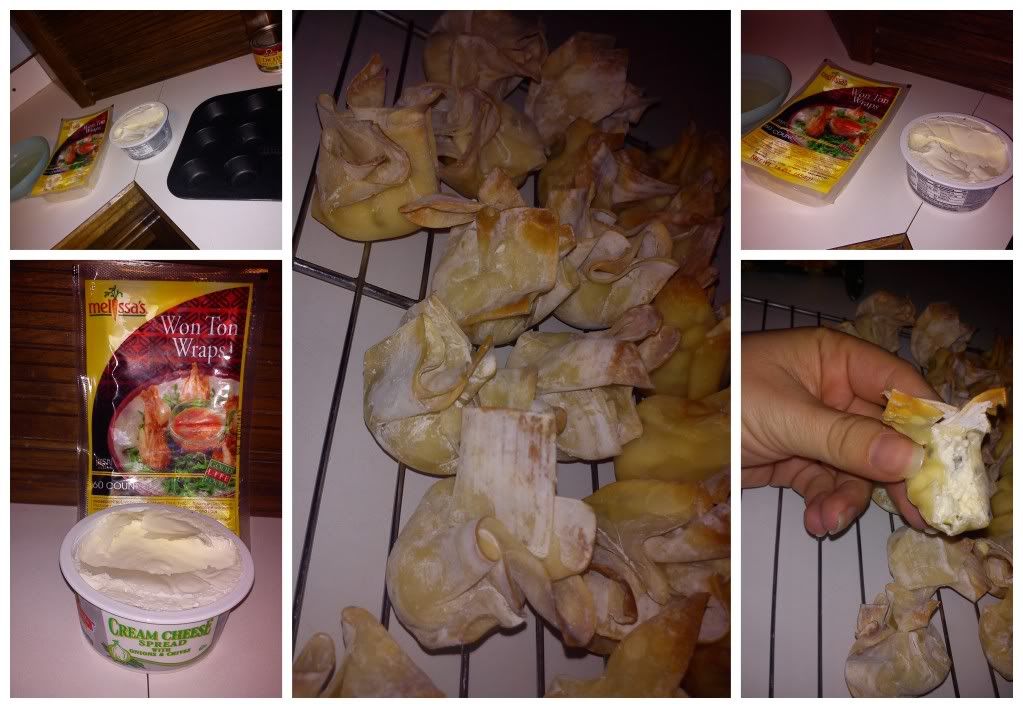
Sweet and Savory Wonton Appetizers

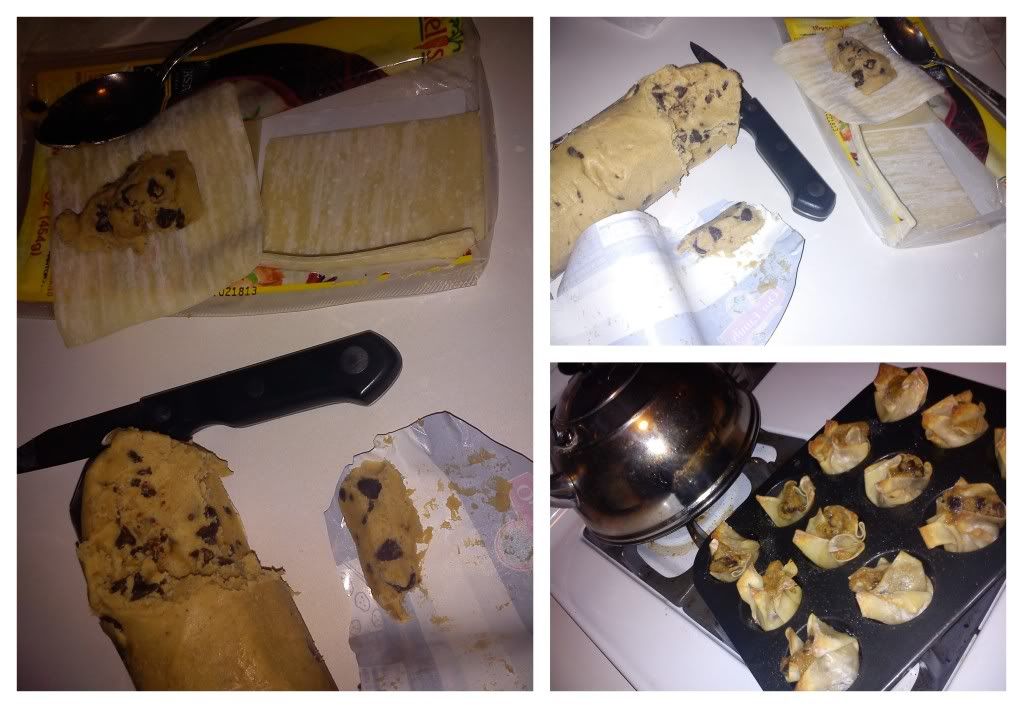
After compiling a ton of Wonton Appetizer recipe ideas, I was pretty eager to try out some of the recipes I'd found or create my own versions. Everything came together super easy, making wonton appetizers, an absolute win!
Photobucket
Variation 1: Stuff wonton wrappers with pre-made cookie dough, bake at 350 for about 15-20 minutes.
Photobucket
Variation 2: Stuff wonton wrappers with flavored cream cheese of your choice, bake at 350 for about 15-20 minutes.


Enjoy with good friends, beloved family and a host of additional appetizers! They were a perfect fit for our New Year's Eve at home with parents and sister, games and lots...and LOTS of snacking!

From the Archives:
January 1st, 2011: Tortilla Roll-Ups
Related Posts Plugin for WordPress, Blogger...